
Default file grouping in Windows Explorer on Windows 11 can disrupt workflows, especially when files are organized by name or type rather than by date or other attributes. Many users find that even after disabling grouping in one folder, grouping reappears in others, or returns after updates, making it difficult to maintain a consistent file browsing experience. Below, you'll find the most effective methods to turn off file grouping everywhere in Windows 11, including advanced registry tweaks and reliable third-party tools, as well as standard built-in options.
Disable File Grouping Globally Using WinSetView
Step 1: Download the WinSetView tool from its official website at https://lesferch.github.io/WinSetView/. This free, open-source utility is portable and does not require installation.
Step 2: Extract and launch WinSetView. The interface allows you to choose your preferred default folder views, including grouping options, for all folder types in File Explorer.
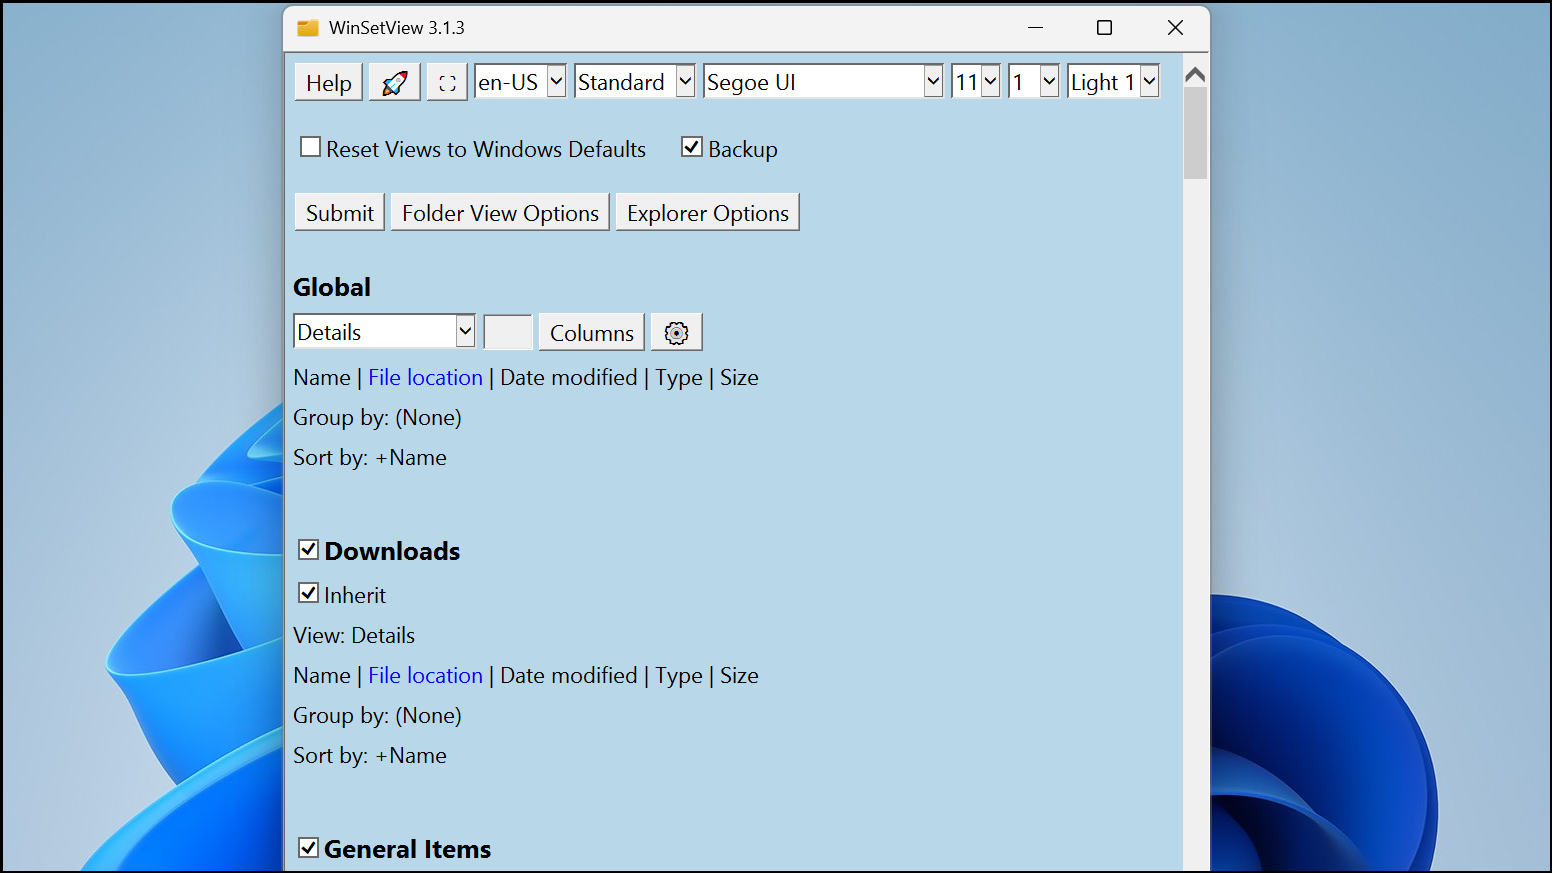
Step 3: In the application, select your desired default view for each folder type (such as General, Documents, Pictures, Music, and Videos). To disable grouping, ensure the grouping option is set to None for each type.
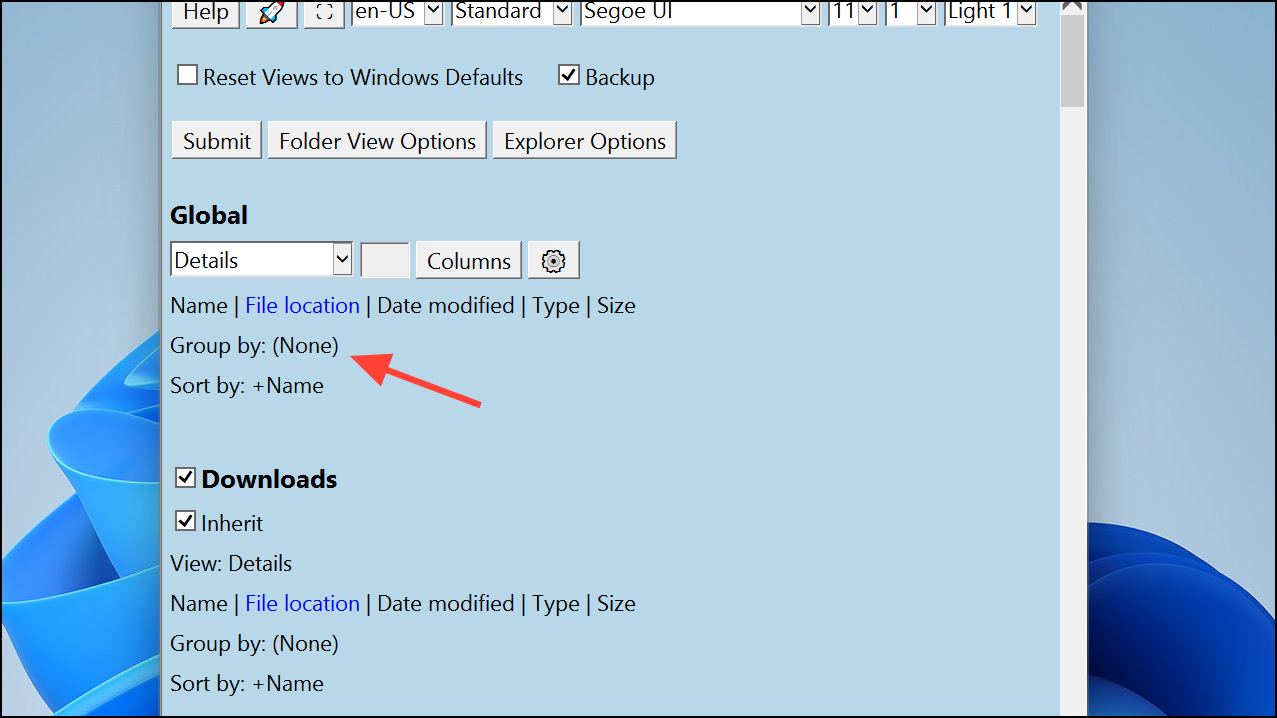
Step 4: Apply your settings. WinSetView will update the relevant registry values for your user profile. This change applies globally, including to File Open/Save dialogs in applications, and persists through Windows updates.
WinSetView is designed not to leave any background processes running and does not modify system files. If you are in an enterprise environment where third-party tools are restricted, you can use the WinSetView-generated INI file and PowerShell scripts to deploy these settings via administrative channels.
Turn Off File Grouping System-Wide with a Registry Edit
For users comfortable editing the Windows registry, you can disable auto-grouping by creating or modifying a specific registry value. This method is effective on most Windows 11 systems and does not require third-party tools.
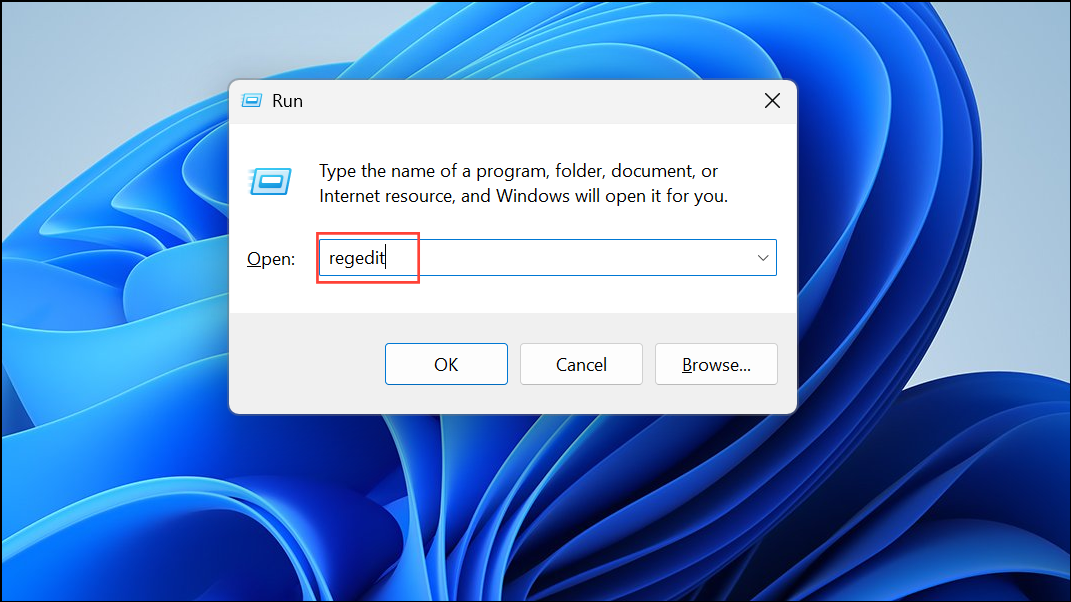
Step 1: Press Win + R to open the Run dialog, type regedit, and press Enter to launch the Registry Editor.
Step 2: Navigate to the following key:
HKEY_CURRENT_USER\Software\Microsoft\Windows\CurrentVersion\Explorer\Advanced
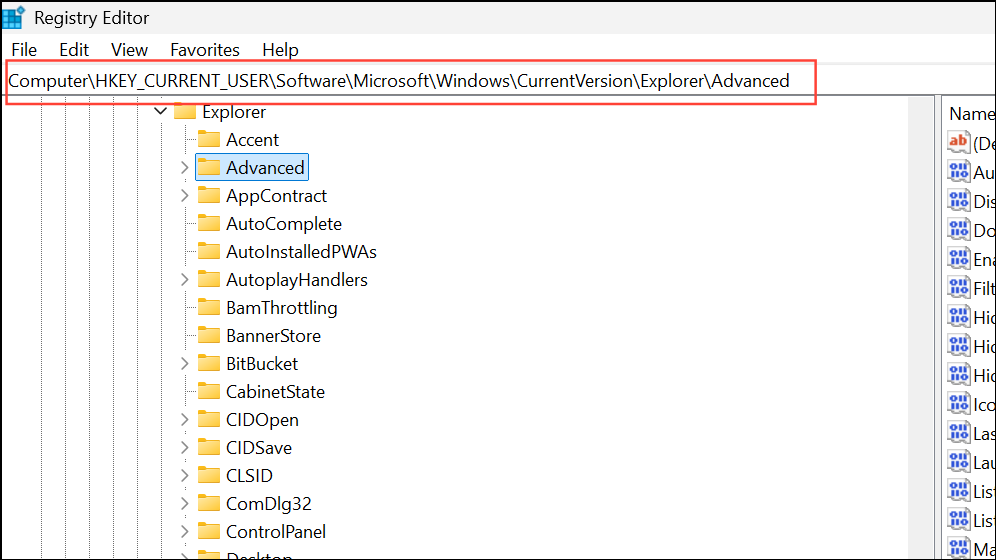
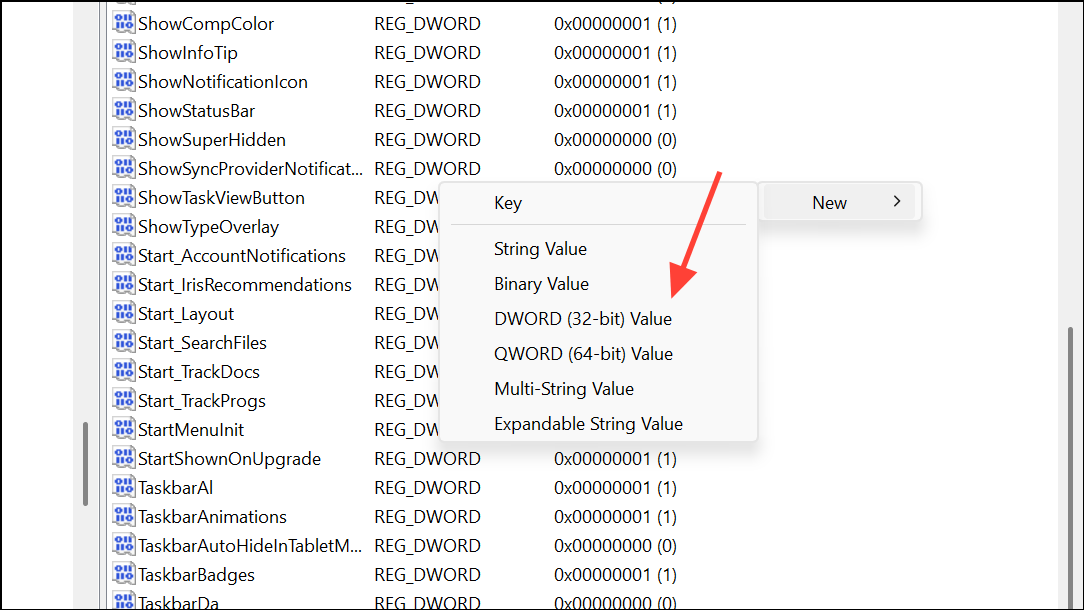
Step 3: In the right pane, right-click and select New > DWORD (32-bit) Value. Name the new value UseAutoGrouping.
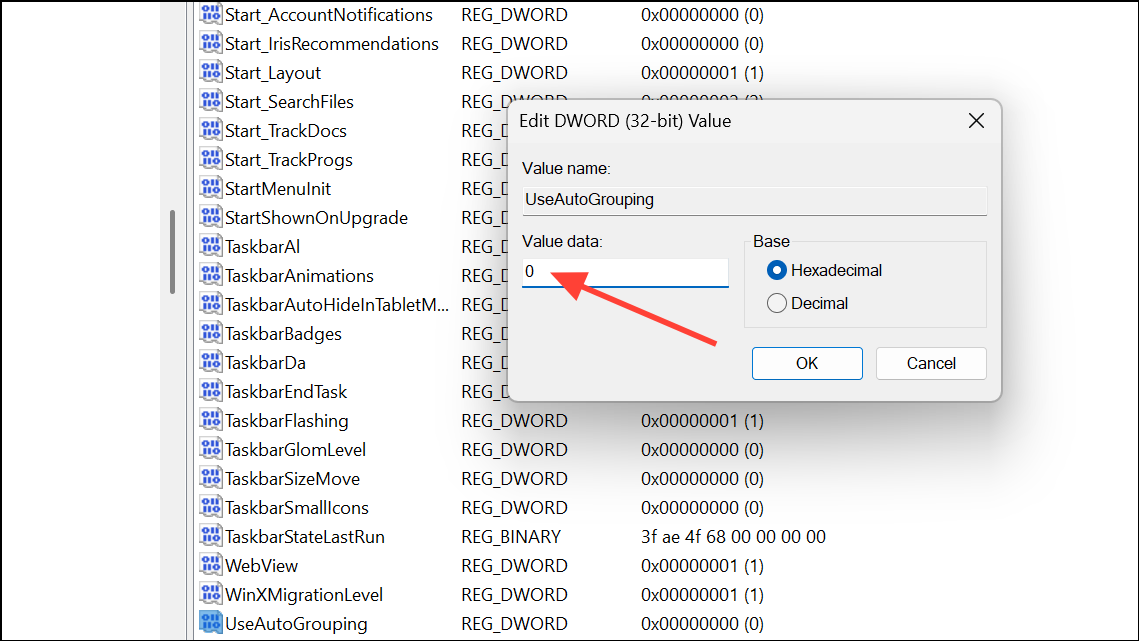
Step 4: Double-click UseAutoGrouping and set its value to 0.
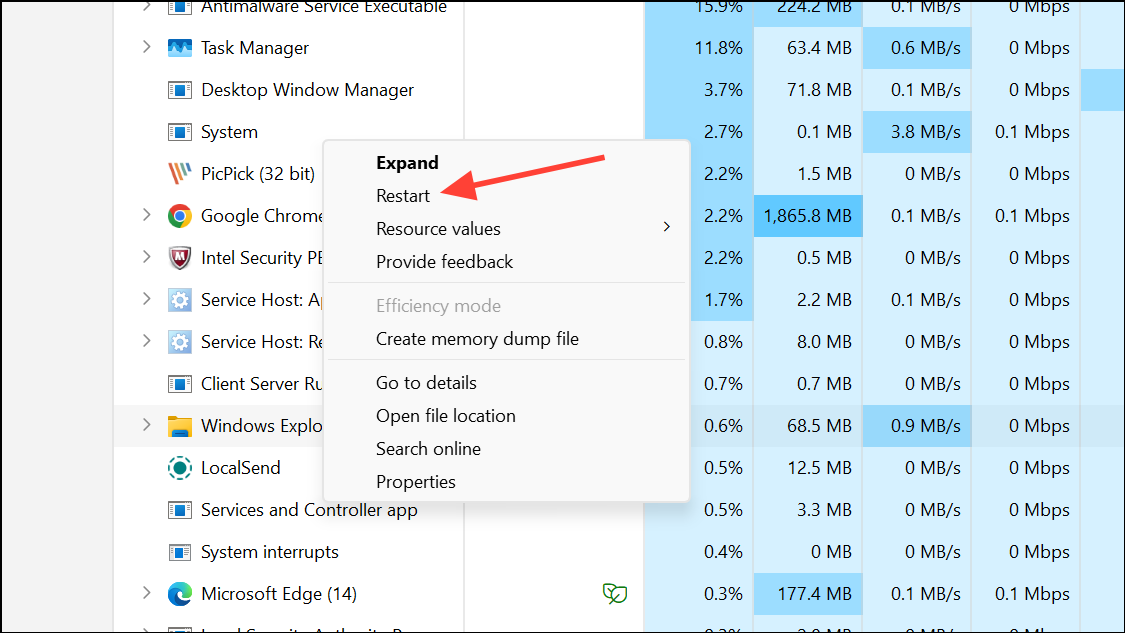
Step 5: Close the Registry Editor and restart File Explorer. You can do this by opening Task Manager, finding Windows Explorer under the Processes tab, right-clicking it, and selecting Restart. Alternatively, reboot your PC.
This registry tweak instructs Windows to turn off automatic grouping for all folders. If you wish to revert this change, delete the UseAutoGrouping value or set it back to 1.
Apply "Group By: None" to All Folders Using Folder Options
Windows Explorer provides a built-in way to apply your current folder view, including grouping settings, to all folders of the same type. This approach is less comprehensive, as it may not affect Open/Save dialogs or all special folders, but it can be useful for standard Explorer browsing.
Step 1: Open any folder that currently displays files in groups (e.g., the Downloads folder).
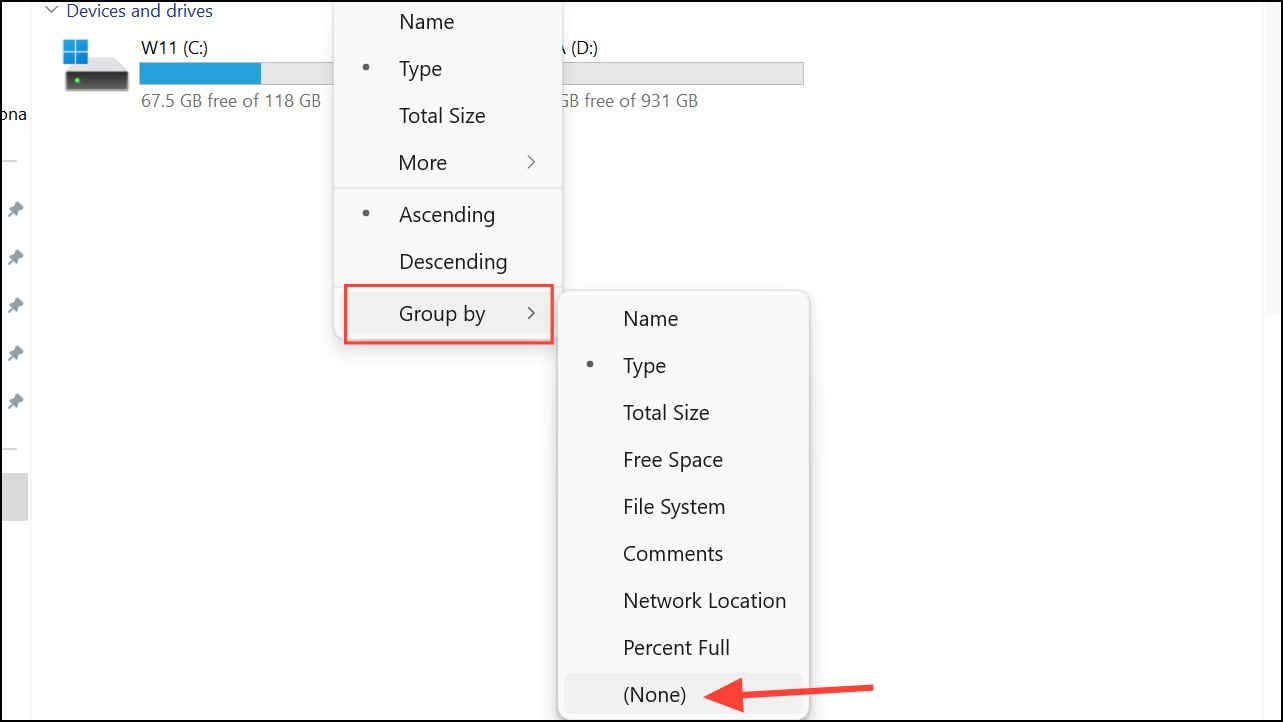
Step 2: In the toolbar, click the Sort button, expand Group by, and select None. This removes grouping in the current folder.
Step 3: Click the ... (three dots) menu in the toolbar and choose Options to open Folder Options.
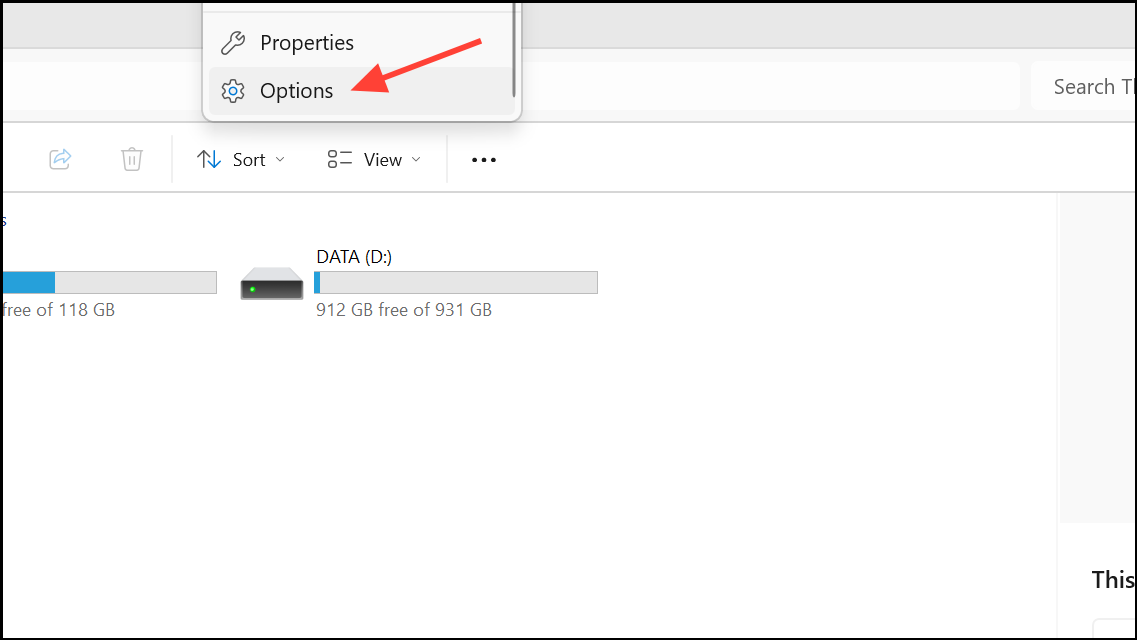
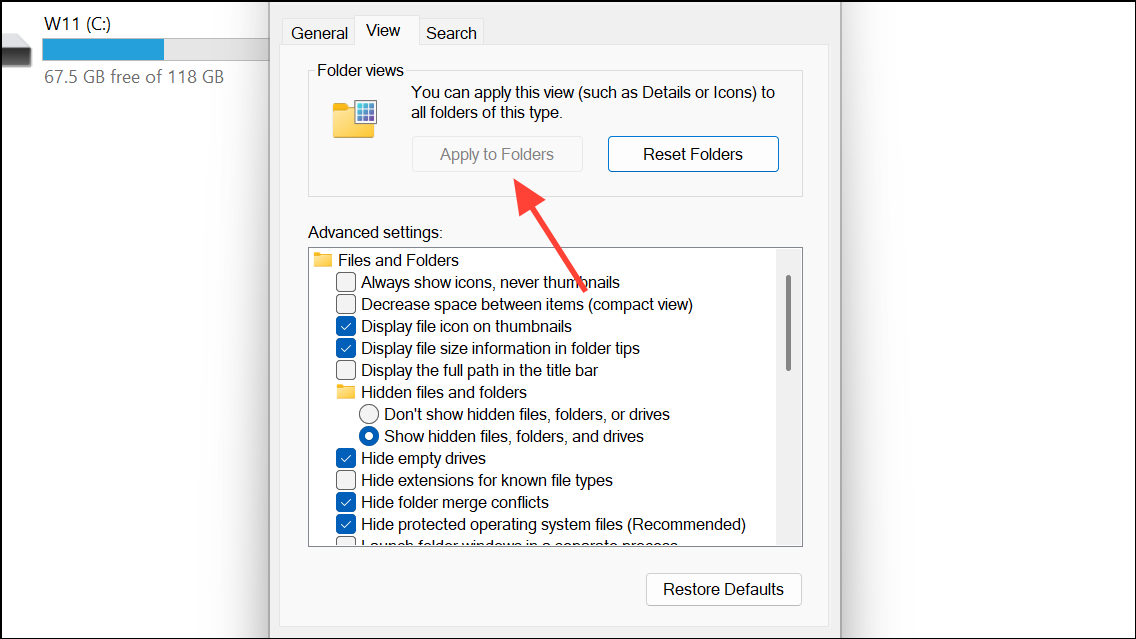
Step 4: In the Folder Options dialog, select the View tab, then click Apply to Folders and confirm your choice. This applies your current view (including grouping) to all folders of the same template (e.g., all Downloads-type folders).
Step 5: Repeat these steps for each folder type (General, Documents, Pictures, Music, Videos) to maximize coverage.
Manual Removal of Grouping in Individual Folders
For users who only need to address a handful of folders, you can manually disable grouping as needed:
- Open the folder in Windows Explorer.
- Right-click in an empty space within the folder window.
- Hover over
Group byand selectNone. - If grouping returns, try refreshing the folder (press
F5) or repeat the process.
This approach is time-consuming for large numbers of folders and does not address new folders or system dialogs.
Disabling file grouping in Windows 11 can streamline file navigation and reduce repetitive adjustments. For reliable, system-wide results, WinSetView or the registry method offer the most permanent fixes, while built-in options provide quick solutions for individual cases.