
macOS 26 Tahoe streamlines how users manage app permissions, introducing more granular controls over app access and system privacy. These updates address longstanding issues with app transparency and empower users to quickly adjust what apps can access, display, and do on their Mac. The new system replaces confusing permission prompts and unwieldy settings with a clearer, more actionable approach to privacy and app management.
Using the New App Permissions Panel
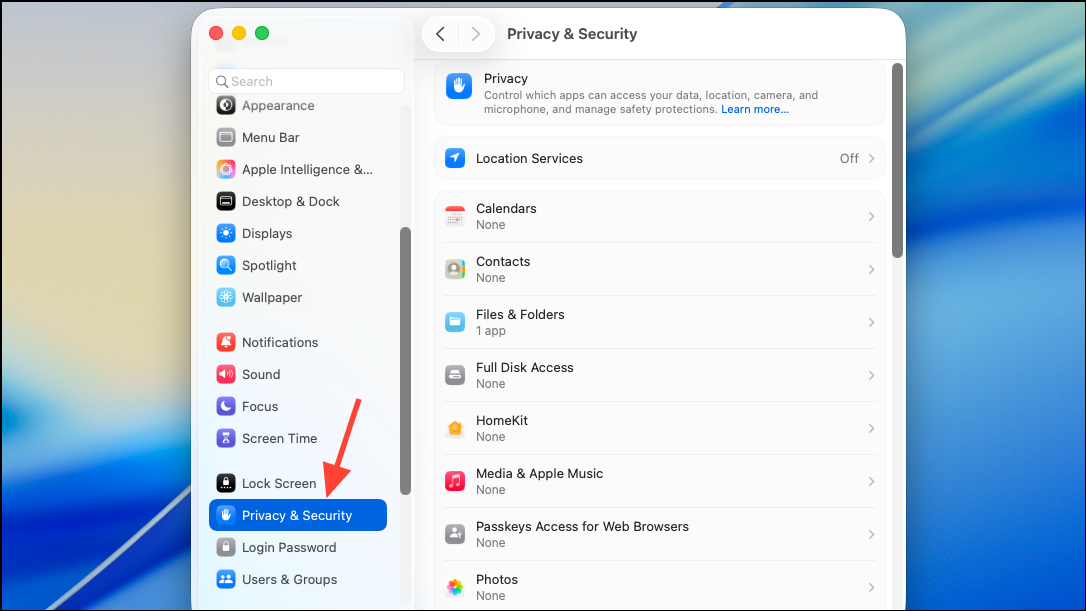
Step 1: Open the System Settings app from your Dock or the Apple menu. Navigate to the Privacy & Security section. Here, you’ll see a reorganized interface that groups permissions by category—such as Files and Folders, Camera, Microphone, Full Disk Access, and the newly expanded Menu Bar Items.
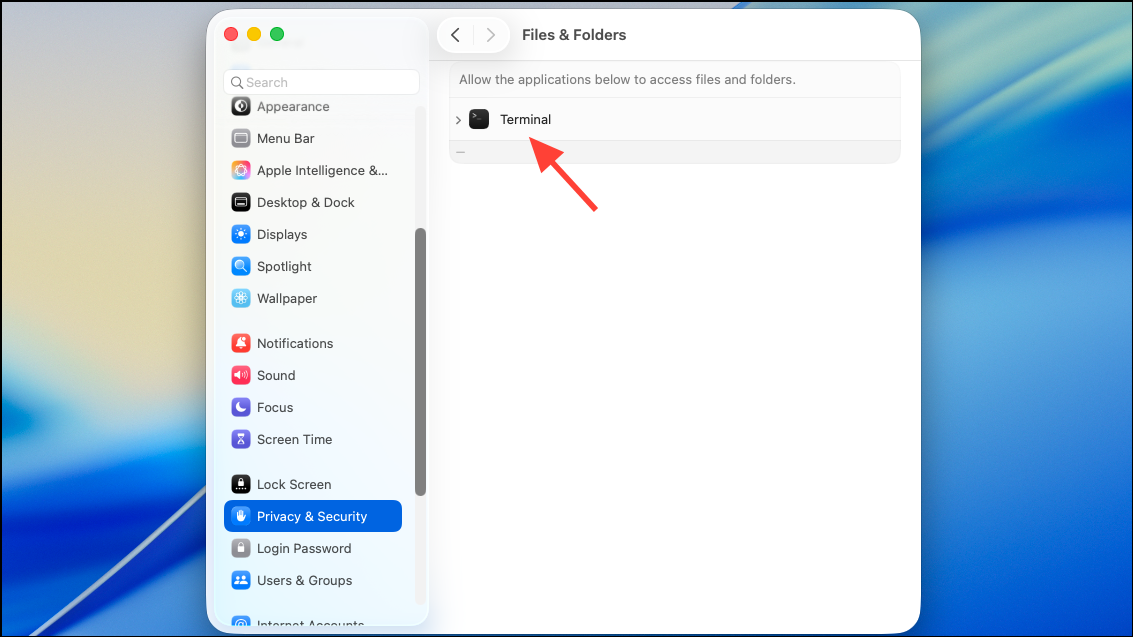
Step 2: Select the permission category you want to manage. For example, to control which apps can access your files, click Files and Folders. The list now displays all apps that have requested access, with toggles to grant or revoke permission for specific folders like Downloads or Documents. This eliminates the need to add apps manually in most cases, as apps appear automatically when they request access.
Step 3: To change an app’s access, simply switch the toggle on or off next to its name. If you revoke access, the app will be blocked from that folder or resource until you grant permission again. For some categories, like Full Disk Access, you may still need to unlock the settings with your password or Touch ID for security reasons. If an app does not appear in the list, launch the app and attempt the action that requires access; macOS will prompt you to approve or deny the request, after which the app will show up in the relevant permissions pane.
Step 4: For menu bar items, macOS 26 Tahoe introduces a dedicated section. Here, you can control which apps are allowed to display icons in the menu bar. Use the switches to hide or display individual app icons, reducing clutter and improving focus. This change addresses a frequent complaint—users no longer need third-party utilities just to manage menu bar space or hide unwanted icons.
Granting and Revoking Special Permissions
Some apps require broader access, such as Full Disk Access or Screen Recording. These are managed under their respective categories in Privacy & Security. Granting Full Disk Access gives an app the ability to read and write to most areas of your Mac, so only approve this for software you fully trust, such as backup or security tools.
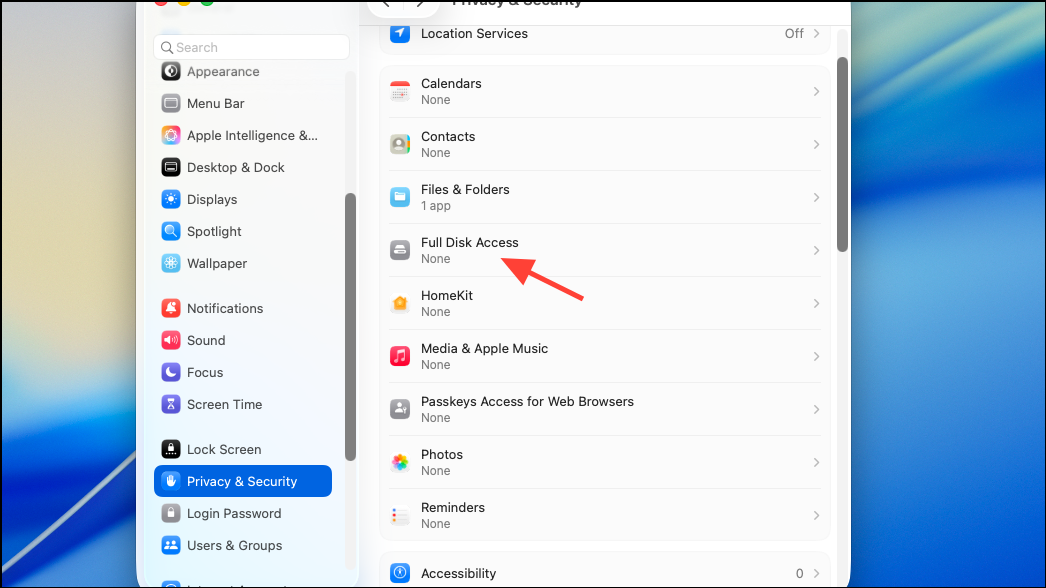
To grant Full Disk Access, unlock the settings, then turn on the toggle next to the app’s name. To revoke it, simply disable the toggle. If an app does not appear here, use the “+” button to add it manually. Note that for some system-level changes, you may be prompted to restart the app or your Mac for the changes to take effect.

Understanding Permission Requests and User Intent
macOS 26 Tahoe continues to use “user intent” to determine when permissions should be granted. For example, opening a file through the standard Open dialog automatically grants the app access to that file, as this is considered a direct user action. However, if an app tries to access protected folders (like Documents or Downloads) in the background, you’ll receive a prompt to approve or deny access. This system reduces unnecessary interruptions while maintaining privacy for sensitive data.
Apps that are not designed to request access may require special handling. If you use command-line tools, scripts, or older applications, you may need to grant permissions manually in the Full Disk Access or Files and Folders sections. In some cases, you may have to add the tool’s interpreter (such as /usr/bin/python or /usr/bin/ruby) rather than the app itself, especially if the app launches via a script.
Troubleshooting Permission Issues
If you encounter persistent permission issues, such as an app not appearing in the permissions list or being unable to grant access, try the following steps:
- Restart your Mac to clear temporary glitches.
- Ensure the app is updated to the latest version compatible with macOS 26 Tahoe.
- Open the app and attempt the action that requires permission; respond to any prompts.
- If the app still does not appear, add it manually in the appropriate section (Full Disk Access, etc.).
- For apps launched via scripts, add the script interpreter to the permissions list.
If problems persist, consult the app developer or Apple Support, as some legacy apps may require updates to fully support the new permission model in macOS 26 Tahoe.
Menu Bar Item Controls and Third-Party Utility Compatibility
The new menu bar controls in macOS 26 Tahoe address a major pain point for users who previously relied on third-party utilities like Bartender or Ice to organize menu bar icons. Now, users can directly show or hide individual app icons from System Settings, reducing reliance on external tools and avoiding compatibility issues that arise with major OS updates. This change also increases privacy, as only approved apps can display persistent menu bar items.
Third-party utilities may require updates to function with the new menu bar system. Developers have reported that menu bar item ownership has changed, with Control Center now managing most items. This structural shift means some utilities may lose the ability to identify or control individual icons until they adapt to the new system. For advanced features like dynamic hiding or icon grouping, monitor updates from your preferred utility and consider submitting feedback to their developers.
Privacy Dashboard and Real-Time Data Usage Insights
macOS 26 Tahoe introduces a Privacy Dashboard that summarizes which apps have accessed sensitive resources, such as location, microphone, camera, and files. This dashboard provides real-time insights, allowing you to review and revoke permissions quickly if you spot unexpected activity. Use this feature regularly to audit app behavior and maintain control over your data.
With these refined controls in macOS 26 Tahoe, users gain direct authority over app permissions, privacy, and menu bar visibility—resulting in a more secure, organized, and user-friendly Mac experience.