
The “Armored Sentinel” clue in Where Winds Meet points you toward the Martial Temple arsenal in Kaifeng, a trapped underground hall guarded by suits of armor. To open the arsenal entrance and push deeper into this dungeon, you need to interact with these armored displays, retrieve their missing weapons, and solve a sequence of bell-and-knocker puzzles and spike trap corridors.
Where the Armored Sentinel fits in (Martial Temple, Kaifeng)
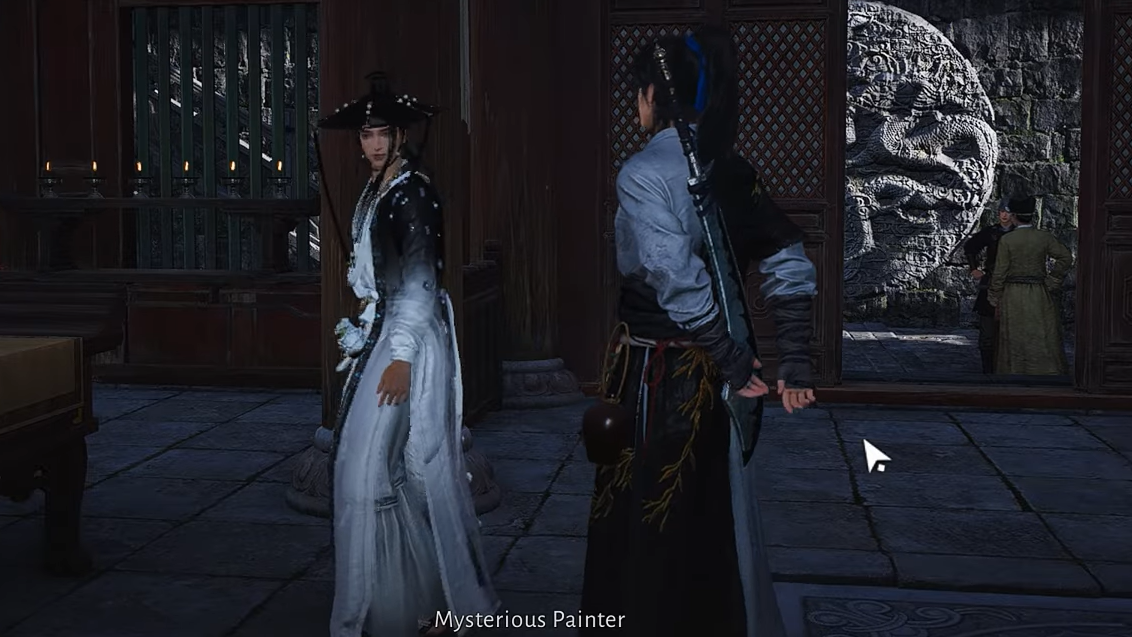
The Armored Sentinel is not a single enemy or boss. It refers to the weaponless armor display that “guards” the sealed Arsenal in the Martial Temple beneath Jadewood Court in Kaifeng. This area is part of the Jianghu Legacy quest An Unholy Prophecy, which you unlock by speaking to the Mysterious Painter inside the Martial Temple.
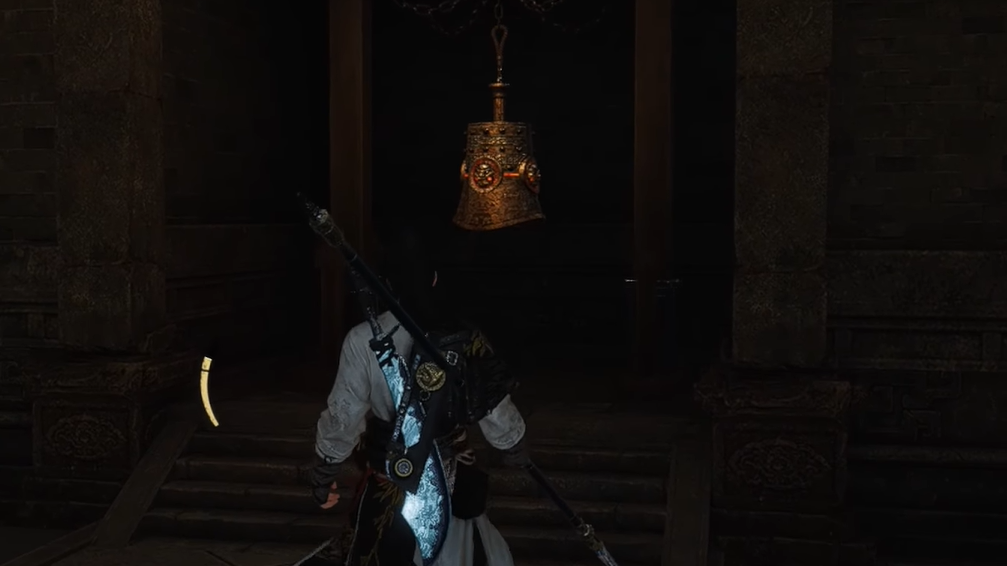
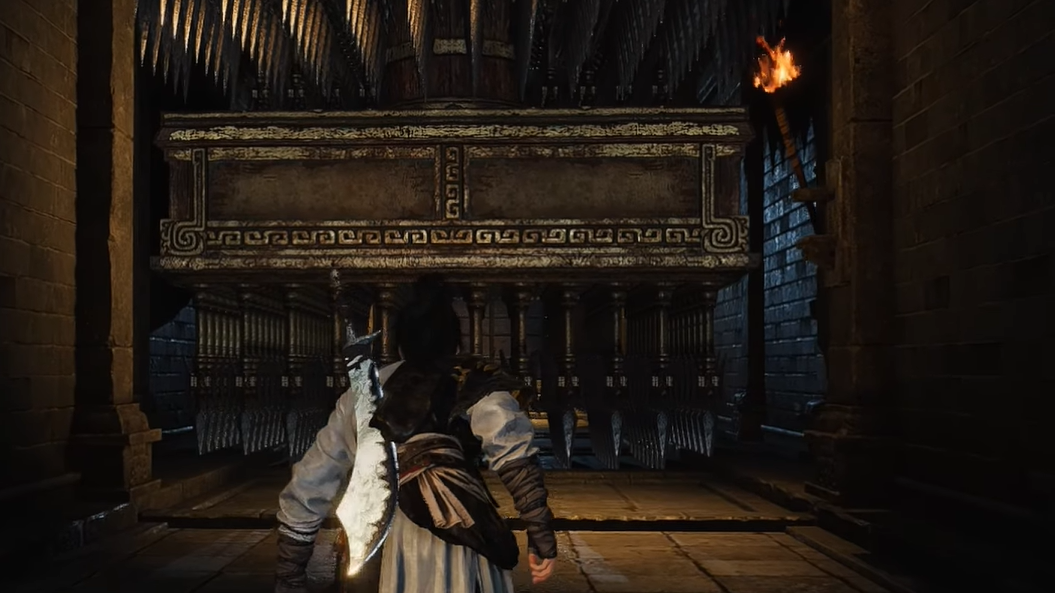
Once you enter the underground Grand Arsenal Hall, you see multiple suits of armor along the walls. One central set is missing its weapons and functions as the mechanical sentinel of the hall. Returning its weapons is what opens the way forward; that interaction is what the game points to with the “Armored Sentinel” wording.
How to unlock access to the Arsenal (An Unholy Prophecy setup)
Step 1: Travel to the Kaifeng region and head to Jadewood Court. Enter the Martial Temple and talk to the Mysterious Painter inside to start the An Unholy Prophecy Jianghu Legacy.
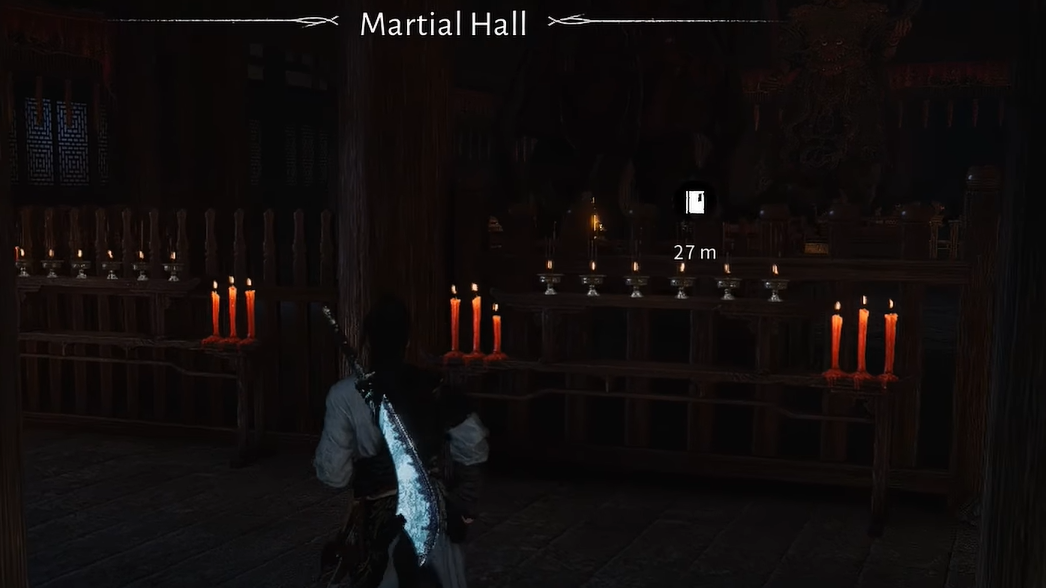
Step 2: Go to the western eaves of the Martial Temple. Climb and jump across the rooftops until you find the hidden entrance that leads deeper into the temple’s restricted area.
Step 3: Follow the marker back to the Painter, then shoot the three hanging braziers with fire arrows to trigger the mechanism. A nearby quiver lets you refill fire arrows if you run out.
Step 4: Stand on the platform beside the Painter and use the An Unholy Prophecy emote from the Puzzle tab (F2 on keyboard, or the function wheel on controller). The platform will descend and deliver you to the locked Arsenal section.
Opening the first inner door (bell and Meridian Touch)
Step 1: From the descending platform, enter the hallway opposite the barred area. You will fight several guards as you work through this passage.
Step 2: At the end of the hall, you reach a jade bell and a locked door with a knocker. Strike the bell once.
Step 3: Immediately use the Meridian Touch mystic skill on the door knocker while the bell’s effect is active. If you wait too long, the door remains locked and you must hit the bell again and retry.
Getting this timing right is crucial because the same bell-and-knocker interaction appears several more times before you are finished with the Arsenal and the Armored Sentinel.
Reaching the Grand Arsenal Hall and the Armored Sentinel
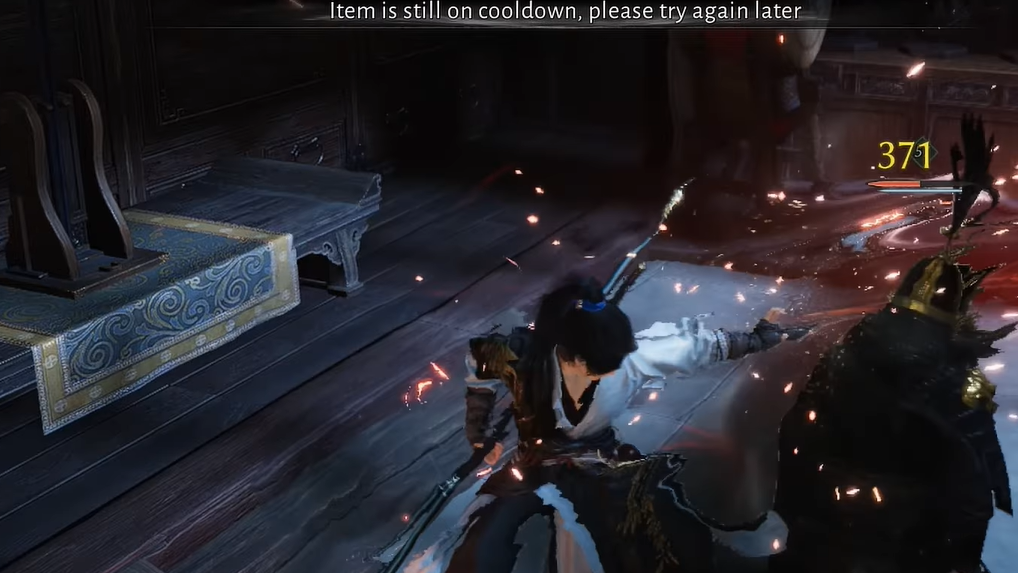
After the first bell puzzle, you enter the Grand Arsenal Hall, a large room lined with armored figures. Three enemies wait inside, including a banner-bearer who can heal and support the others. Eliminating the banner carrier first keeps the fight manageable.
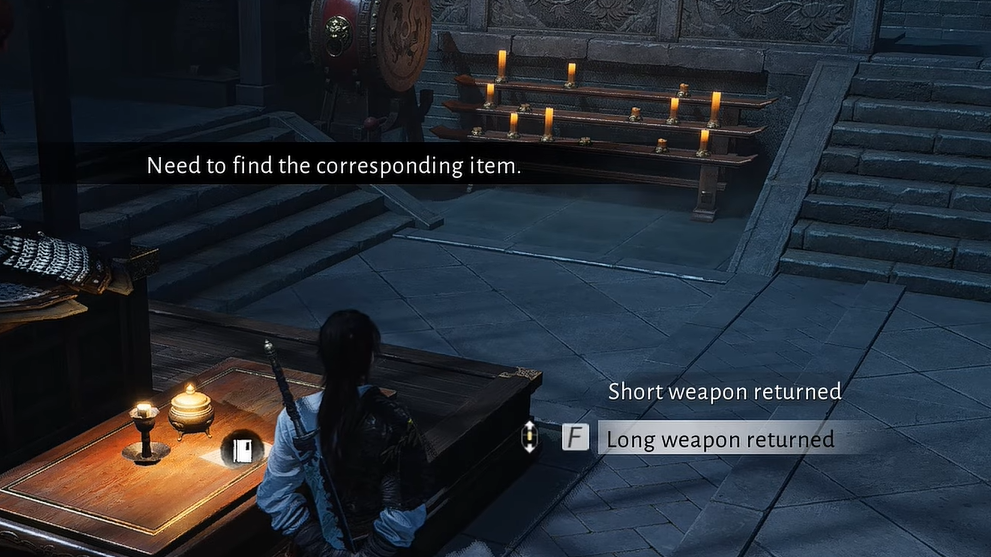
With the guards down, examine the prominent suit of armor that is missing its weapons. This is effectively the Armored Sentinel of the hall. The armor is tied to two objective strings:
- Retrieve the Long Weapon from the Left Wing
- Retrieve the Short Weapon from the Right Wing
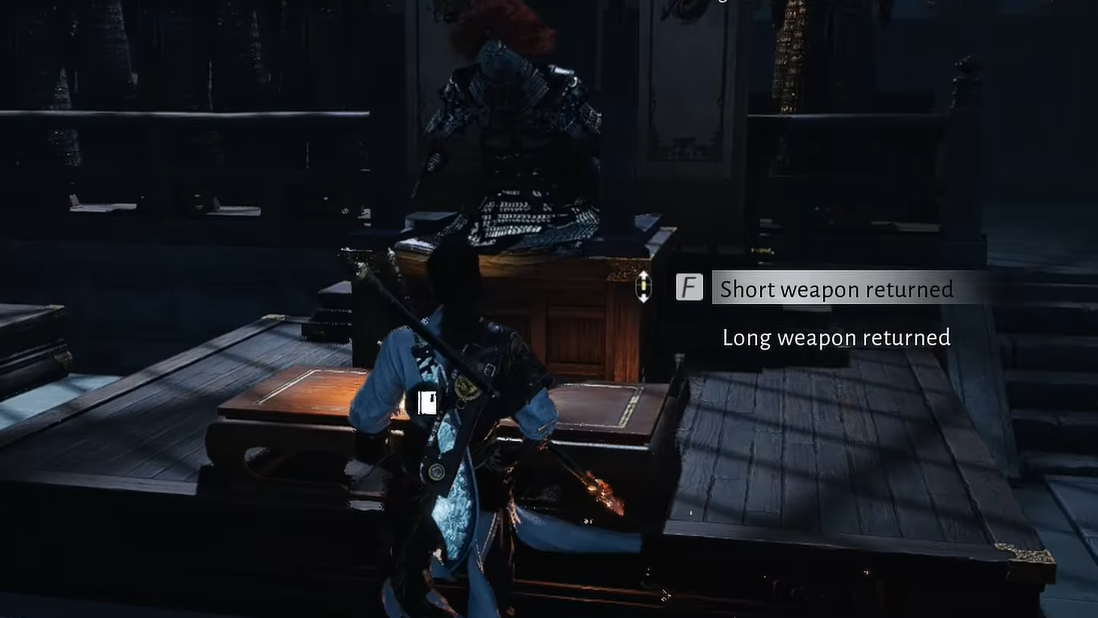
Only once both weapons are returned to this armored display does the Arsenal’s secret doorway open.
Long weapon location (left wing of the Arsenal)
Step 1: From the Grand Arsenal Hall, head into the left wing corridor. Defeat the guards near the entrance, then take the stairs down on the left.
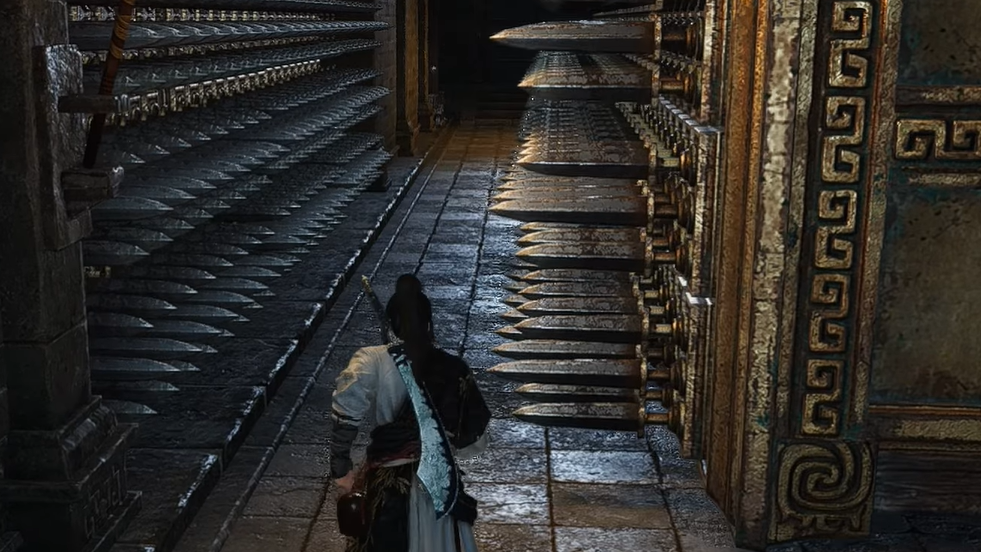
Step 2: Move into the spike corridor where wall-mounted spikes slam together. Wait for one set of spikes to begin retracting, then dash through with your dodge to clear each section. Taking a hit here can deplete your health enough that you are forced to restart the hallway.
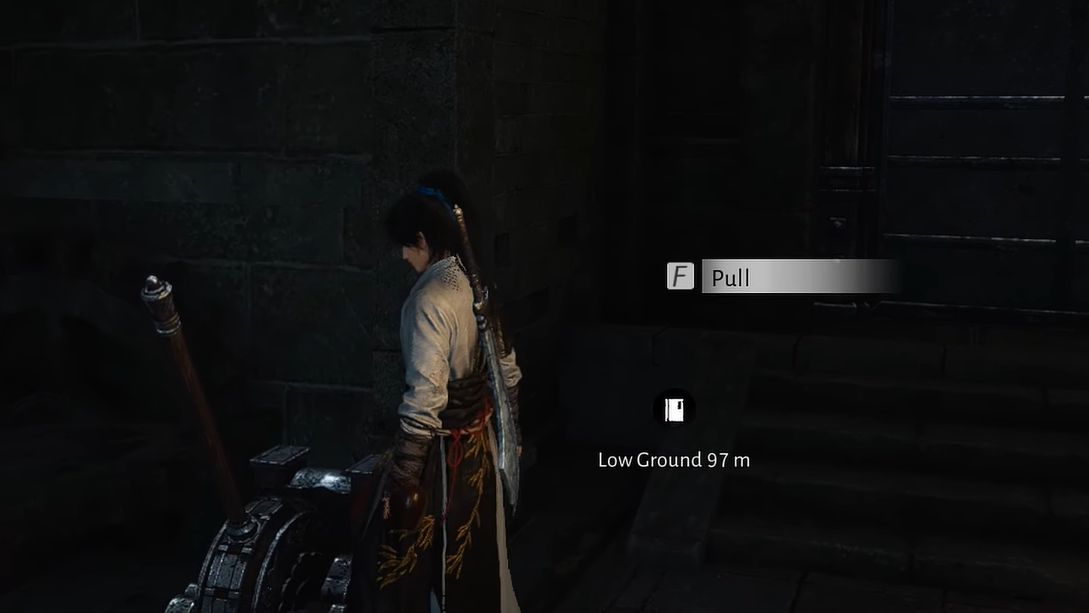
Step 3: At the end of this corridor, pull the lever to disable the spikes. When mercenary guards arrive to chase you, pulling the lever again re-activates the traps to kill them.
Step 4: Continue forward to another jade bell and door knocker puzzle. As before, strike the bell, then immediately use Meridian Touch on the knocker to open the door.
Step 5: Inside, defeat the lone guard standing by a spear. Loot this spear; it is one of the long weapons the Armored Sentinel needs.
Step 6: Move into the next chamber with a spike pit and scattered platforms. Jump from platform to platform; falling results in instant death, so keep your momentum and avoid hesitating mid-jump.
Step 7: After another stretch of tighter, faster wall spikes, you eventually reach a passage that loops back up into the Grand Arsenal Hall. Interact with the weaponless armor again and choose “Long Weapon Returned” to slot the spear into place.
Short weapon location (right wing of the Arsenal)
Step 1: Return to the Grand Arsenal Hall and take the right wing corridor this time. Defeat the guard at the entrance and, once again, take the stairs down on the left.
Step 2: Navigate a new set of spike traps, but here the spikes fall from the ceiling instead of slamming from the sides. For the second set, do not dash; instead, wait for the spikes to retract and walk forward at the right moment so they drop behind you.
Step 3: Pull the lever ahead to manipulate another trap sequence, then proceed to the next jade bell and knocker. Strike the bell and quickly apply Meridian Touch to the knocker, as in earlier rooms.
Step 4: In the next chamber, a guard with a shield blocks your way. If you cannot take him out with a stealth opener, break his guard using the Tai Chi mystic skill before finishing him off. Once he falls, take the sword displayed behind him.
Step 5: Continue into another circular room with a spiked pit and platforms. Jump carefully across to reach a second short weapon, pick it up, and proceed onward.
Step 6: A final narrow hallway features additional falling spike traps. When a trap retracts, crouch and move forward in one continuous motion until you exit the danger zone, then pull the lever at the end.
Step 7: Complete the last jade bell and knocker puzzle on this wing. Eventually the path returns you to the Grand Arsenal Hall. Interact with the armored Sentinel and select “Short Weapon Returned”. If both long and short weapons are present, a cutscene plays, and the hidden door behind the armor opens.
What opening the Arsenal entrance unlocks next
Once the Armored Sentinel has both weapons, the mechanism reveals a secret doorway deeper inside the Martial Temple complex. Venturing through leads to:
- Another circular chamber with a rising spiked floor, where you must quickly jump across platforms before the spikes catch up.
- A final arena where you open a chest and then fight Shi Zhen and four guards, prioritizing the adds before the boss.
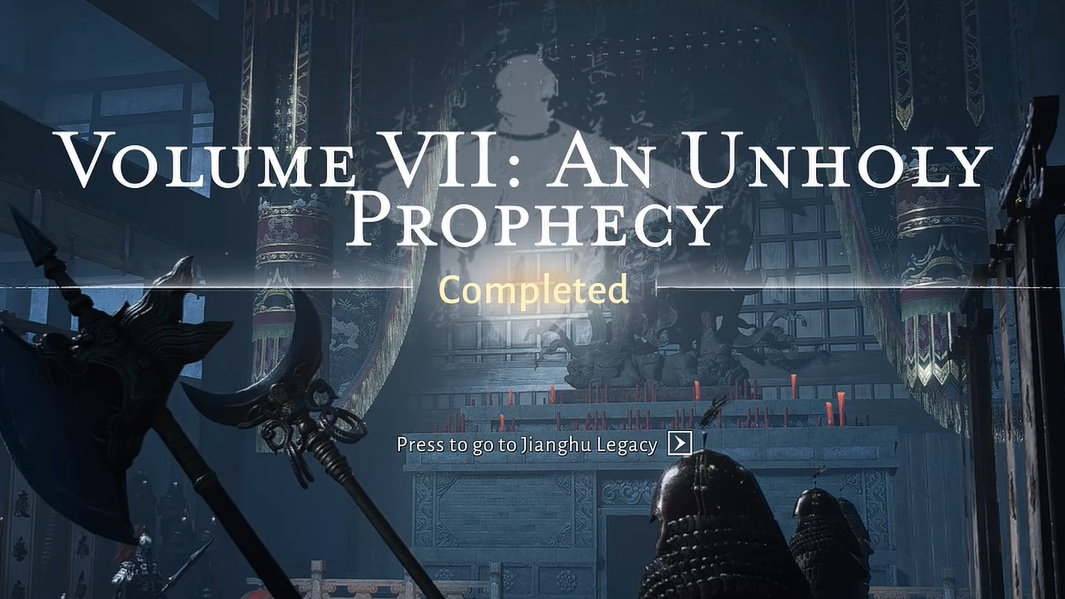
- A final meeting with the Mysterious Painter once you exit, which formally completes An Unholy Prophecy.
Clearing this chain grants a bundle of rewards tied to the quest, including Fame and Fortune Hanging Scroll, Custom Chests, Lv. 3 Ebon Iron, Echo Jade, Kaifeng Exploration progress, Enlightenment Points, character EXP, and coins.
What if you already looted the arsenal weapons?
Some players reach parts of the arsenal early, pick up spears or swords during exploration, and only later trigger the formal quest that references the Armored Sentinel and the Arsenal entrance. The game still expects the scripted sequence of:
- Entering via the Martial Temple platform
- Solving the bell-and-knocker locks
- Clearing each trapped wing in turn
- Returning the long and short weapons to the central armor set
If you already have similar weapon types in your inventory, they do not replace the specific quest objects. You still need to run both wings and interact with the correct displays so the game can flag “Long Weapon Returned” and “Short Weapon Returned” on the Armored Sentinel.
Once those two interactions register, the Arsenal entrance fully unlocks and the rest of the underground sequence plays out, regardless of when you first picked up related loot.