Windrose drops you on a hostile island with a rusty sword, a temperamental pistol, and almost no explanation. The pirate survival game leans on soulslike combat, a crafting loop built around constant building and dismantling, and a naval system that punishes unprepared captains. Knowing a handful of systems before you cast off will save hours of corpse runs.
Combat survival: blocks, fences, and guns
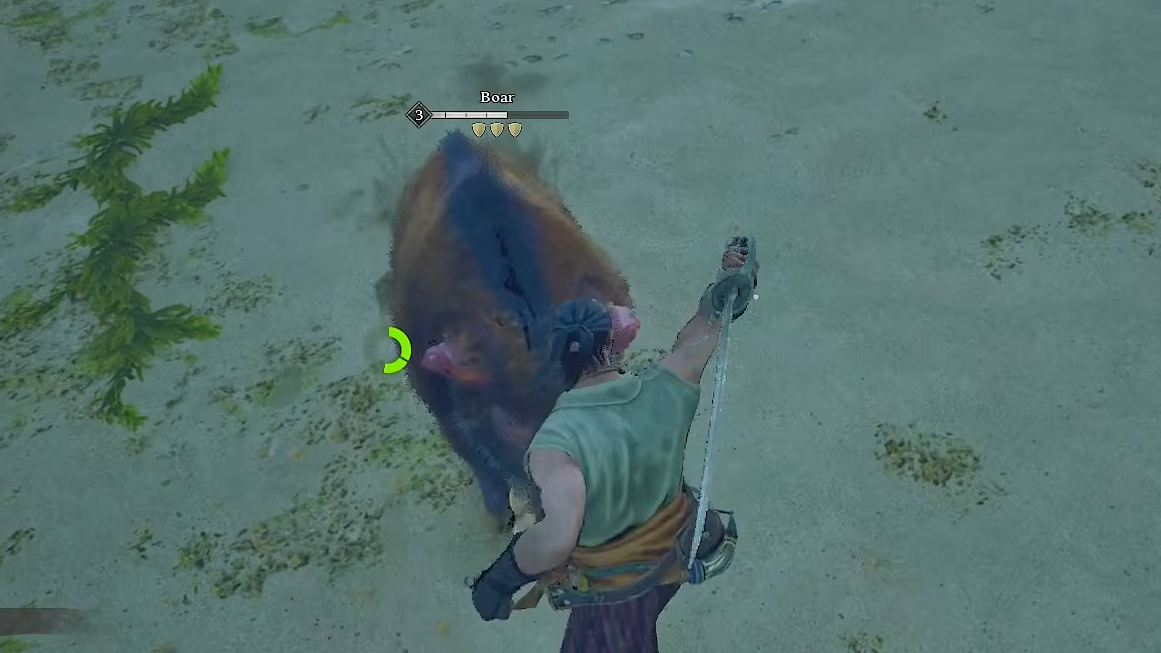
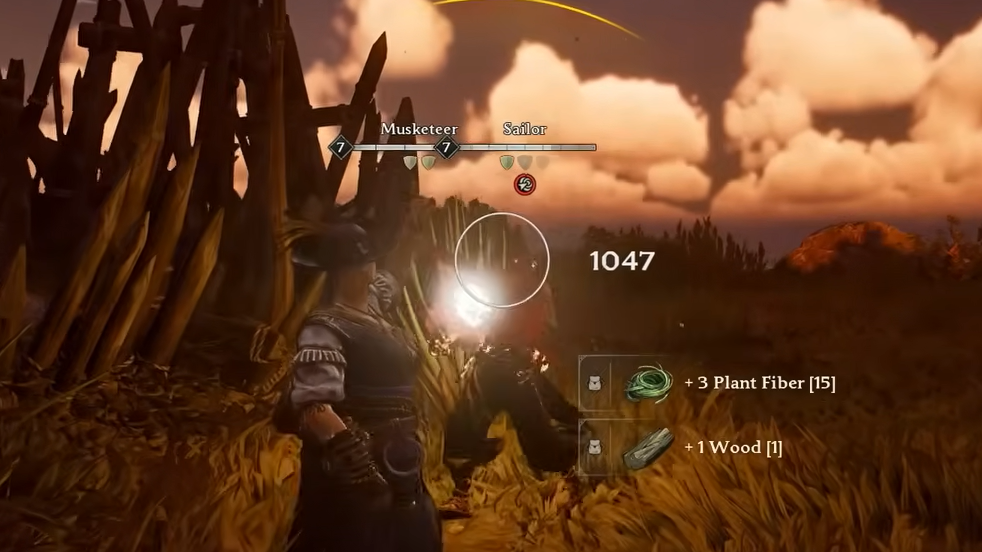
Combat is the fastest way to die in Windrose. Enemies hit hard, and a single boar charge or drowned swing can end a fight in two hits if your gear is underleveled. Blocking is your primary defense, but it is not infinite. A row of tan shield icons near the bottom of the screen tracks your available blocks, and once they are spent the mechanic enters cooldown. Treat blocks like a resource: break contact, let them refill, and re-engage.
Guns are the opposite of reliable. Pistols and blunderbusses deal serious damage at close range but take several seconds to reload, and that window is usually enough for an enemy to close the distance and punish you. Use firearms as finishers on low-health targets rather than openers.
When a pack swarms you, the answer is architecture. Drop a small ring of wooden fences around yourself or around the enemies, and poke through the gaps with a spear or rapier. Boars and drowned enemies cannot attack through fences at all. Pirates still swing, but a fence wall breaks up their approach and turns a group fight into a queue.
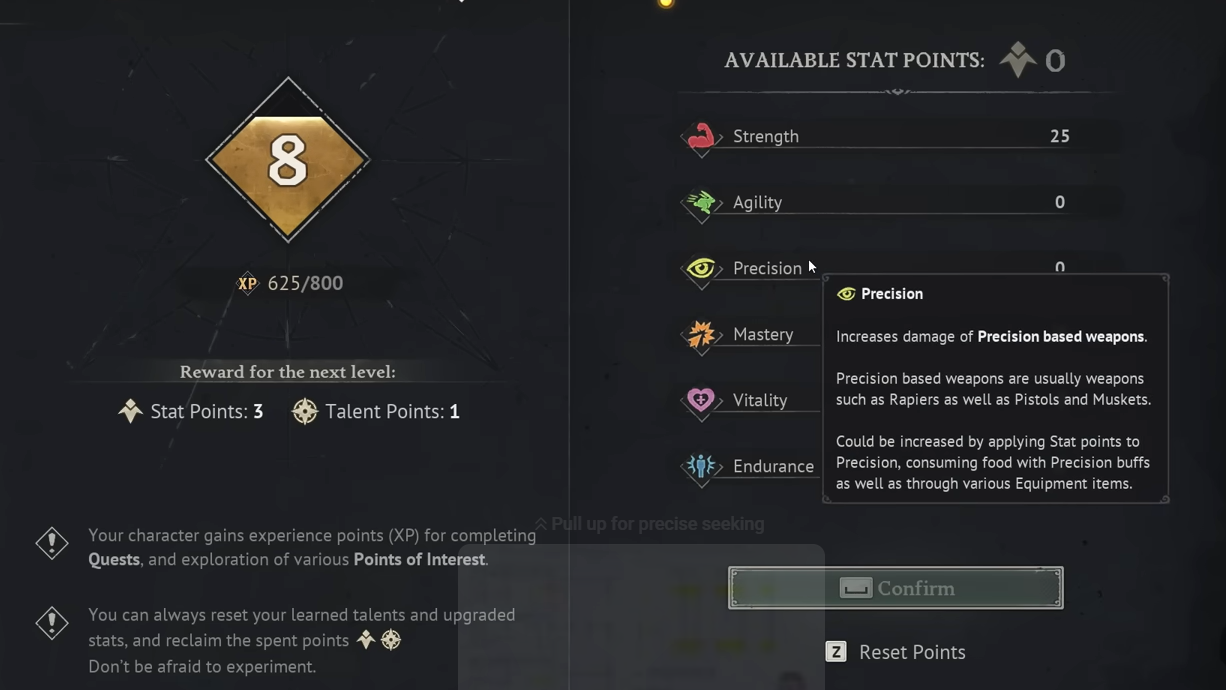
Stat points and the Vitality rule
Every level grants stat points and talent points. Stats can be reset, so experimentation is safe, but the starting health pool is small enough that the first several levels should go entirely into Vitality. Surviving two boar charges instead of one is the difference between finishing a camp and running back to your tombstone.
Once you settle on a weapon, reset and specialize. A practical split is roughly two-thirds of your points into your weapon’s damage stat and one-third into Endurance, so you can actually swing, block, and sprint in the same fight.
Food, healing, and the Rested buff
Food is a combat stat in Windrose. Each dish grants a temporary buff, and you can stack two food buffs at once for bonuses to max HP, agility, or other attributes. Never walk into hostile territory on an empty stomach. Boiled crabs from the beach and bananas from trees cover you in the opening hours.
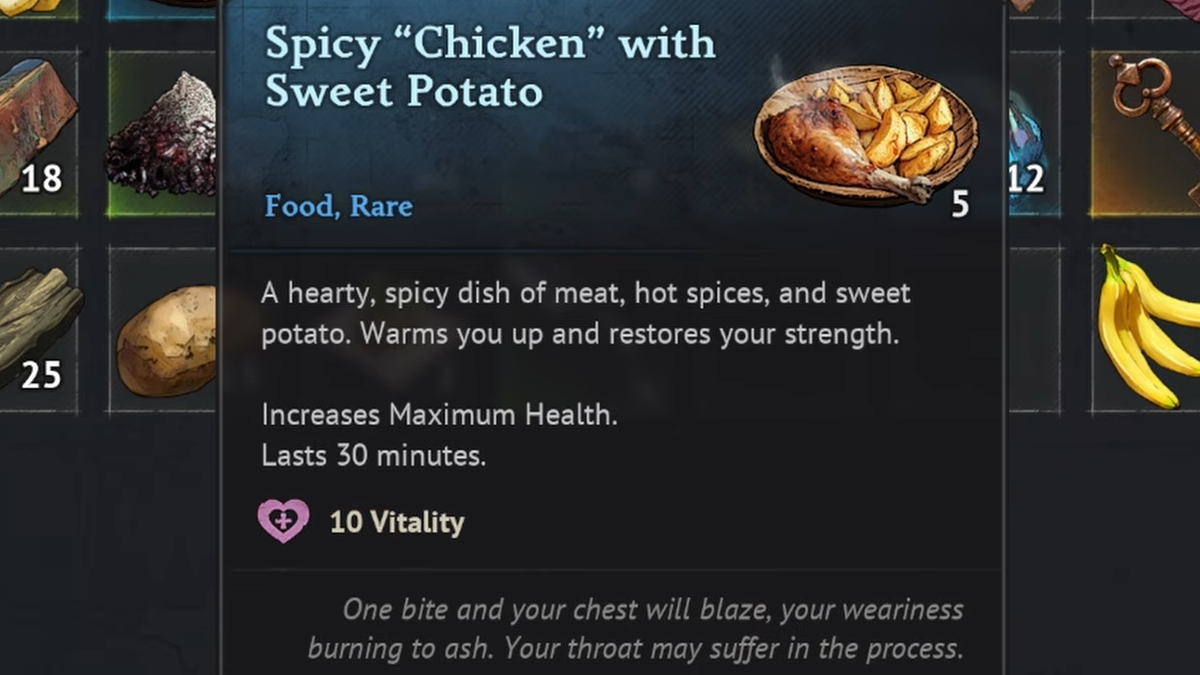
Healing has a hierarchy. Bandages (crafted from coarse fabric) and looted healing potions both work, but they share cooldowns, so you cannot chain-heal through a fight. Save potions for emergencies. When you are safe but hurt, drop a campfire and stand next to it. After a couple of minutes, you regenerate to full for free, no consumables spent.
The Rested buff, which you get from standing near a bonfire at your base, dramatically increases stamina regeneration out in the field. Extending its duration is a matter of Comfort Level. Place furniture around your bonfire, but only one item from each sub-category counts. Five stools give you one stool’s worth of Comfort. A stool, a table, a bed, a dresser, and so on, stack properly. A well-decorated base can push Rested duration up to around 30 minutes.
Build liberally, refund everything
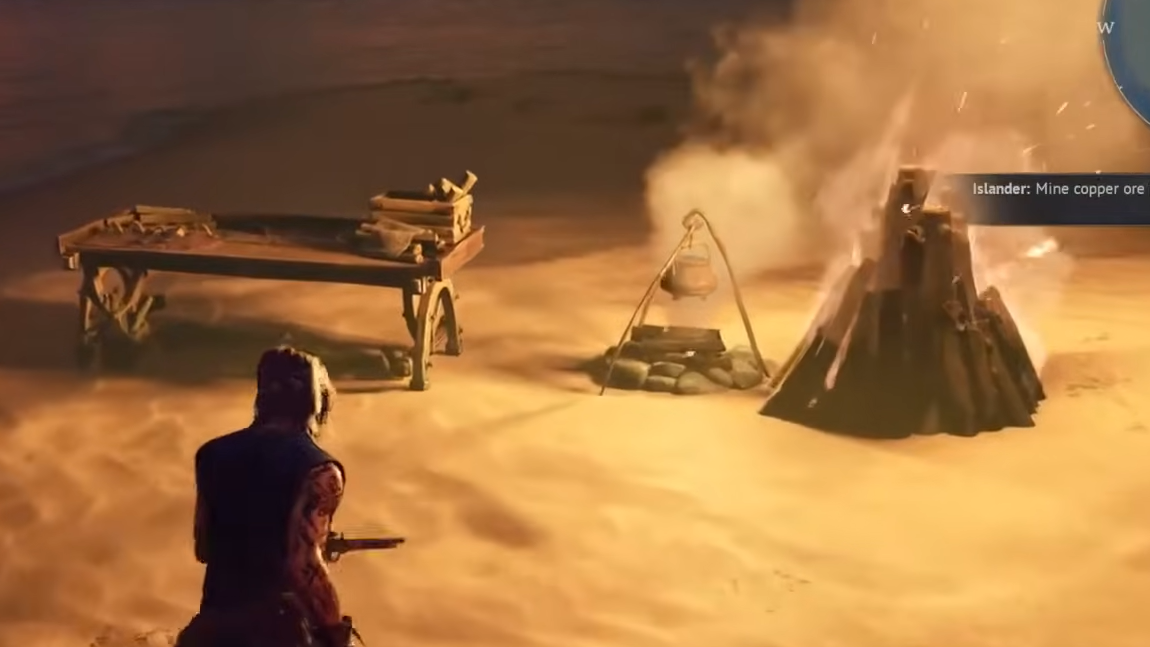
Breaking down structures refunds 100% of the materials used to build them. This single rule changes how you should think about every building decision. Tents, fast travel bells, stairs, torches, barricades, and fences are all temporary infrastructure you can plant, use, and pack up.
Keep plant fiber, wood, and stone in your inventory at all times. When you land on a new island, you can immediately drop a tent as a revival point, build stairs to reach a ledge, or throw up fences before a fight. When you are done, pick it all back up.
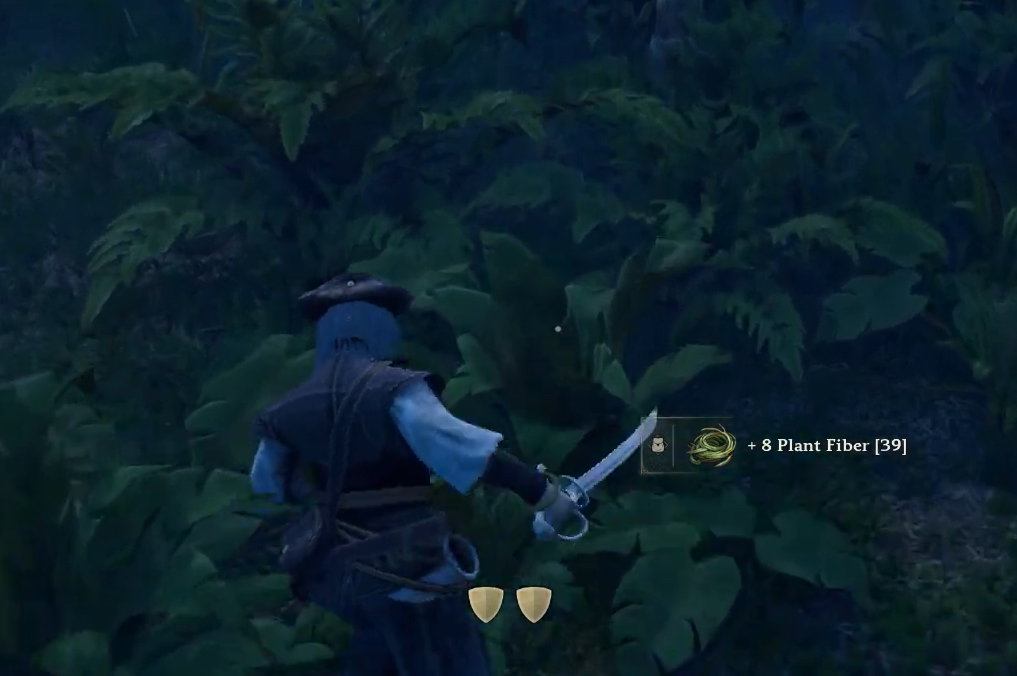
A shovel is the correct tool for plant fiber. Digging the ground directly beneath a bush yields a large pile in a single action, far more than hacking at foliage with a blade and without burning weapon durability.
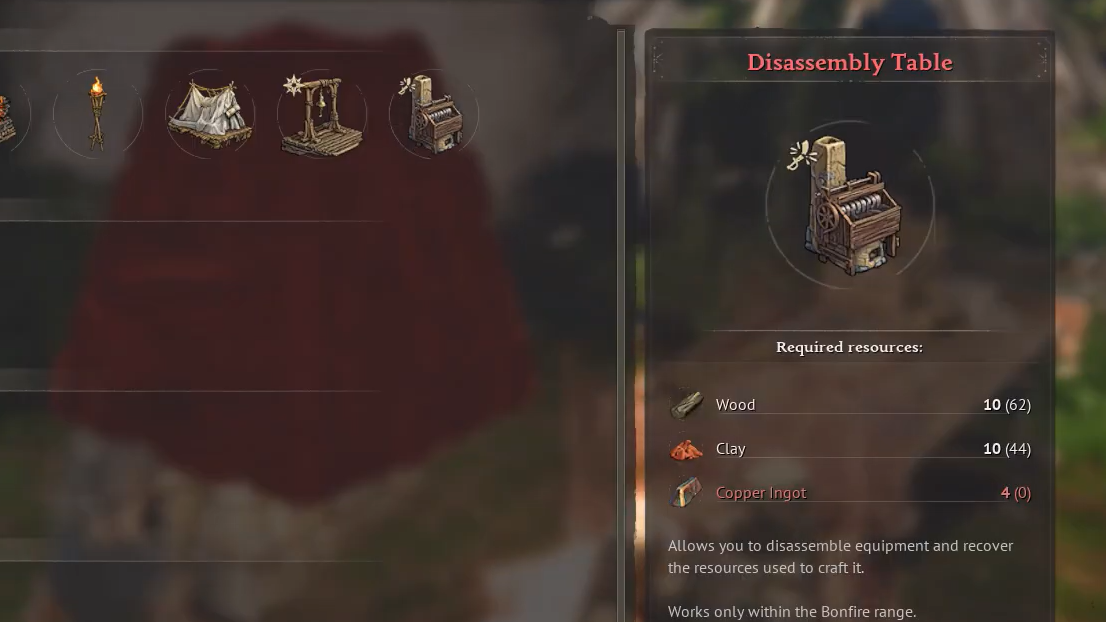
Build a Disassembly Table as soon as the recipe unlocks. Looted weapons and armor from pirate camps refund 100% of their base crafting materials, including copper and nails, when broken down. Any rare materials spent on upgrading a tier are lost in the process, so disassemble obsolete base-tier gear rather than fully upgraded pieces.
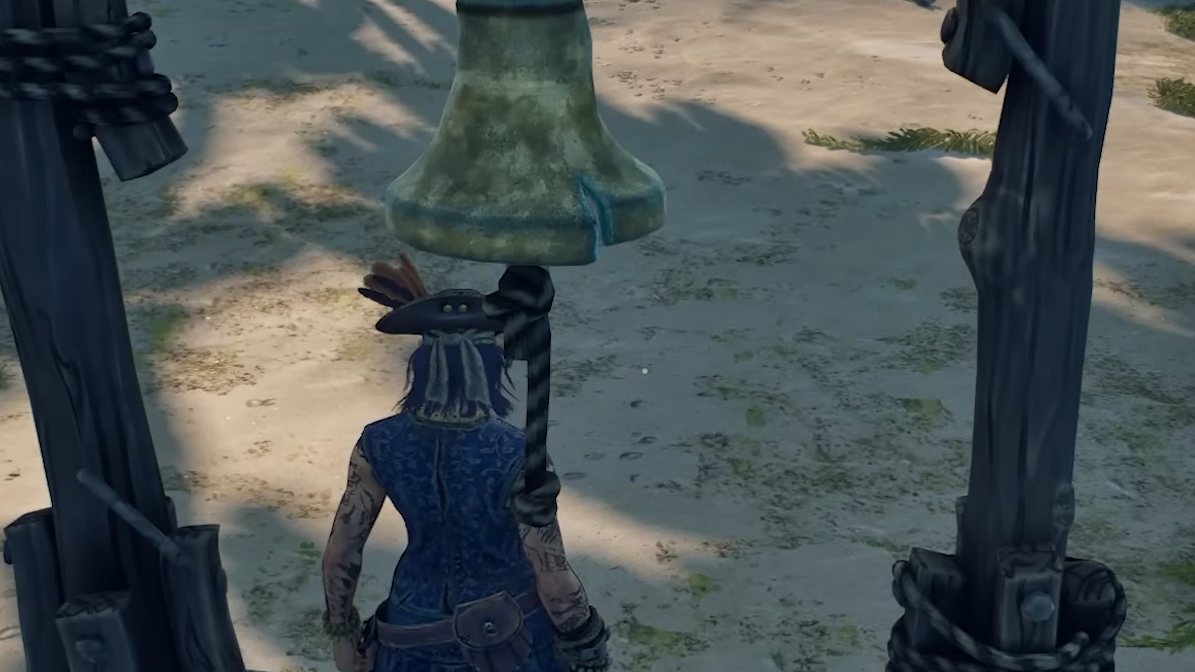
Fast travel from the ship’s wheel
Fast travel on land requires you to be standing at a travel bell. At sea, the rule changes. If you are actively steering your boat, with hands on the wheel, you can open the map and fast travel to any bell in your network. Standing on the deck does not count. Press K to summon your boat to the nearest shore if you are stranded.
This makes bells a flexible tool rather than a fixed network. Drop one near a resource-rich island, use it for a few runs, then dismantle it and move on with all materials refunded.
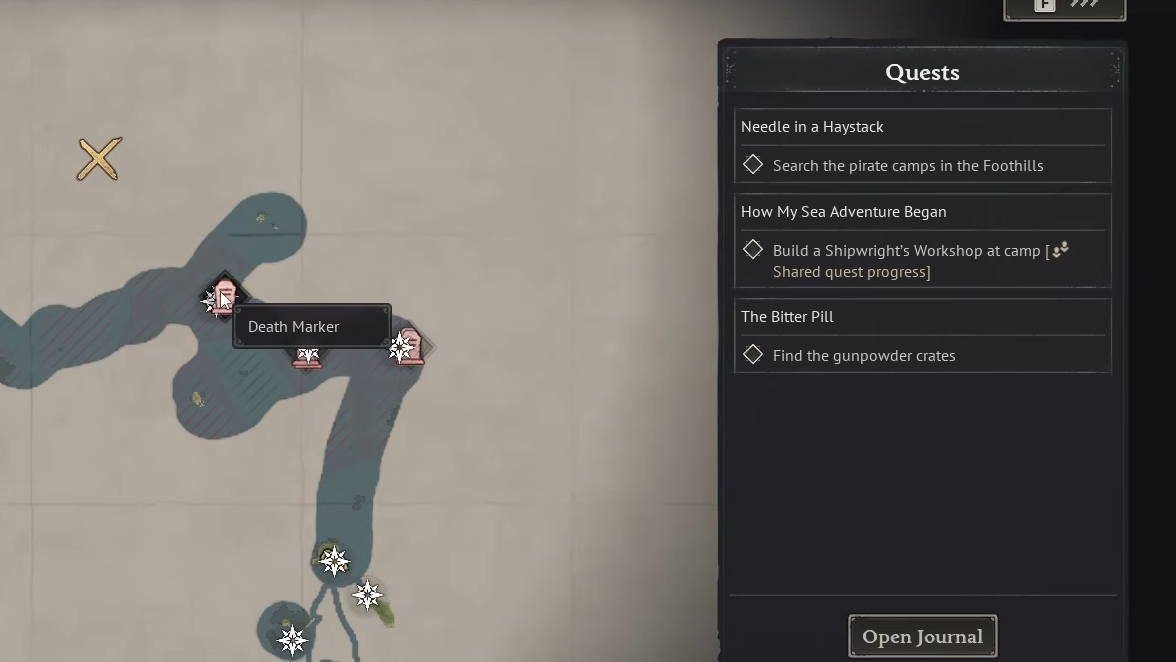
Earning XP: clear points of interest completely
Killing random enemies does not grant experience. XP comes from completing quests and clearing points of interest, and a POI only counts as cleared when every chest inside it is completely empty. Leaving a single rotten banana in a crate blocks the completion reward.
If your inventory is full, drag unwanted items out of the chest and drop them on the ground. The container registers as empty, and the camp clears. Chests themselves do not respawn, but resources, herbs, and enemies do, so returning to an old POI for gunpowder or plants is a valid farming loop.
Ship inventory as insurance
Dying on land means a walk back to your corpse. Dying at sea sounds worse, but it is actually safer if you prepare. Items in your personal inventory drop on death, but anything stored in the ship’s cargo hold stays with the vessel. If your ship sinks, head to a Wharf, pay the recovery fee, and the ship respawns with its cargo intact.
Before any long voyage, move valuables from your personal pockets into the ship’s hold. If the voyage goes badly, you lose the gear on your back, not the expedition’s haul.
Settling story NPCs at your base
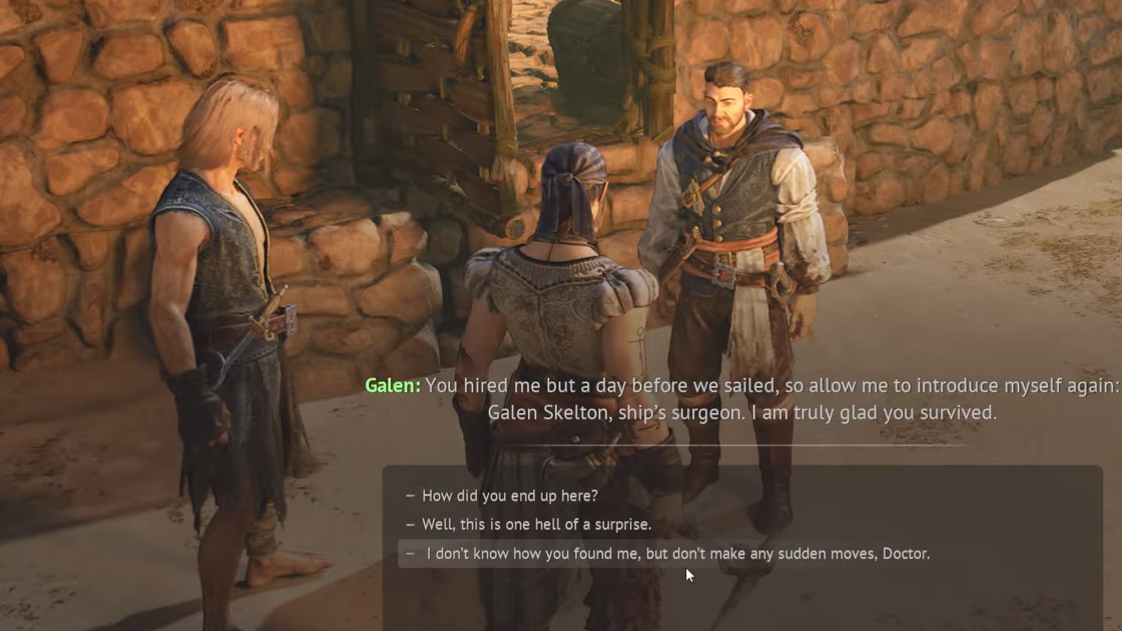
During the main campaign, quests will tell you to meet certain NPCs like Dr. Galen or John Doe back at your base. They will not appear automatically. Walk up to your Bonfire, interact with it, and use the Settle command to assign the NPC to that fire. If you move your base to a new island, Evict the NPC from the old Bonfire and Settle them at the new one, or they will stay behind.
Moving placed objects
Windrose currently has no object-move function. To relocate a crafting station or piece of furniture, enter building mode, destroy the object (middle mouse button), and rebuild it where you want it. The full material refund means this costs nothing but a few seconds.
Sleeping skips the night
Nights are dark, visibility is poor, and enemy spawns get more aggressive. A Simple Bed (5 plant fiber, 5 wood) placed under a roof with clearance to interact lets you press Q to sleep, which fast-forwards server time straight to morning. Treat a bed as essential infrastructure, not decoration.
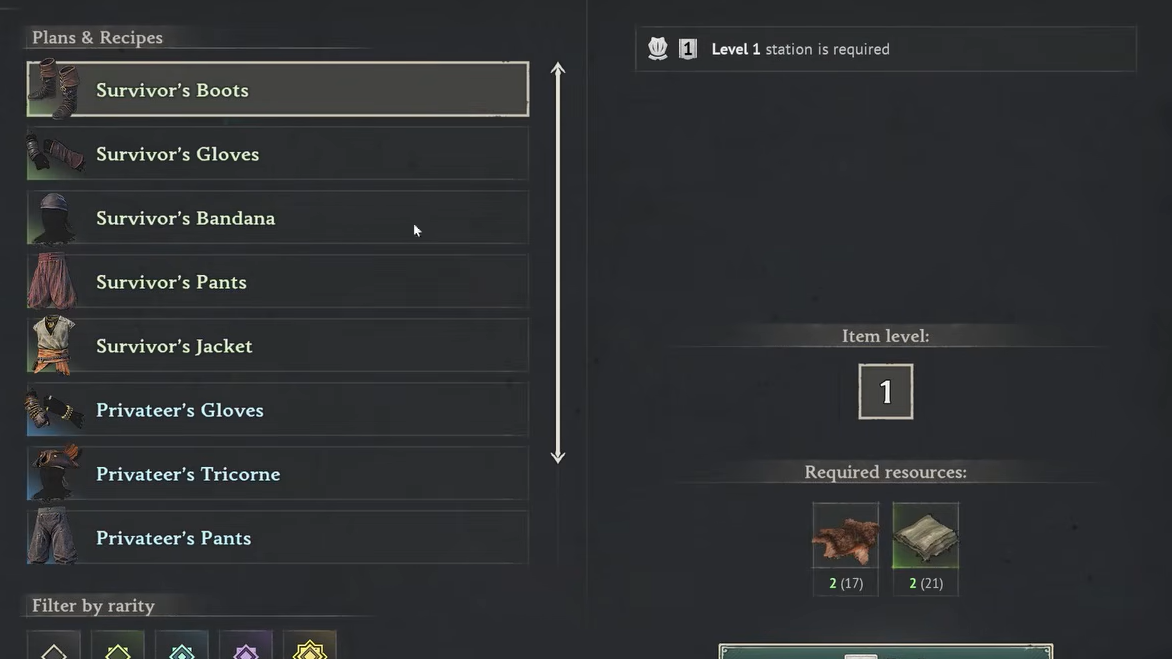
Gear upgrades versus fresh crafts
Gear scales up to level 15, roughly matching the difficulty tiers of the game’s biomes. Keep upgrading a weapon you like as long as the cost makes sense, but once you defeat a biome boss, you unlock higher base-level crafting. Sometimes crafting a fresh level 6 weapon is cheaper than pushing a level 4 weapon up two tiers. Check the material cost both ways before committing.
The same logic applies to armor. Higher base-tier armor combined with points in Vitality is what lets you survive the jump from boars to the drowned to pirate captains without constantly respawning.
The short version: treat building materials as a survival tool, not a scarcity problem. Block deliberately, eat two meals at all times, and clear every chest in every camp. Once those habits lock in, the pirate life gets a lot less punishing.