Wizard Alchemy on Roblox runs on a tight loop: farm materials, brew potions to unlock spells, and buy wands, plus hats and robes to keep your damage and HP scaling with stronger enemies. Every wand has a flat gold cost, every potion has a minimum magic value, and every hat or robe trades gold for a fixed HP bump.
All wands in Wizard Alchemy
Wands are your basic attack source and define farm speed before potion spells come online. Each one is a one-time gold purchase from the wand shop, with later wands adding crit support or cooldown reduction on top of raw attack.
| Wand | Cost | Notes |
|---|---|---|
| Wingbird Wand | 200 Gold | 20 Attack, +5% attack bonus. First practical upgrade from the starter wand. |
| Azure Wand | 500 Gold | Early mid-game step up in attack and bonus scaling. |
| Demon Trident Wand | 8,000 Gold | Mid-game farming wand with stronger attack scaling. |
| Ice Star Wand | 20,000 Gold | Adds cooldown reduction. Sold at the waterfall near the starting village. |
| Ember Staff Wand | 30,000 Gold | Highest attack option with crit support for stronger combat bursts. |
Pick up the Wingbird first to escape starter damage, then save for the Demon Trident before chasing the 20,000 to 30,000 gold wands. Cooldown reduction on the Ice Star helps once you have potion spells worth recasting.

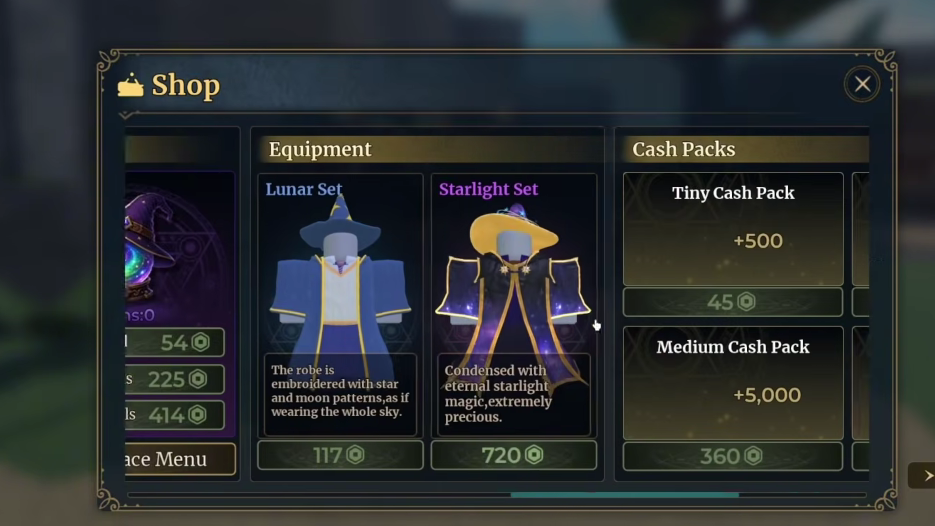
All hats and robes in Wizard Alchemy
Wizard hats and robes are sold from Roger’s shop and add flat HP, which is what keeps you alive against mutant enemies and the Dwarf King boss. Sets share the same names across both slots, so you can pair a Starmoon Robe with a Starmoon Hat for a stacked HP bump.
| Equipment Set | Slot | Role |
|---|---|---|
| Starmoon Robe | Robe | Efficient first HP upgrade from the starter robe. |
| Golden Reverie Robe | Robe | Second-tier HP option once gold income is steady. |
| Starlight Robe | Robe | Higher-cost late upgrade for bossing. |
| Starmoon Hat | Wizard Hat | Early HP boost to pair with the matching robe. |
| Golden Reverie Hat | Wizard Hat | Mid-game HP upgrade. |
| Starlight Hat | Wizard Hat | Late HP option for tougher enemy loops. |
Buy order that holds up well: first wand → first robe → first hat, then upgrade the wand again before jumping to Starlight gear. HP without damage stretches fights and wastes potions, so keep the wand tier close to your hat and robe tier.
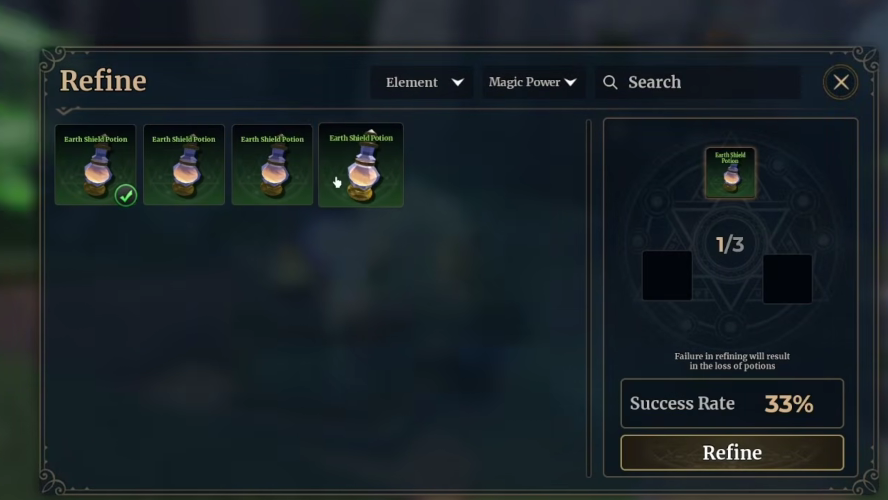
How potion brewing works
Potions are the only way to unlock spells. Every material has a magic score, every potion has a minimum magic threshold, and you brew at the alchemy table by placing up to five materials into the cauldron.
The chance to roll a specific potion is highest when your total magic value sits at or just above that potion’s threshold, but below the next potion’s threshold. Overshooting pushes the RNG toward the next rarity tier, which lowers your odds for the one you actually wanted. The brewing minigame (grind, pour, stir) then sets the potion’s purity, which scales the resulting spell’s damage and stats.

All potions and magic thresholds
Each potion below shows the minimum magic value you need to hit before the brew has any chance of producing it. Pair this with the materials table further down to plan a recipe.
| Potion | Min Magic | Tier |
|---|---|---|
| Wind Blade Potion | 6 | Starter |
| Rock Blast Potion | 8 | Starter |
| Ice Spike Potion | 10 | Starter |
| Lithe Potion | 40 | Mid |
| Fire Arrow Potion | 45 | Mid |
| Earth Shield Potion | 48 | Mid |
| Ice Turtle Potion | 52 | Mid |
| Tornado Potion | 70 | Upper Mid |
| Meteorite Potion | 74 | Upper Mid |
| Earth Spike Potion | 77 | Upper Mid |
| Frost Thorns Potion | 80 | Upper Mid |
| Dragon Breath Potion | 99 | Late |
| Lotus Bloom Potion | 100 | Late |
| Radiant Sword Potion | 105 | Late |
For example, to target Ice Spike (10), keep your total between 10 and 39, since 40 unlocks Lithe and pulls your odds toward that potion instead. The same logic applies all the way up: stay above the threshold of the potion you want, below the threshold of the next one.
All materials with magic power and drop sources
Materials are split into magic-power ingredients (which raise your brew total) and elemental shards (which add a 50% chance for a specific element without contributing magic score).
| Material | Magic Power | Drop Source |
|---|---|---|
| Furnace Core | 43 | Mutant Warhammer Dwarf (43%), Dwarf King Boss (14%), Mutant Archer Goblin (14%) |
| Copper Earring | 30 | Mutant Archer Goblin (43%), Mutant Warhammer Dwarf (43%), Dwarf King Boss (43%), Archer Goblin (13%) |
| Goblin Bone | 21 | Archer Goblin (38%), Knife Goblin (25%), Chests |
| Flame Crest | 19 | Mutant Warhammer Dwarf (43%), Mutant Archer Goblin (43%), Dwarf King Boss (43%), Warhammer Dwarf (13%) |
| Goblin Finger | 15 | Knife Goblin (75%), Archer Goblin (50%), Chests |
| Golden Tooth | 13 | Warhammer Dwarf (38%), Pickaxe Dwarf (25%), Chests |
| Dwarf Emblem | 12 | Pickaxe Dwarf (75%), Warhammer Dwarf (50%), Chests |
| Seagull Egg | 5 | Bird Nests, Chests |
| Withered Mushroom | 4 | Mushroom Clusters, Chests |
| Blueberry | 3 | Blueberry Bushes, Chests |
Furnace Core is the strongest single ingredient at 43 magic, but it only drops from mutant enemies and the Dwarf King boss, so consistent farming requires a stable wand and gear setup first. Copper Earring is the more reliable late-game filler since it shows up across more mutant enemies and even has a small drop chance off normal Archer Goblins.
Elemental shards
Shards do not raise your magic total. Each one adds a 50% chance for the brewed potion to roll with a specific element, which changes spell behavior and pairs with elemental race bonuses like Fiendish Demon (Fire) or Ice Crystal (Ice).
| Shard | Effect | Drop Source |
|---|---|---|
| Light Shard | +50% Light element chance | Mutant Archer Goblin, Mutant Warhammer Dwarf, Chests |
| Dark Shard | +50% Dark element chance | Mutant Archer Goblin, Mutant Warhammer Dwarf, Chests |
| Fire Shard | +50% Fire element chance | Chests, Golden Egg, Elite/Mutant mobs |
| Ice Shard | +50% Ice element chance | Chests, Golden Egg, Elite/Mutant mobs |
| Wind Shard | +50% Wind element chance | Chests, Golden Egg, Elite/Mutant mobs |
| Earth Shard | +50% Earth element chance | Chests, Golden Egg, Elite/Mutant mobs |
For Light and Dark builds, mutant enemy farming is the fastest route since those shards also drop from elite mobs. Fire, Ice, Wind, and Earth shards skew heavily toward chest loops, so build a chest route on top of your gold farming circuit.
Recommended progression order
Plan your gold and material spending around the next spell threshold rather than the highest-cost item available.

Sell any unwanted low-tier materials to Lombart on Departure Isle to keep inventory clean during long farming runs. Inventory pressure is the most common reason mutant farming stalls out, and clearing it costs nothing.
Confirming a successful brew
A brew is working as intended when the alchemy minigame finishes all three phases (grind, pour, stir) and produces a potion with a visible rarity color and purity rating. Higher purity from clean pour and stir timing means stronger spell damage when consumed. If a brew rolls a different potion than you wanted, your total magic score crossed into the next threshold; drop one material or swap a higher-power ingredient for a lower one and try again.