
With the ever-increasing dependence on Internet, a stable connection has become the need of the hour. And what’s better than a wireless connection, which offers both ease of accessibility and mobility. But, wireless connections are prone to errors more often than other types, a reason that might make a dent in their appeal.
However, most of these errors are trivial and can be fixed by some simple troubleshooting. The complex ones require an intensive approach but they too are fixable if you are willing to invest time.
In the following sections, we have listed some of the most effective fixes to resolve issues that might prevent you from establishing a stable Wi-Fi connection.
What leads to Issues with Wi-Fi?
There are several underlying causes that lead to issues with either connecting to the Wi-Fi or accessing the internet after establishing a connection.
- Wi-Fi not in range
- Incorrect credentials
- Problems with the connection
- Driver issues
- Corrupt Files
With a basic understanding of the underlying issues, let’s now move to the fixes.
1. Try Connecting Another Device
Before we move to the fixes pertaining to the PC, let’s first establish where the problem lies. If there’s an issue with the router itself, there’s no point moving forward and meddling with the PC settings.
To identify if there’s a problem with the PC or the router, try connecting to the Wi-Fi using another device, either a PC or a mobile phone. If you are able to establish a connection, the problem lies with your PC, hence move to the fixes mentioned next in the article.
If you are unable to connect, try restarting the router. Restarting the modem/router is known to fix several issues pertaining to Wi-Fi connectivity. All you have to do is unplug the router from the source, wait for a minute and then plug it back in. This should fix the issue.
Some routers have a built-in battery and continue to function even when unplugged from the power source. If that’s the case with your router, remove the batteries as well, put them back in a minute, and check if it fixes the issue.
If you are still unable to connect to the Wi-Fi, the problem likely lies with your router and you could either get it checked by a professional or replace it, as you deem suitable.
2. Restart the PC
One of the simplest troubleshooting methods is to restart the computer. When you restart the computer, the OS is reloaded and any bug that’s preventing the Wi-Fi from functioning effectively is eliminated.
After you restart the computer, check if you are able to connect to the Wi-Fi and access the internet. In case the issue persists, move to the next fix.
3. Check if Wi-Fi Adapter is Enabled
You wouldn’t be able to view the various Wi-Fi networks and connect to them if the Wi-Fi adapter is disabled. Before we move forward, let’s first check if the Wi-Fi adapter is enabled.
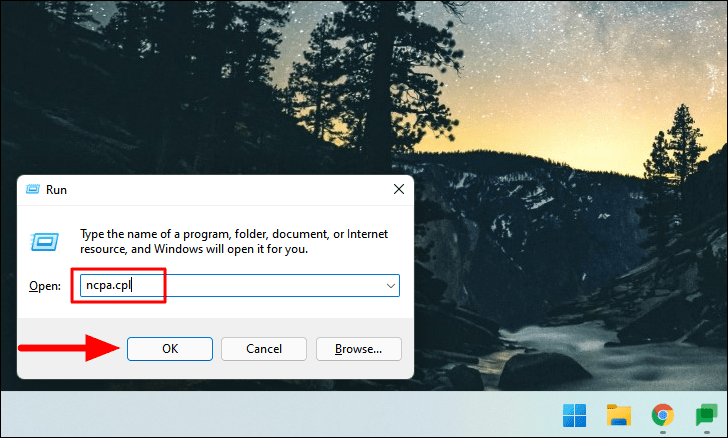
To check if the Wi-Fi adapter is enabled, press WINDOWS + R to launch the ‘Run’ command, type ‘ncpa.cpl’ in the text field, and then either click on ‘OK’ at the bottom or press ENTER to launch the ‘Network Connections’ window.
Now, look if the ‘Wi-Fi’ adapter is greyed out and has ‘Disabled’ mentioned under it. If it’s not, move to the next fix.
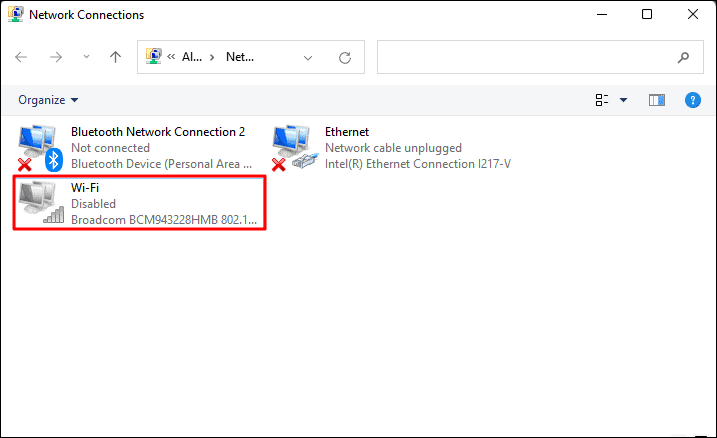
If you find the ‘Wi-Fi’ adapter to be greyed out, right-click on it, and select ‘Enable’ from the context menu.

You will now be able to view and connect to the available Wi-Fi networks.
4. Reconnect to the Wi-Fi Network
If the current connection has some issues, reconnecting to the Wi-Fi network will fix it. This fix applies to the case when you are connected to the network but are unable to access the internet.
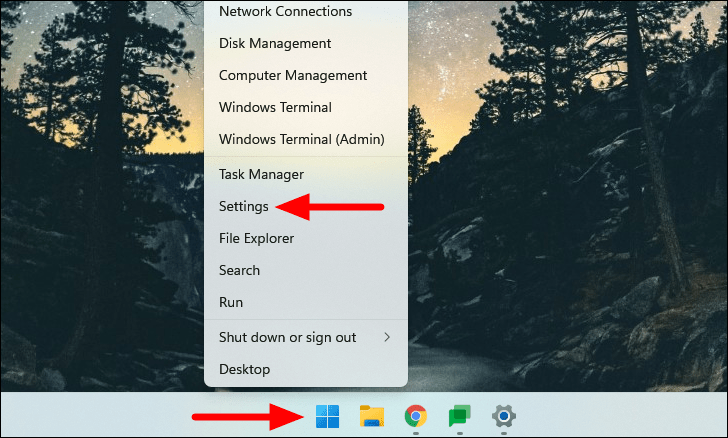
To reconnect to the Wi-Fi network, right-click on the ‘Start’ icon in the Taskbar or press WINDOWS + X to launch the Quick Access menu, and select ‘Settings’ from the list of options that appear. Alternatively, you can press WINDOWS + I to directly launch the ‘Settings’ app.
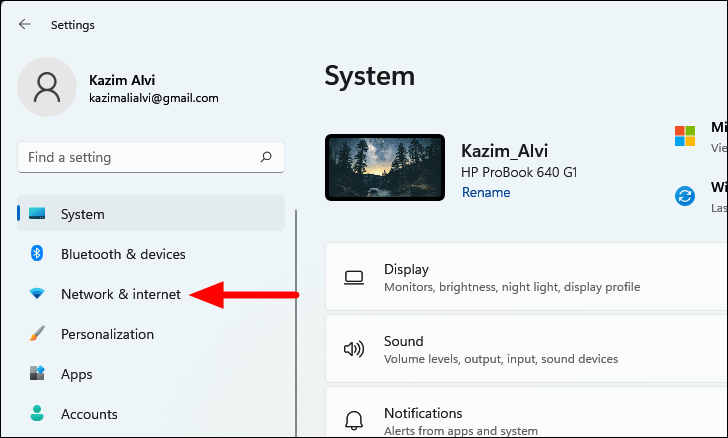
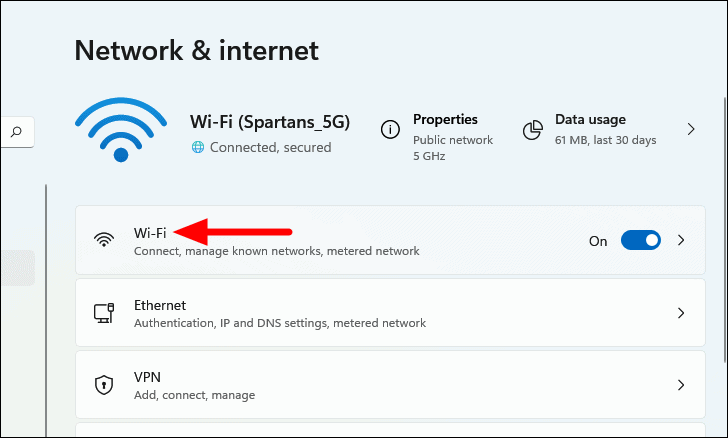
In the ‘Settings’ app, you will have multiple tabs listed on the left, select ‘Network & Internet’.
Next, click on the ‘Wi-Fi’ option.
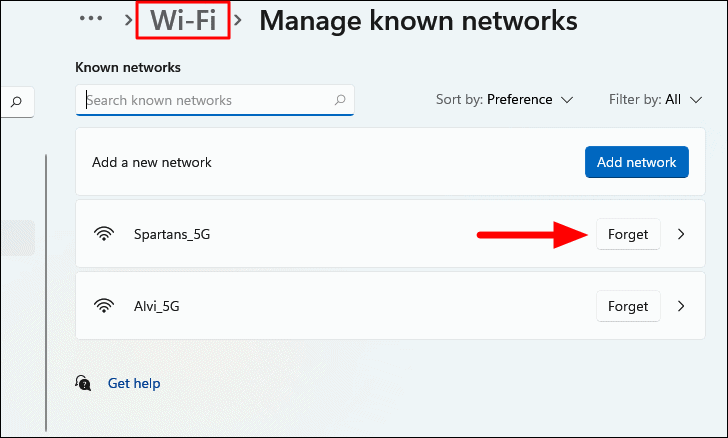
Next, click on the ‘Manage known networks’ option.

You will now find all the saved networks listed here. Click on ‘Forget’ next to the one that you want to remove. After removing the ‘Wi-Fi’ network from the known list, click on ‘Wi-Fi’ at the top to move back to the last page.
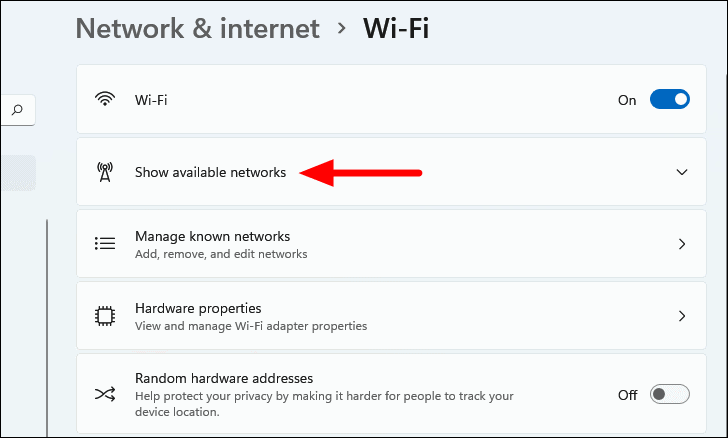
Now, click on the ‘Show available networks’ option to again add the network.
Next, locate the network that you earlier removed, click on it, and then select the ‘Connect’ option.
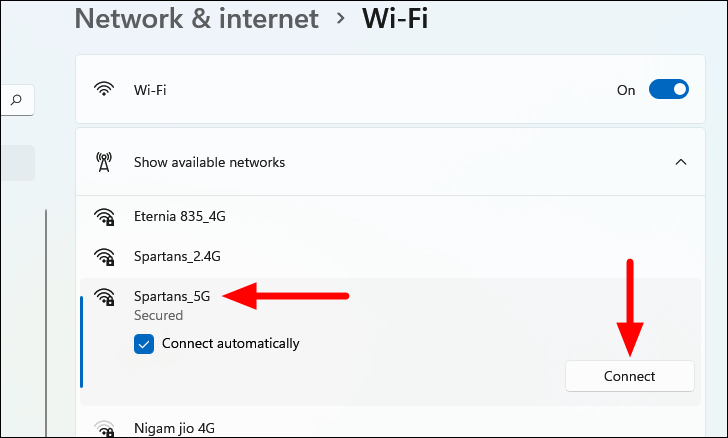
If the network is secured by a password, enter it in the text field, and click on ‘Next’ to connect.

Now, check if you are able to access the internet on the said Wi-Fi network.
5. Enable and Disable Airplane Mode
This is probably the simplest fix and can resolve various trivial issues preventing you from connecting to the Wi-Fi. This would also work if you are unable to access the Internet after establishing a connection.
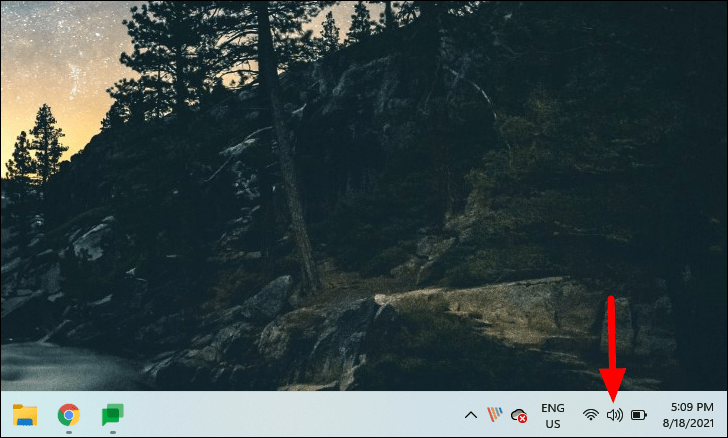
To enable airplane mode, click on the ‘Action Center’ icon in the Taskbar or press WINDOWS + A to access the Quick Settings.
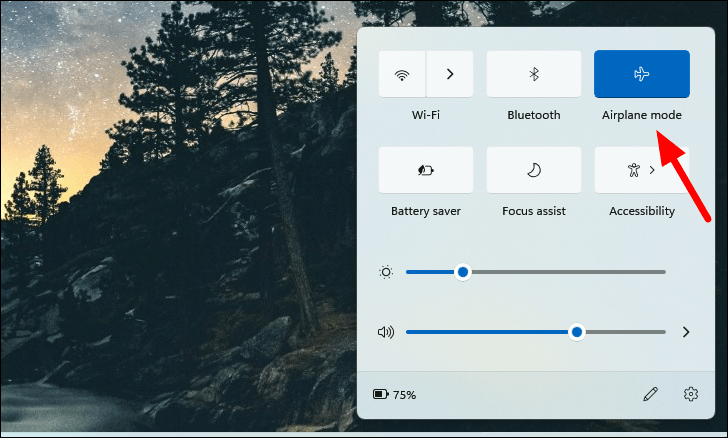
Next, click on the ‘Airplane mode’ tile to enable it. Once it’s enabled, the color of the tile will change from white to blue.
Wait for a minute and again click on the ‘Airplane mode’ tile to disable it.
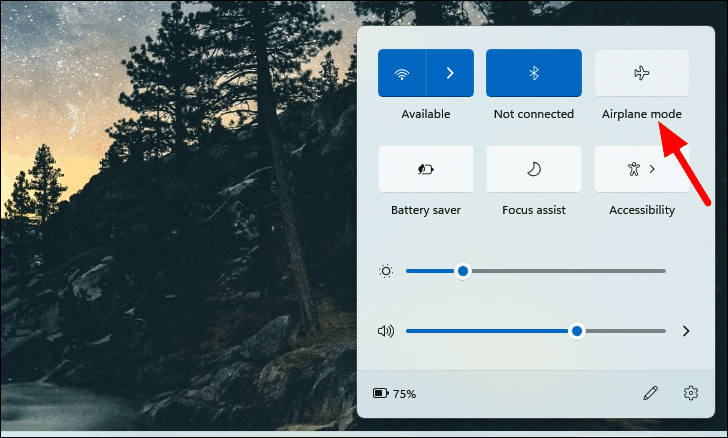
After disabling the ‘Airplane mode’ check if you are able to connect to the network and access the Internet.
6. Move Router Closer to PC
If your PC is unable to detect the Wi-Fi, it could be due to obstructions between the router and the PC. Although Wi-Fi signals are strong and you should be able to establish a connection, there are times when the signal strength isn’t as good. There could be an issue both with the router or PC.
In such cases, you should bring the router closer to the PC and check if it’s now able to receive signals. If it doesn’t work, move to the next fix.
7. Run the Internet Connections Troubleshooter
Windows offers built-in troubleshooters to fix a number of issues, including those with the Wi-Fi network. These troubleshooters are quite effective when it comes to identifying and fixing bugs or misconfigured settings known to Windows.
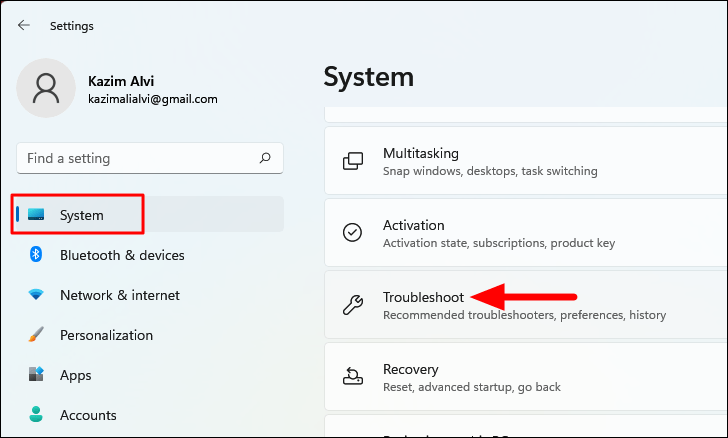
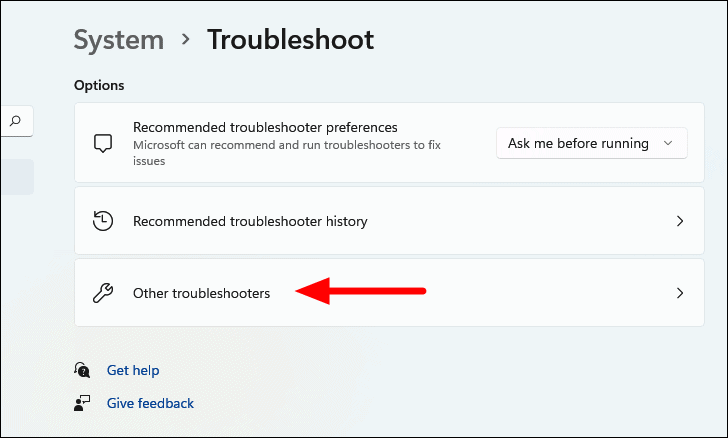
To run the troubleshooter, launch the ‘Settings’ app as discussed earlier, and select the ‘Troubleshoot’ option in the ‘System’ tab.
Next, click on ‘Other troubleshooters’.
You will now find a list of troubleshooters. Locate ‘Internet Connections’ and click on ‘Run’ next to it.
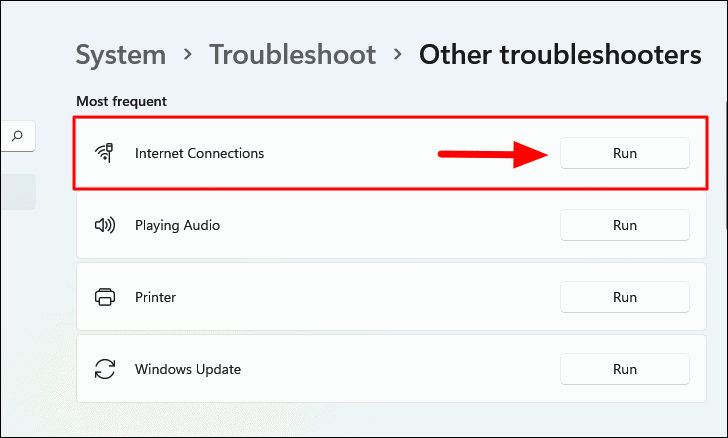
It will launch the Internet Connections troubleshooter, which will then identify the issues preventing the PC from establishing a Wi-Fi connection and fix them. Follow the on-screen instructions and choose the necessary option when prompted to complete the troubleshooting process.
Once the troubleshooter is run, check if you are able to connect to the Wi-Fi network.
8. Release IP and Flush DNS Cache
If you are able to establish a Wi-Fi connection but cannot access the internet, it could be due to the IP or the DNS (Domain Name System). Executing a bunch of commands in an elevated Command Prompt will fix the error.
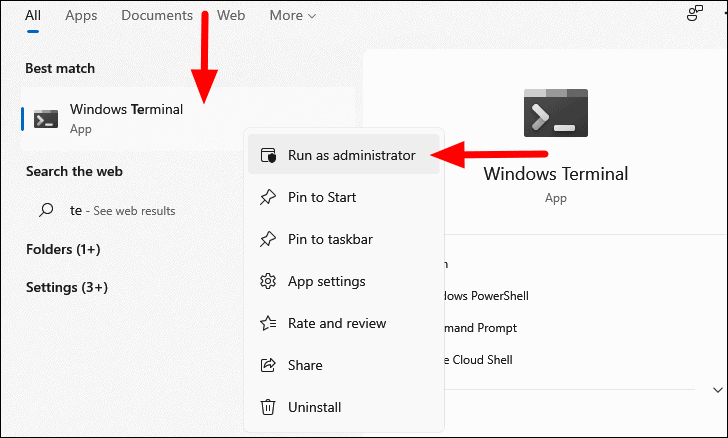
To release IP and flush DNS cache, press WINDOWS + S to launch the search menu, type ‘Windows Terminal’ in the search box at the top, right-click on the relevant search result, and select ‘Run as administrator’ from the context menu to launch an elevated Windows Terminal. Click ‘Yes’ on the UAC box that pops up.
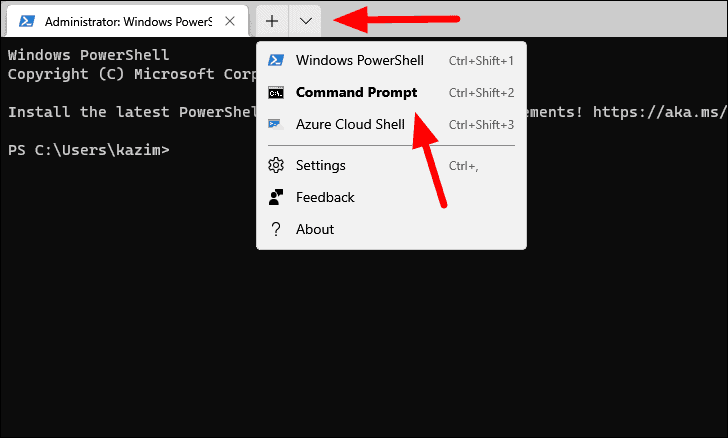
If you haven’t changed the default profile, the Powershell tab will open when you launch Windows Terminal. To open ‘Command Prompt’, click on the downward-facing arrow at the top and select ‘Command Prompt’ from the menu. Alternatively, you can press CTRL + SHIFT + 2 to launch the ‘Command Prompt’ tab.
Next, type or paste the following commands and press ENTER after each to execute before moving to the next one.
netsh winsock resetnetsh int ip resetipconfig /releaseipconfig /renewipconfig /flushdns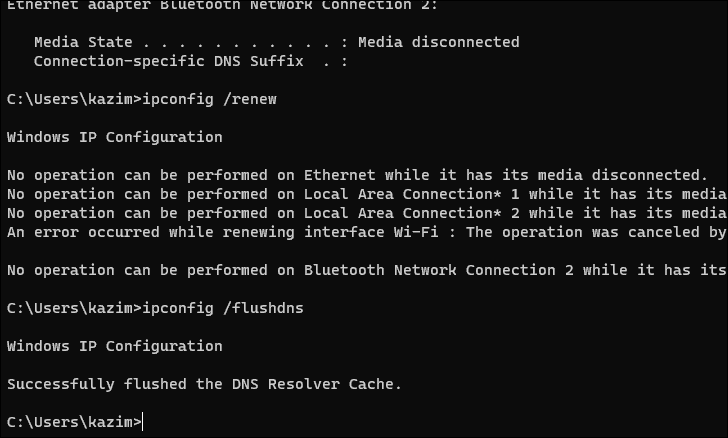
After executing the above commands, restart the computer and check if you are able to access the internet.
9. Update Wi-Fi Driver
A driver is a critical piece of software that helps facilitate the relay of command between the OS and the device. There’s a driver for each of the devices, including the ‘Wi-Fi Adapter’. If you are running an outdated version of the driver, it could lead to problems connecting to the Wi-Fi or accessing the internet. Updating the Wi-Fi driver would fix this.
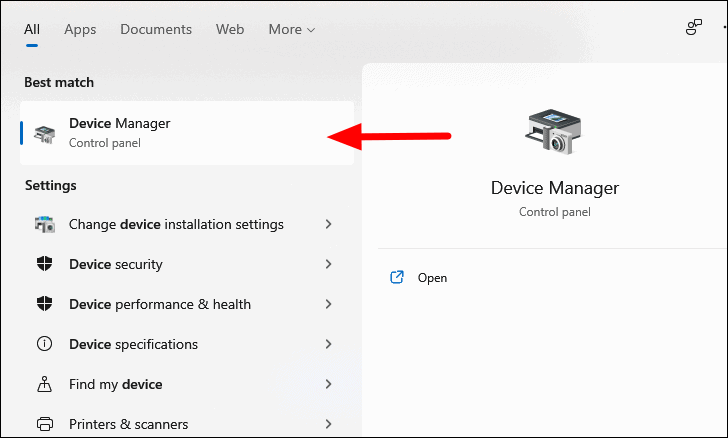
To update the Wi-Fi driver, search for ‘Device Manager’ in the ‘Search’ menu, and click on the relevant search result to launch it.
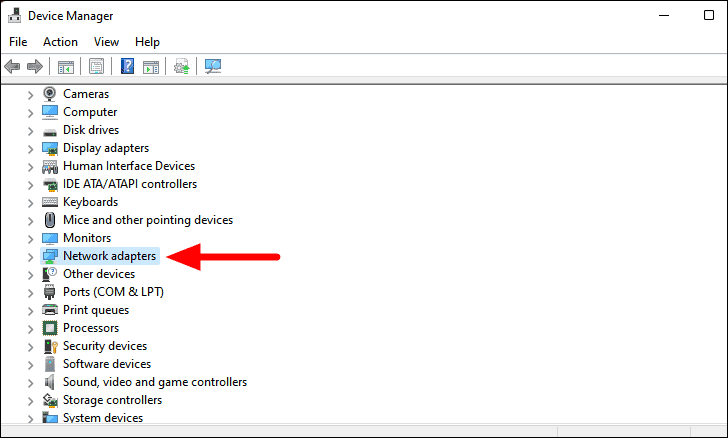
Now, double-click on the ‘Network adapters’ option to expand and view the devices under it.
Next, locate the ‘Wi-Fi Adapter’, right-click on it, and select ‘Update driver’ from the context menu.

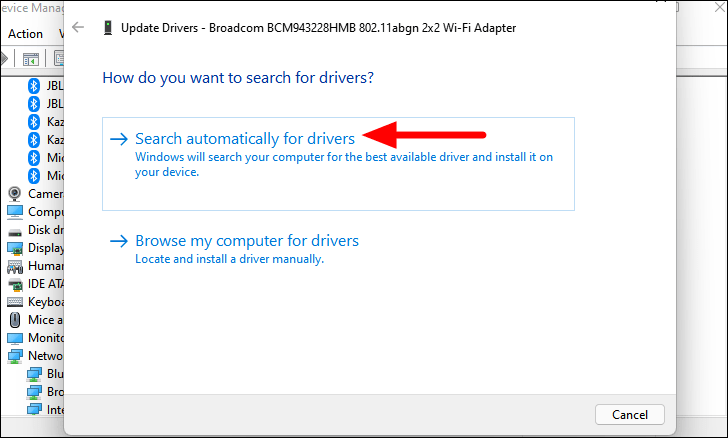
You will now be asked to choose whether to let Windows scan your system and install the best available driver or manually locate and install one. It’s recommended that you select the first option and let Windows install the driver.
Wait for Windows to complete the installation and check if it fixes the issue. In case Windows is not able to locate the driver, it doesn’t necessarily imply that an update isn’t available. You can always manually update the Wi-Fi driver.
10. Reinstall the Wi-Fi Driver
If the current Wi-Fi driver is corrupt, you would face trouble establishing a Wi-Fi connection or accessing the internet. Reinstalling the Wi-Fi driver would fix the issue and it’s a pretty simple process.
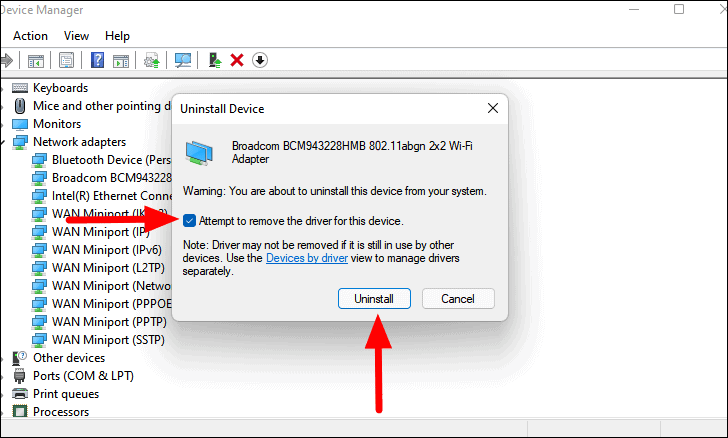
To reinstall the ‘Wi-Fi’ driver, launch the ‘Device Manager’ and double-click on the ‘Network adapters’ option as discussed earlier. Now, right-click on the ‘Wi-Fi Adapter’ and select ‘Uninstall device’ from the context menu.

In the confirmation box that appears, tick the checkbox for ‘Attempt to remove the driver for this device’, and then click on ‘Uninstall’ at the bottom.
After the driver is uninstalled, restart the computer, and Windows will automatically install a fresh driver. Check if this fixes the issue.
11. Reset Network Settings
If your network settings are misconfigured, you might face problems connecting to the internet. While you can go with re-configuring the individual settings, the easiest option is to reset them.
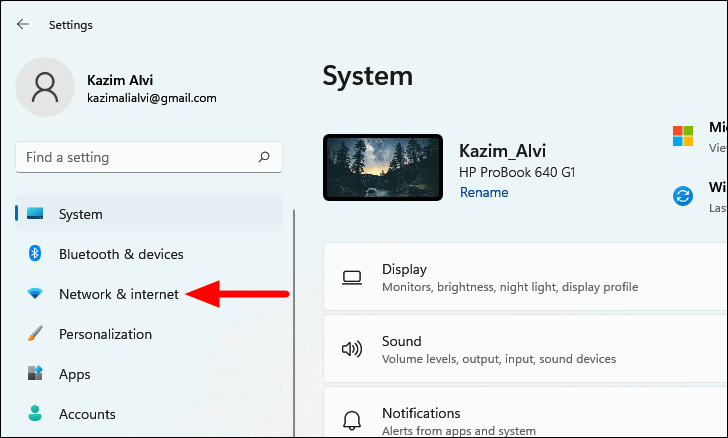
To reset the network settings, launch the ‘Settings’ app as discussed earlier, and click on the ‘Network & internet’ tab on the left.
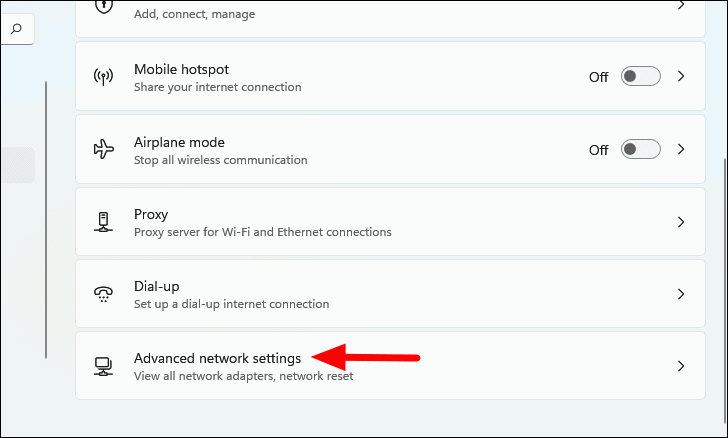
Next, select the ‘Advanced network settings’ option on the right.
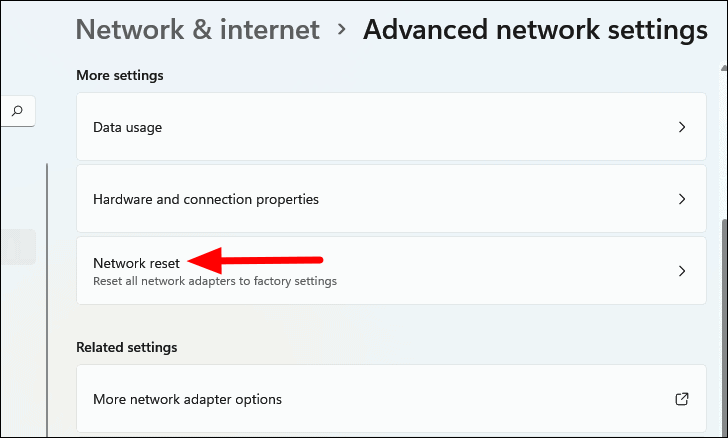
In the ‘Advanced network settings’, select ‘Network reset’ under ‘More settings’.
Finally, click on ‘Reset now’ next to the ‘Network reset’ to reset the network settings.
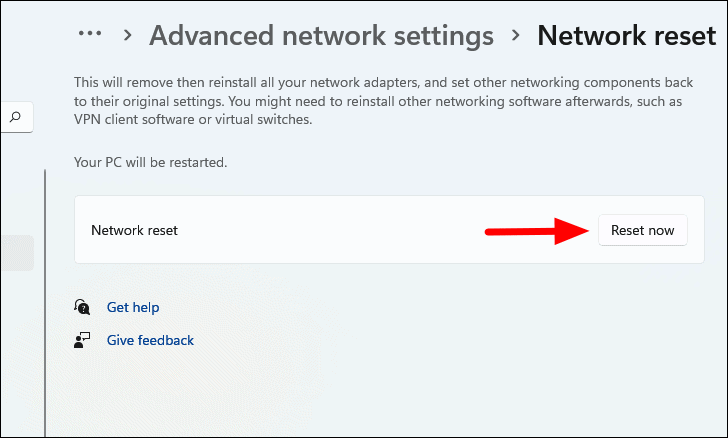
Your PC will be restarted for the network settings to be reset. Therefore, save any open files before you proceed with the reset.
12. Disable IPv6 Settings
The IPv6 settings can also be the reason that prevents you from accessing the internet when connected to a Wi-Fi network. In this case, you can disable the IPv6 settings and only rely on the IPv4 settings. The IPv4 settings work fine for everyday browsing and you wouldn’t have much trouble unless you want to carry out specific tasks.
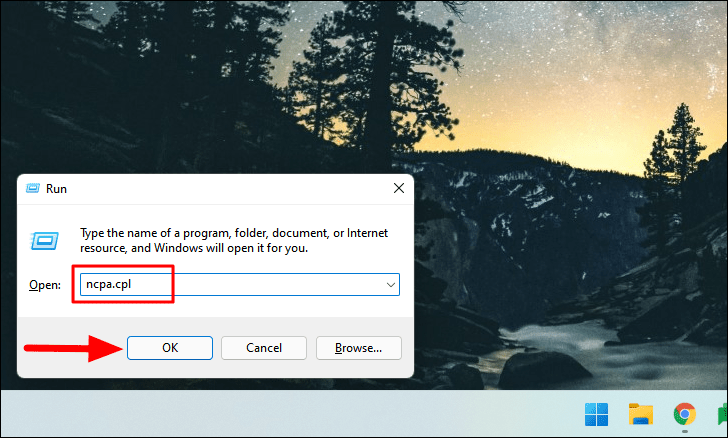
To disable the IPv6 settings, press WINDOWS + R to launch the ‘Run’ command, type ‘ncpa.cpl’ in the text field, and either click on ‘OK’ at the bottom or press ENTER to launch the ‘Network Connections’.
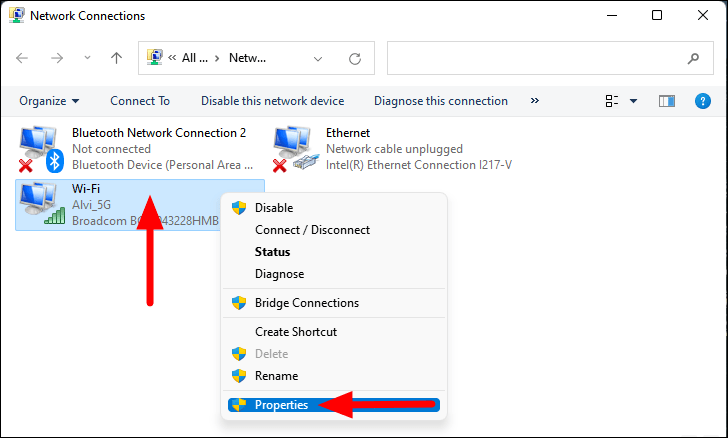
Now, right-click on the ‘Wi-Fi’ option and select ‘Properties’ from the context menu.
Here you will see the list of items that can be used by the connection. The ones currently in use are checked. If you find the ‘Internet Protocol Version 6 (TCP/IPv6)’ option checked, untick the checkbox and click on ‘OK’ at the bottom.
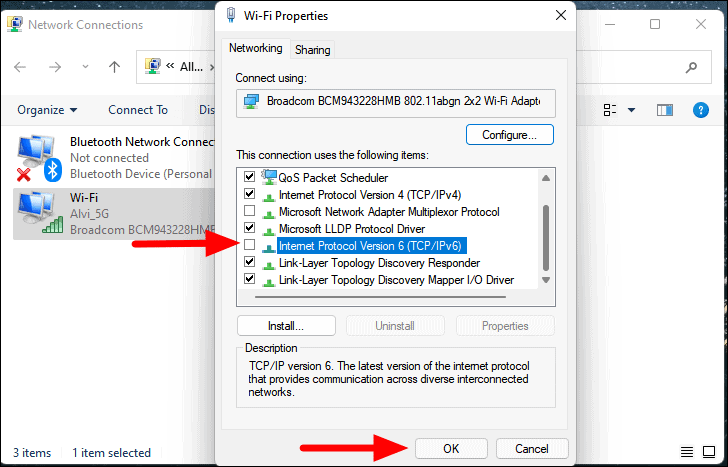
Now, check if you are able to connect to the internet.
13. Disable Windows Firewall
Windows Firewall is critical when connected to a network as it keeps your system safe from attacks and filters the information that you receive or send on a network. However, it’s known to sometimes lead to problems with internet connectivity, and disabling it works as an effective fix.
Microsoft offers a built-in firewall in Windows, which is at par or even better than most of the third-party firewalls available in the market. If you have the firewall configured on a third-party antivirus, you must first disable it as may conflict with the Windows Firewall. This can be done via the built-in app settings. You can refer to the FAQ section of the antivirus website for more information.
Note: Disabling Windows Firewall should only be used as a temporary fix since it exposes your system to external attacks.
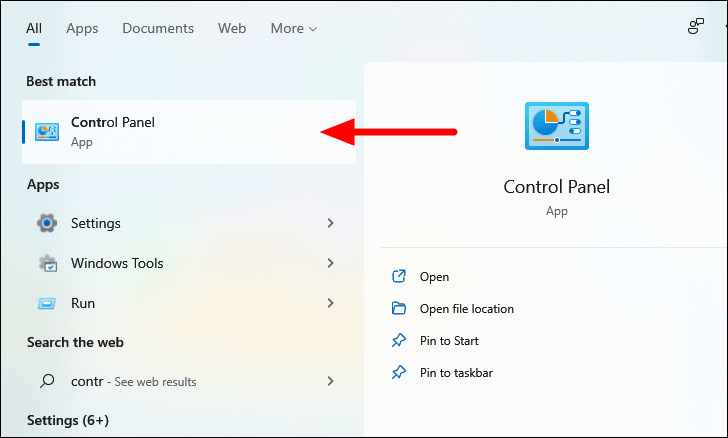
To disable Windows Firewall, search for ‘Control Panel’ in the ‘Search’ menu, and click on the relevant search result to launch the app.
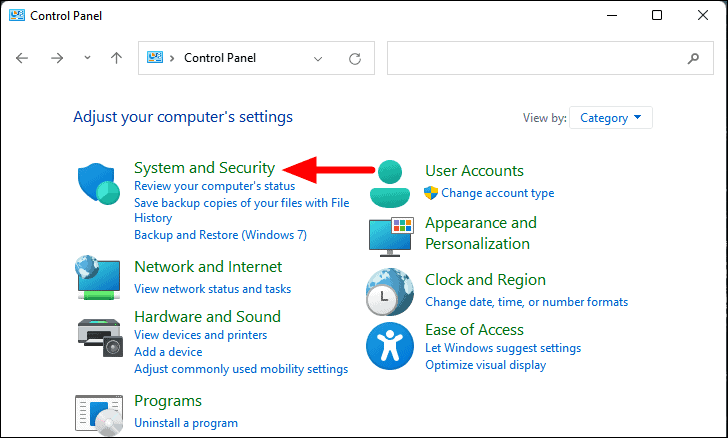
In the Control Panel, click on the System and Security’ option.
Note: If you do not see these options in the Control Panel, click on the ‘View by’ drop-down menu near the top-right, and select ‘Category’ from the list of options.
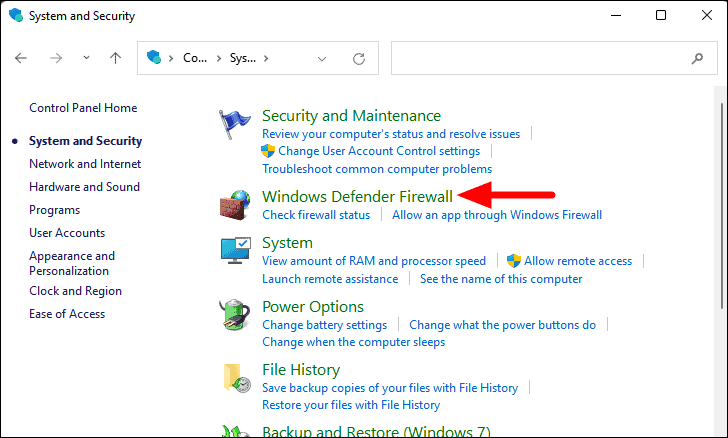
Next, click on ‘Windows Defender Firewall’.
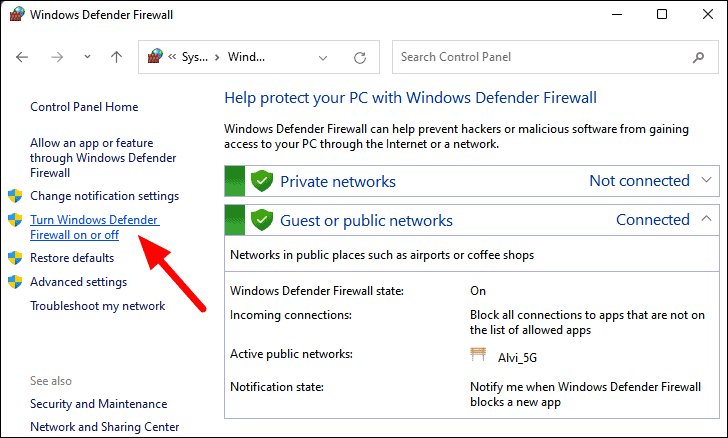
You will now find the current Firewall status listed in the window. Now, click on ‘Turn Windows Defender Firewall on or off’ on the left.
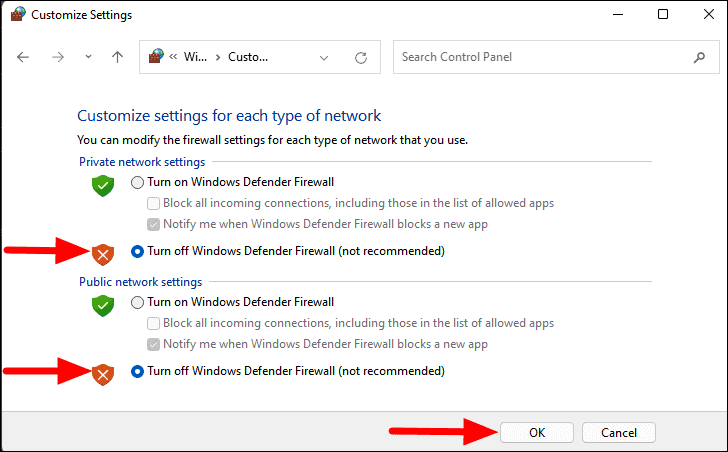
Now tick the checkboxes for ‘Turn off Windows Defender Firewall’ for both ‘Private network settings’ and ‘Public network settings’, and click on ‘OK’ at the bottom to save the changes.
You would now be able to connect to the internet on the Wi-Fi network.
After executing the above fixes, your internet connection should be up and running in no time. Do remember that the ‘Disable Firewall’ fix should be employed as a temporary measure and you must re-enable ‘Windows Firewall’ at the earliest.


