
Well, we all know how important every GigaByte of space is on a Mac since they come with limited storage SSD’s which are soldered to the logic board. Simply put it means that you cannot upgrade the storage on a MacBook after purchase.
The storage on the Mac will eventually run out and not periodically removing these extra files would have a toll on the performance as well.
In this article, we would discuss eight ways to free up storage space by removing unnecessary, files, photos, junk, and other files that you seldom use.
First, check available Disk space
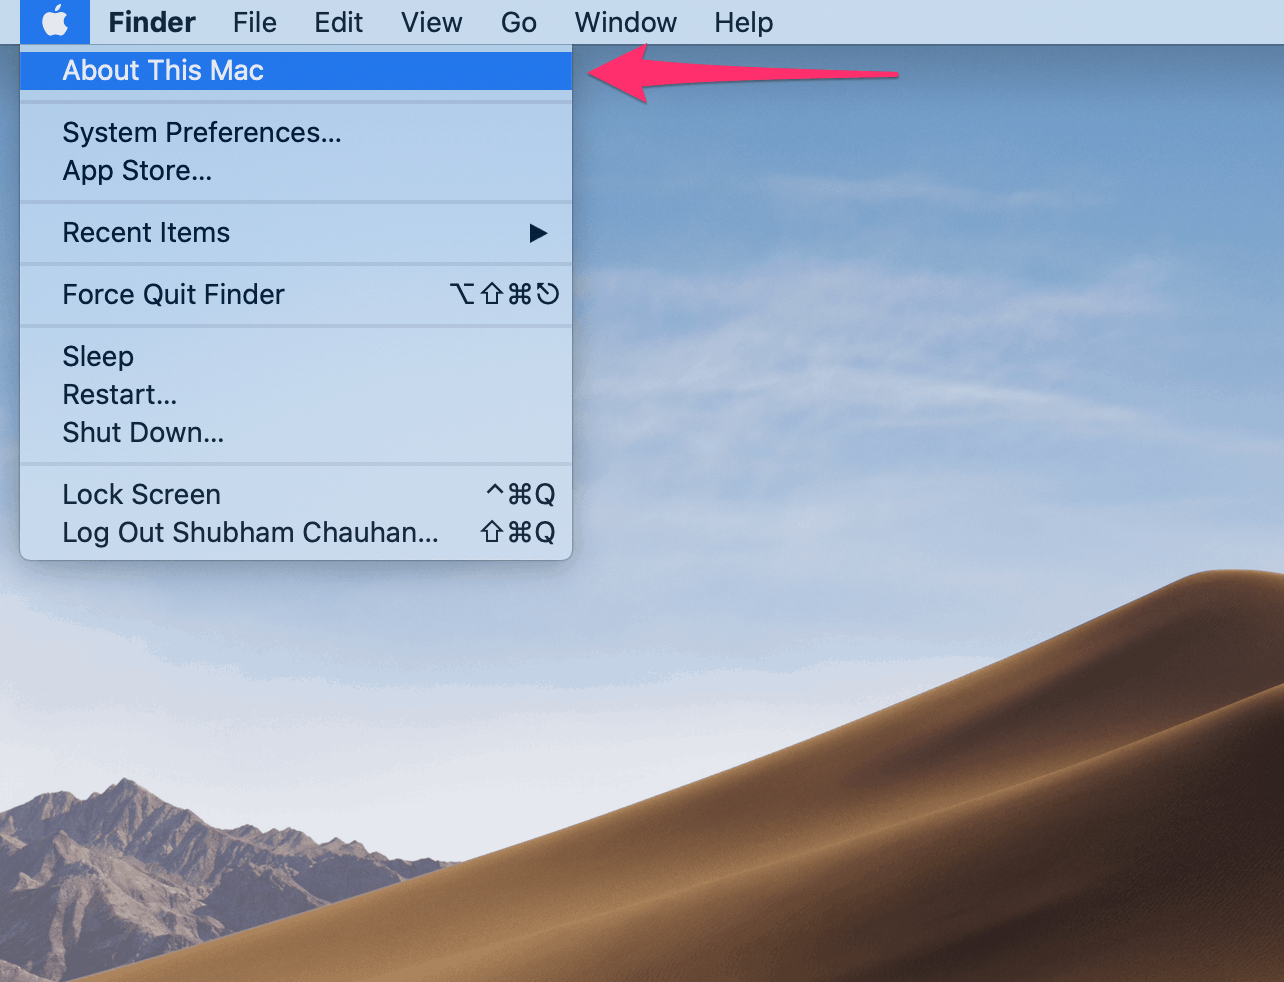
Before we actually start freeing up disk space we must be aware of what is taking up how much space on the system. In order to do so, click on the Apple menu » and select the ‘About This Mac’ option.
Next, go to the ‘Storage’ tab and wait for a few seconds for the system to populate the list.
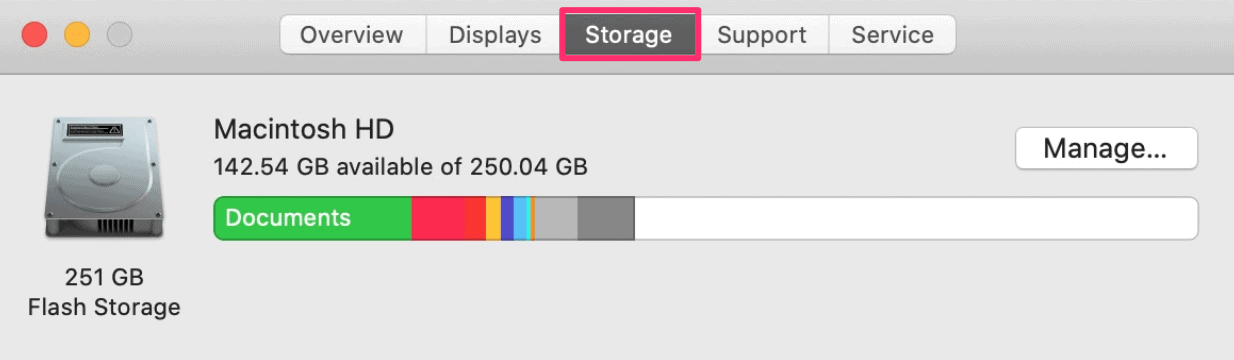
This tells you how much disk space is being utilized and how much is free. It also shows the disk usage space consumed by various items on your system. Once we are aware of that we can go about freeing up disk space on the Mac. The following are the methods to do so.
Optimize Storage by Automatically Removing watched Movies and TV Shows
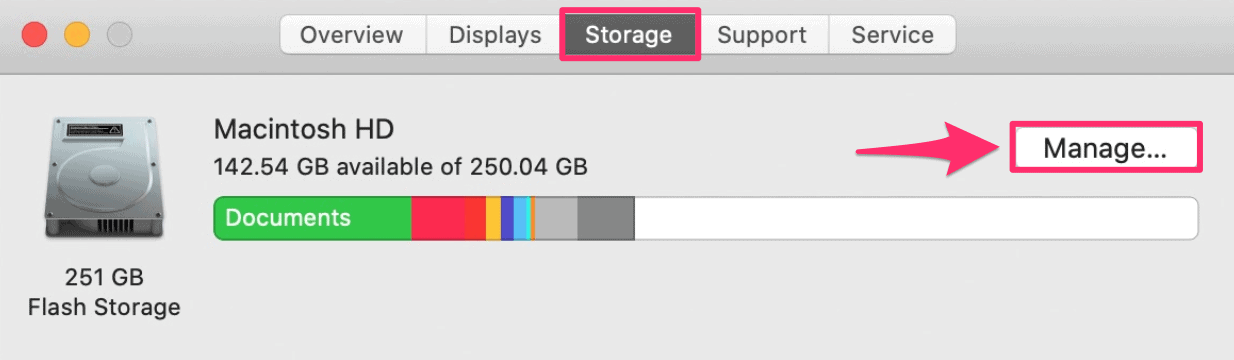
The first and most convenient way to freeing up disk space on the Mac is by using the inbuilt optimization tools. You can find them by clicking the ‘Manage’ button on the Storage settings screen.
Click on ‘Optimize Storage’ to let the system free up storage space by automatically removing watched Apple TV movies and TV shows (if you downloaded any) from your device when storage space is low.

You needn’t worry about your purchases, you can always download back Apple TV content and your movies from the iTunes Store without having to purchase them again.
Once the system has finished optimizing storage, a ‘Completed’ message will show on the screen.

Removing unnecessary clutter from the Mac
The next step for optimizing storage would be removing large files that you don’t use. These large files could be your downloaded applications, videos, zip archives and so on.
For deleting unwanted large files find the ‘Reduce Clutter’ option on the Storage management screen, and click the ‘Review Files’ button.

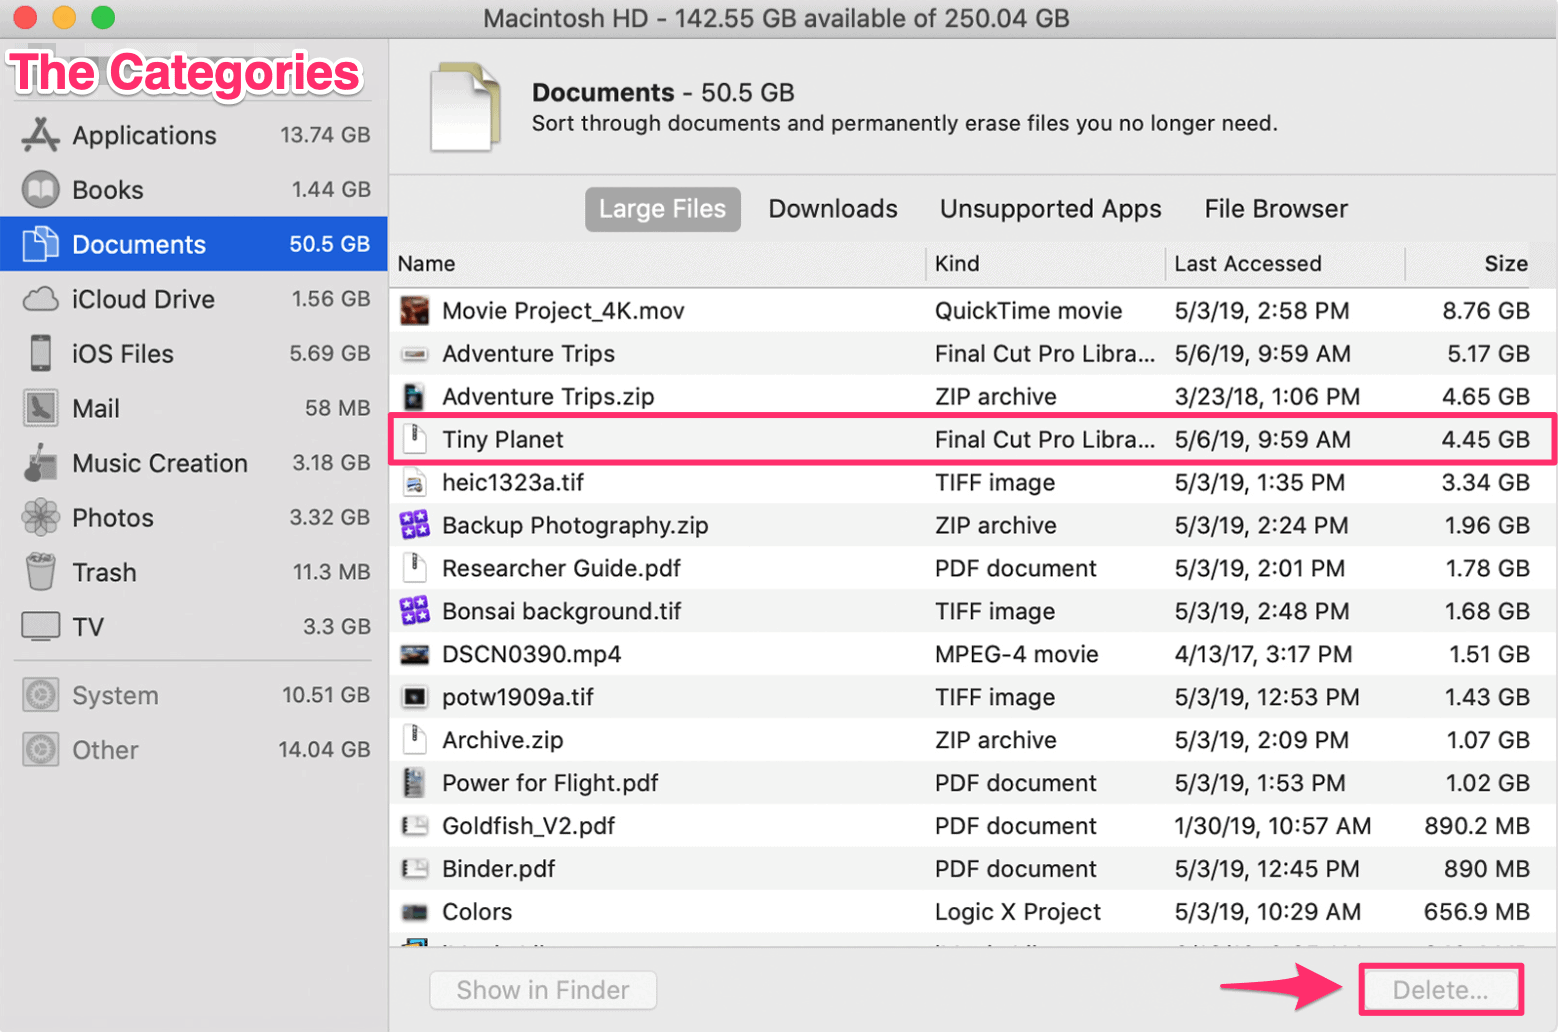
Here you can find all the different types of files along with their size, sorted into different categories (on the left-hand side of the app window). You can easily select the files you don’t need and delete them to free up disc space.
To delete a file, selecting it and click ‘Delete…’ button on the bottom right of the screen.
Remove Temporary Files
Your Mac stores temporary files that build up over time, which can go up to several GB’s. These are called cache and temporary files. These can include everything from the web browser cache and history, including cookies and passwords, to messaging cache folders, partially completed downloads, app temp files, and folders.
The best way to delete temporary files, cookies, and the cache is to Restart your Mac. When the Mac restarts macOS automatically runs optimization tasks and removes unwanted and temporary files. If you keep it running and in sleep mode for days or weeks at a time, these automatic maintenance tasks can’t operate until you restart.
To ensure smooth functioning of your Mac make sure that you shut down and restart your Mac at least once every week.

You can also remove these files manually just in case restarting is unable to do it completely. In order to manually remove temp and cache files from your Mac, go to your desktop, click ‘Go’ on the toolbar at the top, and then select ‘Go to Folder’.
This would open a dialogue box where you need to type ~/Library/Caches. Once you do that it would take you to the Caches folder in the Finder which is usually hidden.

Here you can delete folders beginning with com.apple because these are temporary cache folders stored in the system. In order to delete them select the folders and drag and drop them to the trash bin.

Clean Up Your Downloads Folder
Downloads folder is the default location where your downloads are saved unless you change it manually. This folder is often full of huge files that you may not need and many users ignore checking the folder which leads to huge wastage of storage space.
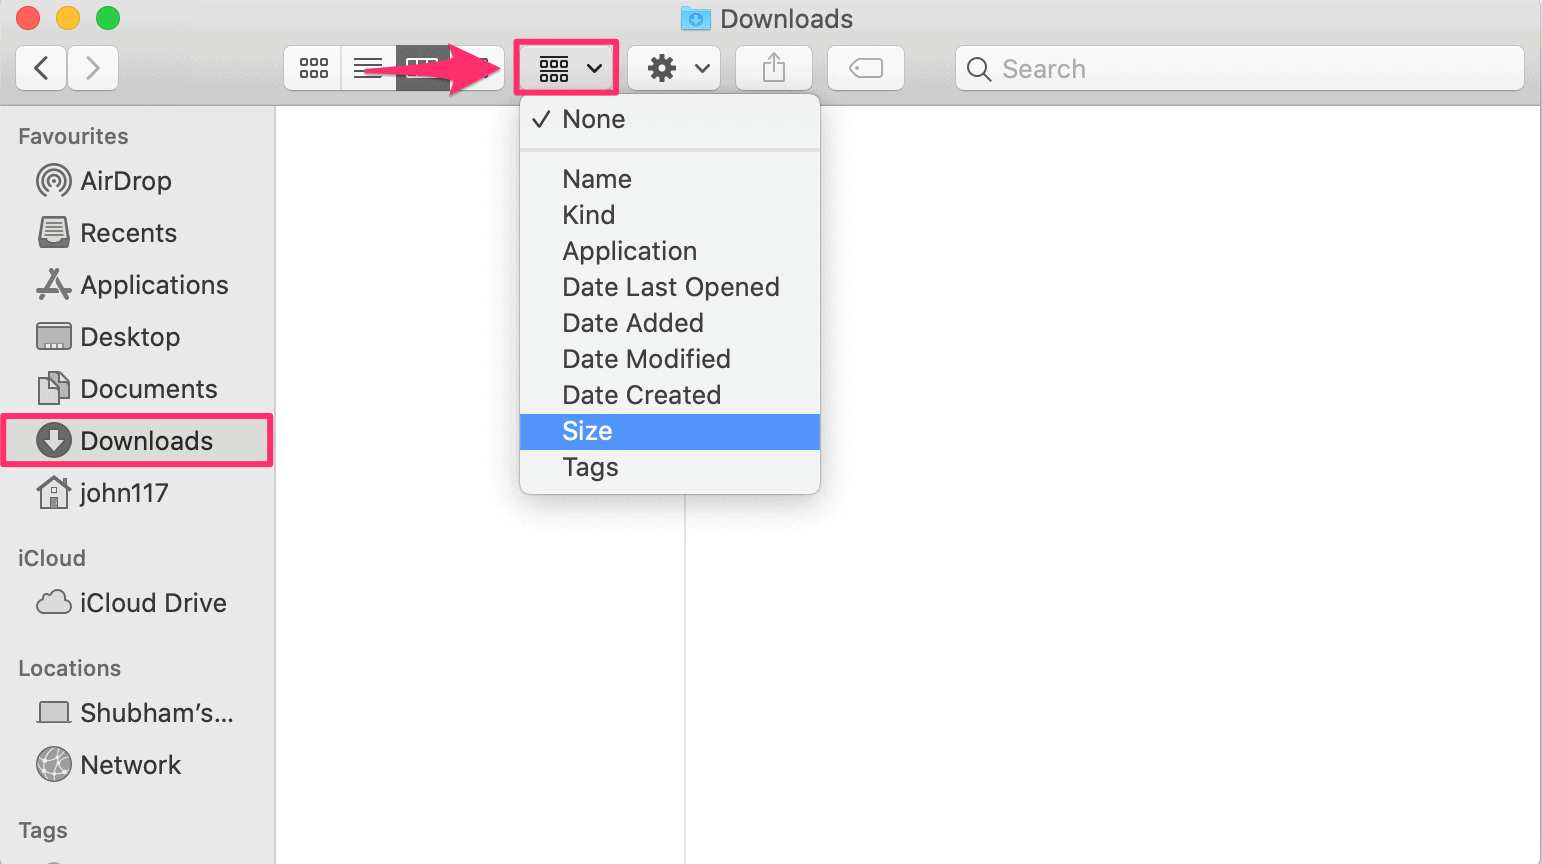
Cleaning up Downloads can release a lot of space for people who have never done it. In order to do it just click Finder from the toolbar at top and head to your Downloads folder.
Start deleting files you don’t need. To quickly find and delete large files in the folder, you can sort the files by size and delete the biggest culprits.
Emptying The Trash Bin
The Trash bin is where everything that you have deleted from your Mac is stored. It is similar to the Recycle bin in Windows. Rather than permanently deleting files, they are sent to your Trash bin so you can restore them later if you change your mind. When these files are in the Trash bin they still consume the space.
To completely remove these files and free up space, you’ll have to empty your Trash. Doing this is really simple, yet, most users often ignore this and as a result have several Gigabytes of data in their Bin.
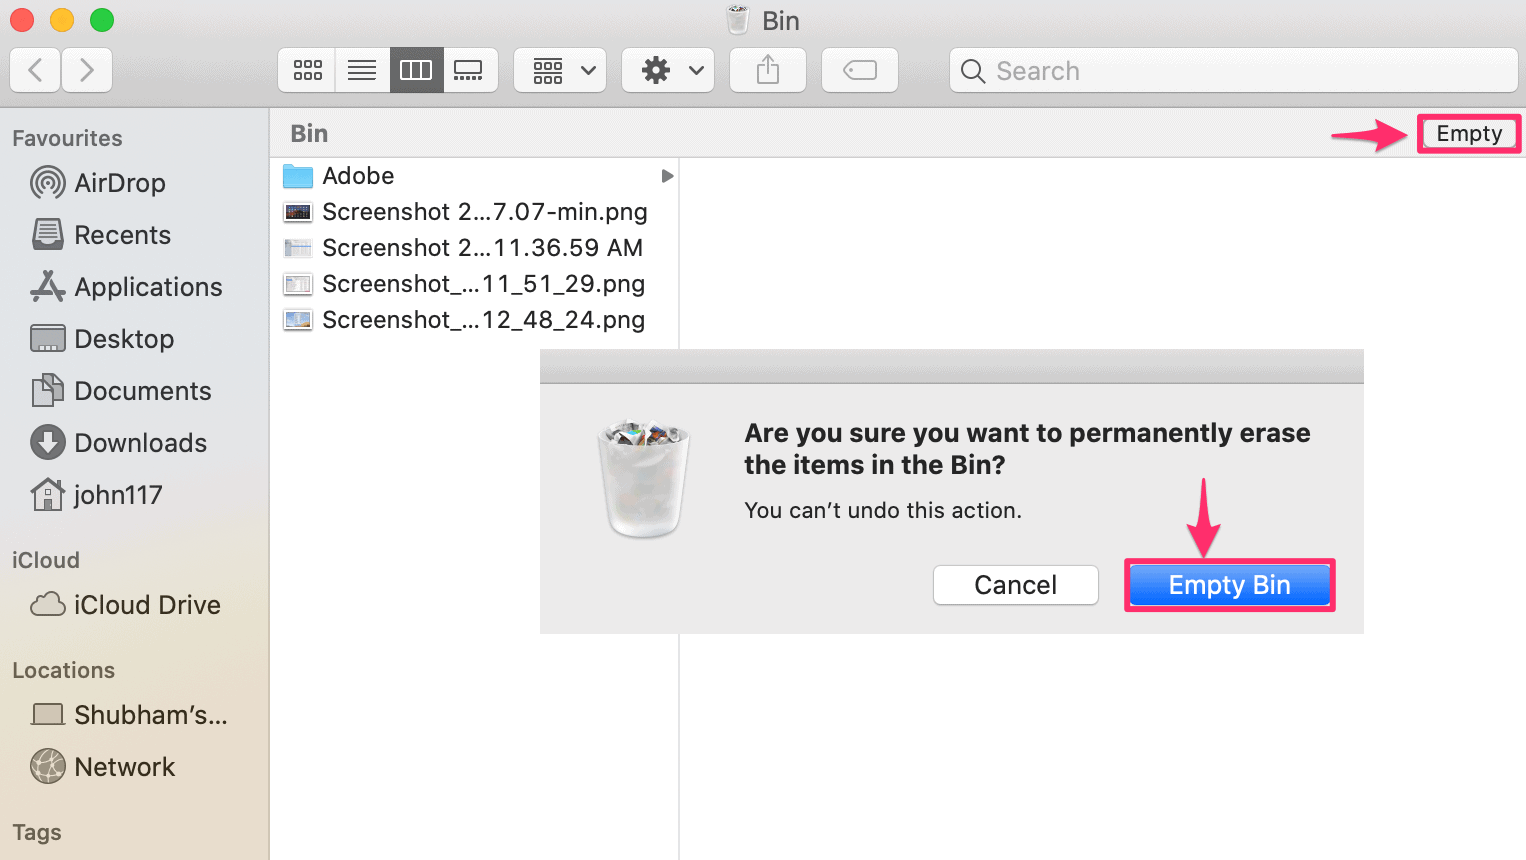
In order to empty the Bin, tap on the Bin icon on the dock and review files in the Bin. When you’re sure you don’t need any file from the bin, click on the ‘Empty’ button at top right corner of the window and then click the ‘Empty Bin’ button on the confirmation dialogue.
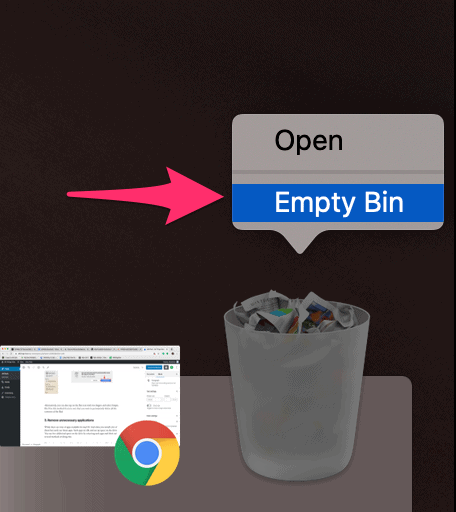
Alternatively, you can also tap on the Bin icon with two fingers and select Empty Bin. Use this method if you’re sure that you want to permanently delete all the contents of the Bin without the need to review files.
Remove unnecessary applications
We often install a lot of apps but rarely use them. Such apps sit idle and use up space on the drive. You can free additional space on the disk by removing such apps.
The simplest method to uninstall apps is from Finder » Applications section. There you’ll find all applications installed on your Mac. You can drag and drop the apps you don’t need to the Bin. You can also tap on the app icon with two fingers and select move to Bin.

Just keep in mind that you will have to remove the apps form the Trash Bin as well to free up disk space.
Clean and Organise your Desktop
Sometimes we have a lot of clutter on the desktop which not only looks unorganized but also adversely affects the performance of the Mac as well.
Organizing your desktop will not only make it aesthetically pleasing but also helps your Mac act a bit faster as it doesn’t waste time loading all those extra icons and junk.
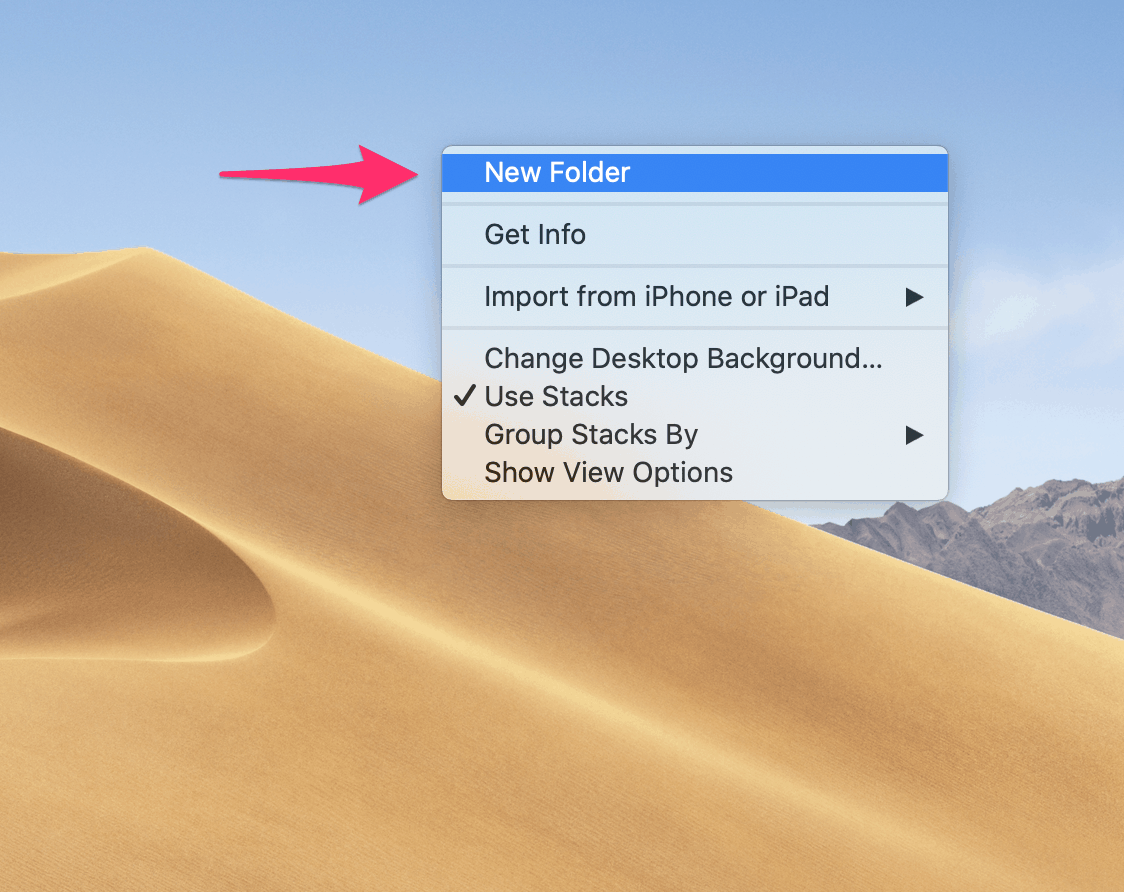
The easiest way to organize your desktop is by tapping on the trackpad with two fingers and create a new folder. You can rename this folder based on your needs and conveniently organize similar items like documents, pictures, etc.
Permanently Deleting Images from Photos App
Photos is the default app on your Mac which helps you keep your picture library organized and accessible. When you delete a picture from Photos app it is not deleted immediately. It is stored in the ‘Recently Deleted’ section for 30 days. This is similar to where the deleted files and apps are stored in the trash Bin.
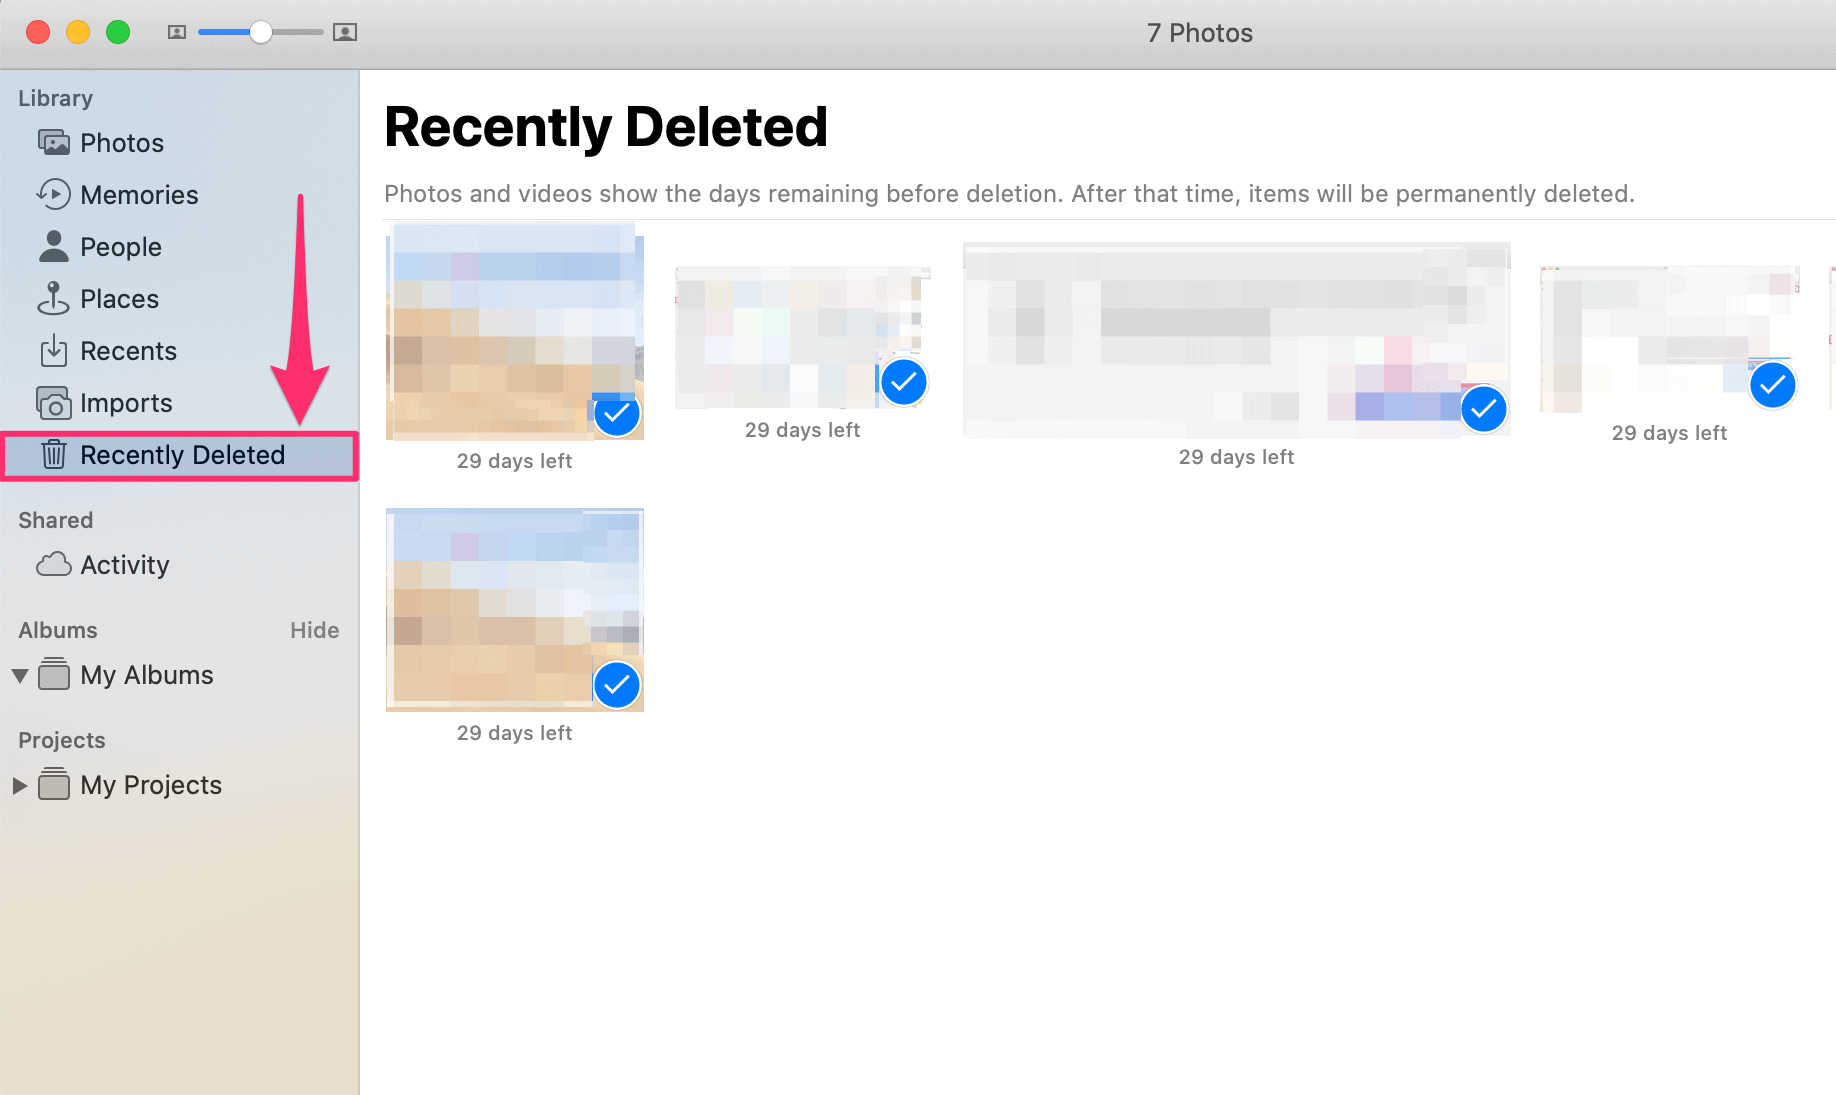
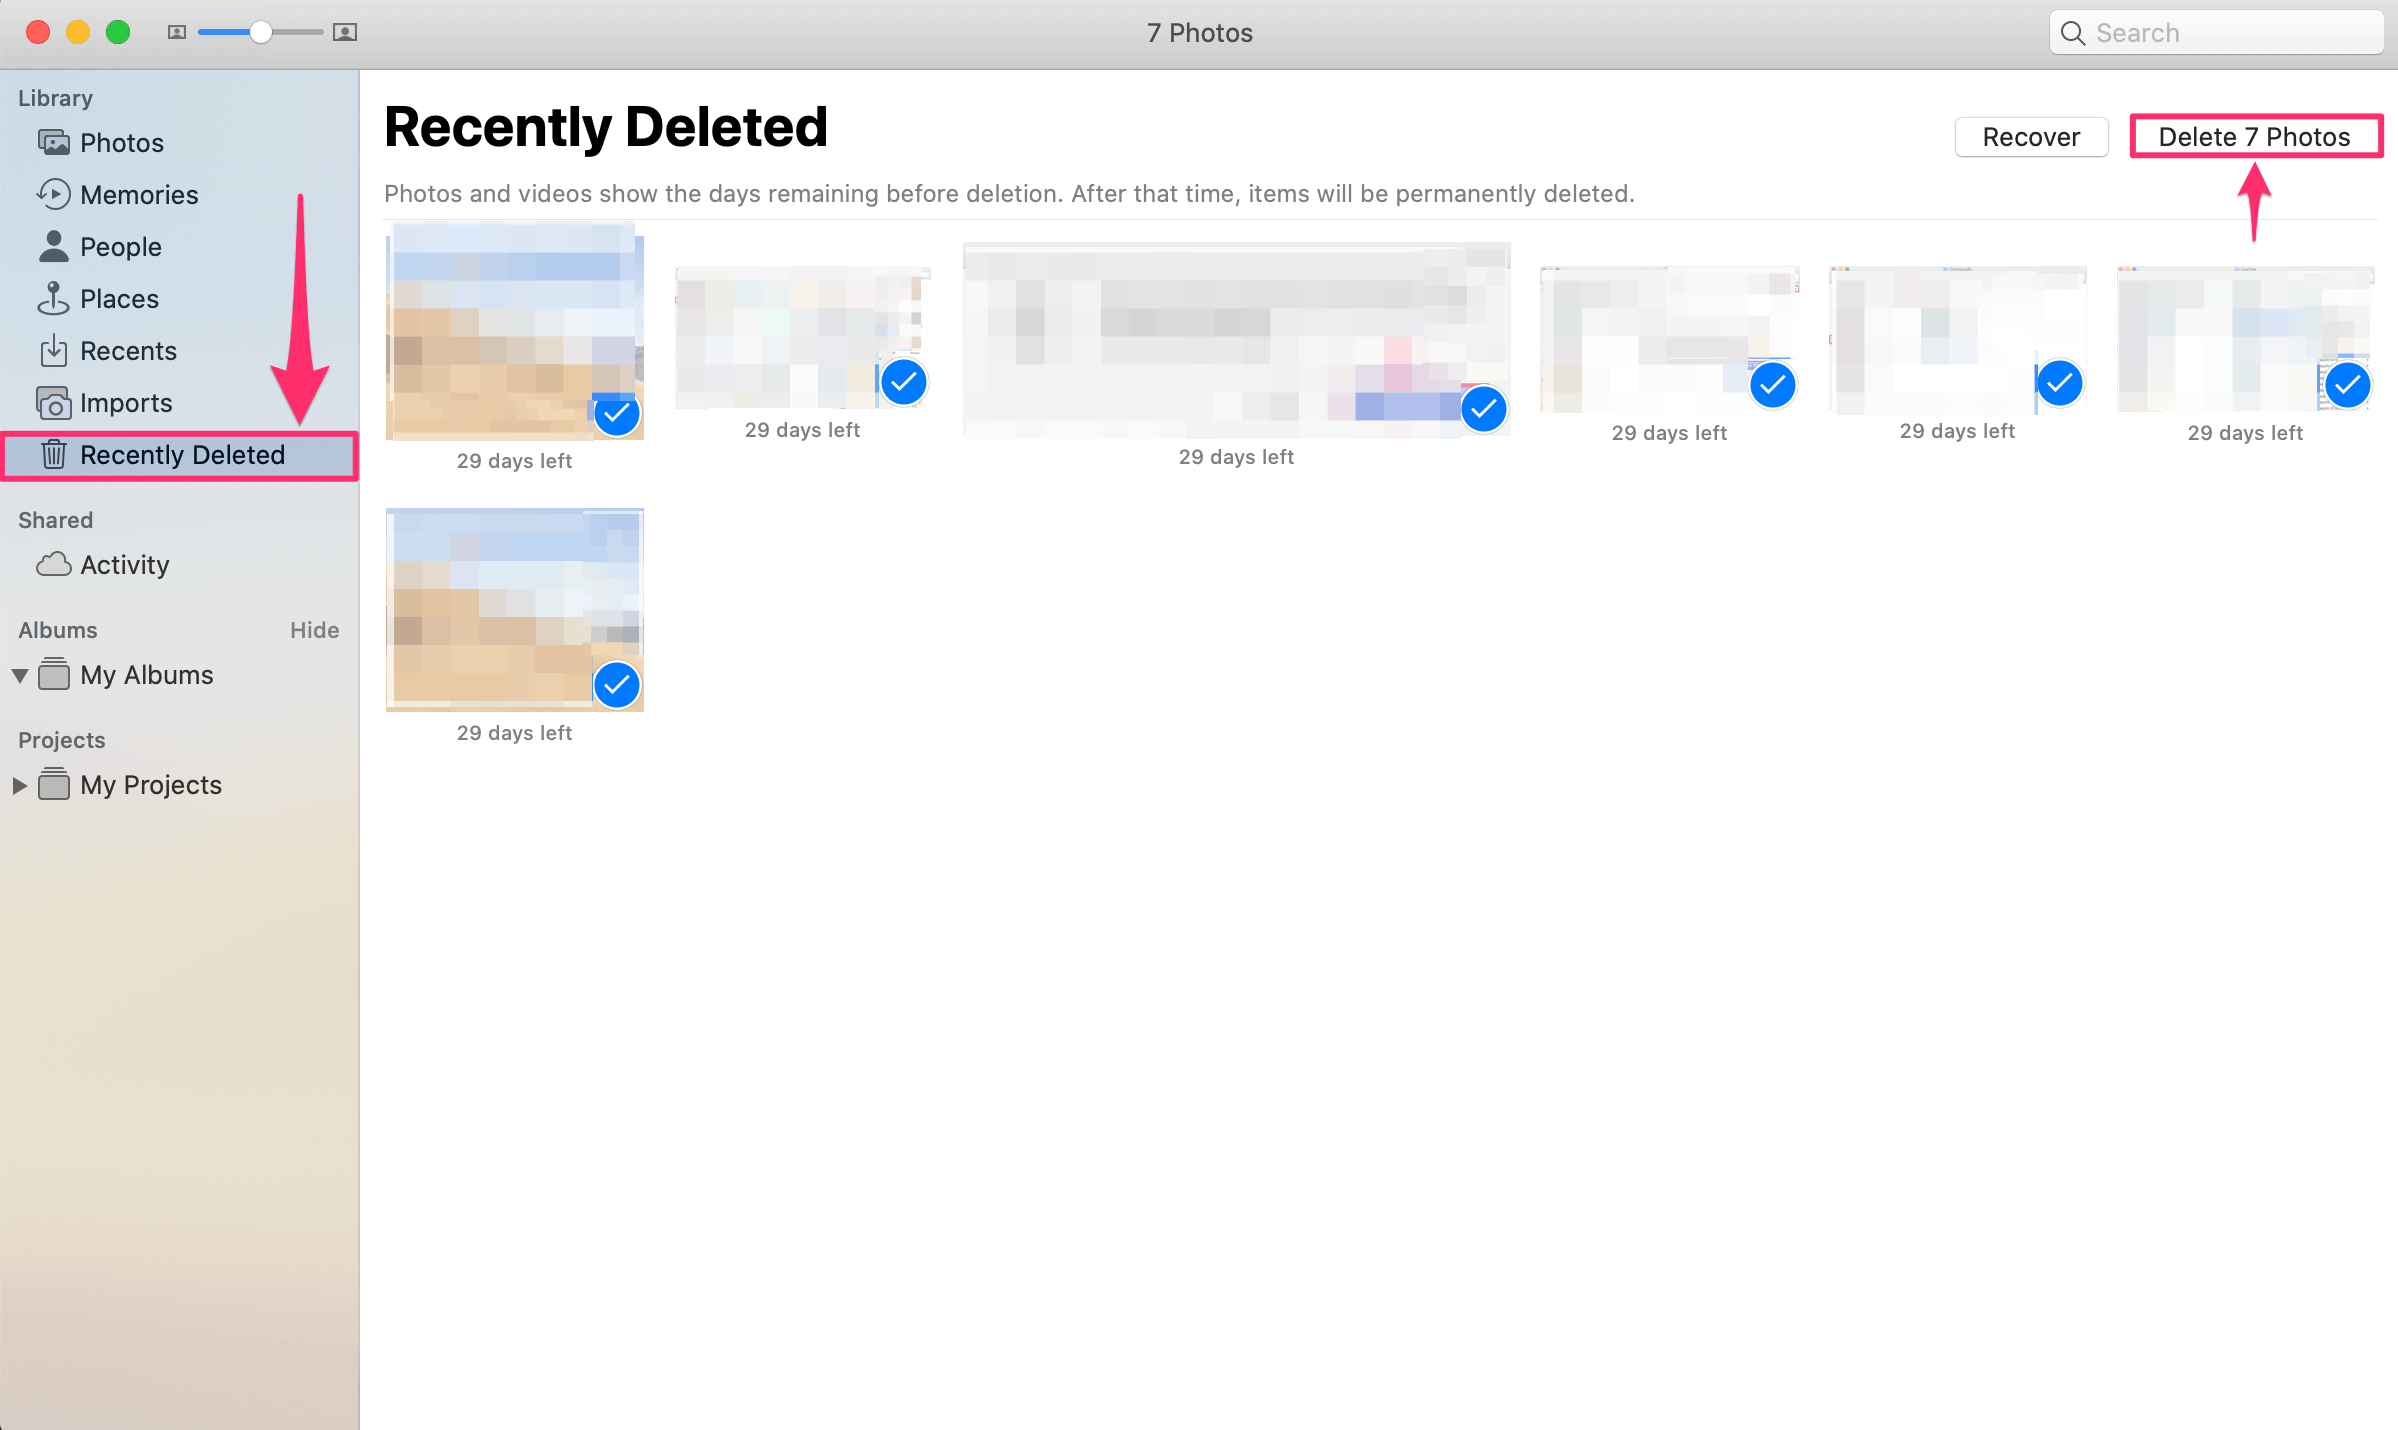
In order to permanently delete the photos, go to the ‘Recently deleted’ section in the Photos app, press Command + A to select all the images and then click on ‘Delete photos’ option at the top-right corner. You can also select and delete individual images if you do not want to delete all of them.
Following the above tips will help you to free up disk space on your Mac.