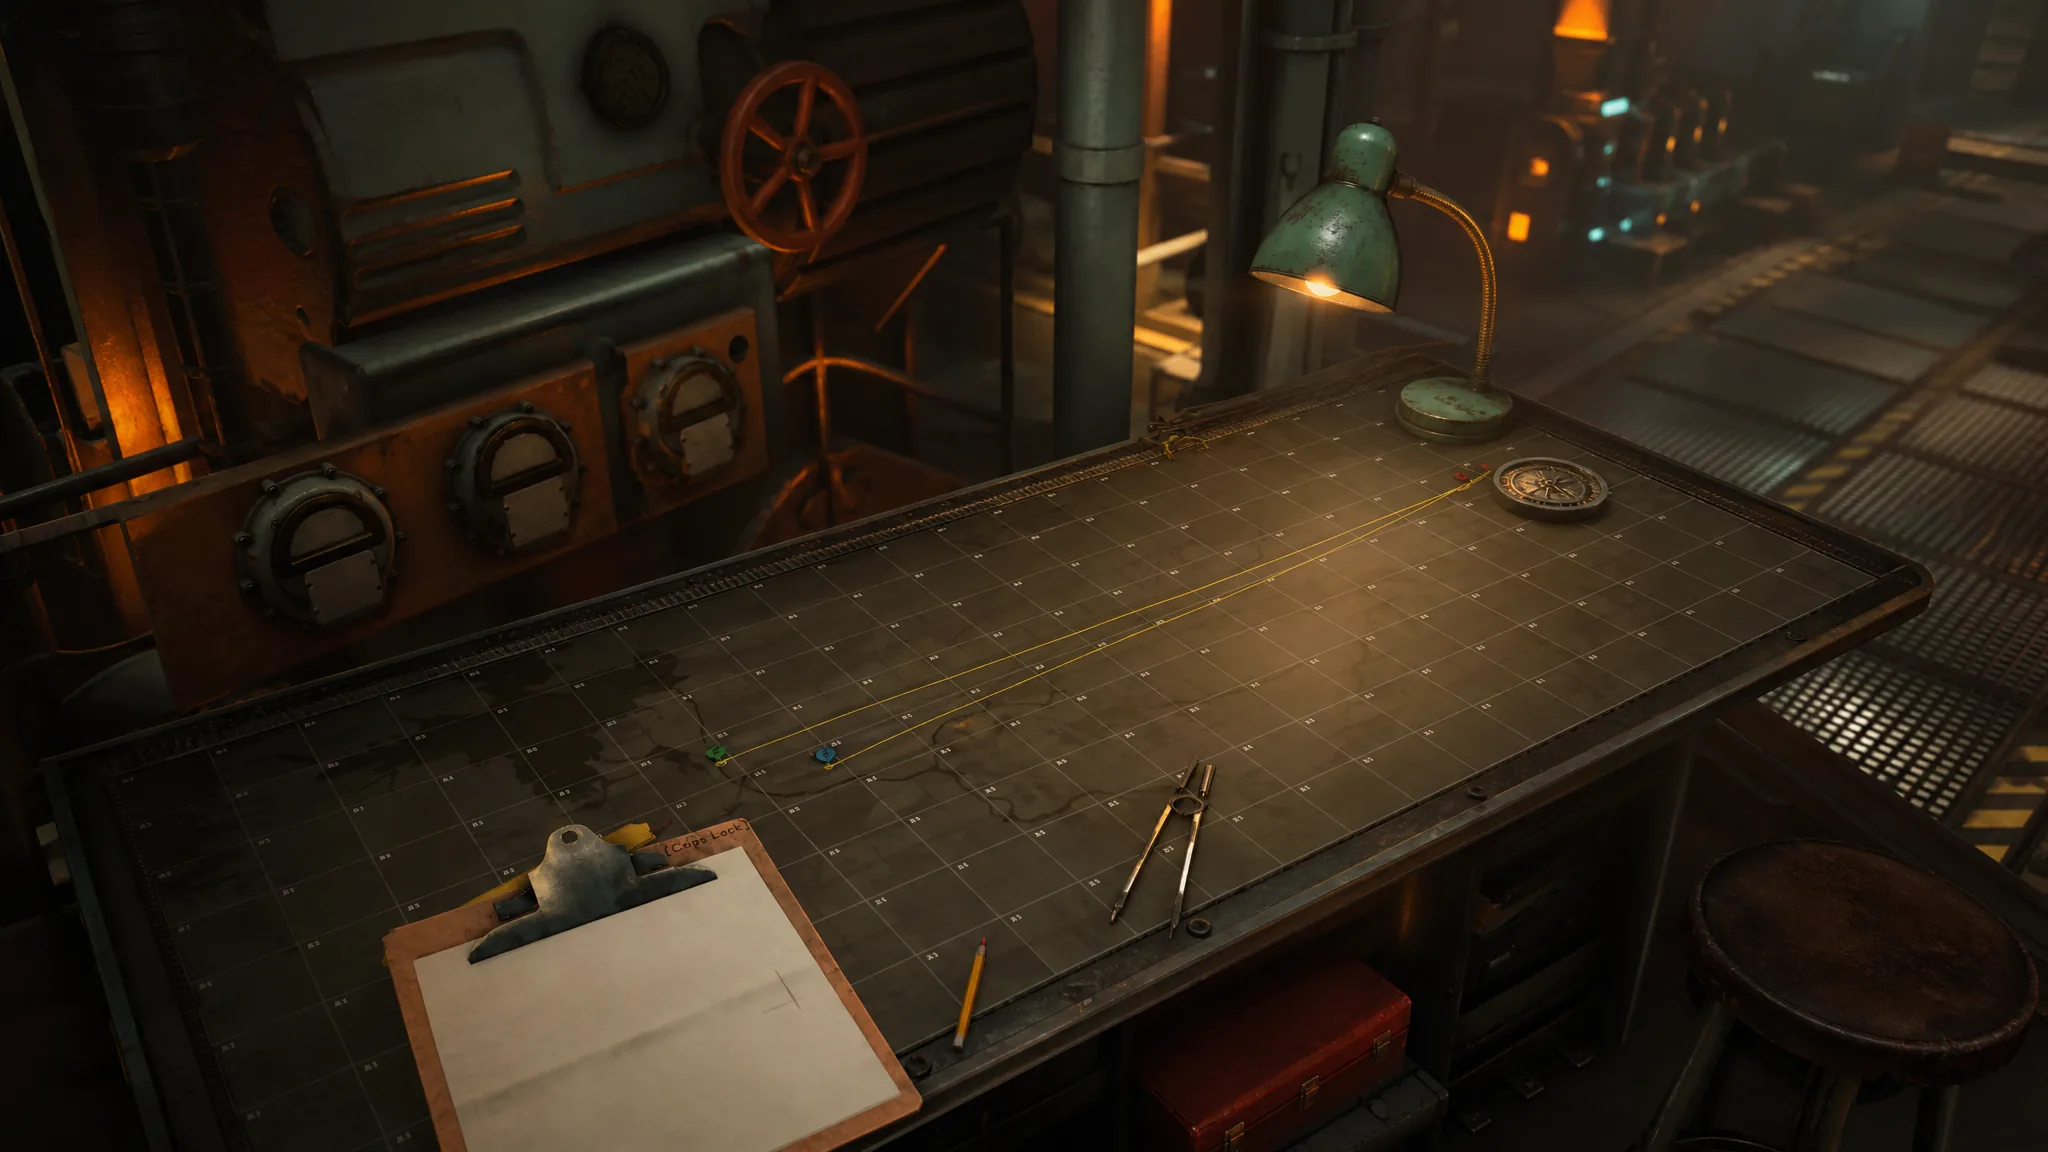
In Iron Nest, you rarely get a target’s exact coordinates handed to you. High Command and Field Reports feed you bearings and distances measured from spotters and reference points, and your job is to fold those clues into a single point on the war table. Triangulation is the mechanic that does this, and it is the difference between landing shells and wasting them.
Quick answer: Place the Iron Nest, spotters, and reference points at their exact sub-cells first. For each target, combine its two clues with the yellow pencil (bearing) and compass (distance), then drop a red token where the lines or circles cross. Switch to the red pencil and draw from the Iron Nest to that token to copy the firing bearing and range to your clipboard.
How the war table grid and coordinates work
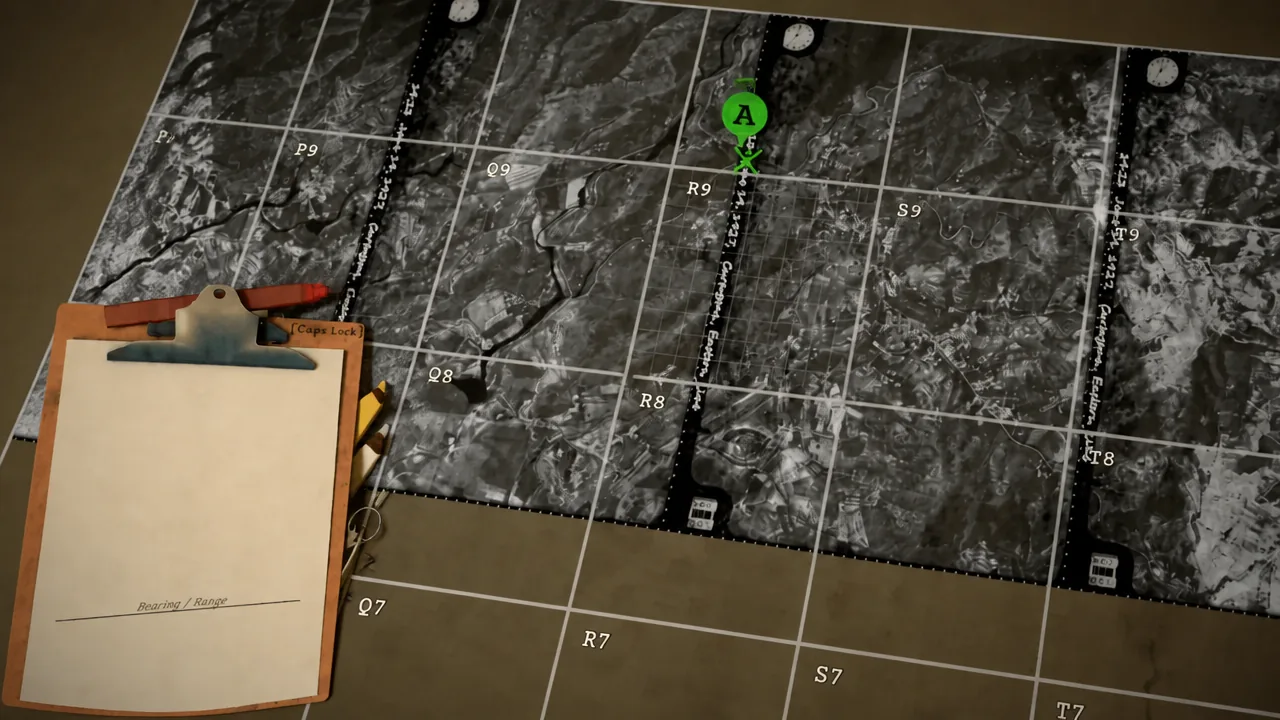
The tactical map is a 20×10 grid. Columns run A to T from left to right, and rows run 1 to 10 from bottom to top, so row 1 is at the bottom. Each large square is named like a spreadsheet cell, so K5 means column K, row 5.
Every large square is then split into its own 10×10 sub-grid. Sub-cell numbers start at 0, not 1, and read 0–9 left to right and 0–9 bottom to top. A full location combines both systems, so F3 1:4 points to cell F3, then to sub-cell 1:4 inside it. Being a single sub-cell off is enough to miss, so aim the token at the center of the correct sub-cell every time.
Place every known position before you measure
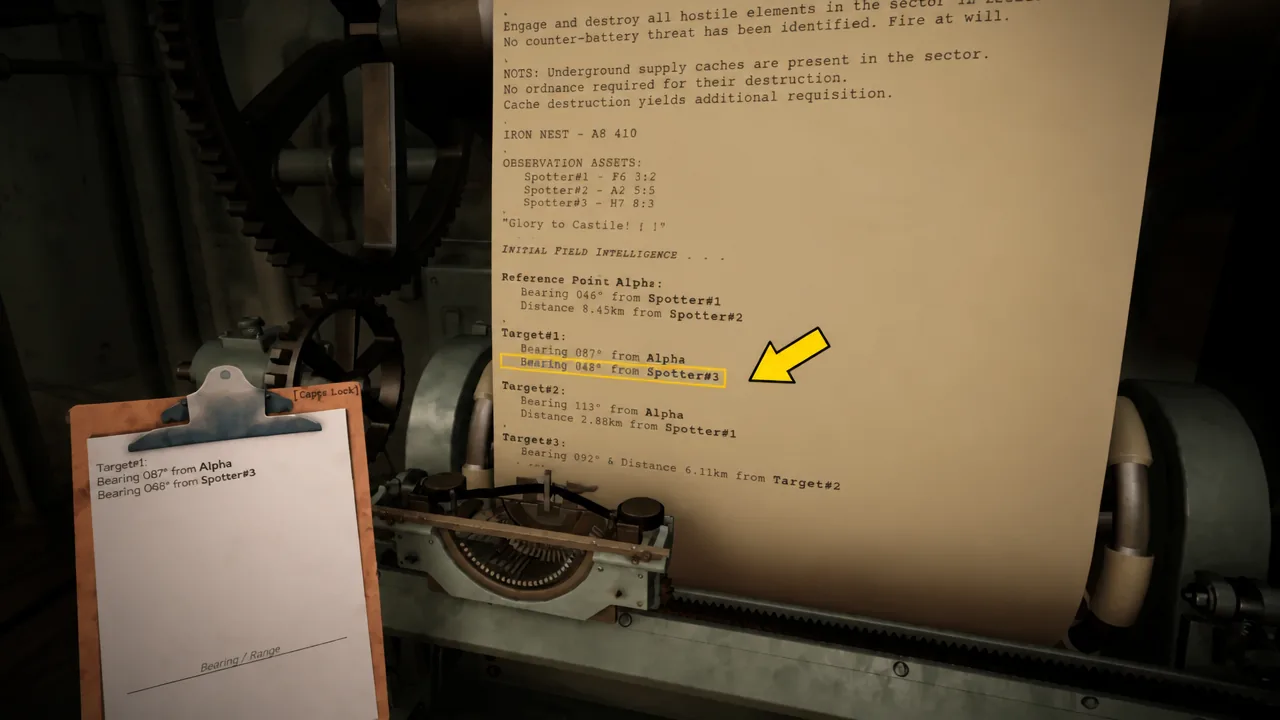
Triangulation only works if your fixed points are exact. Read the teleprinter fully, then lay down everything the game already tells you before drawing a single line. These are the points you measure from, so a wrong spotter placement ruins every target that uses it.
If you move the Iron Nest later, the game prints a new location message. Always read it and re-place the token, because the firing origin has changed.
| Token | What it marks |
|---|---|
| Iron Nest token | Your current gun position and the origin of every firing line |
| Blue number tokens (1–4) | Spotters, your observation assets |
| Green letter tokens (A–C) | Reference points named in the brief |
| Red number tokens (1–8) | Enemy targets once their position is solved |
| Skull tokens | Red confirms a destroyed target, blue means a friendly was hit |
The four map tools you draw with
Open the map and clipboard and you get three wooden pencils and a drawing compass. Each one has a distinct job, and picking the wrong one is a common reason plots go wrong. Right-click deletes any line or token, and table buttons clear all tokens or all measurements at once.
| Tool | What it does | Use it for |
|---|---|---|
| White pencil | Freehand drawing only | Notes, planning order, marking areas |
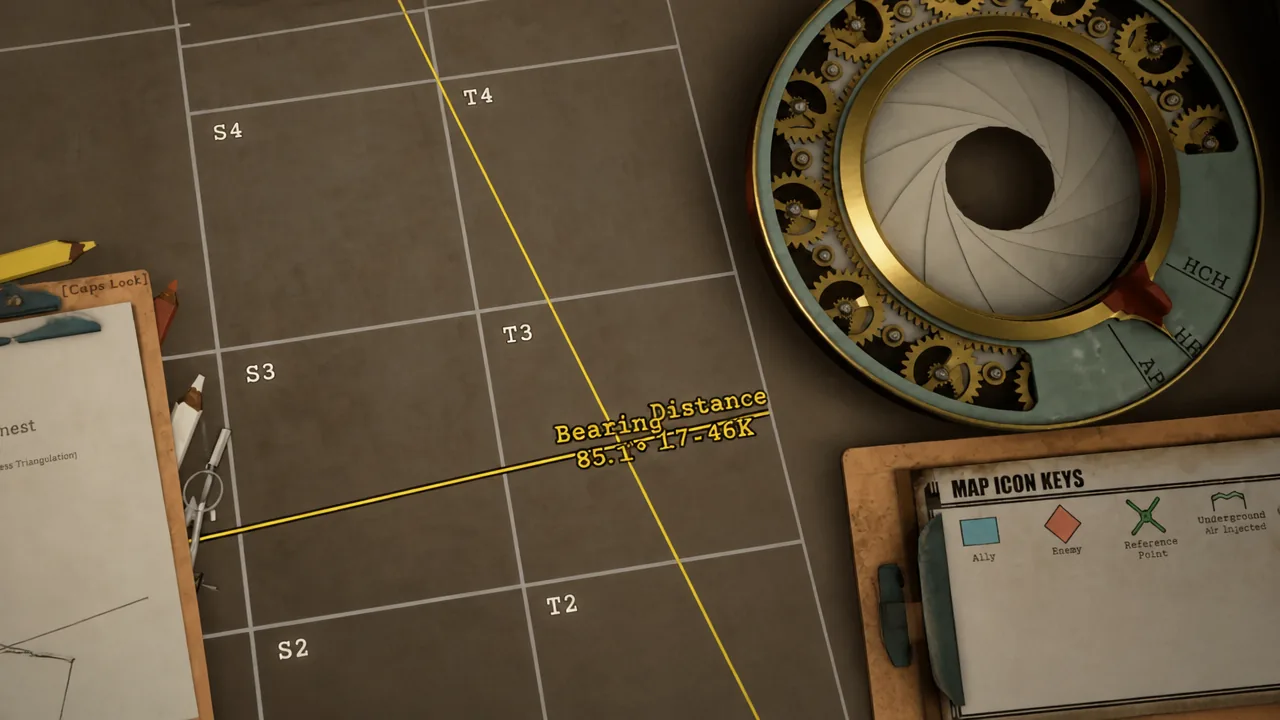
| Yellow pencil | Shows live bearing and distance while you drag | Finding reference points and targets |
| Red pencil | Draws from the Nest and copies bearing and range to the clipboard | The final firing solution only |
| Compass | Draws a precise distance circle | When a clue gives a range |
The four ways to fix a target position
Each target or reference point usually comes with two pieces of data. The method you use depends on whether those clues are bearings, distances, or a mix. Whatever the case, the point you want sits where the two measurements meet.
Two bearings
This is the most common case. Take the yellow pencil, start at the exact sub-cell of the first spotter, and drag a line on the reported bearing, for example 186°. Stretch it far enough to cross the map. Repeat from the second spotter with its bearing, such as 111°. Where the two lines cross is the target, so drop a red token there.
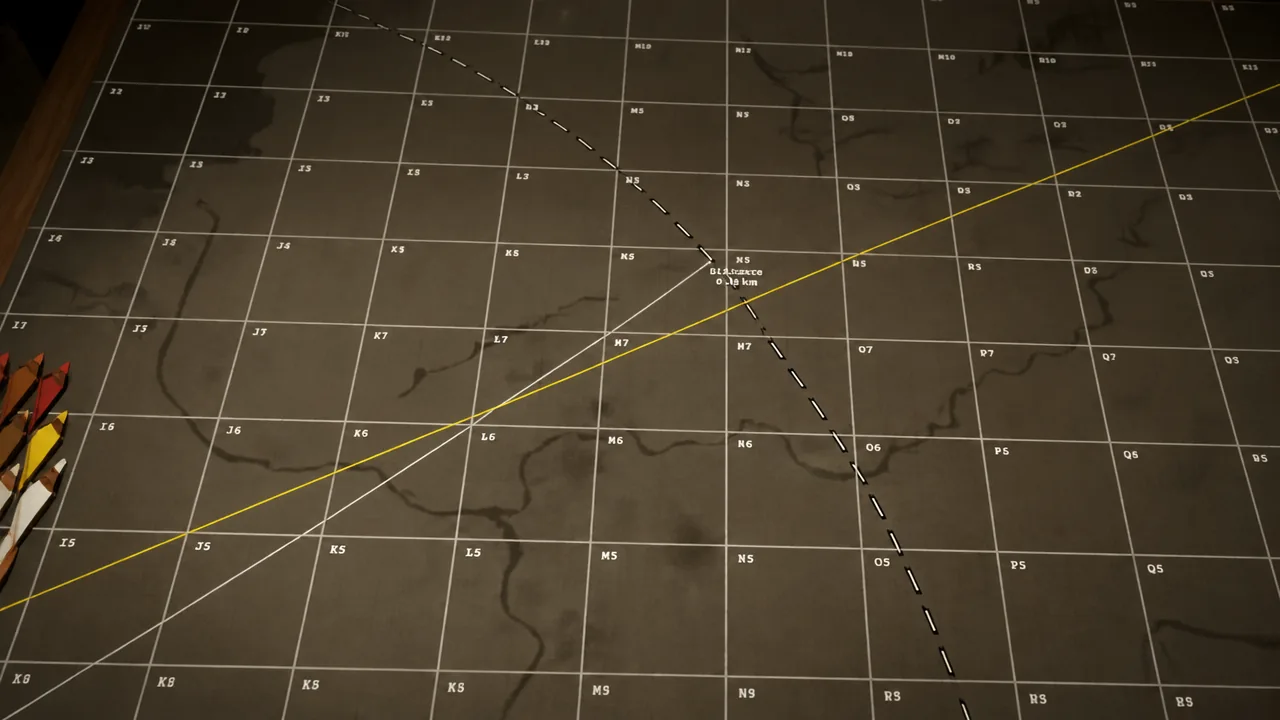
One bearing plus one distance
Draw the bearing with the yellow pencil as a long line from its known point. Then switch to the compass, center it on the second known point, and set the exact distance given. The circle crosses the yellow line at the target. If it crosses in two places, use a star shell or recon plane to decide which is real.
Two distances
When the report gives pure ranges and no bearings, use the compass twice. Center it on the first known point, set the given distance, and draw the circle. Repeat from the second point with its own distance. The two circles almost always cross at two spots. One is your target, and the other is a ghost point sitting at the same ranges. Mark both with temporary tokens, then confirm the real one with a star shell or a third measurement.
Relative to a previous target
Sometimes a report reads like “Target 3, bearing 096° and 6.48 km from Target 2.” Treat the existing red token exactly like a spotter. Draw the 096° bearing from Target 2’s center with the yellow pencil, then set the compass on that same token to 6.48 km. Where the line and circle meet is Target 3. You can chain this indefinitely, so long as each previous token stays in its exact sub-cell.
Turn the target into a firing solution
A located target is not the same as a firing bearing. Spotter bearings, distances, corrections, and Position Reports only tell you where the enemy is. The number that goes into the turret always comes from a fresh line drawn from your current Iron Nest position.
With the red token placed, switch to the red pencil and start from the spiky tip of the Iron Nest model. Drag to the center of the target token. The bearing and range appear on the clipboard automatically, and those are the two values you feed into the ballistic calculator. A worked example makes the point clear. Spotter reports of 96° and 53° can locate a position, yet the actual firing line from the Nest to that intersection came out around 65.7° and 12.91 km. If your turret bearing matches a spotter number, stop before firing.
If the Iron Nest moves, you may keep a confirmed enemy token when the enemy itself has not moved, but discard the old bearing, range, charges, and elevation. The firing origin changed, so the whole solution changes with it.
Confirm ambiguous intersections
When two circles or a bearing-and-circle pair produce two possible points, do not gamble on an expensive shell to cover the uncertainty. Star shells and recon planes both confirm which intersection is real. After firing, aerial reconnaissance photos with red markers appear on the table so you can check how close each token landed. A target placed slightly off-center is usually within limits, while a bearing entered as 0.2° instead of 2.0° will drop the shell noticeably off.
When several targets sit close together, use the ammunition overlay to view the blast radius of HE, HCHE, and AP before deciding which shell to load.
Common mistakes that cause misses
- Drawing a bearing from the Nest instead of from the spotter it belongs to
- Measuring Nest ← target instead of Nest → target, which reverses the bearing by 180°
- Placing a spotter or the Nest in the wrong sub-cell
- Drawing bearing lines too short to reach the crossing point
- Leaving old yellow lines on the table until it becomes unreadable
- Trusting the initial Nest placement without checking the printout
- Reusing a firing card after the Nest has moved
Note: In chill mode you can work slowly. In challenge mode, plot every target you can before firing the first shell, since the first shot starts the counter-battery timer. Artillery positions are the exception where marking everything before you open fire is the safest approach.
Pre-fire checklist
- Iron Nest and all spotters placed and double-checked
- Reference points found and marked with green tokens
- Every target triangulated with the yellow pencil and compass
- Red pencil drawn from Nest to target, with numbers copied to the clipboard
- Bearing and range entered into the ballistic calculator
- Correct shell and powder charges loaded
- Guns laid to the exact bearing and elevation, with the intended gun armed
Once those seven items line up, the shot is consistent and the gun does exactly what you tell it. Keep finding and firing separate, rebuild the firing line whenever the Nest moves, and every target on the war table becomes a matter of two clues and one clean intersection.