


Hell Let Loose: Vietnam drops two 50-player teams into the jungle as either the North Vietnamese Army or the US Armed Forces, and every match is decided by one of four objective systems. Each mode changes what you fight over, how death is punished, and how a round actually ends. Knowing those rules before you deploy is the difference between wandering the map and pushing the win.
Quick answer: The game ships with Warfare, Conquest, Domination, and Offensive. Warfare and Domination are the easiest to learn because dying carries no team penalty, so start there. Conquest adds a shared Morale meter that acts as your team’s life pool, and Offensive splits the lobby into attackers racing a 30-minute clock against defenders.
The four modes compared
| Mode | Objective | How you win | Death penalty |
|---|---|---|---|
| Warfare | One shared capture zone at a time | Take the enemy HQ, or hold more territory when the 90-minute timer ends | None |
| Domination | Three control points across the map | Capture the enemy HQ first, or hold more points at time expiry | None |
| Conquest | Multiple points in a cross pattern | Drain the enemy Morale meter to zero | Morale drops on every redeploy |
| Offensive | Attack or defend a single point at a time | Attackers take every point in time; defenders run out the clock | None |
How capturing points works in every mode
Capturing is the one mechanic shared across all four modes, so learn it once and it applies everywhere. To take a point you simply need more of your teammates inside the capture radius than the enemy has.
When you step onto a contested point, a Capturing bar appears at the top of your HUD. Blue chevrons count your side, red chevrons count theirs, and the team with more chevrons makes progress. Standing inside the tighter, central capture radius counts as a Hard Cap, which is worth three times the normal capture rate. Stacking players into that inner ring is the fastest way to flip a point.
Warfare: the main tug-of-war mode
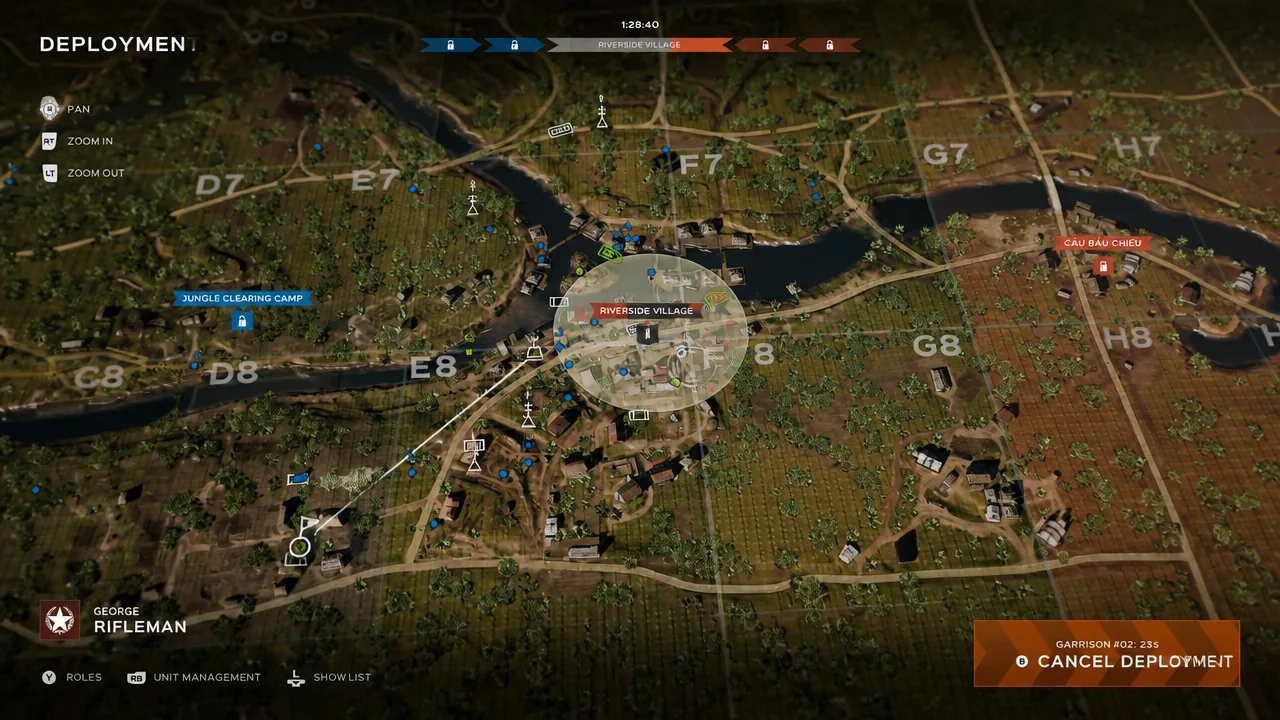
Warfare is the core mode and the one to play first. Both teams push a single battle line deeper into enemy ground, and only one capture zone is active at a time. At the start, each side holds its half of the map while a large neutral band fills the two middle columns. On your Tactical Map, the active objective shows up as a big circle over a single point of interest.
Nothing else on the map advances the objective, so both teams collapse onto that circle hard. You can still roam to build supplies, tunnels, or outposts, but presence on the point is what moves the line. Once you secure the neutral zone, the front shifts into enemy territory and a fresh point is marked. Keep taking the next one and you eventually reach their HQ. Lose a sector you already held and the line slides back toward the enemy.
You win by capturing the enemy headquarters, or by controlling more of the map when the 90-minute timer runs out. Casualties do not matter here; whoever holds more ground at the end takes the round. Because there is no death penalty and only one point to focus on, this is the most manageable mode for newcomers.
Domination: three points and no death penalty
Domination blends the front-line idea of Warfare with multiple objectives. Three control points sit scattered across the map, and both teams fight over all of them. Win the majority of those points and you can push into enemy ground to seize their headquarters.
You take the round by capturing the enemy HQ first, or by holding more points when the timer expires. There is no Morale ticker, so you can die and redeploy freely without hurting your team. That low punishment, combined with the constant movement between sectors, makes Domination another solid starting point for players still learning the maps.
Conquest: the mode where lives count
Conquest turns the whole map into a battlefield. Instead of one shared objective, several circular points sit in a cross pattern, spreading the fighting out through the jungle. Capturing works the same as elsewhere, but the twist is the Morale meter.
Morale is a shared pool that represents how many collective lives your team has left. It drops whenever a teammate redeploys, and it also bleeds away whenever you hold fewer points than the enemy. The more points a side controls, the faster the other team’s Morale drains. If you have played Battlefield, the flow will feel familiar.
Overtime is where Conquest gets specific. If the team that holds more points is the first to run out of Morale, the match goes to overtime. During that window, the team with zero Morale still wins if the enemy fails to capture more points than they do. Flip that around and the enemy takes the round only by grabbing more points before overtime ends.
Because every redeploy chips away at Morale, reckless respawning can lose a Conquest match even if your team is winning firefights. Push objectives together rather than feeding in one at a time.
Offensive: attackers versus defenders on a clock
Offensive is the most frantic mode because it drops the tug-of-war entirely and assigns each team a fixed role. One side attacks, the other defends.
Attackers must capture a single control point within a 30-minute timer. Take it, and a new point spawns deeper in enemy territory while the 30-minute clock resets. Keep chaining captures within each window until you seize the final point to win the match. Miss the timer on any point and the round is over.
Defenders have the simpler brief. Hold off the attackers until the clock hits zero and the round is yours. One rule matters most: a point that falls cannot be reclaimed, so there is no value in contesting a lost sector. Fall back and dig in on the next point to deny the attackers their next capture.
If you are enlisting for the first time, drop into Warfare or Domination to get comfortable with capturing points and reading the Tactical Map, then move on to Conquest once you can manage your redeploys, and take on Offensive when you want the tightest, most time-pressured fights the game offers.





