Sidearms are the ranged half of your kit in Mortal Shell 2, and there are exactly eight of them scattered across Fallgrim. Most sit at the end of a dungeon, one is handed to you in the prologue, and one is just lying on a tavern stage. None of them can be permanently lost.
Quick answer: Collect all eight sidearms to unlock the Guns. Lots of Guns trophy/achievement. Every one remains available after the final boss during free roam, so you can mop up leftovers before starting New Game+.
All 8 sidearm locations at a checklist level
The order below roughly matches normal campaign progression, starting in Fainweald and finishing in Mammon. If you only need to know what you’re missing, the table covers it.
| Sidearm | Where it is | Nearest beacon |
|---|---|---|
| Nayleshotte | Prologue, awarded automatically | — |
| Forgotten Crossbow | Flooded Village dungeon, locked room | Blackridge Pass |
| Salvaged Trebuchaxe | Ravaged Hideout, on a body in the final room | Gloomshade Grove |
| Troubadour’s Lute | One Legged Wolf Tavern stage | One Legged Wolf |
| Triach Repeater | Blackwell Cavern, first lit area | Castigator’s Keep |
| Ballistazooka | Sentry’s Grave, miniboss drop | Gate of Mammon |
| Cursed Child | Revered Beacon dungeon, top of the hill | Sester’s Gate |
| Caged Hystrix | Chamber of Becoming, near the exit | The Silent Steps |
Merrick, the merchant in Marrow Keep, sells maps that mark the approximate spot of each sidearm on the overworld map. They’re a convenience, not a requirement, so the coin is better spent elsewhere if you already know where to go.
The two you can’t miss: Nayleshotte and Troubadour’s Lute
The Nayleshotte is your starting sidearm. It arrives during the prologue alongside The Iconoclast sword and the Untarnished Seal, and it fires a shotgun-style spread at close range. There’s nothing to hunt down here.
The Troubadour’s Lute is the easiest open-world pickup in the game. Head southeast of the One Legged Wolf Beacon and walk into the One Legged Wolf Tavern. It’s sitting on the stage, just left of the man playing his own lute. Reaching this part of eastern Fainweald requires Mether’s Breath, the power you get after siphoning enough Ova in Marrow Keep, since a corrupted growth blocks the road north from the Mushroom Village Entrance beacon.
Note: the Lute is worth grabbing early even if you’re not collecting everything. It confuses enemies and can send groups of hostiles after each other instead of you. Gragu is sitting in the same tavern, so you can start his shell questline in the same trip.
Fainweald dungeon sidearms: Forgotten Crossbow and Salvaged Trebuchaxe
Forgotten Crossbow (Flooded Village)
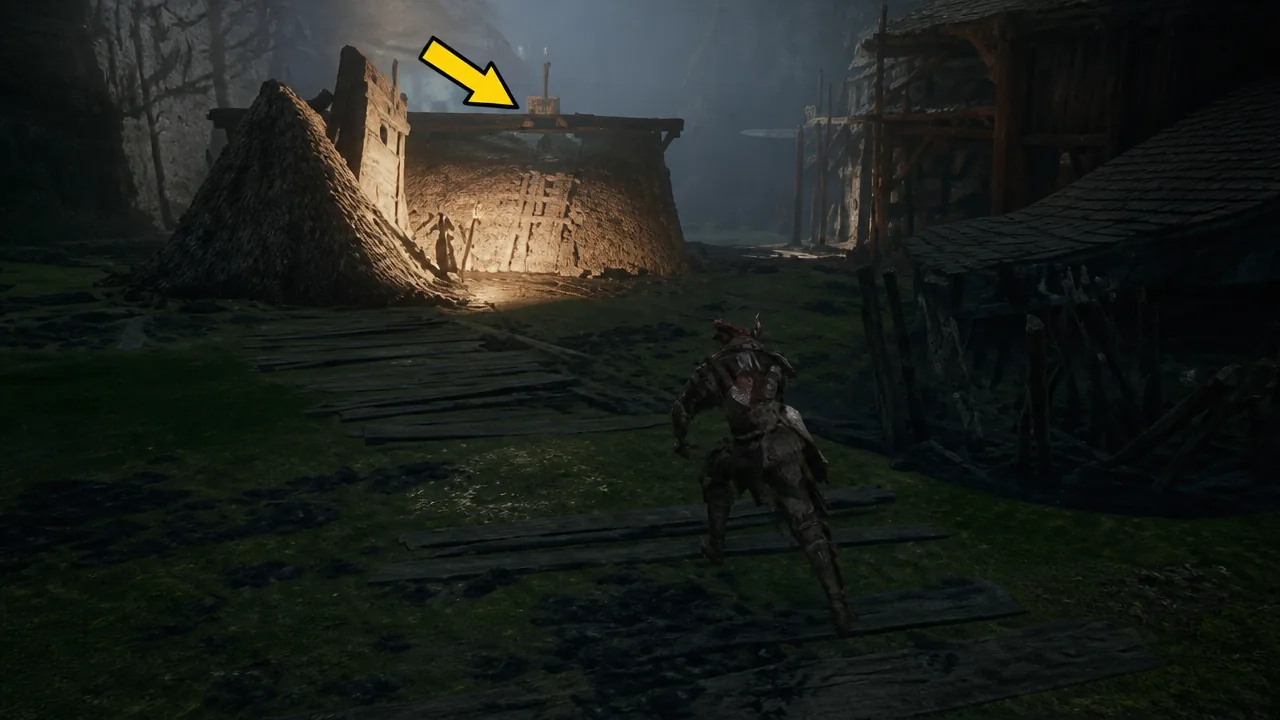
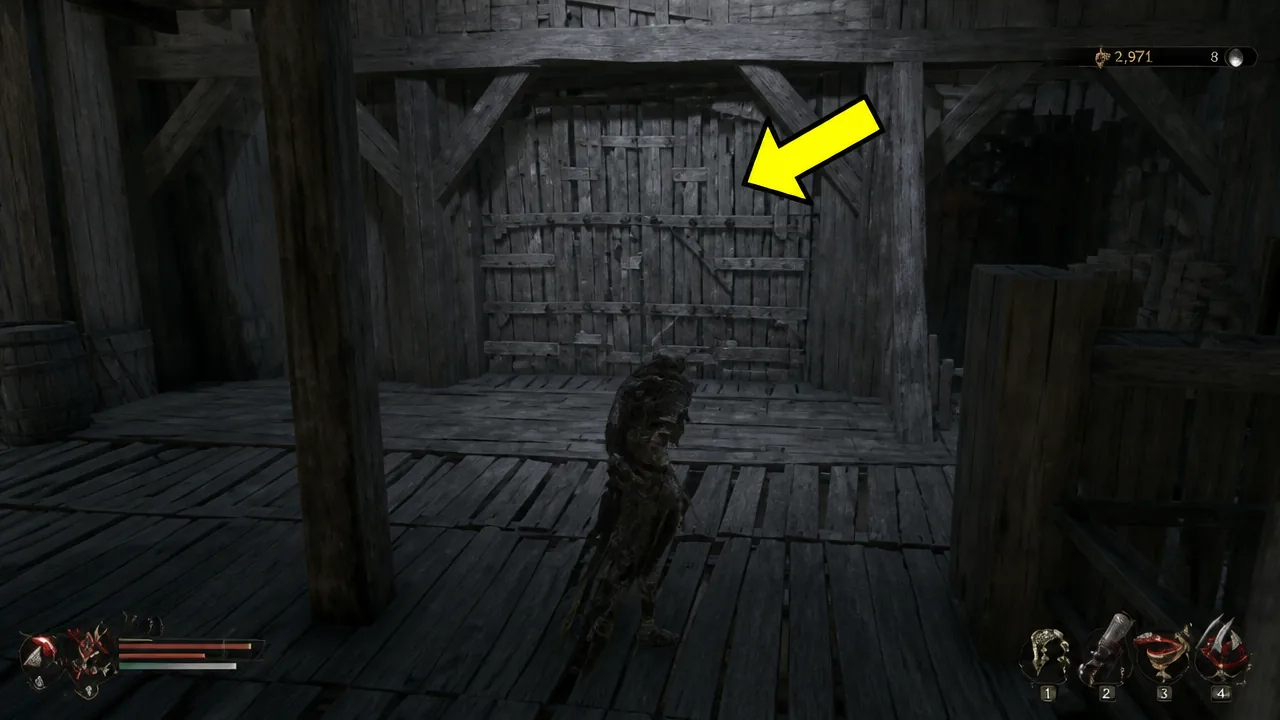
Salvaged Trebuchaxe (Ravaged Hideout)
South of the Gloomshade Grove Beacon, at the base of the hills below the Citadel of Penance, the Ravaged Hideout stays sealed until you kill the Bloodcursed Lithopod boss that lurks nearby. Once it’s dead, the lair opens up.
Head inside and follow the single path to the final room. The Salvaged Trebuchaxe — a launcher that throws axes — is looted from a body there.
Mammon dungeon sidearms: Triach Repeater and Ballistazooka
Triach Repeater (Blackwell Cavern)
From the Castigator’s Keep Beacon, either take the paths down or drop off the ledge directly behind it to reach the lower level. Follow the route north and the Blackwell Cavern entrance sits around the corner near the cliff edge.
Visibility inside is close to zero, so hug the tunnel walls as you move. The Triach Repeater is on the ground in the first lit-up area you reach partway through, well before the end of the dungeon.
Ballistazooka (Sentry’s Grave)
From the Gate of Mammon Beacon, go northwest up the first flight of stairs to the building’s first level, then loop clockwise around it until you reach the indoor area. The stairs there lead down into Sentry’s Grave, inside the Lonesome Spire.
The dungeon is full of Ballista Head enemies that snipe you from range. At the end you’ll fight the Subjugated Guardian miniboss, an upgraded version whose bolts explode on impact. Closing the distance shuts down its ranged attacks and leaves it swinging head slams you can block or parry. Killing it hands you the Ballistazooka automatically.
The two hardest sidearms: Cursed Child and Caged Hystrix
Cursed Child (Revered Beacon)
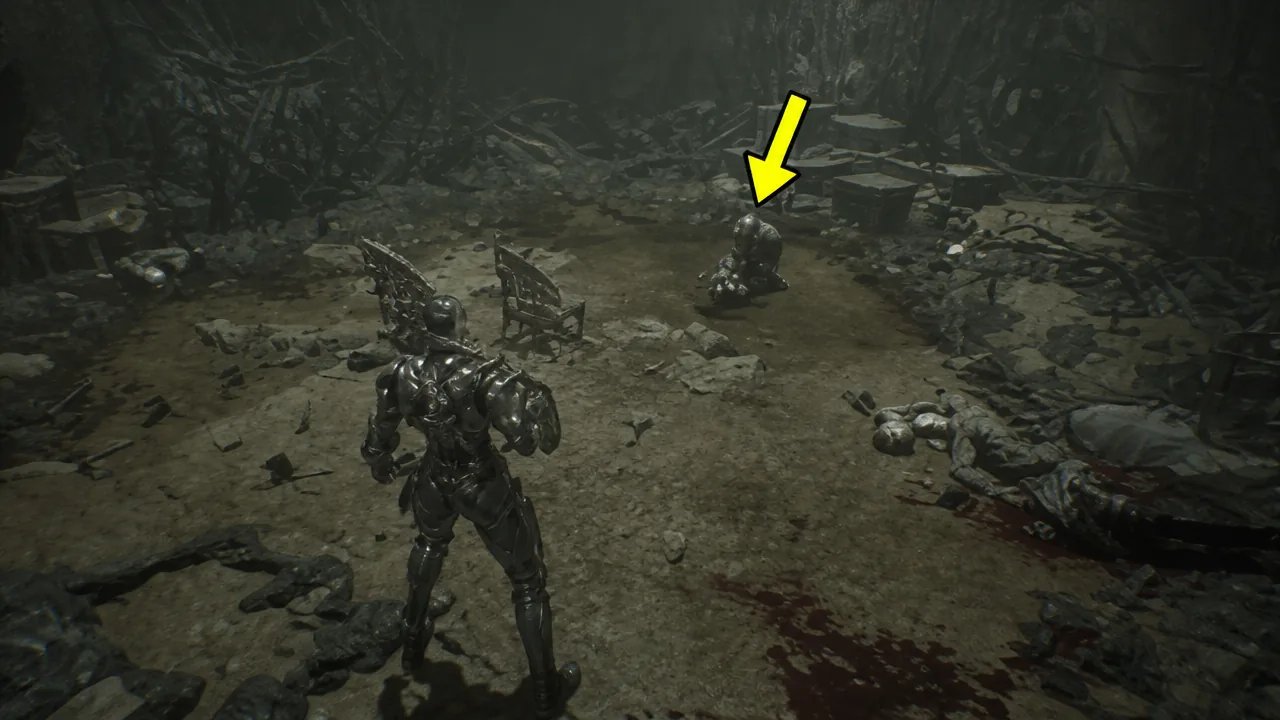
Caged Hystrix (Chamber of Becoming)
How to confirm you have all eight
Each sidearm has its own individual trophy/achievement, so the ones that haven’t popped tell you exactly what’s still out there. Once the eighth is in your inventory, Guns. Lots of Guns unlocks immediately.
Two things commonly stall the run. The Salvaged Trebuchaxe stays out of reach until the Bloodcursed Lithopod is dead, and the Caged Hystrix won’t spawn if Sariel keeps reviving because a tombstone survived. Everything else is a straight walk to a pickup.
Once collected, every sidearm can be upgraded at the Tarforge in Marrow Keep, provided you’ve banked enough coin and upgrade materials.