Healing in Mortal Shell 2 scales in two directions, and both of them are hidden in the world rather than sold in a menu. Revered Glands raise how many healing items you can carry, while Synaptic Vessels make each use restore more. There are 21 upgrades in total, none of them tied to a trophy or achievement, and all of them worth grabbing before a long boss run.
Quick answer: There are 21 healing upgrades — 11 Revered Glands and 10 Synaptic Vessels — spread across Marrow Keep, Fainweald, Ruins of Mammon, Glutted Mire, Prisoners’ Domain, and Sanguine Caverns. Two are bought from Merrick for 1,500 coin each, and none are missable, so anything you skip can still be collected in free-roam after the final boss.
Revered Gland vs Synaptic Vessel: What each healing upgrade does
The two upgrade types never overlap, so the split matters when you decide which detours to take first. If you keep dying with charges left over, chase Vessels. If you keep running dry mid-fight, chase Glands.
| Upgrade | Effect | Total in game |
|---|---|---|
| Revered Gland | Increases the number of healing items you carry | 11 |
| Synaptic Vessel | Increases the potency of each healing item | 10 |
All 21 healing upgrade locations
Each entry below is anchored to the nearest Beacon, listed in the same order the Beacons appear in the Mether’s Breath fast travel menu. The pickups that need a dungeon route, a puzzle, or a boss kill are broken down further down the page.
| Upgrade | Beacon / area | Where it is |
|---|---|---|
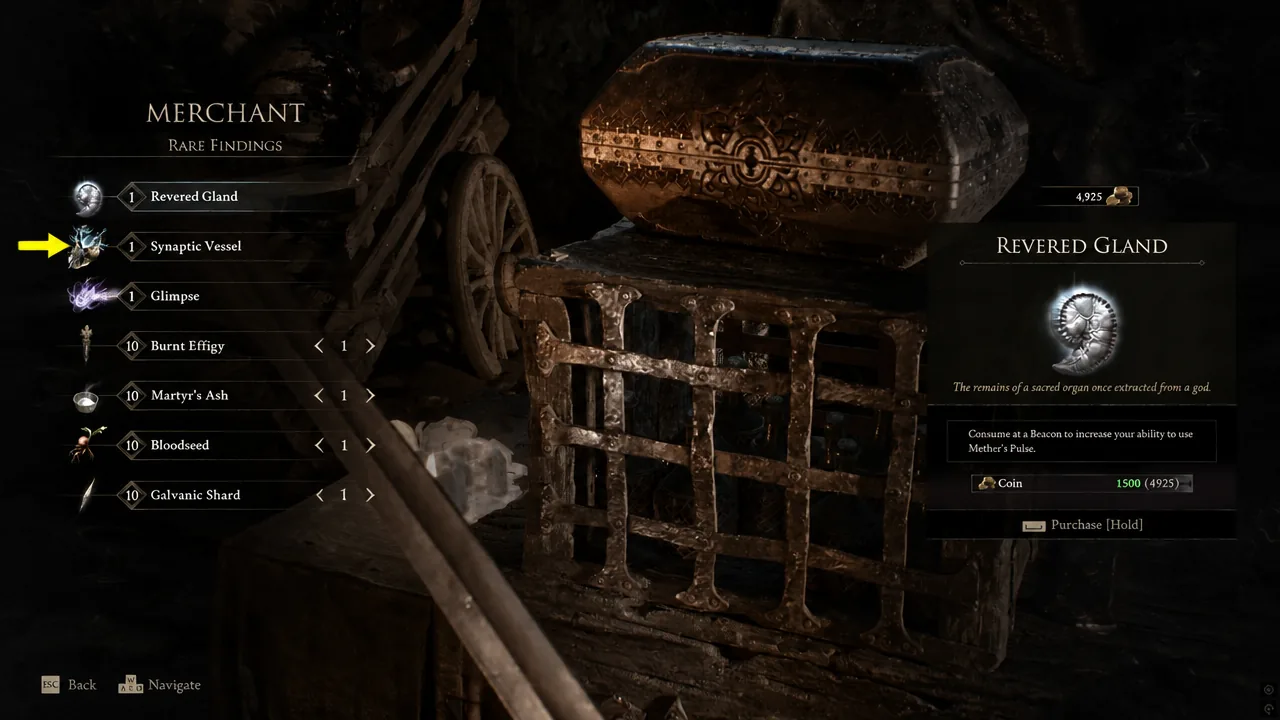
| #1 Revered Gland | Marrow Keep | Bought from Merrick in the southern part of the keep for 1,500 coin |
| #2 Synaptic Vessel | Marrow Keep | Also sold by Merrick for 1,500 coin |
| #3 Synaptic Vessel | Stonebled Gate | South of the Beacon in the camp, beside the fire next to some boxes |
| #4 Revered Gland | Nocthean Gate | End of the Thieves Retreat dungeon, north of the Beacon and one level down |
| #5 Revered Gland | Mushroom Village | Inside the Holding Cells dungeon, entered through a well northwest of the Beacon |
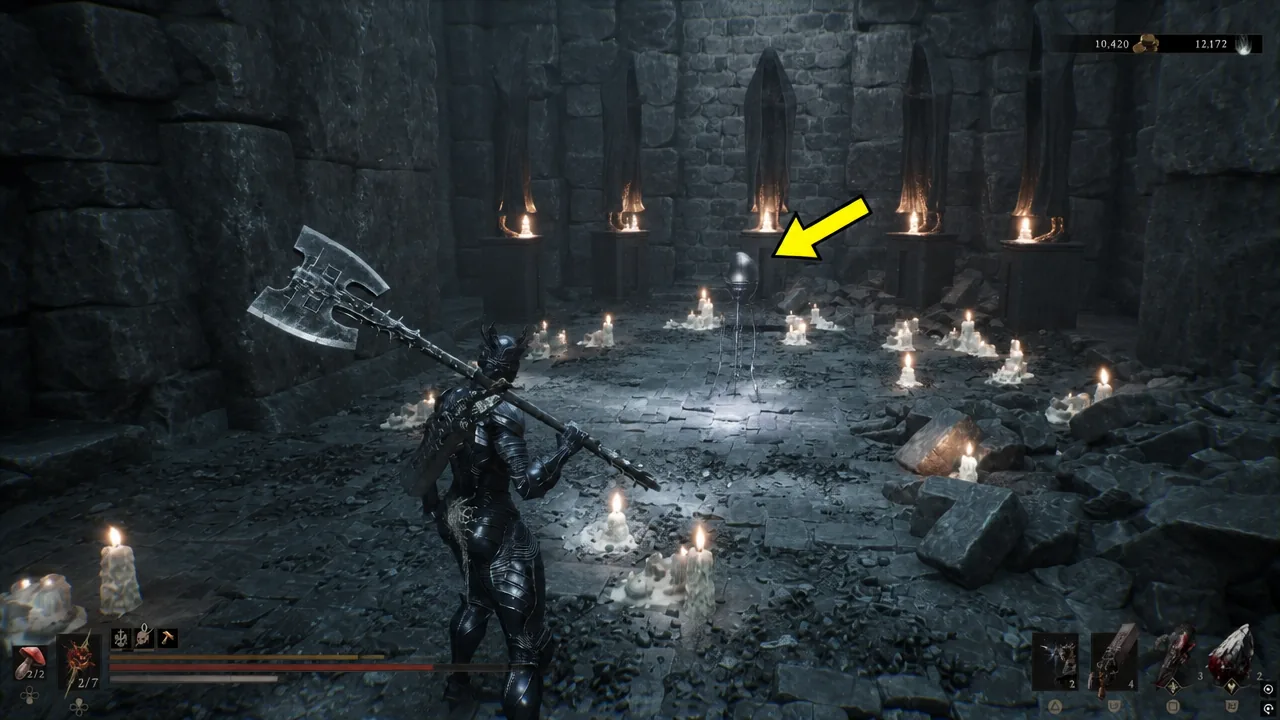
| #6 Synaptic Vessel | Mushroom Village | North of the Deserted Mine dungeon, on the east edge of the stone circle around the Trial Obelisk |
| #7 Synaptic Vessel | Outskirts of Nochte | South of the Beacon in the upper castle area, tucked inside a small part of the building on the north interior |
| #8 Revered Gland | One Legged Wolf | Dropped by the Pale Grisha boss at the end of the Grisha Hunting Grounds dungeon, northwest past the ruins |
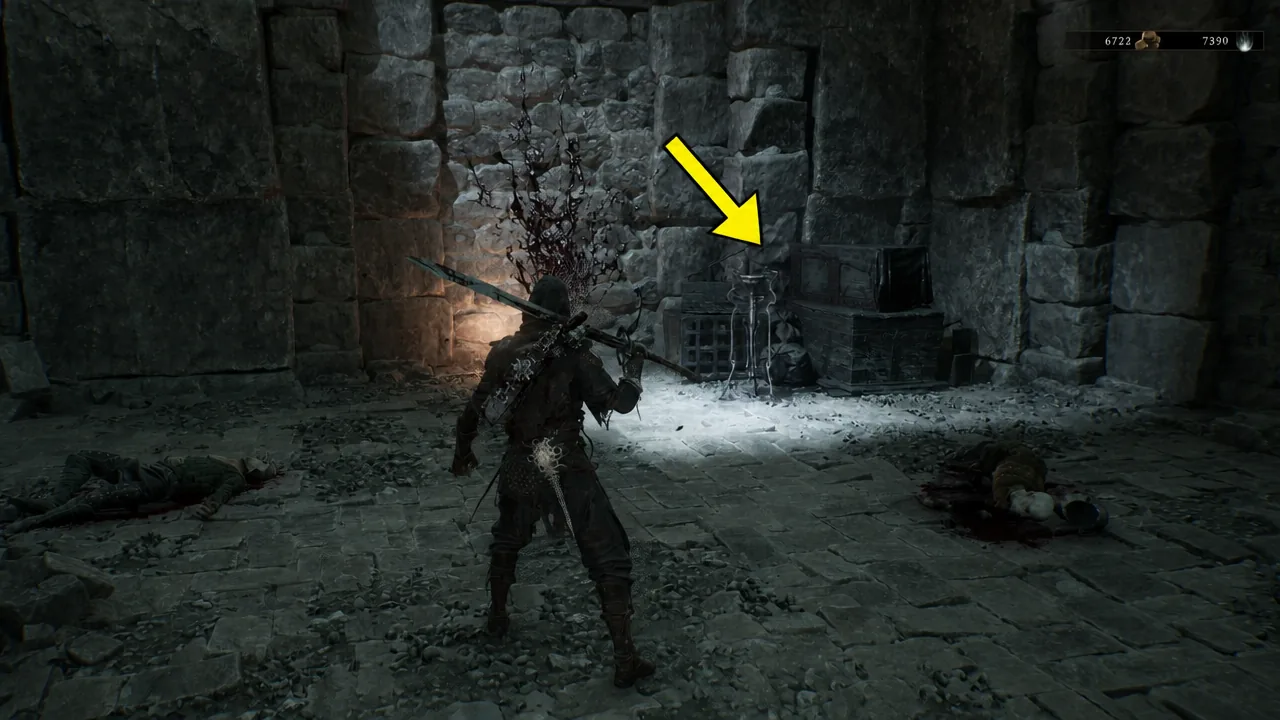
| #9 Revered Gland | Widow’s Overlook | South of the Beacon, beside a body near the western cliff edge |
| #10 Revered Gland | Citadel of Penance | Southeast of the Beacon in the outer castle area, behind a breakable wooden wall in the southwestern corner |
| #11 Synaptic Vessel | Citadel of Penance | Behind a gate opened by the button on the wall opposite where Eredrim was |
| #12 Synaptic Vessel | One Legged Wolf | East through the jump into the Temple of Vatra area, on the right just before the large staircase |
| #13 Synaptic Vessel | Sester’s Gate | On the ground at the far back wall near boxes, past the long bridge where you shoot the bells |
| #14 Synaptic Vessel | Gate of Infinity | At the first point where you can climb onto the bookshelves, on the left as you enter |
| #15 Synaptic Vessel | Castigator’s Keep | South of the Beacon, in the middle of the castle’s central courtyard |
| #16 Revered Gland | Abbey Entrance | In a cave east of the town, behind a door opened by destroying three glowing tombstones |
| #17 Synaptic Vessel | Abandoned Outpost | In the Slums, among a cluster of tombstones on the north side of the western church building |
| #18 Revered Gland | High Lord’s Courtyard | In the central long building on the southern side of the outer courtyard, in front of a statue |
| #19 Revered Gland | Sunken Village | In a container down the hill behind you, accessible only after cleansing the Beacon |
| #20 Revered Gland | Prisoners’ Domain | Past the toppled statue, in the room beyond the iron maidens |
| #21 Revered Gland | Sanguine Shoreline | In a cave along the main path, just after the first open area |
Buying the two Marrow Keep upgrades from Merrick
Merrick sits in the southern part of Marrow Keep and stocks one Revered Gland and one Synaptic Vessel, each priced at 1,500 coin. They appear under his rare stock rather than his general goods, and you hold the purchase prompt to confirm. Buying both is the cheapest healing boost in the game if you have been selling junk and clearing effigies.
Healing upgrades behind dungeons, puzzles, and bosses
Most of the 21 pickups sit in the open once you are in the right spot. These eight need a specific action first, and they are the ones players usually walk past.
#4 Revered Gland — Thieves Retreat dungeon
From the Nocthean Gate Beacon, head north and drop down one level. A switch there opens the metal gate that leads to the dungeon entrance.
Inside, the route runs across invisible walkways. The bodies suspended in midair mark where the path turns, so use them as your guide. Falling drops you into a crowded lower area, but the elevator in the middle of the room takes you back up to the platforms, and the upgrade waits at the end of the path.
#5 Revered Gland — Holding Cells dungeon
Go northwest from the Mushroom Village Beacon, past the Shrine of Trials entrance, and use Mether’s Breath to burn away the corruption blocking the jump pad. That lifts you to the upper level, where interacting with the well drops you into the dungeon.
Stay on the upper floor and follow the long hallway until you spot a button hidden behind a stack of boxes. Pressing it opens a gate on the left side of the corridor, and the Gland is inside that room.
#8 Revered Gland — Pale Grisha boss drop
Head northwest from the One Legged Wolf Beacon and cross the valley past the ruins to reach the Grisha Hunting Grounds dungeon. The upgrade is the reward for beating the Pale Grisha at the far end, so there is no way to sneak past it.
#10 and #11 — Citadel of Penance
The Revered Gland is southeast of the Beacon. Follow the path out to the castle’s outer ring, walk to the southwestern corner, and break the wooden wall covering the alcove.
The Synaptic Vessel is nearby but easy to miss. Stand where Eredrim was, turn to face the opposite wall, and press the button there to open the gate hiding the pickup.
#16 Revered Gland — Abbey Entrance tombstone cave
From the Abbey Entrance Beacon, drop south into the town and follow the path east until you are outside the castle wall. The cave there is full of enemies and holds three glowing tombstones. Destroy all three and the door at the back opens.
#19 Revered Gland — Sunken Village container
This one is gated by the Beacon itself. Cleanse the Sunken Village Beacon first, then turn around and walk back down the hill. Three enemies stand in front of the container, which only becomes accessible once the cleanse is done.
#20 Revered Gland — Prisoners’ Domain statue
Follow the main path from the start of the area until it dead-ends at a giant statue. Blowing up the pots at its base topples the statue and creates a route to the upper level. Push through the room lined with iron maidens and the pickup is in the next chamber.
How to check which healing upgrades you already have
There is no collection counter for these. Nothing in the menus tracks how many Glands or Vessels you have picked up, so the only reliable check is fast travelling to each spot and seeing whether the pickup is still sitting there. Confirmation of a successful pickup comes from your healing item itself, either a higher charge count or a larger heal per use.
None of the 21 are missable. After the final boss you are returned to free-roam, and every uncollected upgrade is still in place, so clean up the list before you commit to New Game+.
If you are working through them in order, the Marrow Keep purchases and the Fainweald pickups cover the early game comfortably, and the Mammon and Glutted Mire entries land right when boss damage starts spiking. Collect them as you pass through rather than saving a dedicated sweep for the end, and the back half of the game gets noticeably less punishing.