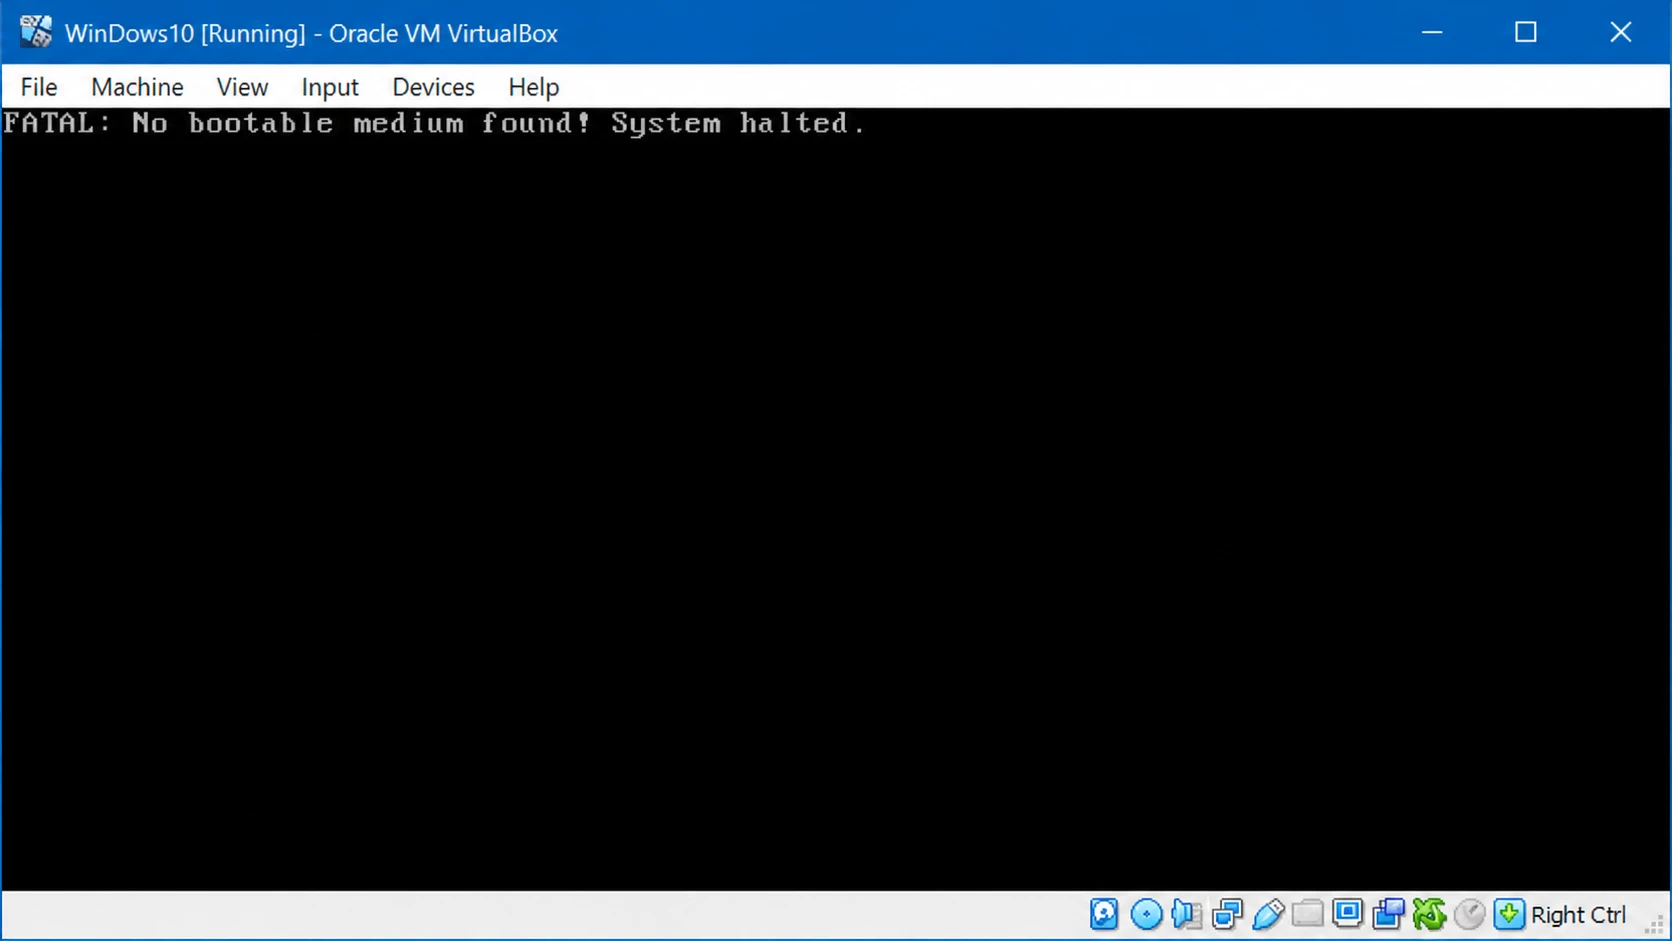
The message “FATAL: No bootable medium found! System halted” appears when VirtualBox starts a virtual machine but cannot find anything to boot from. There is no mounted installation ISO and no virtual hard disk that holds a usable operating system. It shows up most often on a brand-new VM, but it can also hit an existing machine if the virtual disk is missing, empty, or wrongly configured.
Quick answer: Open the VM’s Settings > Storage, attach a valid bootable ISO to the Controller: IDE (not SATA), then in System > Motherboard set the correct boot order and start the machine again.
Why the “No bootable medium found” error happens
VirtualBox checks its boot devices when a VM powers on. If none of them contain a loadable operating system, it stops with this error. A few specific conditions cause it.
| Cause | What is happening |
|---|---|
| No ISO or OS attached | A new VM was created but no bootable installation ISO was mounted, and the virtual disk is still empty. |
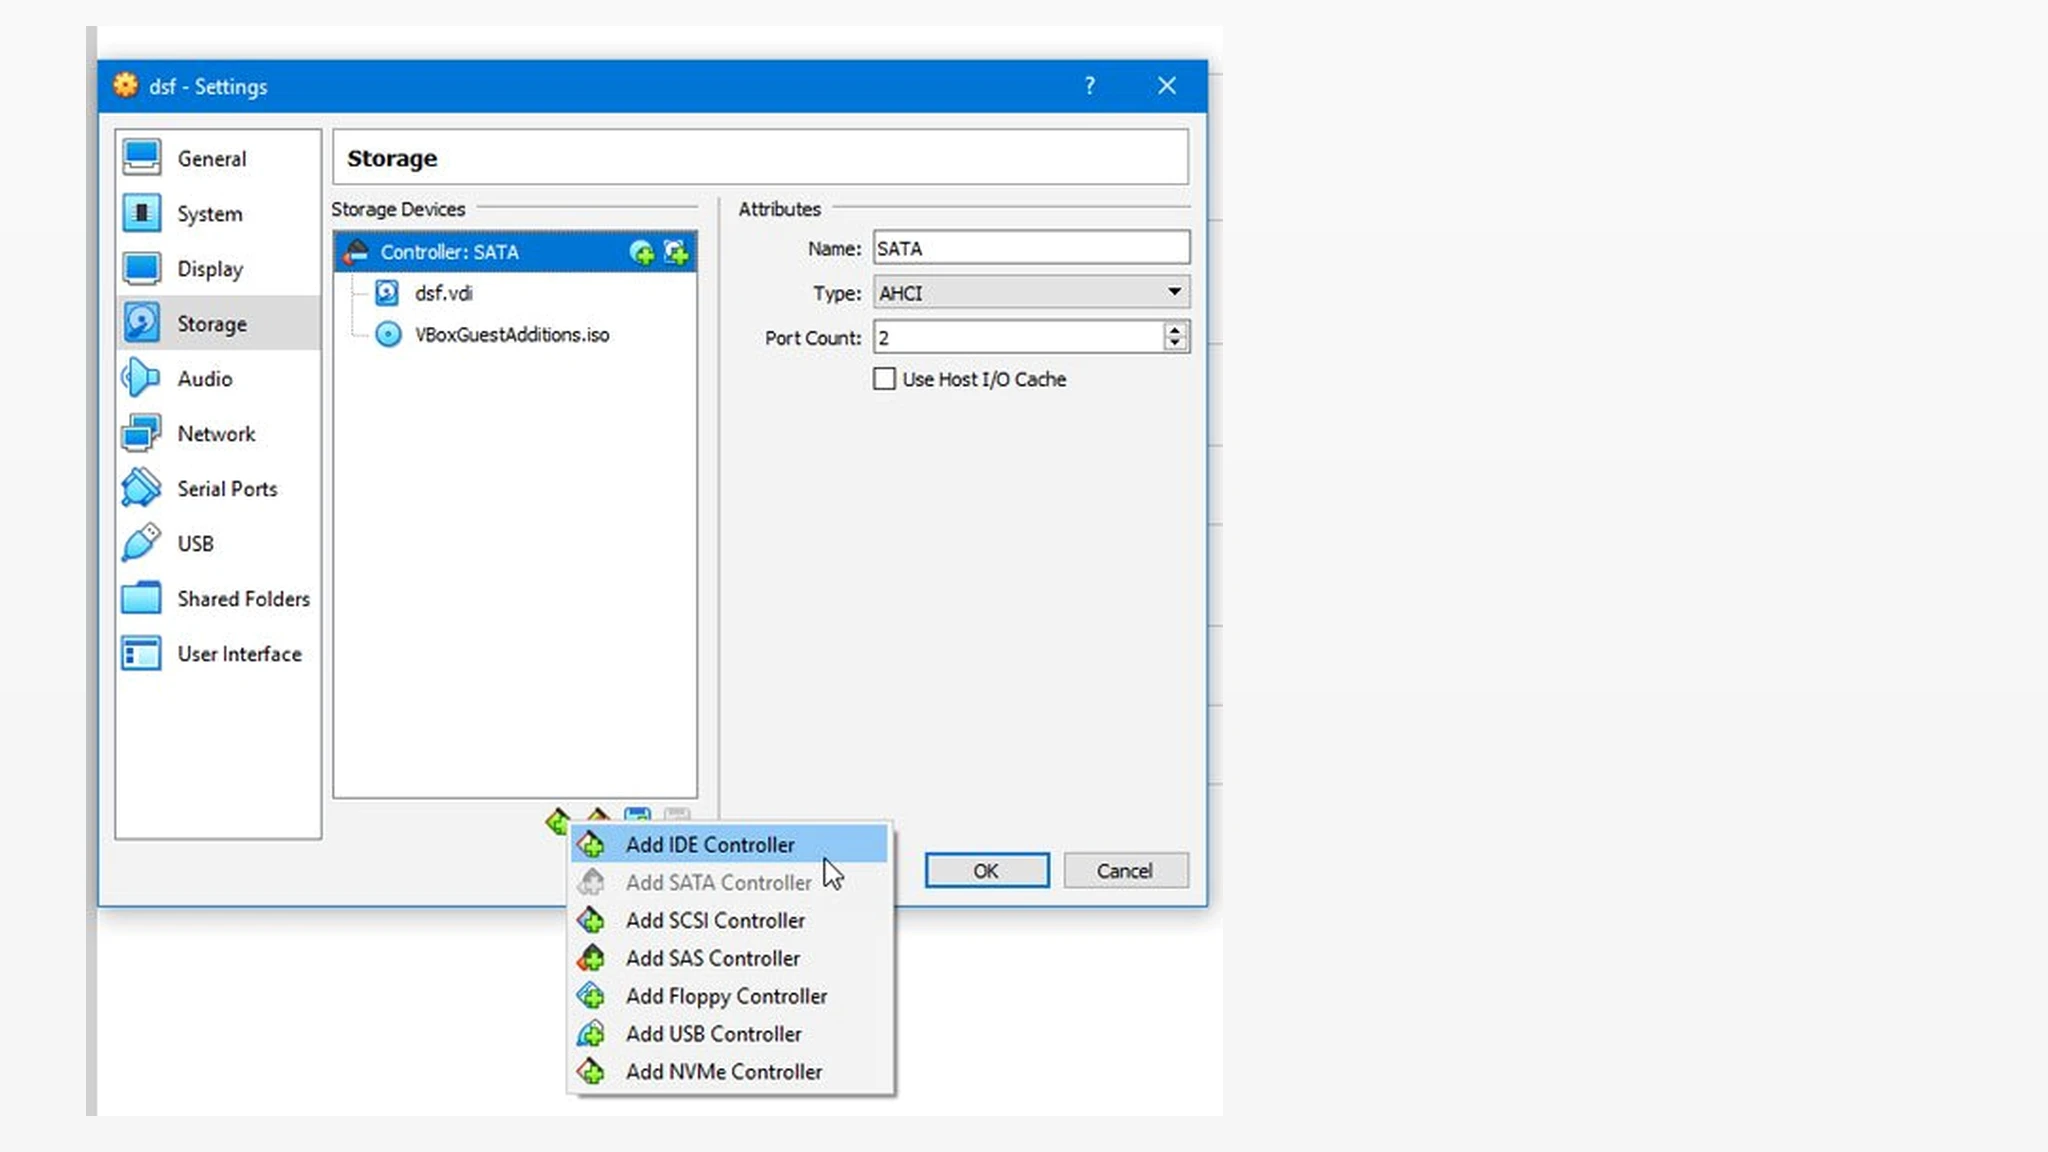
| ISO on a SATA controller | The installation ISO was mounted to a SATA controller. SATA works for virtual hard drives, but a bootable ISO needs the IDE controller. |
| Wrong or corrupt ISO | The disc was burned as data only, the ISO download is corrupt, or the wrong architecture image was selected (for example arm64 instead of amd64). |
| UEFI guest without EFI enabled | The disk holds a UEFI-based OS such as Windows 10 or 11, but EFI is turned off in the VM. |
| Invalid boot configuration | A cloned or converted disk is missing its boot loader or its boot files are damaged, common after using Disk2vhd or CloneVDI. |
| Boot order disabled | Booting from the hard disk was switched off in the System boot order, so the installed OS is skipped. |
Note: This problem is specific to VirtualBox and can occur on any host, whether Windows, macOS, or Linux.
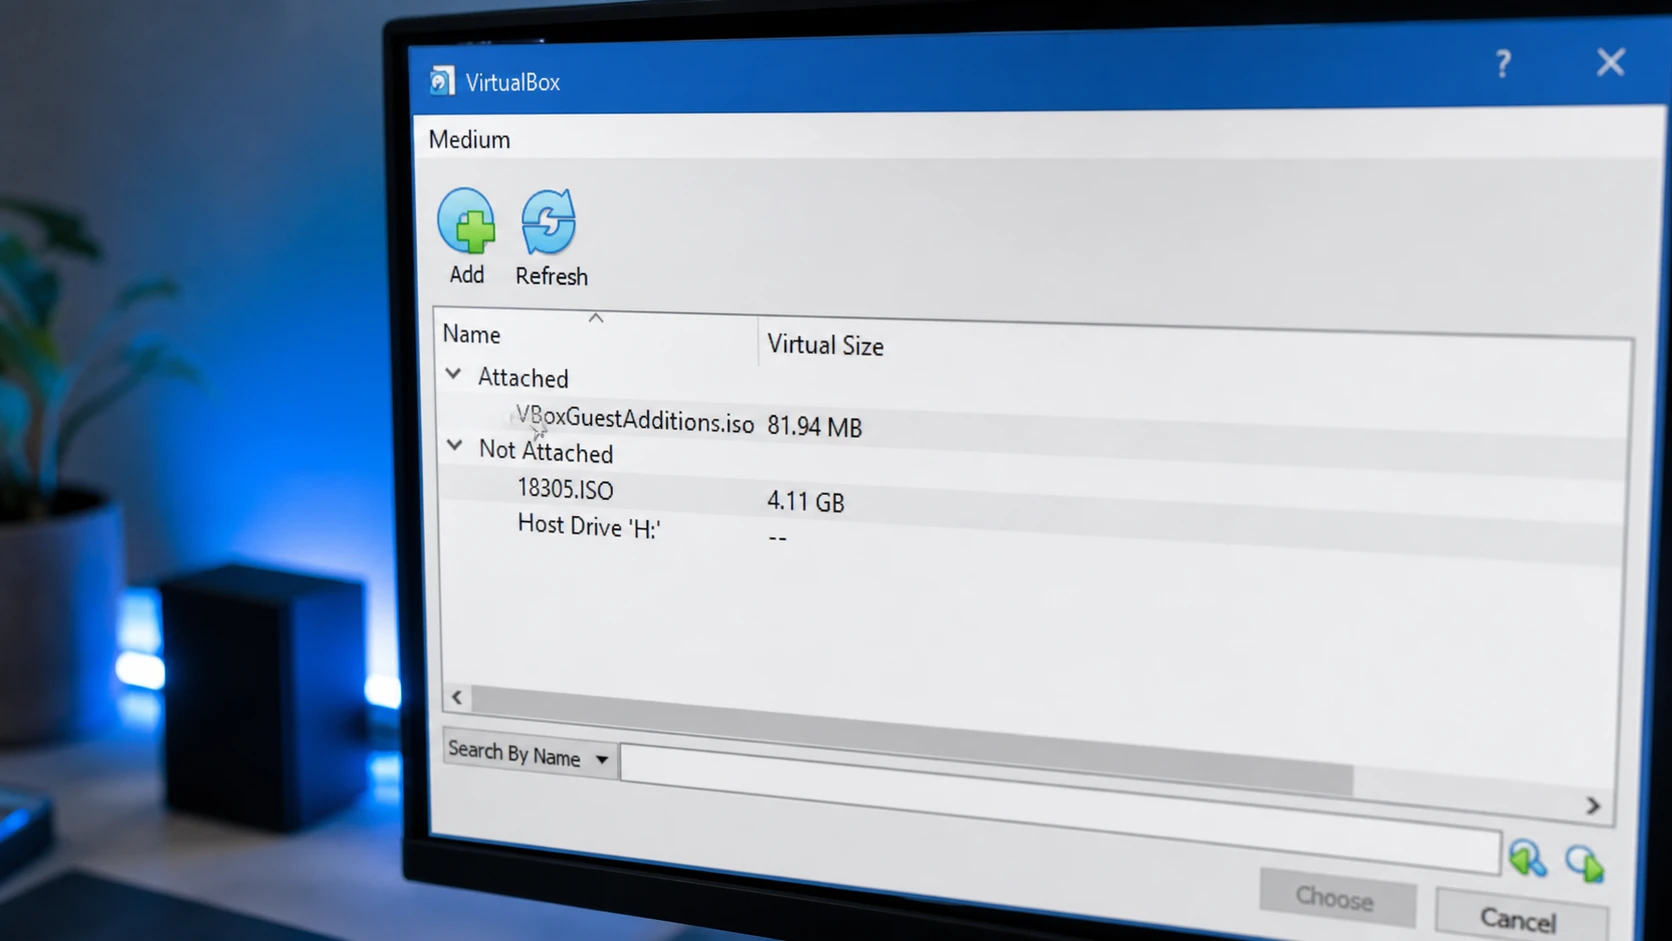
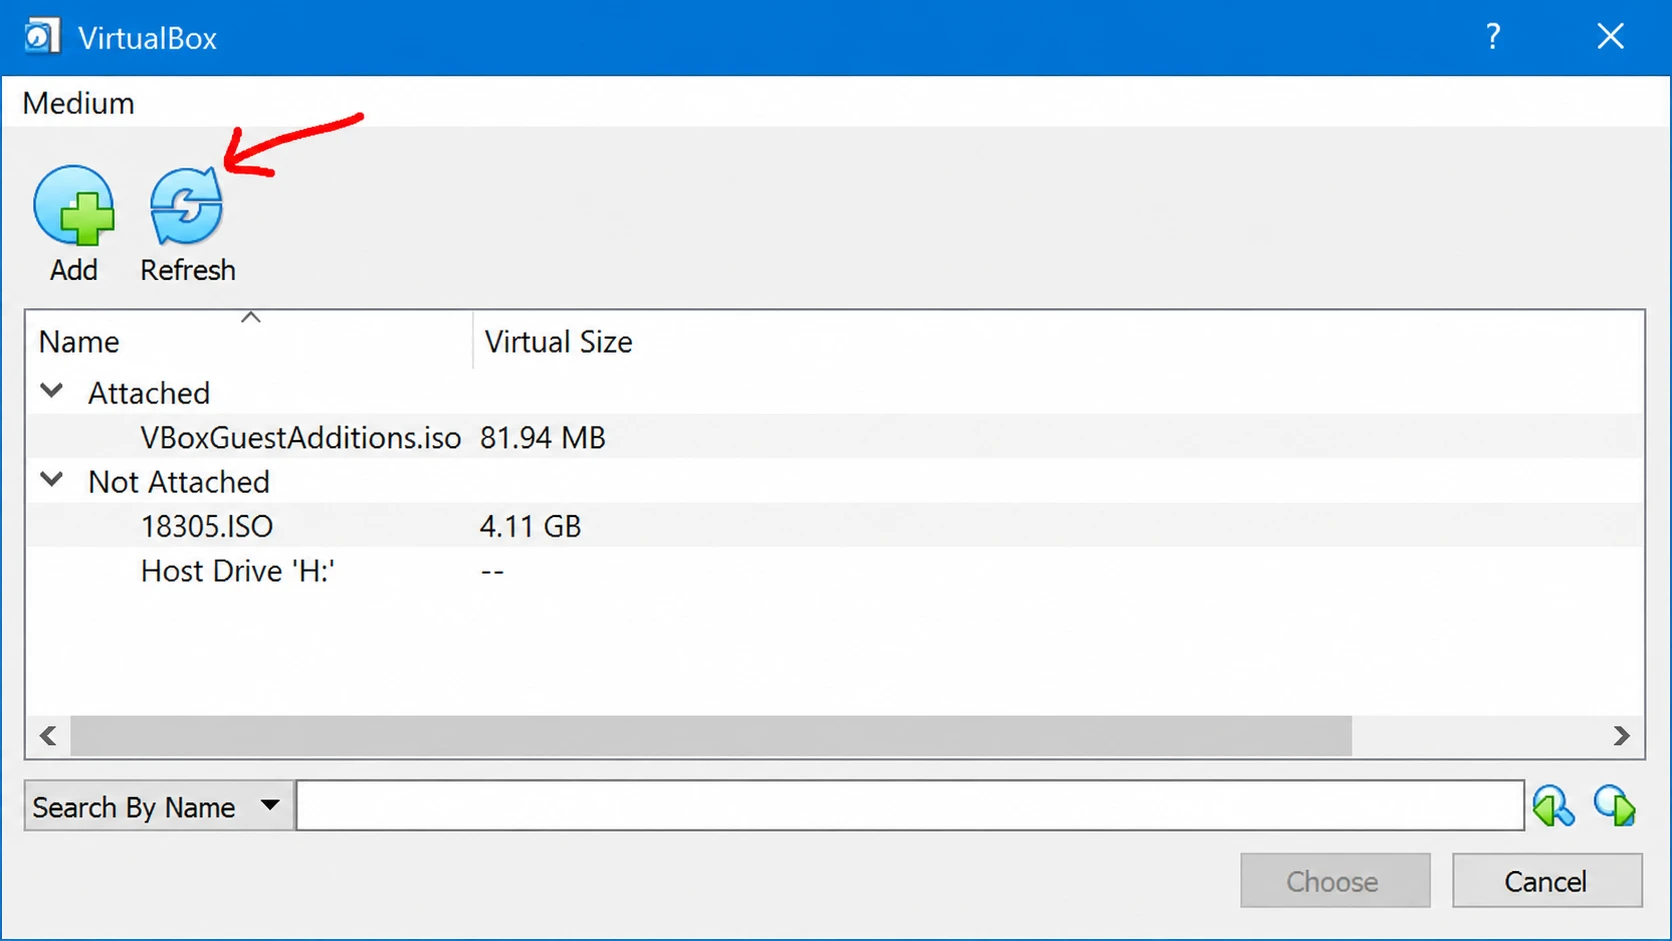
Fix 1: Attach a bootable ISO to the IDE controller
This is the fix when you are installing an operating system into a fresh VM. Before you begin, make sure you have a valid, uncorrupted ISO. If you are unsure, download a fresh copy from the official source, such as the VirtualBox downloads page for the program itself, and verify the ISO checksum against the value listed on the OS vendor’s site.
Tip: If you created the VM with the wrong OS type, the error can persist. When making a Linux VM, set the type to Linux and the version to your distribution, since picking Windows by mistake produces the same halt.
Fix 2: Boot from an existing virtual hard disk
If you already installed an OS, or you downloaded a ready-made VDI image, the VM must point to that disk rather than expect a new empty one.
Fix 3: Enable UEFI for Windows 10 and 11 guests
A virtual disk that holds a UEFI-based operating system will not start under legacy BIOS. Turn on EFI so the firmware matches the disk.
Fix 4: Repair boot files on a cloned or converted disk
When you convert a physical machine into a VHD or VDI with tools like Disk2vhd or CloneVDI, the boot loader can be left behind or damaged. In Windows, the boot loader usually lives on a small “System Reserved” partition, not on the C: partition, so cloning only C: produces an unbootable disk. Rebuild the boot files using BCDBOOT.
list volume.diskpart
select disk 0
list partition
list volume
select volume 2
assign letter=Z
exitbcdboot C:\windows /s Z: /f ALLFor a UEFI guest, use bcdboot C:\windows /s Z: /f UEFI instead.
How to confirm the fix worked
The error is resolved when the VM moves past the black halt screen and either loads the installer from the ISO or boots straight into the installed operating system. If you reach the OS desktop or the setup wizard, the boot device is now valid.
If the halt returns, the most common reasons are an ISO mounted to SATA instead of IDE, a corrupt or wrong-architecture ISO, the hard disk left out of the boot order, or a firmware-and-partition mismatch between BIOS/MBR and UEFI/GPT. Walk back through the fix that matches your setup, correct that one detail, and the machine will boot.