Gaming How-To

How to Find Coordinates and Set a Course in MOLE

Use the Navigation and Targeting Cassettes to decrypt seismic data, lock your X and Y, and drill to the right spot.

Use the Navigation and Targeting Cassettes to decrypt seismic data, lock your X and Y, and drill to the right spot.

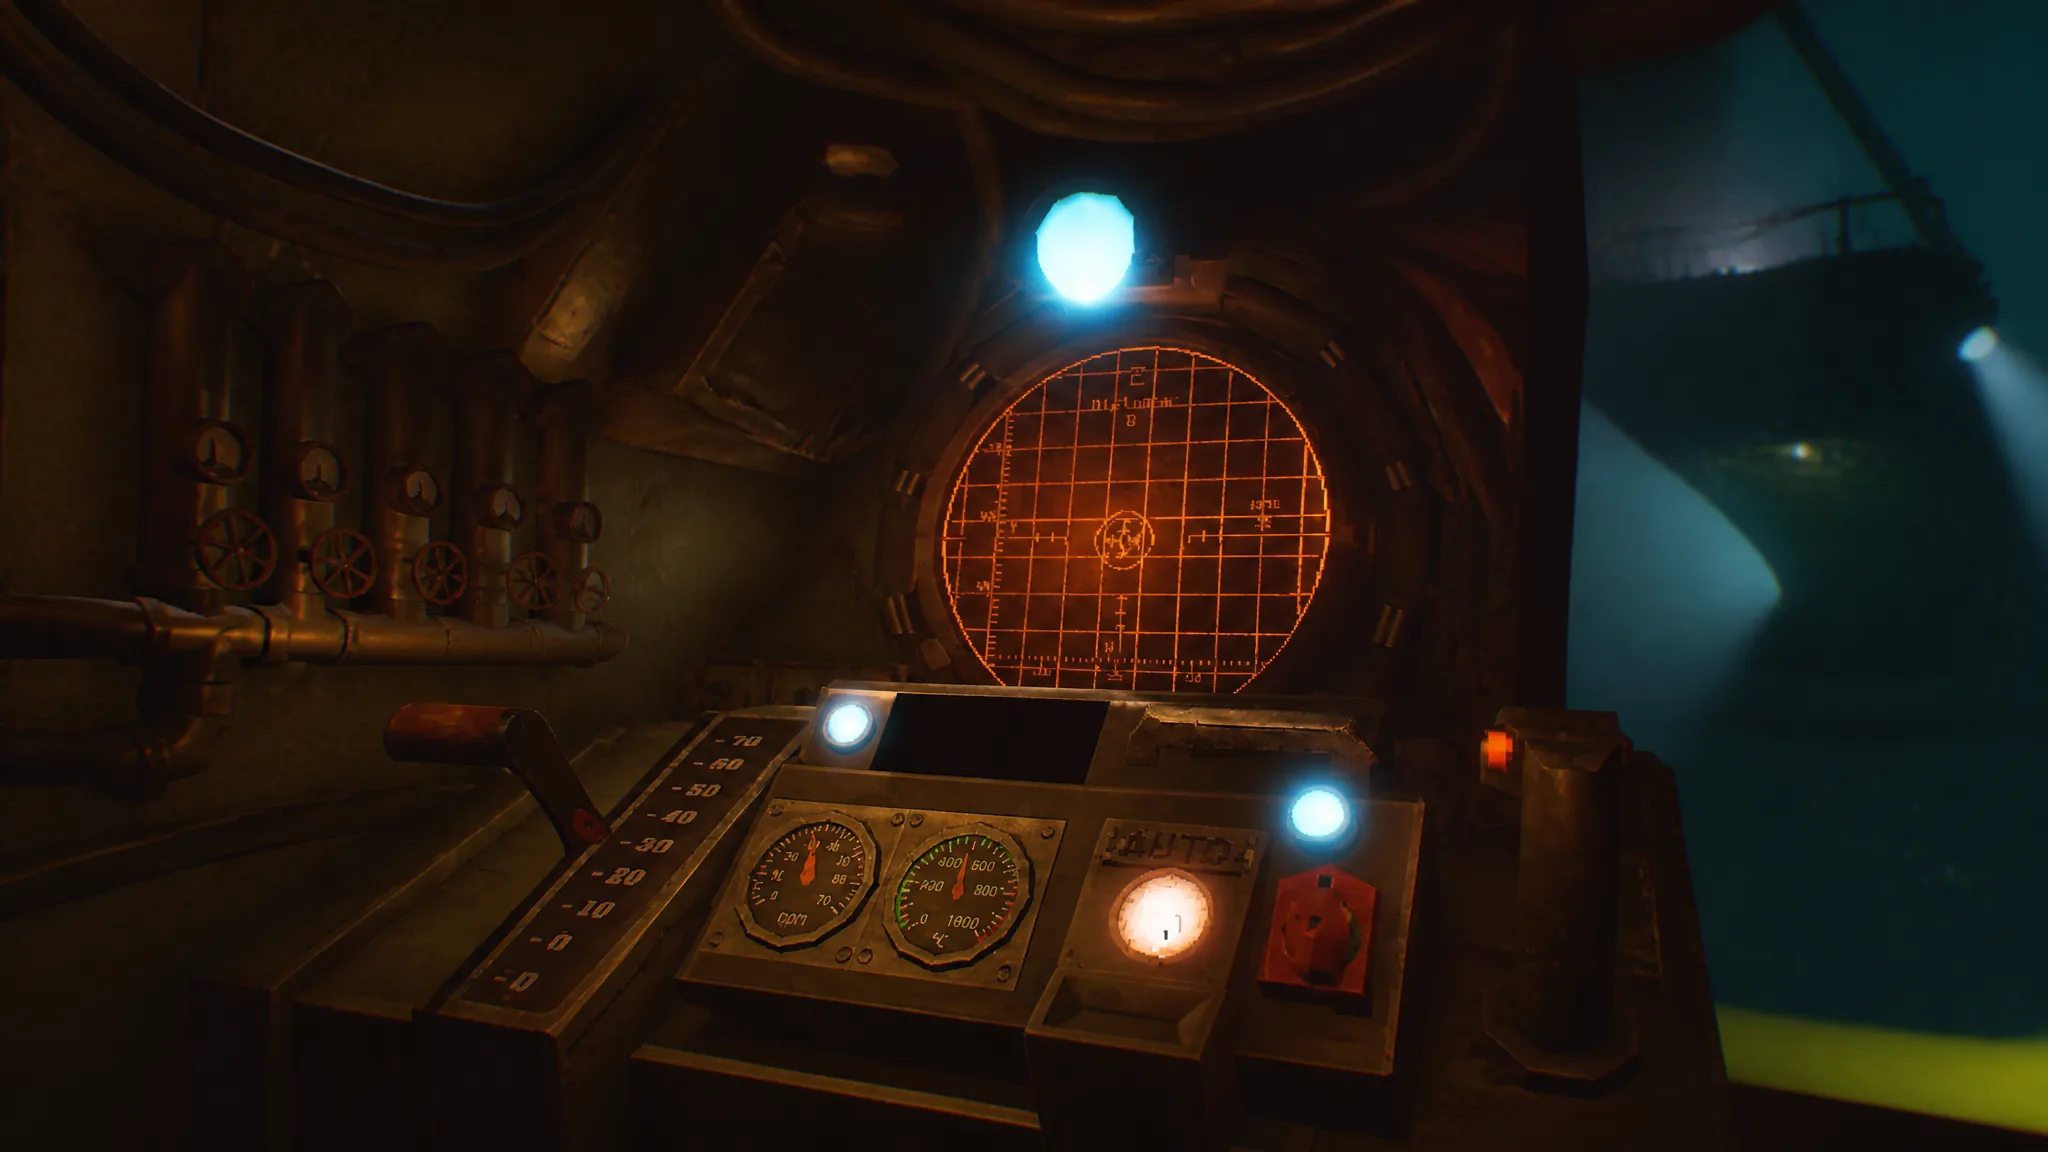
Piloting in MOLE runs on a simple loop hidden behind a wall of unlabeled levers, consoles, and cassettes. You pull seismic data, decrypt it, read off a Y and X position, and steer the drill toward a fixed destination point. Once you know which console does what, every run follows the same rhythm.

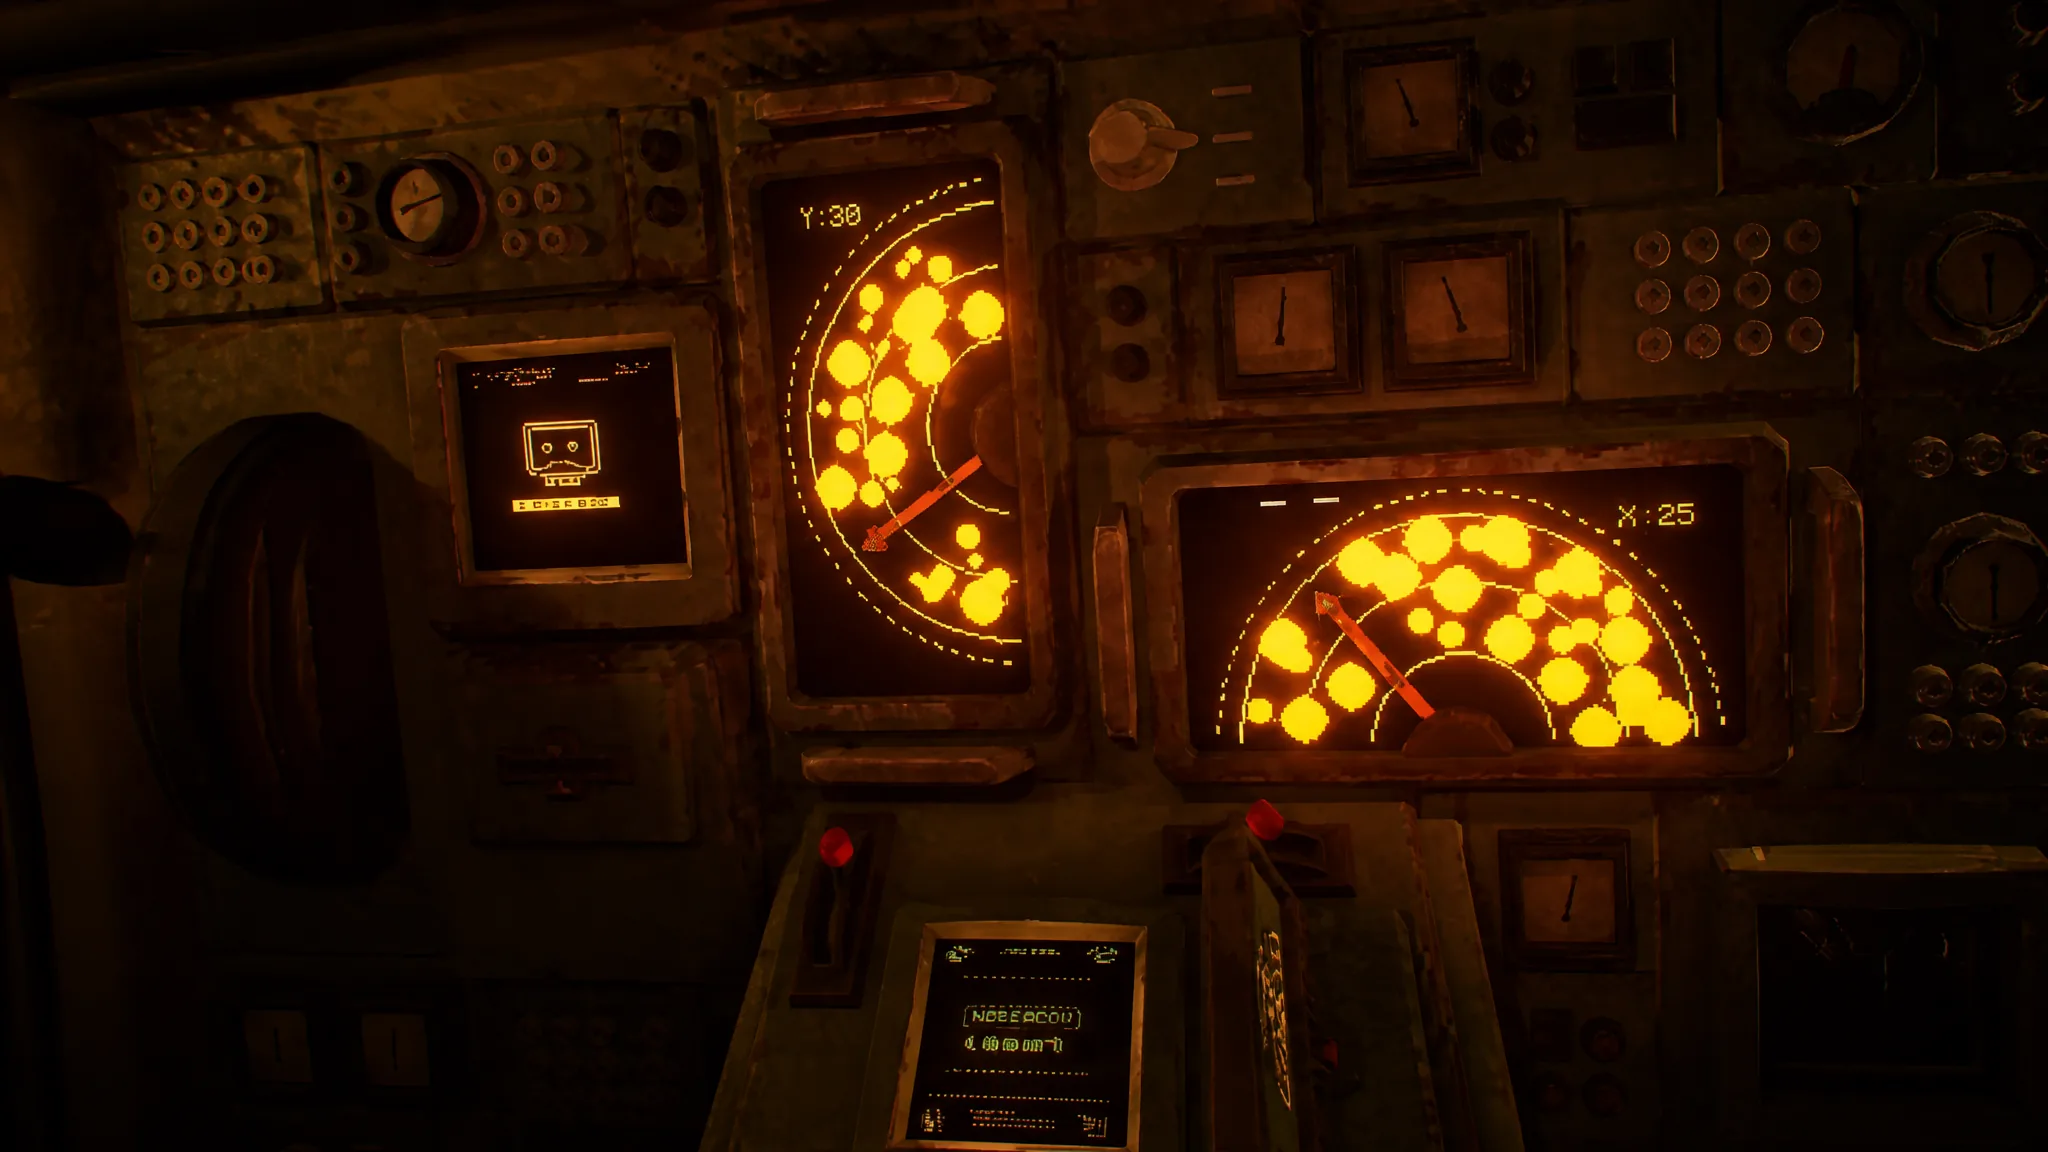
Quick answer: Upload the Navigation Cassette at the left terminal, decrypt the data at the opposite computer, reinsert the cassette into the main left-wall console to read your Y and X coordinates, then type both into the keypad at the pilot seat after pulling the red handle.


Find coordinates with the Navigation Cassette

The Navigation Cassette is the core of the early game. It collects seismic data that you decrypt and turn into a Y and X position. You start every coordinate hunt from the cockpit, working between three consoles.

Getting the X and Y coordinates in cockpit
Insert the Navigation Cassette into the terminal on your immediate left inside the cockpit. This console has a small display, a lever, and a cassette slot. Pull the lever to begin uploading the seismic data.
Wait for the upload bar to reach 100 percent, then remove the cassette. Turn to the computer terminal directly opposite and press Spacebar to decrypt the data you just pulled.
Insert the Navigation Cassette into the main console on the left wall, the one with two smaller levers. Set the levers so the arrow points through the empty spaces on the displays above. Avoid the rock clusters and aim for a clean, straight path through open space. This produces your Y and X coordinates.
Move to the pilot seat and pull out the red handle. Type both sets of numbers into the keypads to lock in your destination.

Note: There are two ways to get coordinates, but the second method only matters from day two onward. Until then, the Navigation Cassette covers everything.


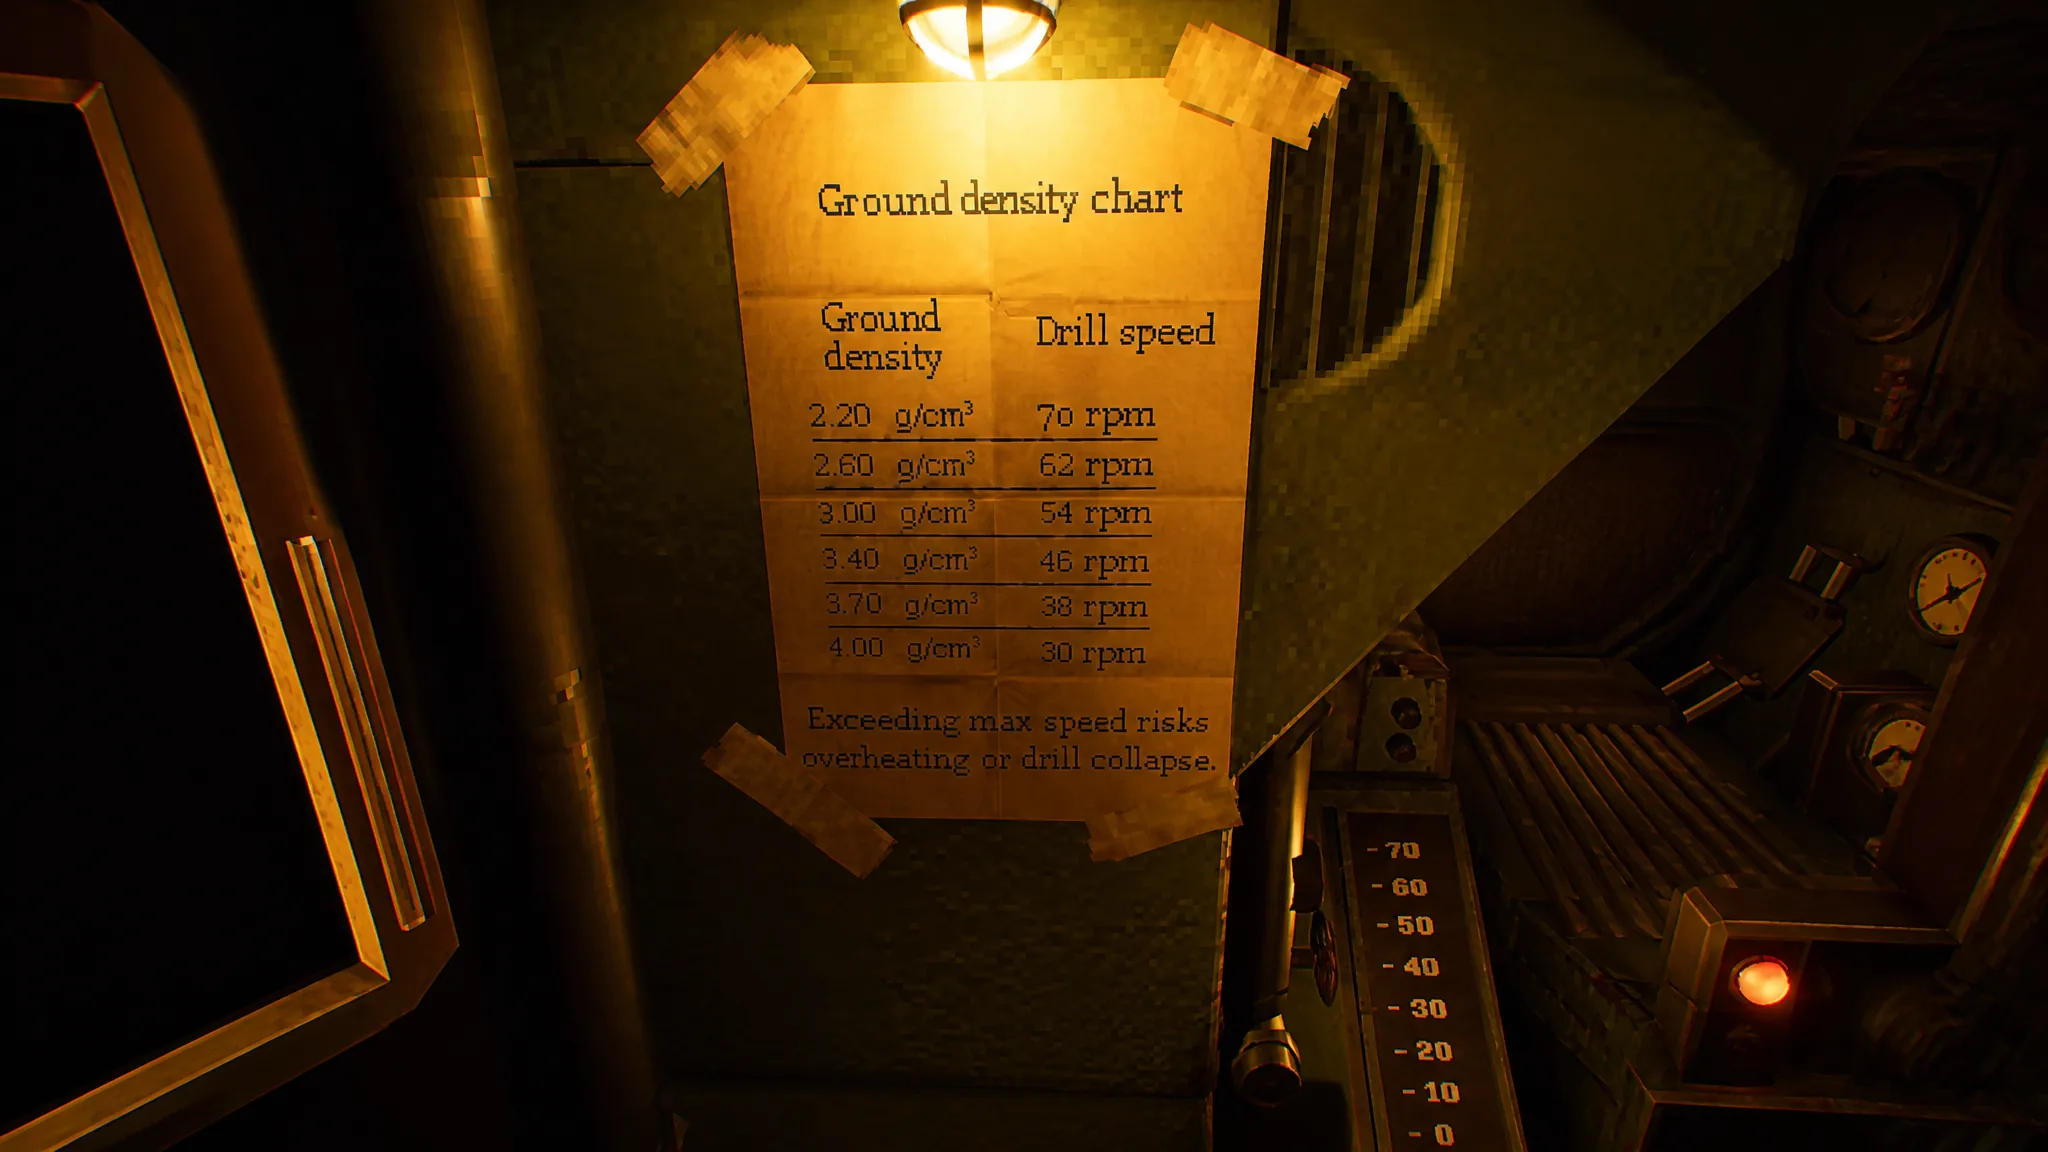
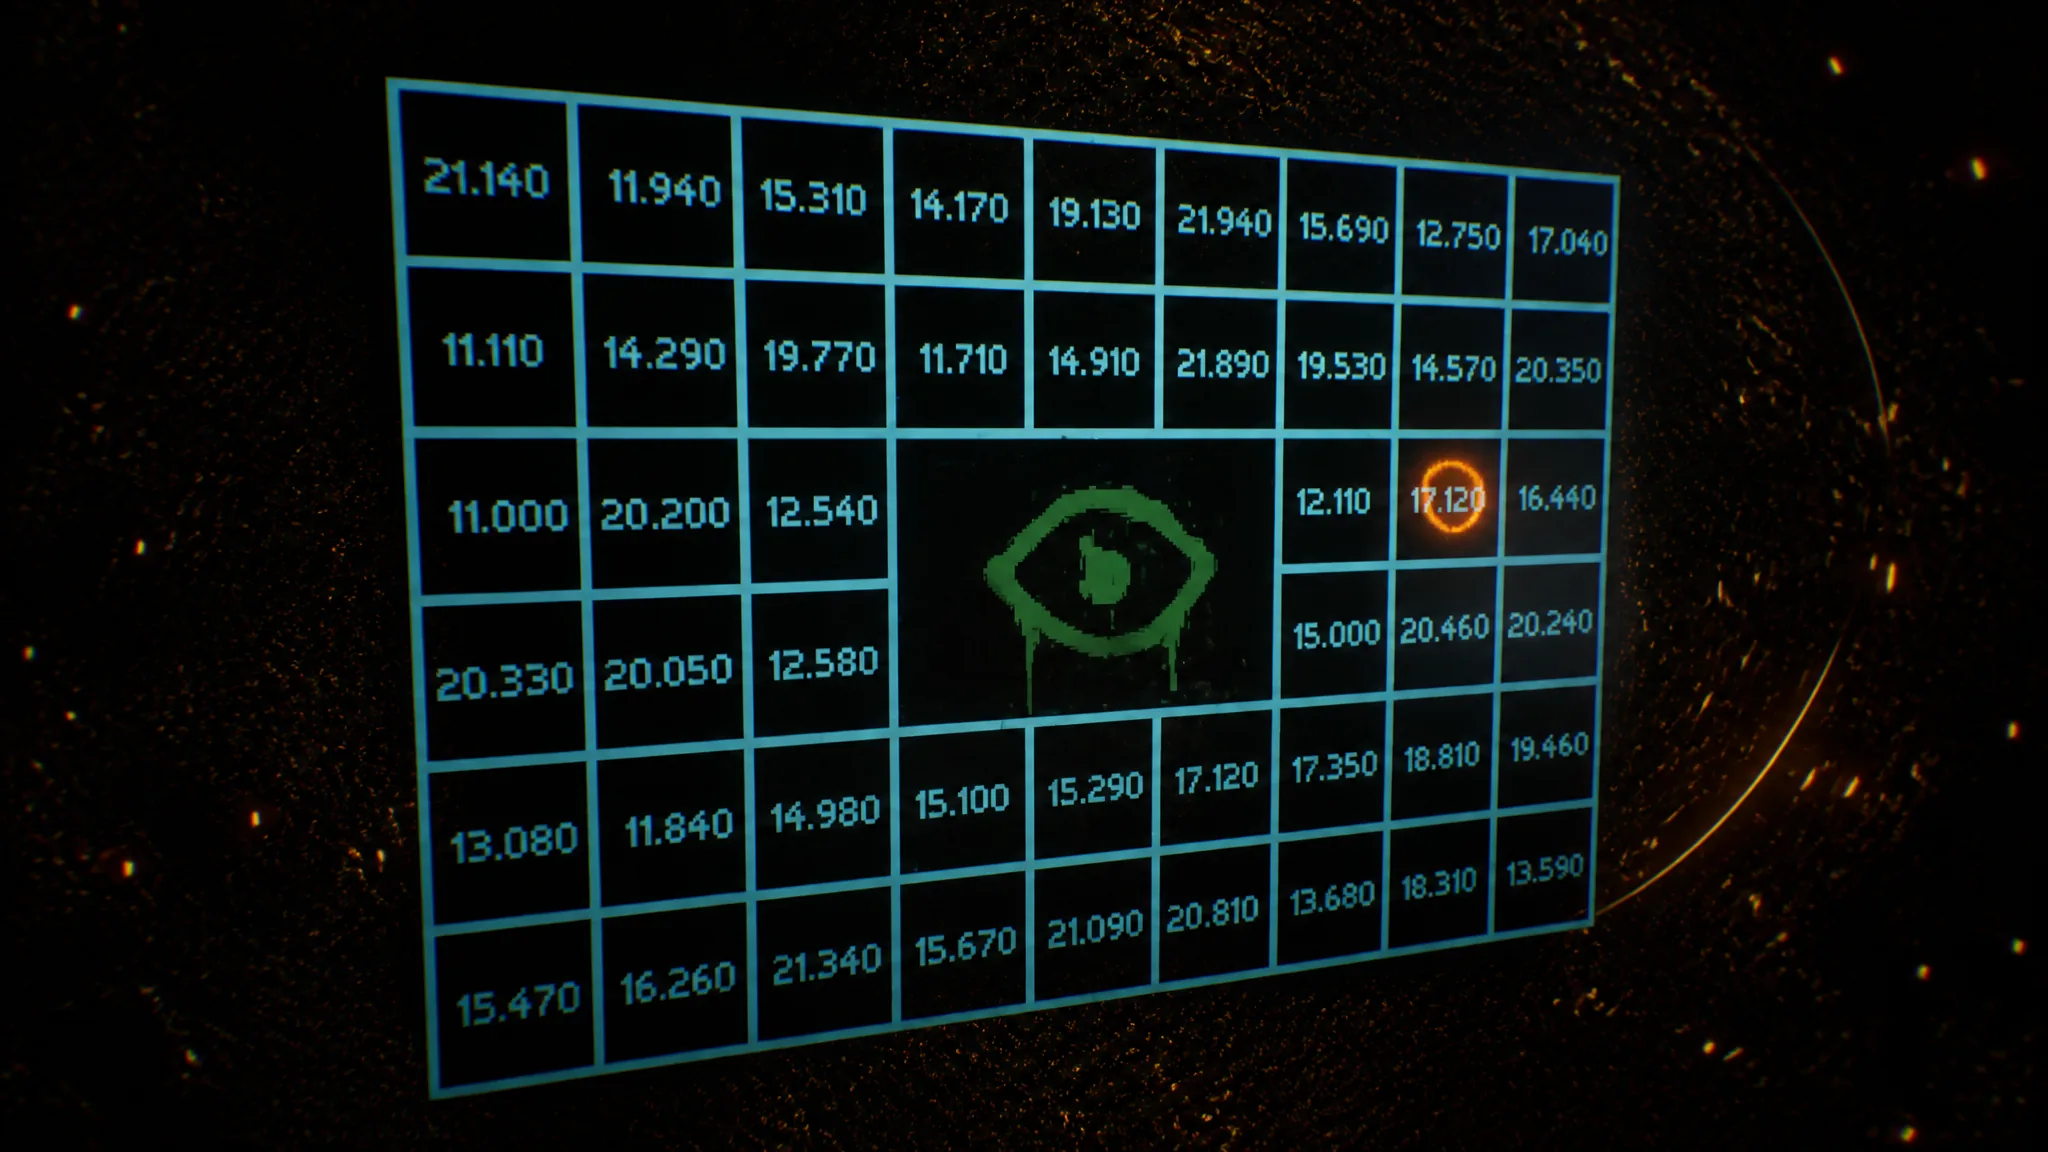
Set drill speed using the ground density chart

With coordinates entered, the next job is matching the drill speed to the terrain. The wrong speed for a given density makes for a rough descent, so this step matters on every run.

The ground density chart
Return to the two small levers and read the Terrain Density display. The value is shown in g/cm³.
Convert that g/cm³ reading using the ground density chart mounted next to the pilot seat. The density won’t always line up with an exact drill speed, so pick the closest match the chart allows and adjust from there. Check the chart again each time you receive a fresh set of coordinates.
Sit down and set the speed with the red lever on the left. Steer with the navigation stick on the right, following the arrow on the grid ahead until the piloting circle lines up with the stationary destination circle. When the option appears, press the button to switch to Auto.

Plot a course with the Targeting Cassette

The second coordinate method arrives when the Lab opens on day two. The Targeting Cassette gathers the Signal’s new data and feeds a different conversion process before you fall back to the Navigation Cassette to actually drill.

Grid with radio frequencies and White Rabbit eye at its center. Gold circles on top of 17.120 frequency
Take the crystal from the Geologist’s workstation and place it on the motherboard beneath the monitor displaying the White Rabbit Signal.
Turn off the lights and interact with the Signal. Keep staring until beams of light encircle part of your view.
Still in the dark, turn to the wall behind you and interact with the grid to read the radio frequency.
Switch the lights back on and insert the Targeting Cassette into the radio. Turn the top knob to the first two digits of the frequency and the bottom knob to the remaining three digits. Pull the small lever with the red light under it to tune the cassette.
Head back to the cockpit computer terminal to convert the tuned signal into coordinates. Select three .xyx files with Space, then press Enter twice once all are highlighted.

After that conversion, the loop resets. Load the Navigation Cassette and follow the same upload, decrypt, and read sequence to pilot the drill to its destination.


CassettePurposeWhen it matters
Navigation CassettePulls seismic data you decrypt to get Y and X coordinates and pilot the drillFrom the start, every run
Targeting CassetteGathers the Signal’s new data and tunes a radio frequency into .xyx coordinate filesAfter the Lab opens on day two

You know a run is set up correctly when the keypad accepts both coordinate values, the speed matches the density reading on the chart, and the piloting circle overlaps the stationary destination circle so the Auto button becomes available. From there, the navigator’s job is just to keep feeding clean coordinates and let the drill do the rest.