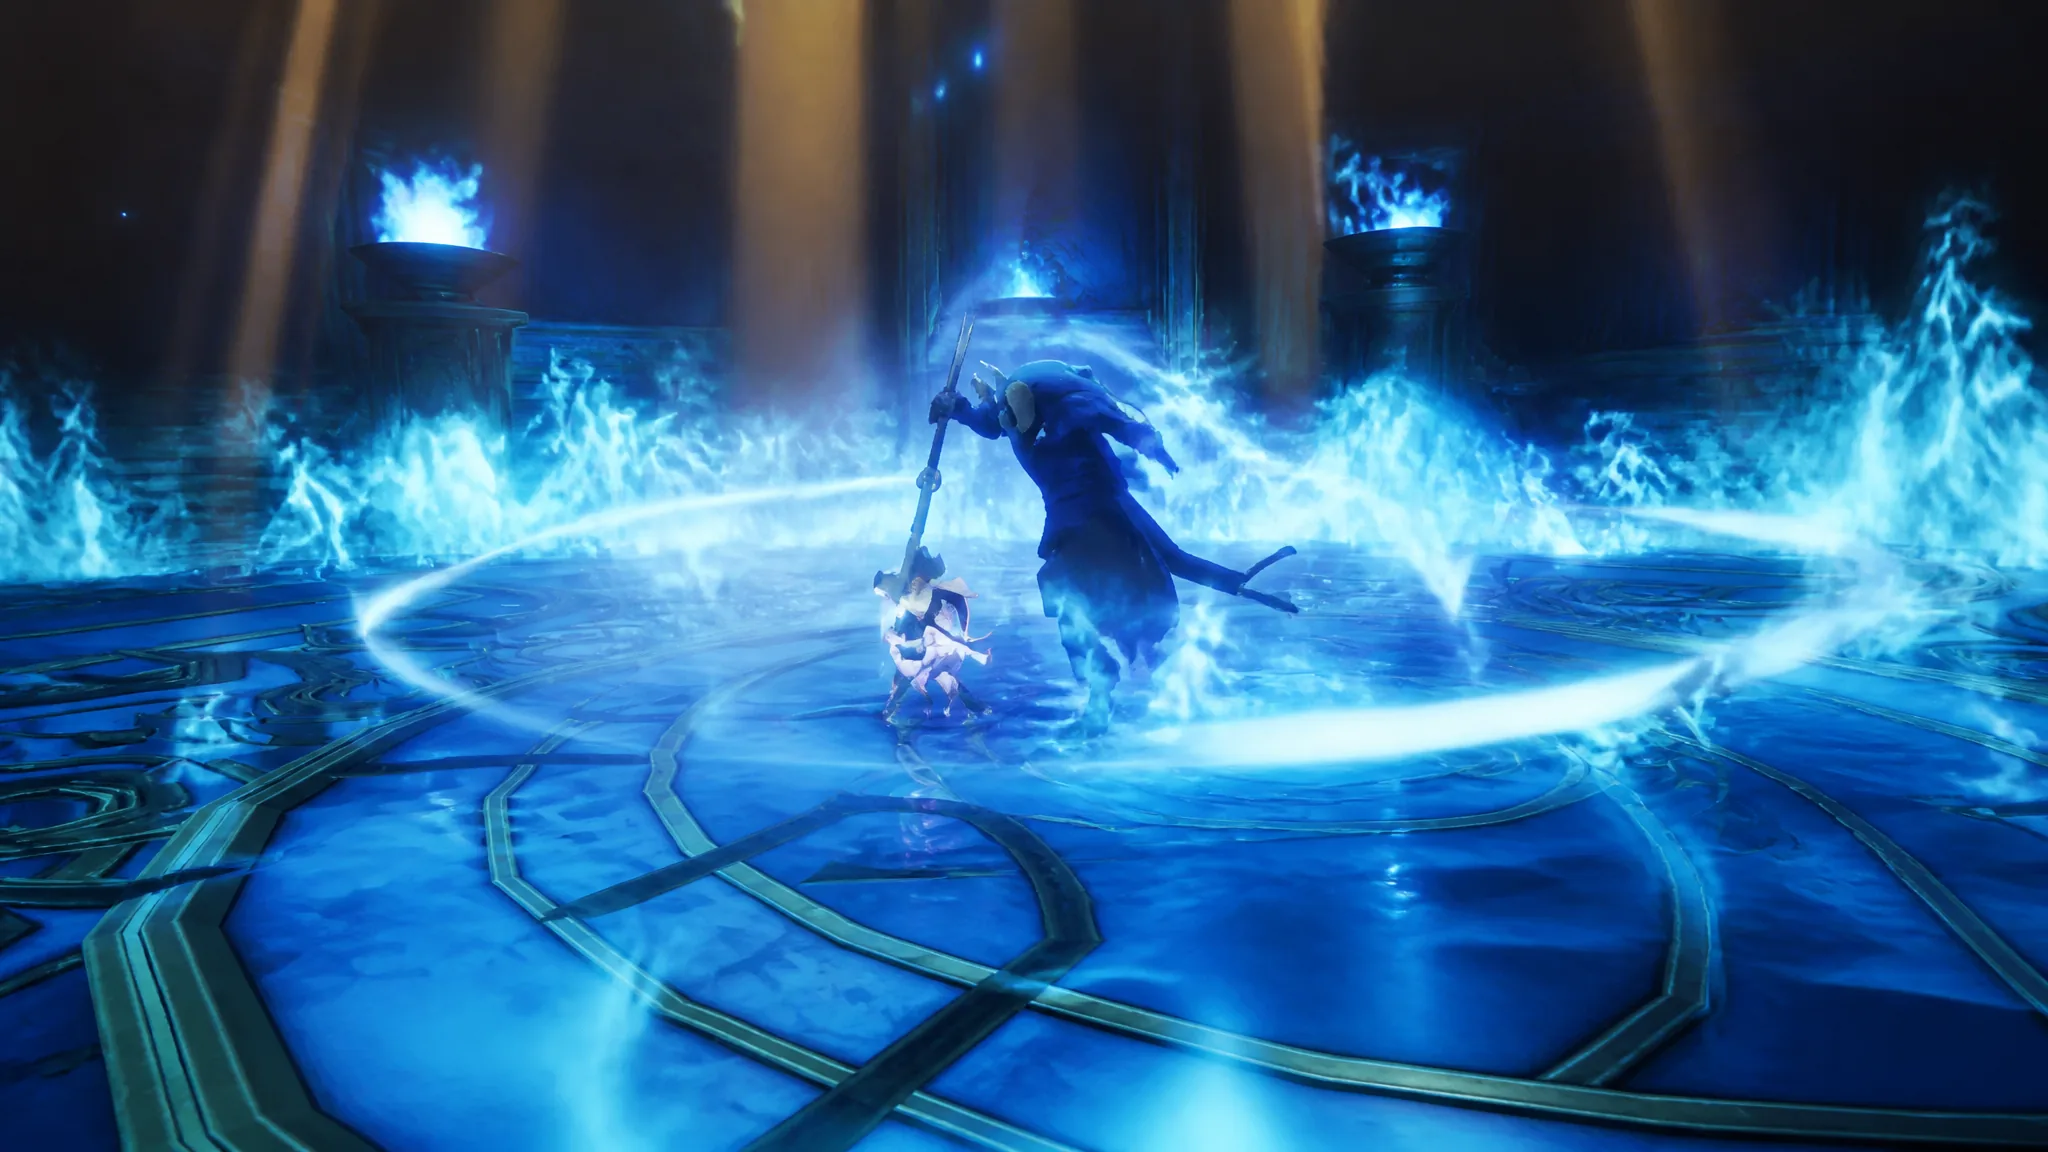
Raids are the toughest endgame activity in Sailor Piece, where you team up against the Minotaur boss for Raid Coins and a small pool of exclusive drops. The fight runs through distinct phases, including a shield mechanic that forces the whole team to scramble for levers before damage can resume.
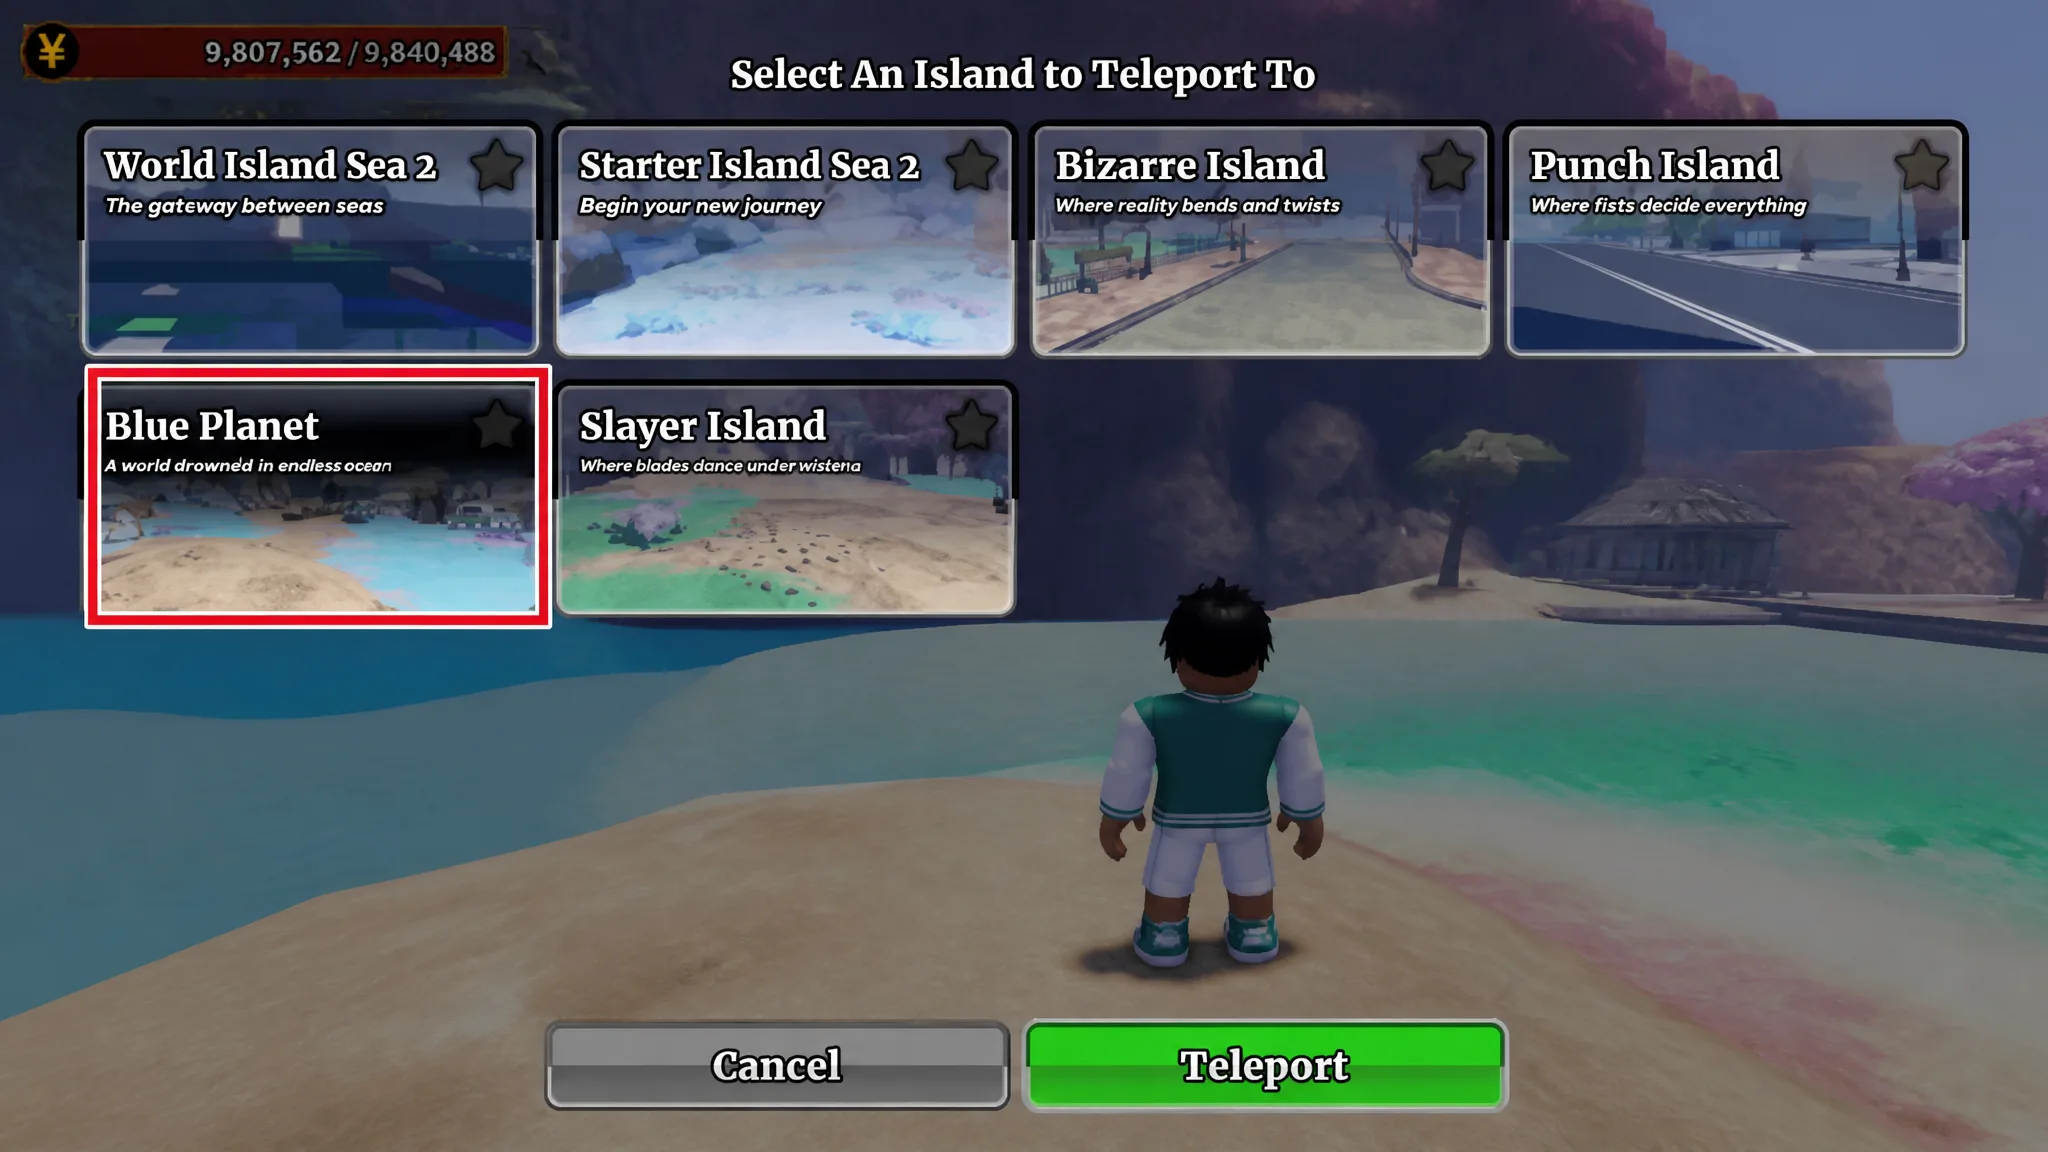
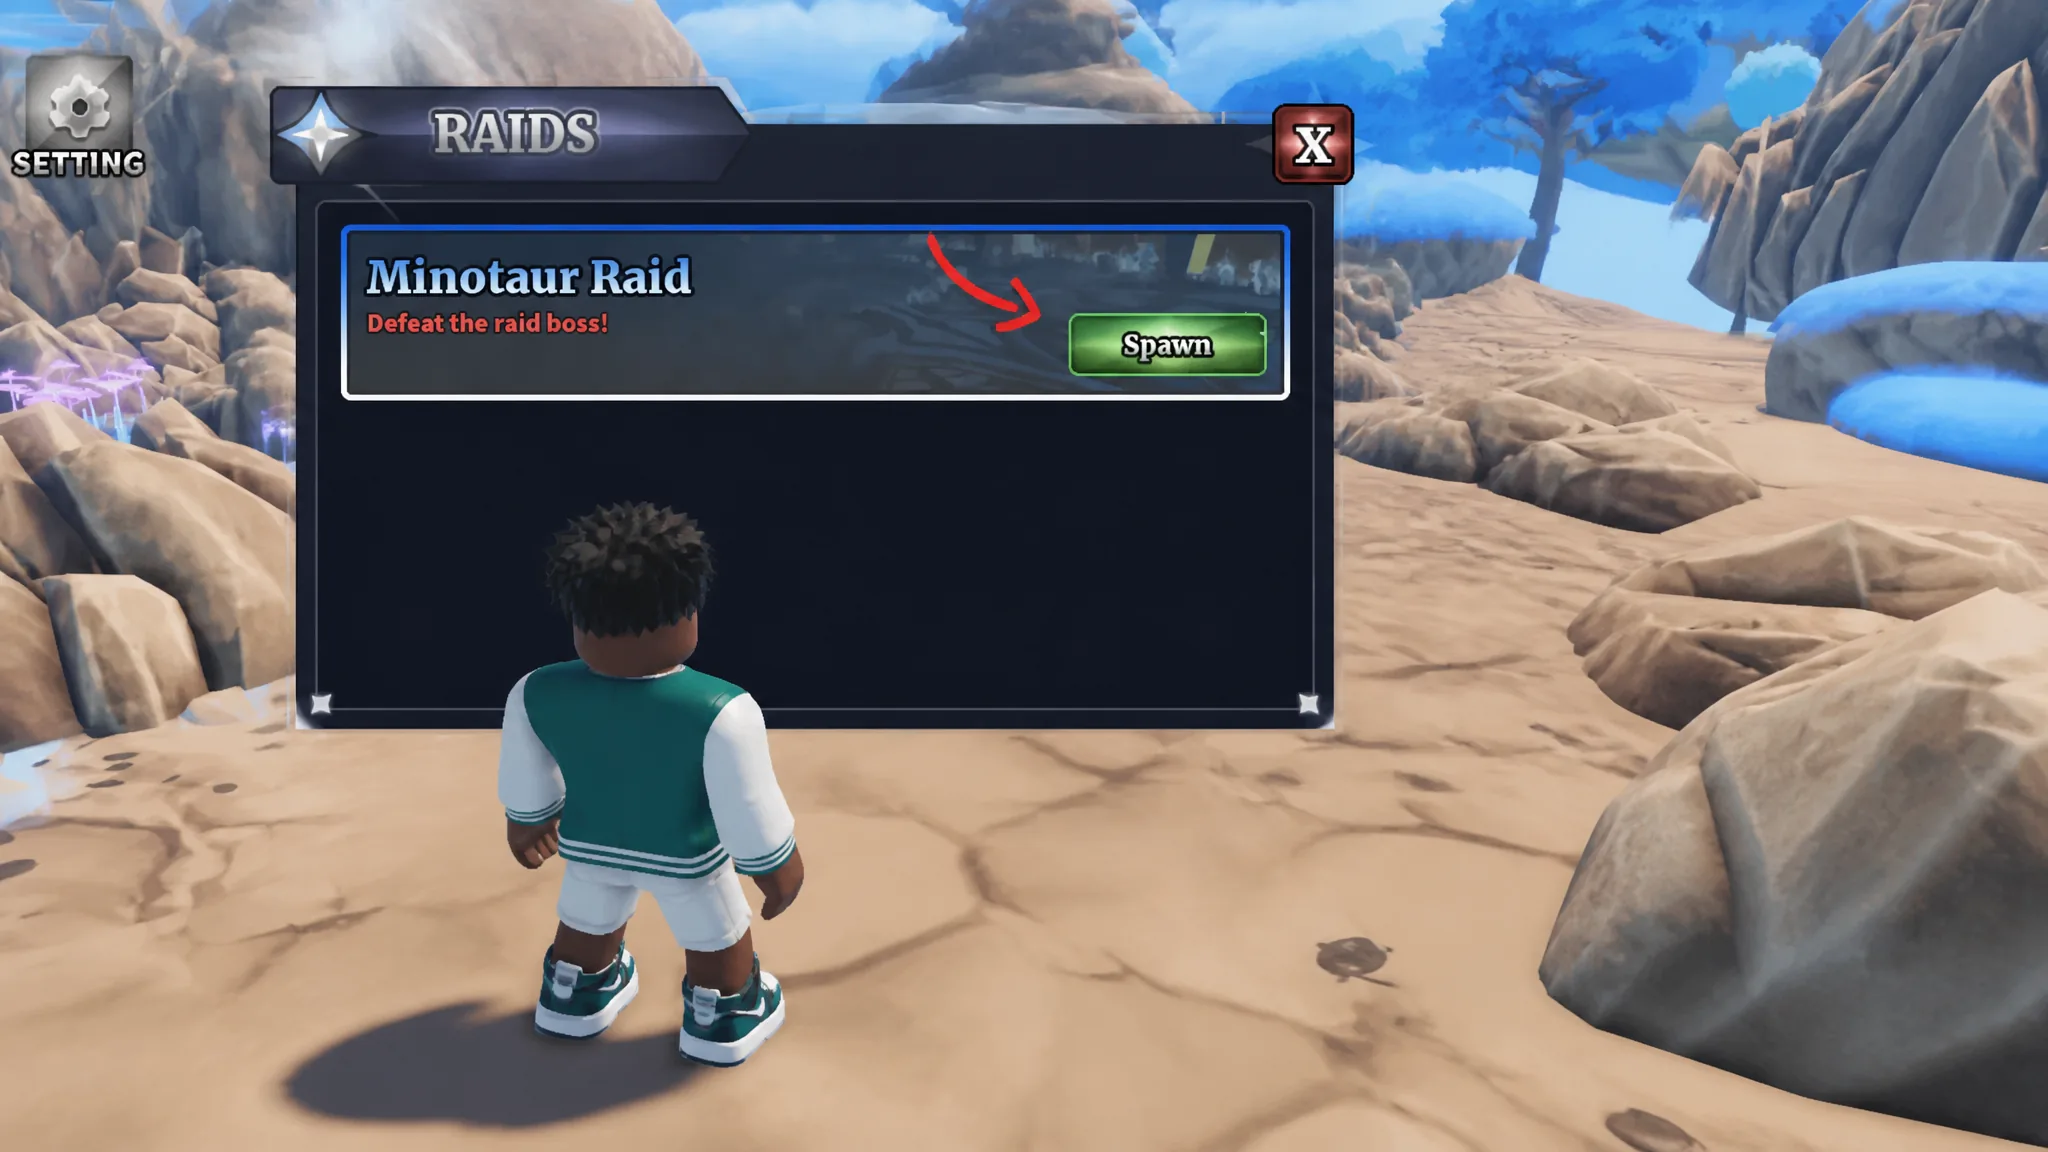
Quick answer: Unlock Sea 2, travel to Blue Planet Island, find the black and red Raid Portal NPC slightly to the right of spawn, hold E, then spend a Raid Key to spawn and start the Minotaur Raid.
Where to find Raids in Sailor Piece
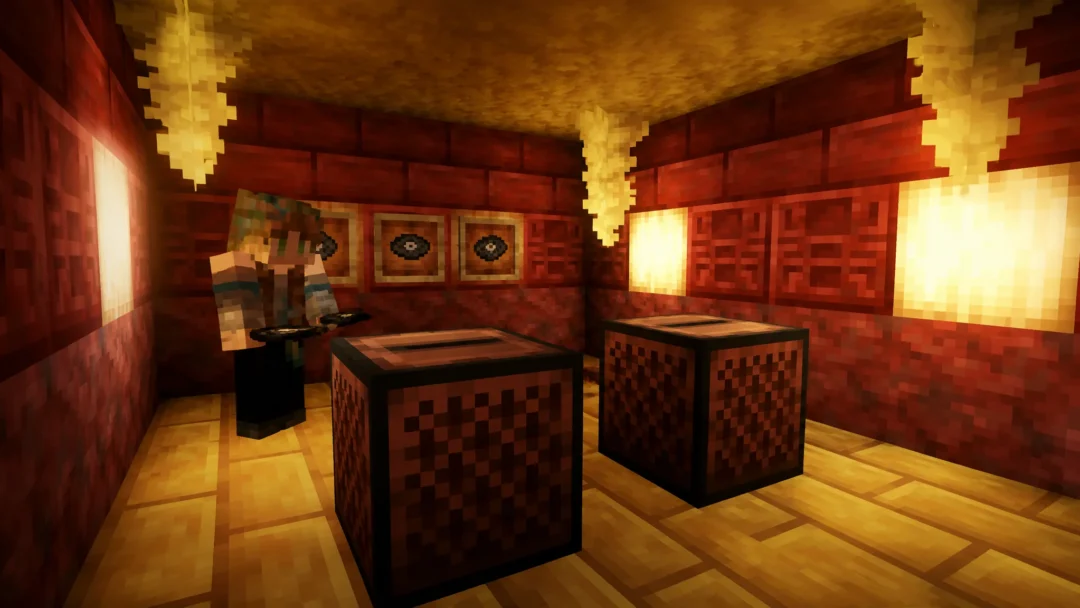
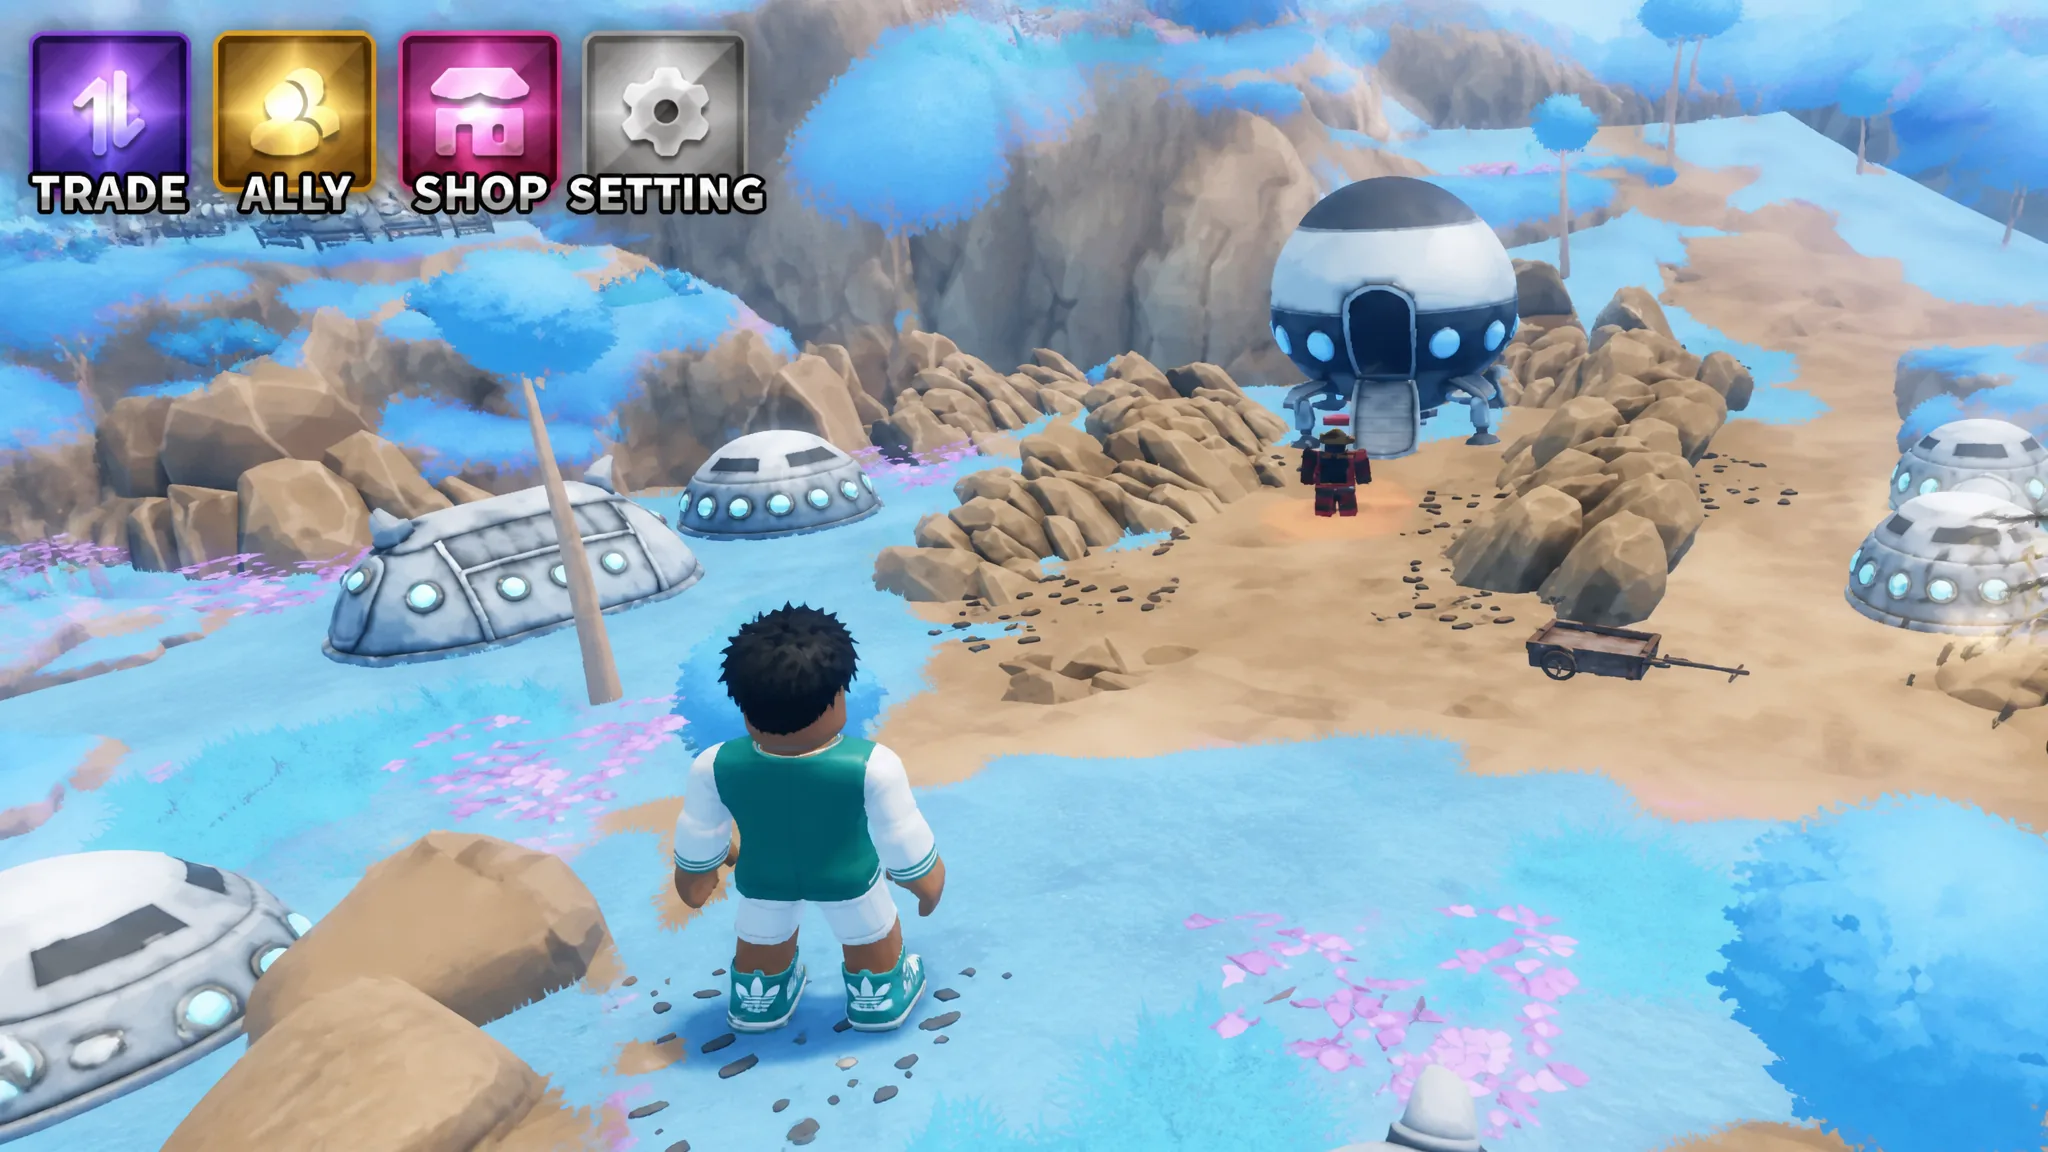
Raids live on Blue Planet Island in Sea 2. You need to unlock Sea 2 first before any of this is accessible. Once you land on Blue Planet, look slightly to the right of the spawn point, toward the back of the teleport area, and you will spot a black and red NPC standing near a capsule. That is the Raid Portal NPC.
How to get Raid Keys
You cannot enter a raid without a Raid Key, and each attempt consumes one. Keys drop from enemies in Sea 2 that fight using only their fists. Fast Ninjas on Punch Island and Spirit Fighters on Blue Planet are reliable targets for this. The drop is not guaranteed, so build up a stack before a long session rather than stopping to farm between runs.
Tip: AOE fighting styles or swords clear fist enemies in groups much faster, which speeds up key farming considerably.
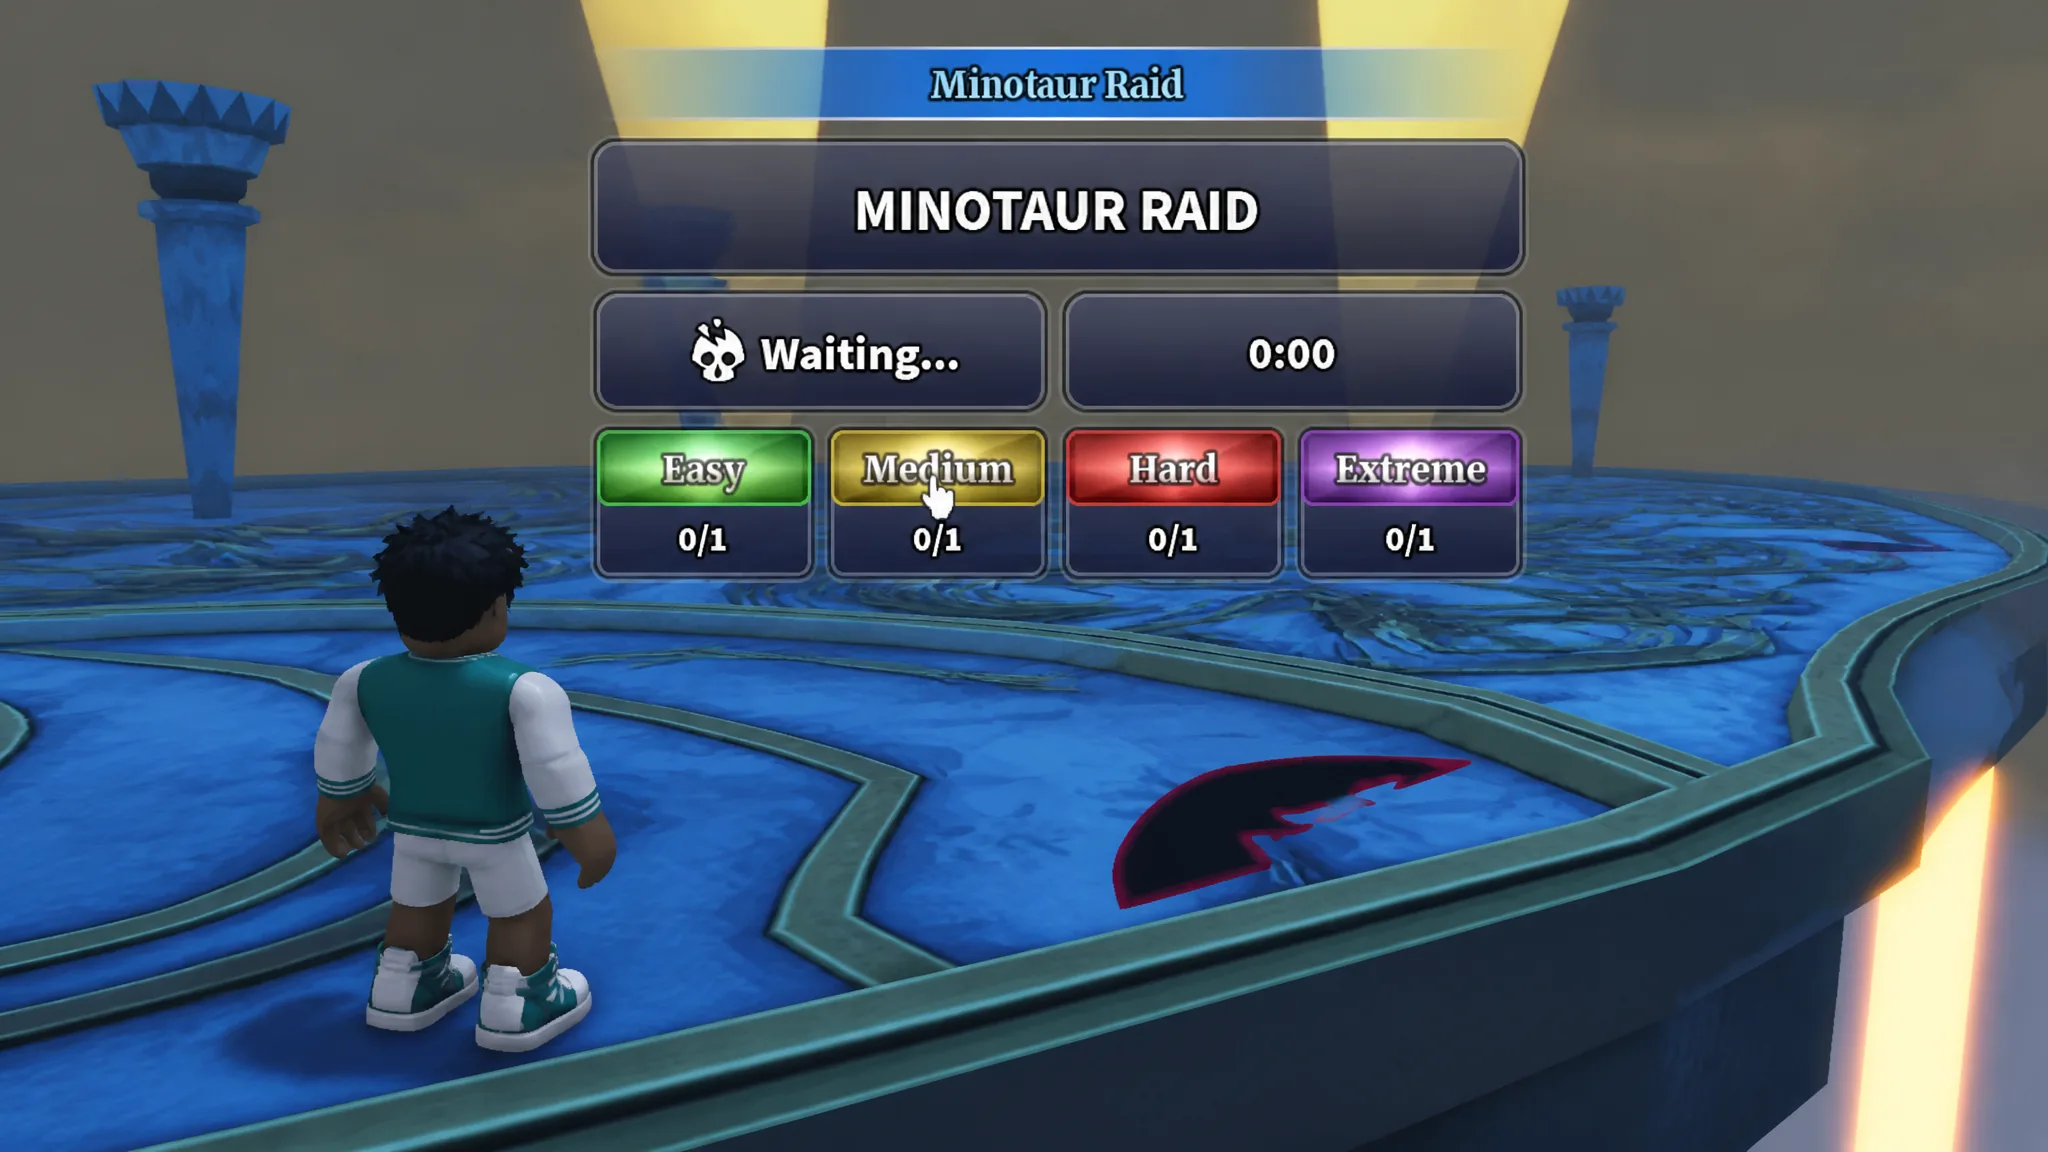
How to start the Minotaur Raid
Minotaur Raid difficulties and HP scaling
The Minotaur’s HP scales with party size, rising by roughly 35% for each additional player in the raid. More teammates make survival easier, but the total damage you need to clear the run goes up at the same time. There are four difficulty tiers, each raising the boss HP and stripping away your defensive tools.
| Difficulty | Minotaur HP | Modifiers |
|---|---|---|
| Easy | 1.5T | Damage Reduction +35%, Lifesteal -50%, Obs Haki 1 Use, IFrames 2 Uses |
| Medium | 7.5T | Damage Reduction +40%, Lifesteal Disabled, Obs Haki 1 Use, IFrames 1 Use |
| Hard | 35T | Damage Reduction +45%, Lifesteal Disabled, Obs Haki 1 Use, IFrames Disabled |
| Extreme | 100T | Damage Reduction +50%, Lifesteal Disabled, Obs Haki Disabled, IFrames Disabled |
How to beat the Minotaur Raid phases
Phase 1: Open damage window
At the start, the Minotaur uses no special attacks. This is the safest and cleanest window to deal damage, so unload your strongest burst abilities and cooldowns right away. Do not hold them back, because the later phase is far more punishing.
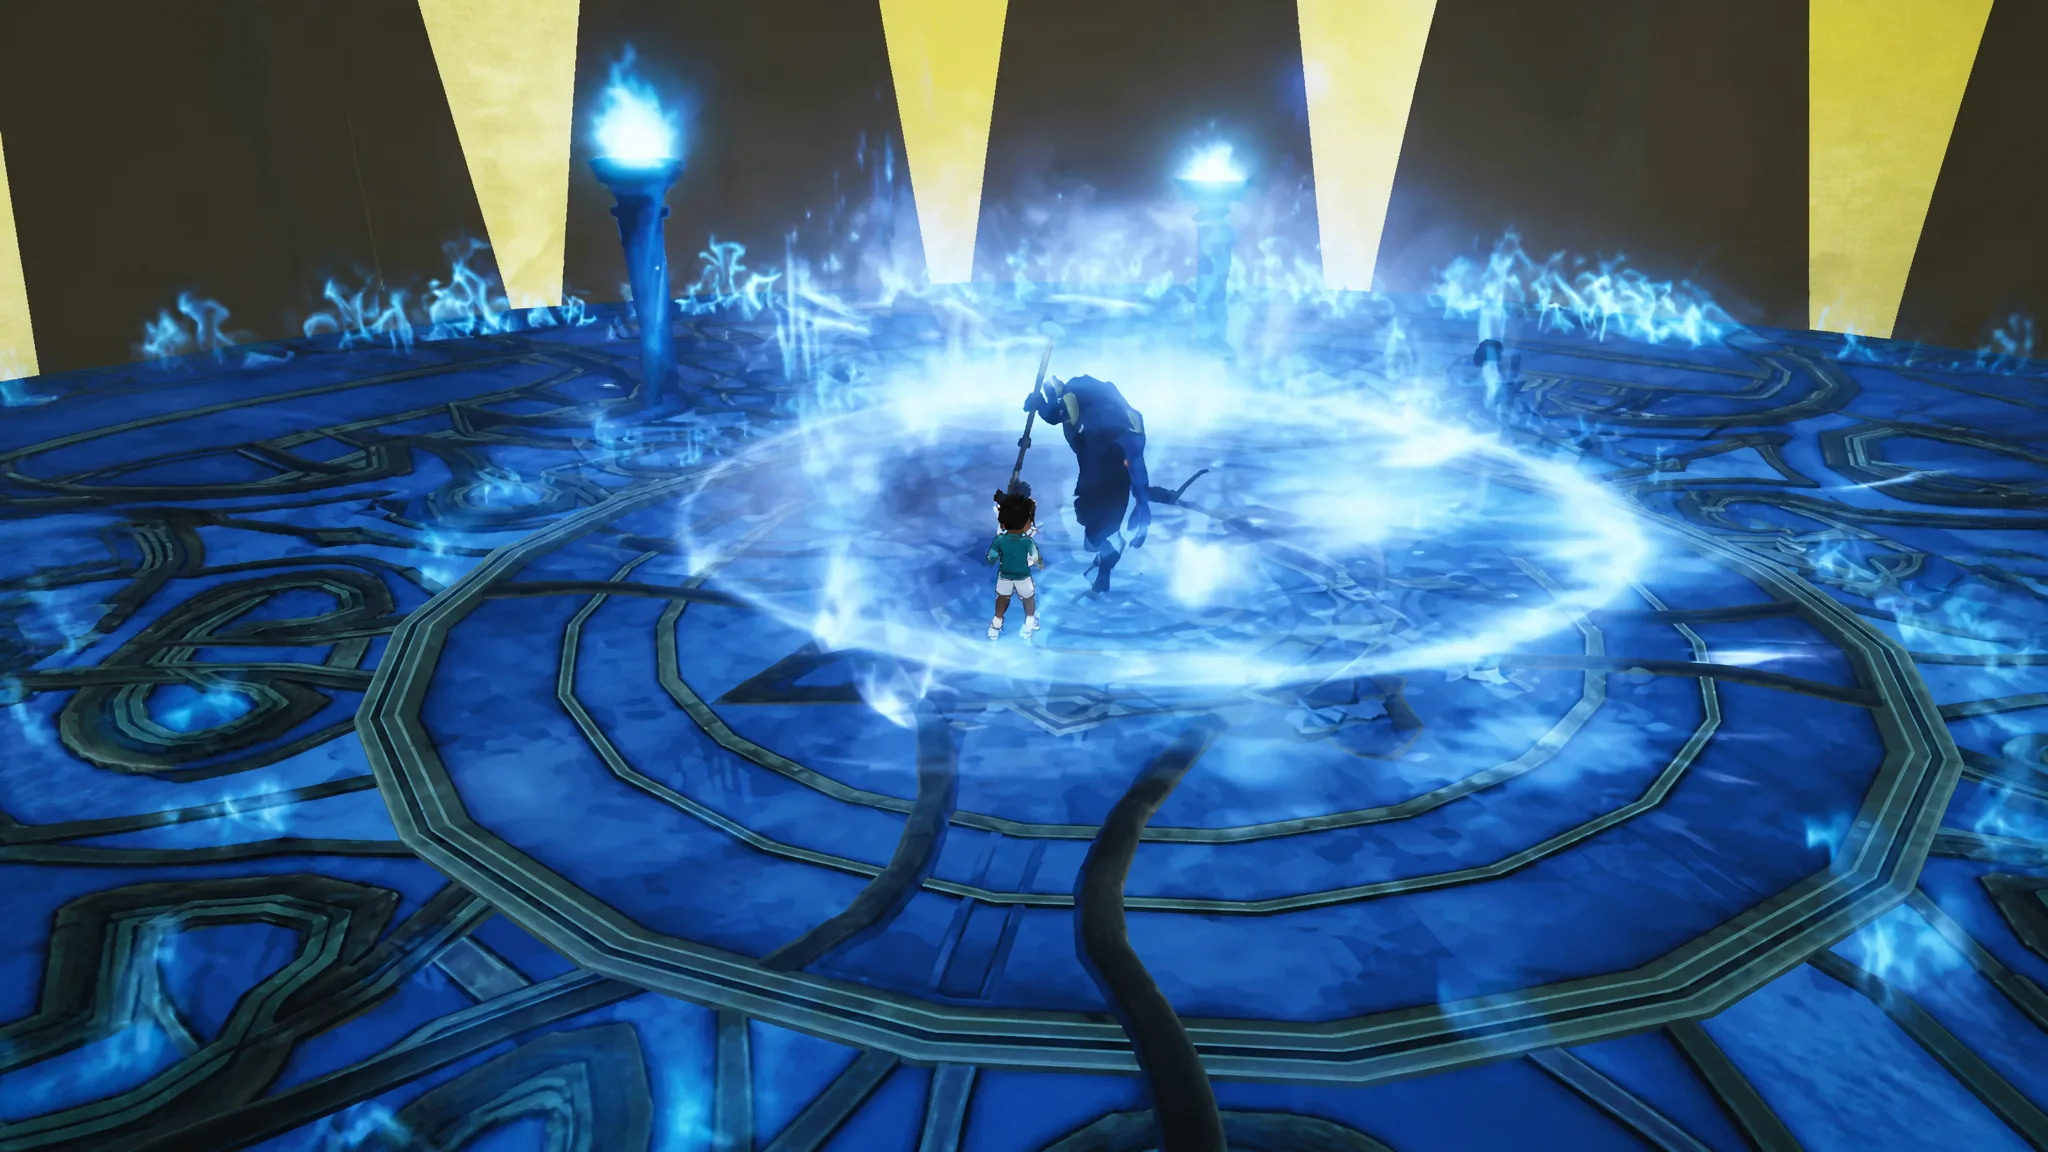
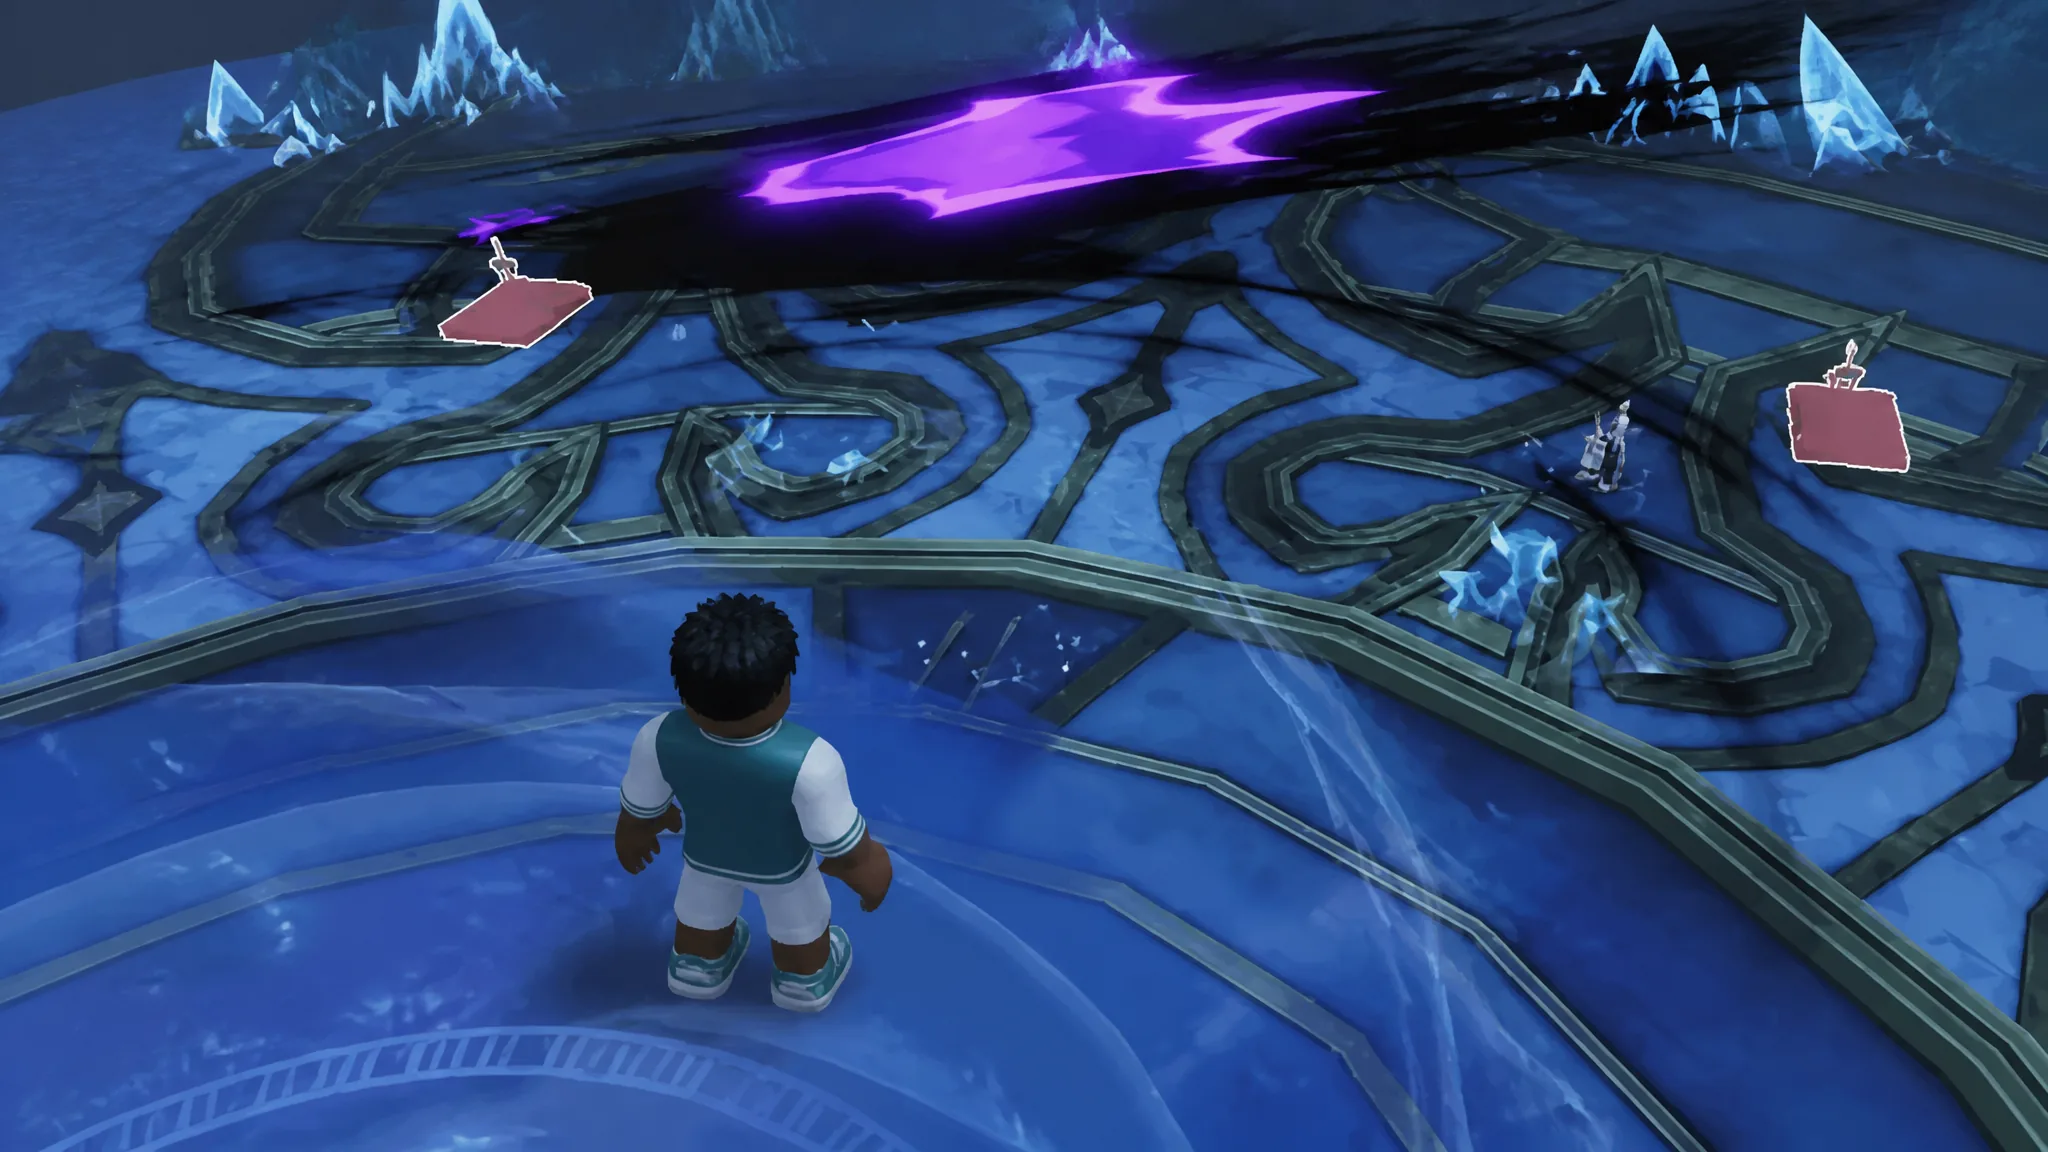
Shield Phase: Pull every lever
When the Minotaur drops to around 50% HP, it moves to the center of the arena and raises a shield that blocks all incoming damage. Between three and six levers spawn randomly around the arena, and your team must pull every one of them to break the shield. If the shield stays up too long, the boss heals 15% HP every 30 seconds, which can drag the run out badly. Split lever duties across teammates so they all get pulled quickly.
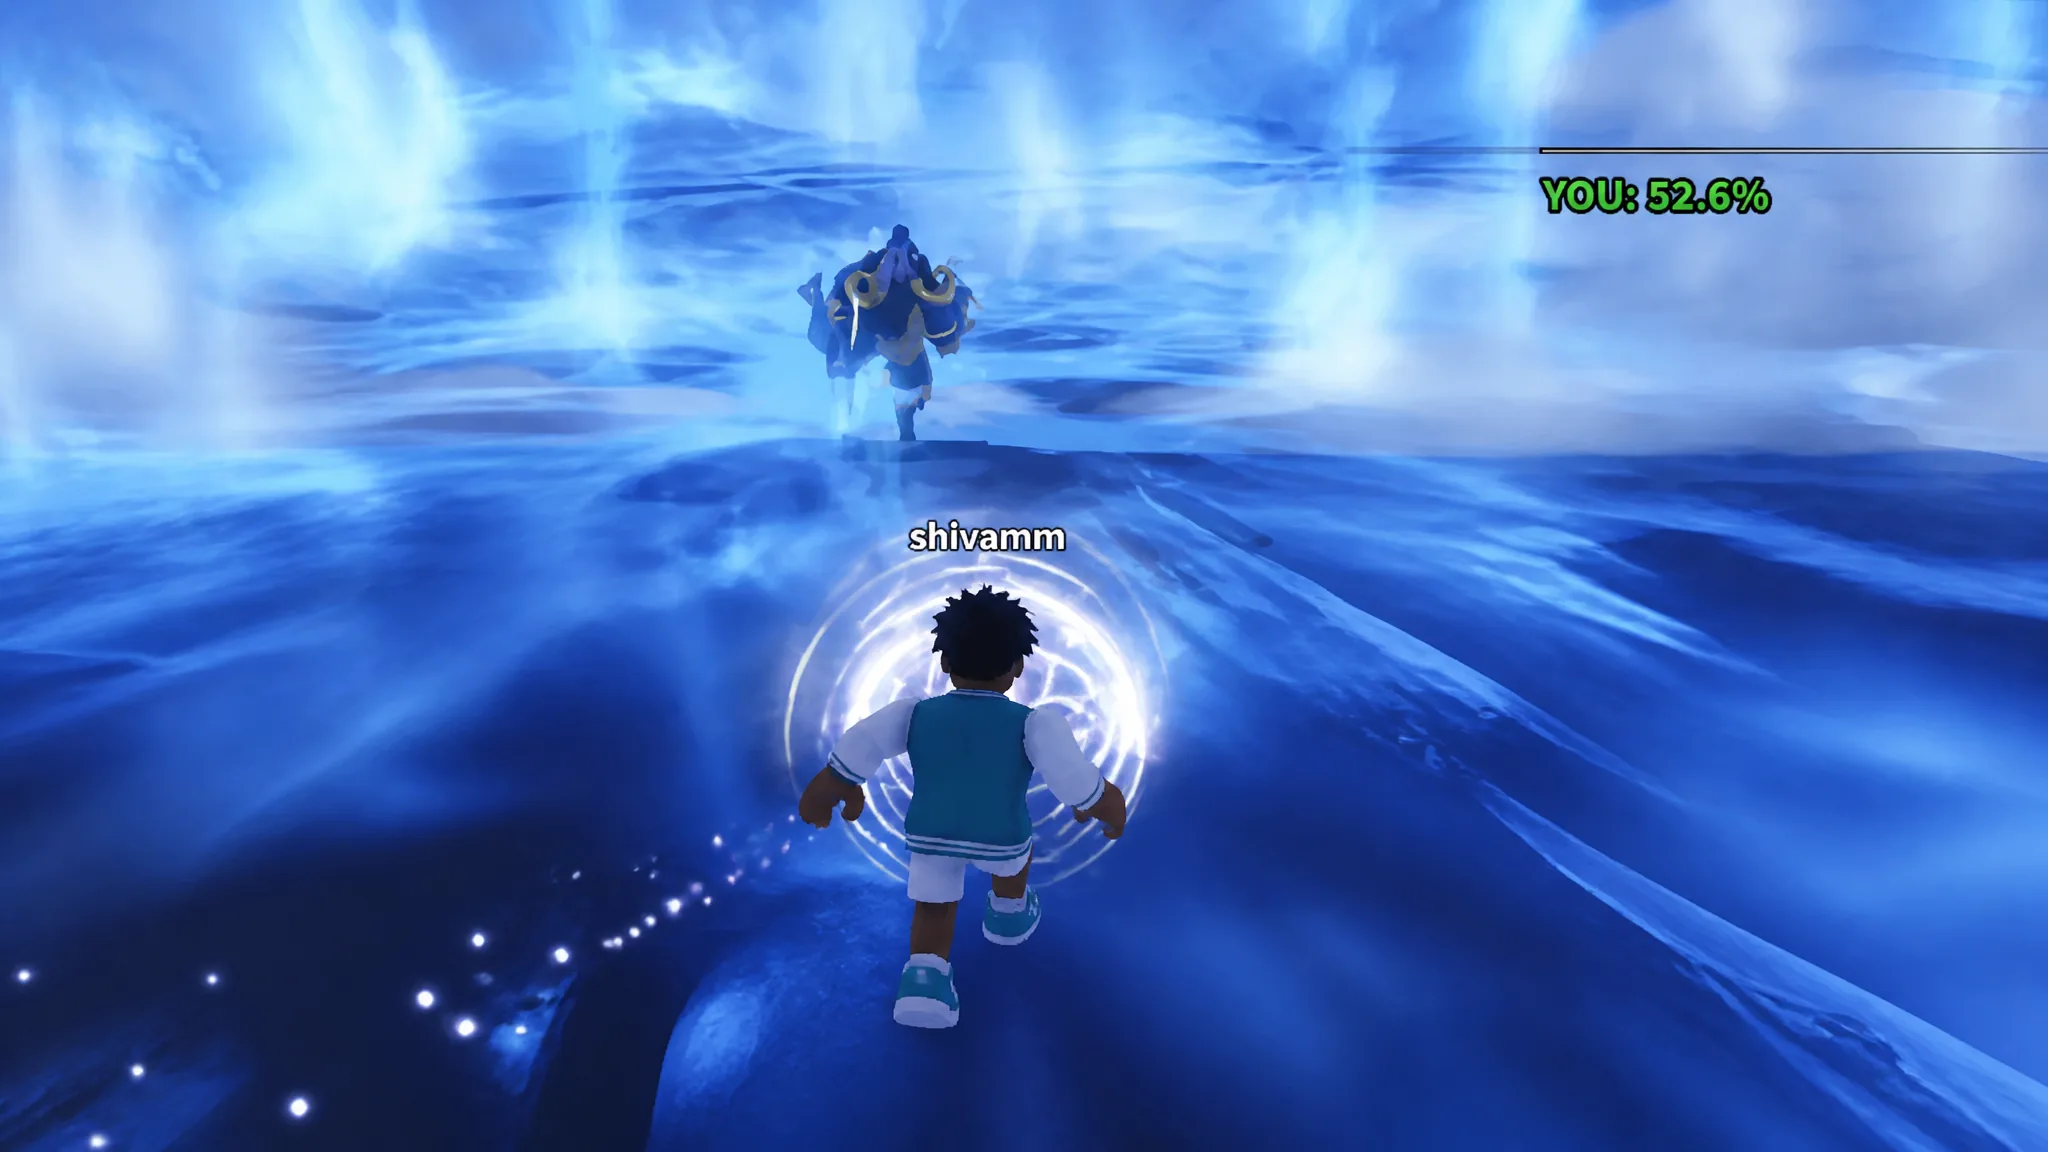
Phase 2: Keep your distance
Once the shield breaks, the Minotaur gains a new set of high-damage attacks that can wipe players who stand too close, sometimes in a single hit. Ranged abilities are the safest way to keep dealing damage here. If your build is melee only, you will need to dodge carefully and time your Invincibility Frames, which matters even more on Hard and Extreme where those frames are disabled entirely. The moment the shield breaks is also a strong damage window, so save a heavy cooldown for it.
Tips to clear Raids faster
- Run a high-damage build before attempting Hard or Extreme, since the jump from Medium to Hard is steep.
- Bring ranged abilities for Phase 2 to avoid one-shot melee range attacks.
- Assign teammates to arena zones ahead of time so all levers get pulled at once.
- Save your strongest cooldowns for Phase 1 and the instant the shield breaks.
- Farm Easy and Medium first to build Raid Coins while your loadout improves.
Minotaur Raid drops
Defeating the Minotaur gives a chance at a handful of exclusive drops. The Dual Wielder sword is the standout, since it cannot be obtained anywhere else in the game. The Dual Swordsman Title carries a 100 pity counter, so it is guaranteed once you hit that threshold without it dropping.
| Item | Drop Rate |
|---|---|
| Dual Swordsman Title | 0.85% – 2.5% (100 Pity) |
| Dual Outfit | 8% |
| Dual Wielder | 2% |
| Celestial Aura | 1.5% |
Raid Coin shop items and prices
Every clear earns Raid Coins, which you spend at the Raid Merchant NPC back on Blue Planet. The shop stocks chests, crates, keys, rerolls, and two of the rarer raid rewards directly. The Celestial Aura is the most expensive purchase at 2,500 Raid Coins, while Dual Outfit can be bought outright for 500.
| Item | Price |
|---|---|
| Common Chest | 1 Raid Coin |
| Rare Chest | 3 Raid Coins |
| Epic Chest | 9 Raid Coins |
| Legendary Chest | 15 Raid Coins |
| Mythical Chest | 50 Raid Coins |
| Secret Chest | 400 Raid Coins |
| Aura Crate | 500 Raid Coins |
| Cosmetic Crate | 650 Raid Coins |
| Boss Key | 3 Raid Coins |
| Dungeon Key | 3 Raid Coins |
| Tower Key | 7 Raid Coins |
| Trait Reroll | 3 Raid Coins |
| Race Reroll | 3 Raid Coins |
| Clan Reroll | 7 Raid Coins |
| Bloodline Stone | 11 Raid Coins |
| Dual Outfit | 500 Raid Coins |
| Celestial Aura | 2,500 Raid Coins |
Light Raid and the Bearer of Light title
A second raid, the Light Raid, works differently from the Minotaur fight. After you select it from the Raid Portal NPC menu and hand over a Raid Key, you are dropped into a series of stages to complete before reaching the boss. The combat itself is manageable with a solid setup, so the real challenge is chasing a rare drop rather than surviving the fight.
Beating the Light Raid boss gives a small chance at the Bearer of Light title, which is needed to fully progress Light V2 mastery. The base drop rate is low, but the raid has a pity system. Defeat the boss 125 times without the title and you are guaranteed to receive it on that run.
For now, the Minotaur and Light Raids are the two available endgame raids. Once you have the phase timing down and your team handles levers cleanly, runs settle into a fast, repeatable loop for farming coins and drops.