Dokkōdō drops players into a punishing slice of feudal Japan inspired by the manga Vagabond, asking you to walk the road of the samurai with a blade in hand and almost nothing else. The pace is deliberate, the duels are unforgiving, and almost every system, from how you draw your katana to which spirit you cultivate, rewards patience over button mashing. New players who arrive expecting a casual hack-and-slash will get cut down quickly, but those willing to study the controls, learn a stance, and earn their mon will find one of the most mechanically rich samurai sandboxes on Roblox.
Quick answer: Spawn in Kyoto at the Inn, talk to Yoshioka Seijuro and Takuan Soho to start the Vagabond storyline, then storm the Yoshioka Dojo to unlock your first katana stance. Use the in-game settings (top-left corner) to view your controls before stepping into a fight.
You can jump into the game on Roblox via the official Dokkōdō experience page, and the community hub for patch notes, clan recruitment, and bug reports lives on the official Discord server.
Getting Started in Kyoto

You begin at the Inn/Bathhouse in Kyoto wearing a Ragged Kimono and carrying a bokken. From here, head into the main square to meet Yoshioka Seijuro, who introduces you to the world’s tone, and then visit the Teahouse for a cup of tea, which doubles as a stamina recovery buff for your next scrap. Takuan Soho, sitting at the inn, is the anchor for the Vagabond storyline and will point you toward both your “Way” (your weapon path) and your “Spirit” (your passive tree).
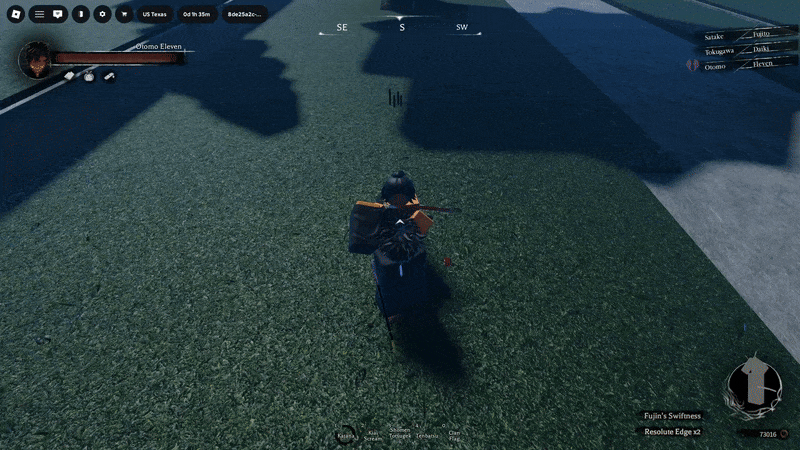
Controls are displayed in the in-game settings at the top-left of the screen. A few quality-of-life toggles worth knowing right away:
| Input | Action |
|---|---|
| P | Toggle hat vanity (includes armor helmet) |
| Shift + P | Toggle free camera mode |
| Q | Dodge (Perfect Dodge with parry-timing) |
| Hold M2 then M1 | Chamber — a piercing attack confirmed by a blue glint |
Core Combat Mechanics
Combat in Dokkōdō revolves around a small number of high-skill systems that interact constantly. Master these before worrying about gear or stance trees.
Chambers
Hold M2 and then tap M1 to perform a chamber. This is an M1 attack that powers through enemy swings, letting you trade favorably or interrupt their combo. A blue glint on your character confirms you input it correctly. Chambers can still be parried, so do not treat them as an “I win” button against an alert opponent.
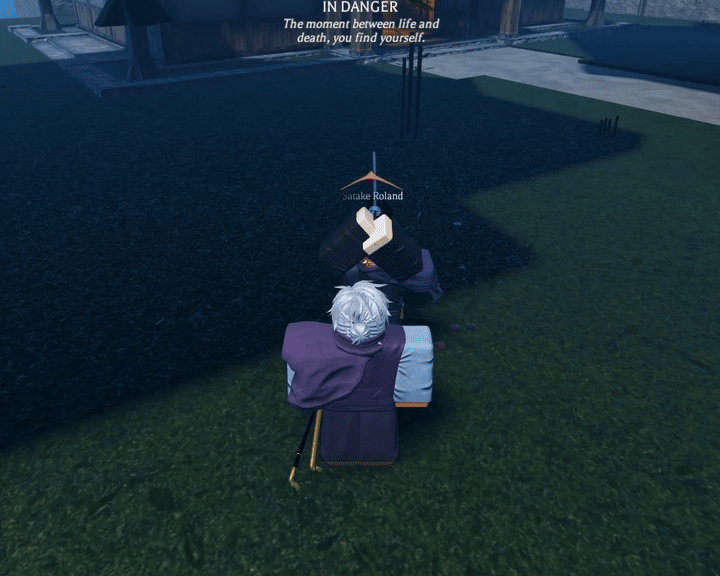
Dodging and Perfect Dodges
Press Q to dodge. A regular dodge does not give you i-frames for its full duration; only a Perfect Dodge does, and the timing is the same as a parry. If you see after-images of your character trailing behind the roll, you nailed it and can immediately threaten a counterattack.
Clashes
When two players swing in the same direction at the same moment, a clash triggers. Reading your opponent’s swing direction becomes part of the duel, especially in clan skirmishes where mirrored stances are common.
Posture
Every weapon has a posture value, and so do you. Breaking an enemy’s posture opens them up; protecting your own keeps you alive. Many Spirit passives and weapon components scale posture damage or posture resistance, so prioritize either offense or defense, not both halfway.
The Way of Weapon: Stances and Dojos
Your “Way” determines which weapon family you specialize in. Each weapon type has stances you learn from a corresponding dojo, and every stance has its own skill tree where some passives are gated behind earlier ones. To progress a stance you need two things: Mon (currency earned from storylines, ronin kills, selling components, and bounties) and Training Experience (earned by sparring students at the relevant dojo).
| Weapon | Dojo | Stances |
|---|---|---|
| Katana | Yoshioka Dojo | Hasso, Jodan, Chudan, Gedan, Migi-Gedan, Katawake, Katamaki (7 total) |
| Spear | Hozoin Dojo | Chudan, Seigan, Jodan (3 total) |
| Polearm | Sohei Training Grounds | Chudan (1, more planned) |
| Greatsword | Kobutaiken Training Grounds | Sha (1, more planned) |
Katana Stances (Yoshioka-Ryu)
The katana tree is the most fleshed out and the natural starting point for new players. Hasso opens with Migi Joho Tsuki, a right-side diagonal into a thrust, and Hayate Giri, a four-hit combo you can even initiate during a sprint. Jodan brings Shomen Totsugeki, a charging overhead, and Tenbatsu, a phasing dash into a heavy vertical strike. Gedan focuses on counters with Uke Kiri (a downward counter that bails you out of a missed deflect) and Ushiro Kiri, which spins behind the enemy for a backstab.
Three stances — Migi-Gedan, Katawake, and Katamaki — are not taught at any dojo. They drop from specific enemies (Gion Toji, Mercenaries, and Aka-Oni respectively) and require the Prodigy spirit passive Way of Inheritance. Drop chance is small, but failed rolls increase your odds on the next attempt.
Spear Stances (Hozoin-Ryu)
Chudan and Seigan both share Kaiten Niten, a jump-dodge into a double spinning slash, but diverge afterward. Chudan adds Totsugeki Tsuki, a charging piercing thrust. Seigan layers in Tsuki Renpatsu, a barrage of thrusts after a charge, and Niten Tsuki, a clean double thrust. Jodan offers Otoshi Tsuki, a counter that sweeps low to ragdoll before finishing with a thrust, and its Kaiten Niten variant is exclusive to Prodigy users.
The Way of Spirit
Spirit is the second half of progression — a passive/skill tree that defines your playstyle independently of your weapon. There are four spirits, each with its own theme and a mix of T1/T2/T3 passives and skills. You unlock awakenings within a spirit by spending Karma.
Guardian
Guardian is built around defense, deflection, and protecting allies. Its signature skill Kokyu is a 5-second buff (8s with Sustained Kokyu) that widens your deflection window, extends deflect duration, and boosts posture damage on deflects. Layered passives like Devastating Deflect, Immovable Steel, and Unyielding Guard turn every successful parry during Kokyu into a small punishment. Notable utility includes Kumiuchi, a 3-second locked clinch that drains 8 posture per second, and the T3 skill Revive for picking allies back up at 10-stud range.
Coward
Coward is the movement and survival tree. Cornered Rat stacks +5% damage, +5% posture damage, and +2 movement speed per extra enemy (up to 3 stacks), making it ideal for outnumbered fights. Adrenaline Rush gives a 5-second speed and jump burst, while Dust Throw and Rock Throw let you blind or stun foes at a distance. Rat’s Scurry at T3 replaces dashes with quick short-range bursts with no windup or recovery — a heavy mobility tool for hit-and-run players.
Warrior
Warrior is the aggressive offense tree. Its core skill Kiai grants +10% damage, posture damage, and armor penetration for 2 seconds (4s with Sustained Kiai). Stack Kiai Intensity, Kiai Strike (hyperarmor on your first post-Kiai attack), and the T3 Kiai Burst (which forces nearby enemies to guard and makes your next strike undeflectable) for a relentless opener. Takedown grapples and pins a target for 2 seconds, and Phantom Intent at T3 cancels an attack windup into an afterimage while you go partially invisible.
Prodigy
Prodigy is the technical tree built around weapon mastery and learning techniques no dojo teaches. Studious Edge and Disciplined Edge together unlock eight extra weapon mastery slots. Mirrored Form and Predator’s Read reward fighting enemies in your own stance. The defining passives are Way of Sight (chance to learn a stance from defeating enemies who use it) and Way of Inheritance (chance to learn one of their skills, provided you already own the stance). Mitate stores an enemy technique used against you and lets you replay it.
Reputation, Karma, and Bounty
Three separate currencies of standing govern almost every late-game system.
Reputation
Reputation is earned only through quests — events, bosses, and dojo storms no longer give it. Quests are repeatable, and reputation caps at 25. Every point reduces equipment prices by 1%, so a maxed reputation grants a 25% blanket discount at every shop.
Karma
Karma is earned by executing enemies. Executing the same NPC repeatedly reduces the karma they give over time, but roaming NPCs give a fixed amount that never diminishes. Hunting other players is the most efficient way to farm karma — you steal up to 25 karma from them, plus a +5 bonus if they have equal or more awakenings than you. Karma is required to unlock awakenings inside each spirit tree.
Sakki
Sakki is unlocked by completing Chapter 1 of the Vagabond storyline (defeating Hozoin Inshun) and reaching 1000+ earned karma. Earned karma is permanent — losing karma does not affect the threshold. Sakki scales all buffs by 25% and grants a small HP bonus.
Bounty
Bounty is a separate, persistent value per character slot that increases when you execute players. Wanted tiers use Japanese-themed colors and danger ratings.
| Tier | Bounty Range | Threat Level |
|---|---|---|
| Nusubito | 1–4 | Common |
| Ronin | 5–14 | Moderate |
| Akuto | 15–29 | Dangerous |
| Kaizetsu | 30–49 | Highly dangerous |
| Oni | 50+ | Extreme |
Killing a player gives +1 bounty by default, +2 if their combat experience is within 5 of yours, and +3 if it’s equal to or higher than yours. Completing a bounty spawns a Tansu loot box at your feet, with rarity scaling to the target’s tier, and resets their bounty to 0.
Weapons and Stats

Every weapon has a base profile of damage, posture damage, armor penetration, swing timings, range, and posture. Components (handles and blades) modify these. Here is the baseline comparison for the main weapons:
| Weapon | DMG | Posture DMG | Pen | Range | Slot |
|---|---|---|---|---|---|
| Bokken | 20 | 20 | -0.15 | 5.75 | Primary |
| Katana | 30 | 30 | 0.10 | 5.75 | Primary |
| Wakizashi | 25 | 25 | 0.05 | 5.00 | Secondary |
| Yari | 27.5 | 27.5 | 0.25 | 7.75 | Primary |
| Boku-Naginata | 22.5 | 22.5 | -0.15 | 7.75 | Primary |
| Naginata | 32.5 | 32.5 | 0.15 | 7.75 | Primary |
| Dai-Bokuto | 27.5 | 30 | 0.15 | 7.00 | Primary |
| Odachi | 37.5 | 40 | 0.40 | 7.00 | Primary |
| Yumi | 4.5 | 4.5 | 0.03 | — | Secondary |
The katana, wakizashi, yari, and yumi can be bought at the Blacksmith in Kyoto or Nara. The naginata and odachi must be forged from their respective blade and handle components (the naginata costs 250 Mon plus a Naginata Blade and Handle). Wooden trainers — the bokken and boku-naginata — drop from common NPCs and serve as your first practice weapons.
Weapon Components
Components are blades and handles that customize your weapon. They come in rarities (Common, Uncommon, Rare, Mythical, Legendary) and roll variable bonus stats up to a ceiling. The katana has the deepest component pool currently:
| Component | Rarity | Best Stats | Source |
|---|---|---|---|
| Default Katana Handle/Blade | Common | None | Crafting baseline |
| Katana Blade Notare | Uncommon | +1% Posture DMG, +1% Pen | Drops/forging |
| Gion Toji Handle | Rare | +5% Windup, Swing, Posture | Gion Toji |
| Aka-Oni Handle | Rare | +5% Windup, Swing, Posture | Aka-Oni |
| Katana Blade Gunome | Mythical | +3% DMG, +6% Posture DMG, +6% Pen | Aka-Oni / Gion Toji |
| Katana Blade Midare | Legendary | +5% DMG, +8% Posture DMG, +8% Pen | Aka-Oni / Gion Toji |
Other weapons have parallel handle/blade systems. The Yari Jumonji blade and handle drop from Hozoin Inshun, while the Naginata Benkei blade and handle drop from Benkei. Wakizashi mirrors the katana with its own Aka-Oni and Gion Toji handles.
Wearables and Crafting
The Tailorshop in Kyoto handles cloth gear. The Kimono costs 150 Mon (112 with max reputation), and crafted outfits use fabric drops from specific NPCs. Kamishimo Fabric drops from Nijo Castle Guards, Kyoto Guards, and the Gion Toji/Aka-Oni boss tables. Suzukake Fabric comes from Monks, Sohei Outpost Guards, and the same two bosses. Each crafted outfit needs 3x of its fabric. Notably, a bright green Suzukake is given to you for free when you learn Hozoin-Ryu.
Armor sits at the Blacksmith and unlocks in tiers gated by quest items:
| Armor | Cost (Max Rep) | Requirements |
|---|---|---|
| Ashigaru | 1250 (937) | None |
| Tatami Gusoku | 2250 (1687) | None |
| Tosei Gusoku | 5000 (3750) | Soldier’s Endorsement + Commander’s Favor |
Helmets follow a similar pattern. Menpo Onikojin costs 1000 Mon (750 at max rep) with no requirements, while Menpo Ressei requires both the Soldier’s Endorsement and Commander’s Favor at the same price tier. Boss-drop masks (Benkei Mask, Aka-Oni Mask) have small drop rates and serve purely as cosmetic trophies.
Useful Accessories
- Prayer Beads: +5% shrine luck.
- Coin Pouch: +5% luck. Reward for completing the Losers and Winners tale.
- Lantern: Sits on your left hip and emits light in every direction — essential for night raids.
- Clan Flag: Given when you join a clan. Used to invite others.
Markings
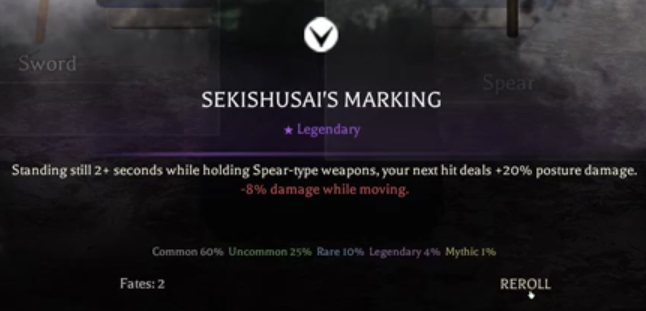
Markings are rolled passive identities that buff or nerf your build. Some are minor flavor; others are genuinely game-changing. The full known pool:
| Marking | Rarity | Effect | Drop |
|---|---|---|---|
| Jotaro’s | Common | +20% Combat XP near other players | 31.5% |
| Matahachi’s | Common | +25% sprint speed out of combat | 31.5% |
| Denshichiro’s | Uncommon | Bigger build, slower, +20% to attack power passives | 10% |
| Tsujikaze’s | Uncommon | More/rarer loot from executions | 10% |
| Ueda’s | Uncommon | +20% to defense passives | 10% |
| Inshun’s | Rare | +10% Combat XP, faster base move, +25% movement passives | 3% |
| Seijuro’s | Rare | Smaller frame, +25% attack speed passives | 3% |
| Musashi’s | Legendary | +10% all passives, +15% attack power, bloodthirst aura | 0.5% |
| Kojiro’s | Legendary | +10% all passives, +15% defense/counter, hidden tells | 0.5% |
The Vagabond Storyline

The main story currently runs through Chapter 1 and follows a clear progression.
Side Tales
- Break the Outpost: Start with the Capital Ashigaru at the Nara crossroads campfire. Kill the sohei at the Upper Nara Sohei Outpost and return for the Soldier’s Endorsement.
- Commander’s Favor: Requires the Soldier’s Endorsement and 10 reputation. Escort a shogunate informant at night from inside the Kyoto Outpost to the halls of the shogun castle, then return to the Commander. Grants the Commander’s Favor item, which unlocks the Retainer’s License.
- Losers and Winners: Talk to the Hustler near the Dicehouse, then win 120 Mon at the dice tables for the Coin Pouch accessory (+5% luck).
- Stolen Hooves: Find the Stable Hand mentioning a stolen shipment, clear the marked camp, ride the recovered horse back to the stables, and earn the Trail Horse mount.
- Aka-Oni Questline: Speak to the guard NPC next to the beheaded body on the bridge to Nara (requires 10 rep), then track down the NPC placing heads on the bridge near the stables, kill him, and pick up Aka-Oni’s message to unlock the Aka-Oni raid at Westpoint House.
Bosses and Mini-Bosses

| Boss | Location / Trigger | Notable Drops |
|---|---|---|
| Hozoin Inshun | Campfire behind Kofukuji Temple (Second Spear quest) | Yari Jumonji Blade/Handle, Yari components |
| Gion Toji | Speak to Hozoin Agon at Kofukuji Temple | Gion Toji Handle, Lootbox |
| Aka-Oni | Westpoint House at night | Aka-Oni Mask, Aka-Oni Handle, Katana, 4x Lootboxes, 15 karma |
| Benkei | Nara bridges, every 10 minutes — interact with a sword in a bridge | Naginata Benkei Blade/Handle, Benkei Mask, Naginata, 15 karma |
| Commander Kurogane | Wave 4 of the Kyoto Outpost raid | Dai-Bokuto, Odachi components, 4x Lootbox, 15 karma |
Note: Benkei’s spawn timer is dynamic. If you spawn him at xx:10 and kill him at xx:13, he respawns at xx:23 rather than on the original 10-minute mark.
Clans and the Castle System
You can join a clan by being invited — a clan member holds out their Clan Flag and clicks on you to send the invite. Creating a clan requires both the Commander’s Favor and 1000 Mon. Walk into Nijo Castle, sit on one of the Tatami Mats, choose “I Wish To Establish A Clan,” and customize the name, emblem, and colors. Once you’re in a clan, your displayed name changes to the clan’s name.
Kokura Castle is the current contestable territory. A clan can buy an unclaimed castle for 10,000 Mon and starts earning 1 leaderboard point per minute plus 150 Mon income per minute while holding it. The castle doubles as clan storage and a training arena. When anyone attacks the gates, a 10-minute siege starts; defenders must protect the inkeep door, attackers must destroy it. A failed siege locks attacking clans out of the path to the castle for 20 minutes before they can retry. Reach Kokura Island by taking the Boat to Kokura Castle near the Kyoto stables.
Locations Worth Knowing
Kyoto
- Inn/Bathhouse: Your spawn point.
- Blacksmith: Buys/sells weapons and armor; also offers a Mon-priced recolor service.
- Tailorshop: Crafts and recolors clothing.
- Bow House: Sells the Yumi (125 Mon) and arrows (5 Mon each).
- Appraisal/Bank: Sells your loot and stores items.
- Horse Stable: Behind the Tailorshop. Home of the Stablemaster, who sells Farm Horse (2100) and Samurai Horse (4200, requires both quest unlock items).
- Nijo Castle / Ninomaru Palace: Where you pursue the Retainer’s License (defeat 3 retainers after answering the Shishodai’s questions) or, alternately, create a clan.
- Teahouse: Buys you a stamina-boosting Tea for 11 Mon.
- Dicehouse: Gamble higher/lower on dice rolls; tied to the Losers and Winners tale.
- Westpoint House: The Aka-Oni boss arena. Expect roughly 20 guards before the boss.
- Yoshioka Dojo: Where you spar, learn katana stances, and storm for Chapter 1.
- Kyoto Outpost / Kobutaiken Training Grounds: Site of the Commander Kurogane raid (Odachi parts and Dai-Bokuto drops) and Odachi training.
Nara
- Kofukuji Temple: Houses the Hozoin Dojo, Kofukuji Shrine, and Hozoin Agon (your gateway to the Gion Toji fight).
- Hozoin Dojo: Where you learn spear stances.
- Lower and Upper Nara Sohei Outposts: Targets for the Break the Outpost tale.
- Sohei Training Grounds: Where you learn Sohei-jutsu for the Naginata, located beside the Upper Nara Sohei Outpost.
- Pickle Farmer / Nara Village: Trade a Radish (found at the farmlands around Nara) plus 75 Mon for Pickled Radish.
Shrines and Dojo Modifiers
Two shrines exist so far: the Kyoto Shrine behind the inn and the Nara Shrine next to Kofukuji Temple. Shrines respond to your Spirit, and luck-boosting accessories like the Prayer Beads (+5% shrine luck) and Coin Pouch tip the odds toward rare rewards. Spending a bit of Mon or completing a worthy kill before approaching can also influence the outcome, but the system is intentionally fickle.
Dojo Experience is earned by sparring students and storming dojos. The amount you gain scales with the modifiers you take on during a session, including:
- No Dashing
- No Guarding
- 1 HP
- Double Student HP
Higher-difficulty modifiers stack the experience multiplier, so accepting the suffering pays off in faster stance progression.
Roaming NPCs and Farming Routes
| NPC | Location | Drops |
|---|---|---|
| Outlaws | Kyoto | 1x Lootbox, 1 Karma |
| Thugs | Kyoto | 1x Lootbox, 1 Karma |
| Ronin | Kyoto and Nara | Equipped accessory, 1x Lootbox, 1 Karma |
| Mercenaries | Nara | 2x Lootbox, 2 Karma |
| Sohei Group | Nara | 2x Lootbox, 6 Karma |
| Elite Ronins | Nara | Equipped accessories, 2x Lootbox, 6 Karma |
If you’re hunting karma for awakenings, Sohei Group and Elite Ronins in Nara are the most efficient PvE targets per kill. For loot quantity, Mercenaries and the same Sohei/Elite Ronins lead the list with double lootboxes.
Mounts
| Mount | Top Speed | Acceleration | Handling | How to Get |
|---|---|---|---|---|
| Trail Horse | 30 | 1.25 | 0.70 | Stolen Hooves tale reward |
| Farm Horse | 32.5 | 1.00 | 0.35 | 2100 Mon at the Stables |
| Samurai Horse | 40 | 1.25 | 0.40 | 4200 Mon + Soldier’s Endorsement + Commander’s Favor |
A Practical First-Hour Plan
Dokkōdō is designed to be hard, and the systems reward players who treat the game like a real martial discipline rather than another loot grinder. Pick one Way and one Spirit, commit to learning chambers and Perfect Dodges, and let the rest of the world — bounties, clans, castle sieges, hidden Prodigy stances — open up as your blade work matures. The most rewarding moments come from the duels you almost lose and the techniques you bleed for, exactly the kind of journey a Vagabond-inspired samurai sandbox should ask for.