The Monad Depths come back in Persona 3 Reload, but they work differently than in earlier versions of the game. Instead of a single end-game dungeon, Monad now shows up as black doors and passages scattered through Tartarus, each hiding Shadows far stronger than the regular enemies on that floor. Clear them and you walk away with yen, costumes, weapons, and Major Arcana cards.
Quick answer: Monad content opens in the Yabbashah block after the July Full Moon operation. You do not need to beat The Reaper first. Monad Doors respawn nightly, while Monad Passages stay locked on a fixed floor until you bring the matching Major Arcana card, and the final door on Floor 255 only opens after you finish Elizabeth’s Request 101.
How Monad Doors work
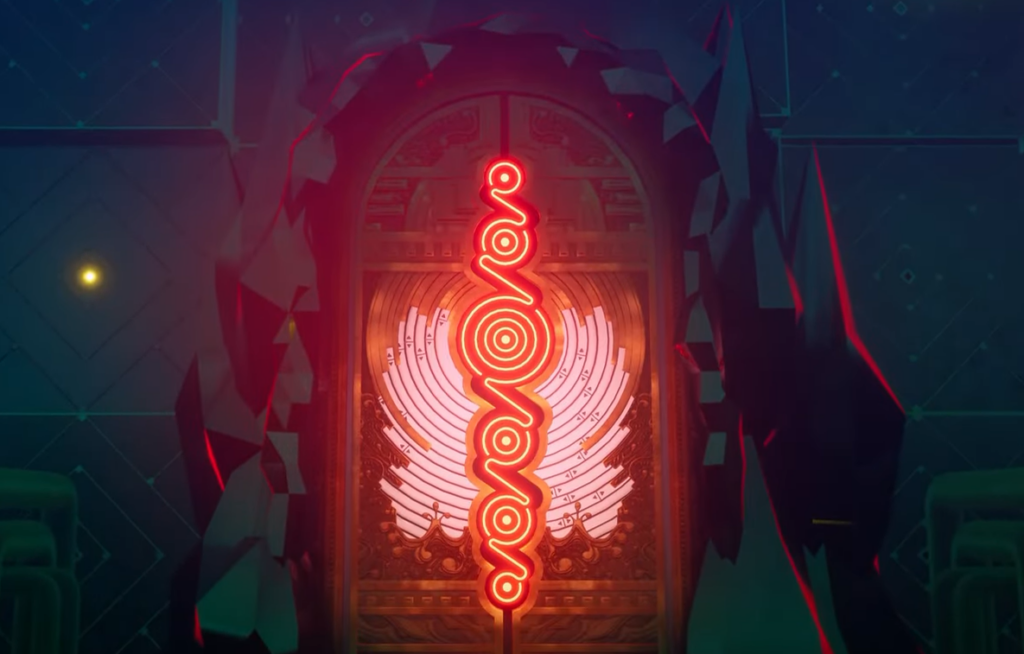
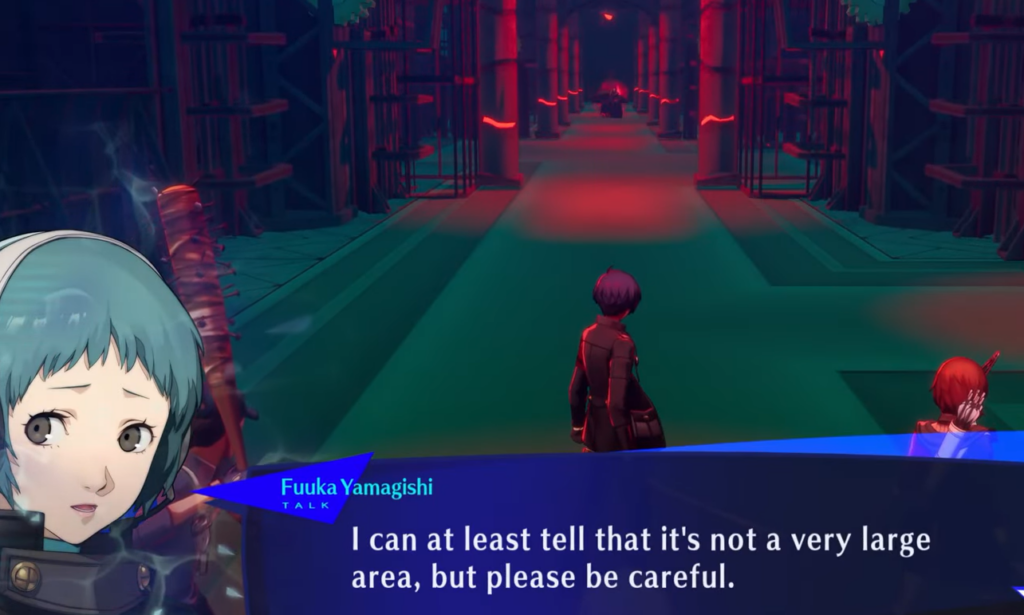
When a Monad Door appears, Fuuka points out a large black door with a glowing red symbol somewhere on the current floor. She will not let you leave that area until you go check the first one. Inside, Fuuka can’t map the layout for you, so you push deeper until you reach the powerful Shadow she senses.
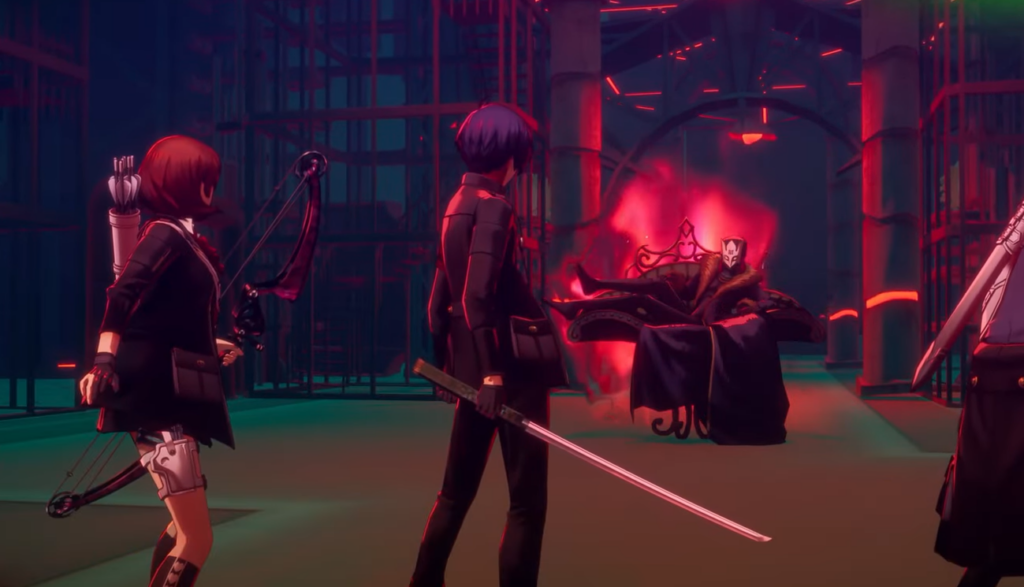
Beating the Shadow has two payoffs. The game automatically scans the floor you are on plus the one directly above it, and two treasure chests open up past where the mini-boss stood. One holds a standard reward like cash or Skill Cards. The second is a green-glowing Nihil chest, and the Nihil items inside can be traded at Mayoido Antiques for strong gear and armor.
Monad Doors respawn every night with a fresh tough enemy and new prizes, so they are worth a visit whenever you head into Tartarus to grind or track down Missing Persons.
How Monad Passages work
Once you clear the regular Monad Doors in a block, a Monad Passage spawns high up in that same block. Unlike standard doors, a Passage stays put on the floor where it appears, even if you leave Tartarus for the night and return on another day. The first one shows up on 91F of the Yabbashah block.
Passages react to the Major Arcana cards you have collected. The door stays sealed until you approach it while carrying the right card. You usually earn Major Arcana cards by beating Full Moon bosses, but Passages hand them out too, including arcana that no Full Moon Shadow represents.
The fights inside are noticeably harder than anything else in the block. Many Monad mini-bosses have affinity charts that shrug off normal damage, so lean on Theurgy attacks, which ignore affinities entirely. Walk in with everyone’s Theurgy gauge fully charged, and use those attacks early. Every time a party member gets KO’d, they lose half of their charged Theurgy gauge, which can waste all the buildup you did before the fight.
If you are under-leveled, you can turn around and come back later. Fuuka double-checks that you are ready before the battle starts, so you won’t trip into one of these fights by accident. When you return, the Passage floor is marked on the teleporter list with a red Monad symbol, usually sitting just before a border floor with a teleporter nearby for quick access.
Rewards include extra Major Arcana cards, Twilight Fragment chests, and a Nihil chest holding a prototype you can bring to Mayoido Antiques. One thing to note: Monad Passage Shadows do not respawn, so you only fight each one once, though you can double back for any chests you skipped.
Every Monad Passage location and recommended party
Because each Passage locks to the same floor every night, you can plan exactly where to go and who to bring. The table below lists the floor, the block it sits in, and a party built to handle that fight.
| Floor | Block | Recommended party |
|---|---|---|
| 91F | Lower Yabbashah | Junpei, Akihiko, Mitsuru |
| 117F | Upper Yabbashah | Yukari, Akihiko, Mitsuru |
| 143F | Lower Tziah | Akihiko, Mitsuru, Junpei |
| 171F | Upper Tziah | Yukari, Ken, Akihiko |
| 197F | Lower Harabah | Mitsuru, Akihiko, Yukari |
| 225F | Upper Harabah | Balanced team with Wind and Fire coverage |
Affinities matter a lot in these rooms. A few enemies to plan around:
- 91F: Rampage Drive resists all physical damage and Magical Magus resists all elemental damage, so spread your skills and save Theurgy for them.
- 117F: The Dice enemies split weaknesses across Electric and Ice, while Platinum Dice nullifies Slash, Electric, Light, and Dark.
- 171F: Minotaur 2 repels physical attacks, and the Castle pair flip between Light and Dark weaknesses, so bring both.
- 197F: Devious Maya resists every damage type, and the Balance Shadows drain or repel matched elements, which makes Theurgy your cleanest option.
- 225F: The Hand enemies each carry a single weakness (Fire, Wind, Ice, or Electric) while draining the rest, so target them one at a time.

The final Monad Door on Floor 255
After you clear the last Monad Passage, a different-looking Monad Door waits on Floor 255. It can’t be opened right away, and behind it is the toughest enemy in the game. Opening it is tied entirely to Elizabeth’s Requests rather than anything in Tartarus itself.
Inside, Elizabeth reveals herself as the hidden boss and challenges you to a one-on-one duel. She acts twice per turn and swaps between Personas to shift her affinities and skills mid-fight. Two special rules apply: you cannot repel, drain, or block any of her attacks, and Armageddon only works if it lands the killing blow. Beating her confirms the clear, since the door has no enemy to face afterward.
Treat Monad as a steady source of rare gear and Major Arcana cards rather than a single endgame slog. Hit the respawning Doors whenever you grind, clear each Passage once you hold the matching card, and save the Floor 255 fight for when your protagonist is fully built and Elizabeth’s request line is complete.