Sanity is the only thing standing between your night shift and a game-over screen in Animal Hospital. It works like a health bar, except the damage is mental rather than physical, and once it hits zero your run ends on the spot. Every enemy, jumpscare, and bad call at the reception desk chips away at it, so learning where it drains and how to refill it is the core survival skill in the game.
Quick answer: Drink Coffee before you drop below 40% Sanity, reject anomalies at the desk so they never become Skinwalkers, and keep a Chocolate in reserve for unavoidable hits like cursed photos. At zero Sanity your run is over.
How Sanity works in Animal Hospital
Think of Sanity as a decision-quality meter, not just a number that ticks down. As it falls from jumpscares, neglected patients, enemy proximity, and Skinwalker attacks, your attention narrows and mistakes pile up. Those mistakes cause more false admits and more threats, which drain even more Sanity. Below roughly 20% the screen starts distorting with hallucinations, which makes photo comparisons harder at the exact moment you can least afford to misread a tell.
Most failed shifts are not a single dramatic death. They are a slow slide where tired, low-Sanity players wave through two or three anomalies in a row and a Skinwalker spawns inside the hospital. Finishing a shift with high Sanity also earns better coin payouts, so the meter ties directly into progression. You can launch the game and check your current shift on the official Animal Hospital Roblox page.
Every way Sanity drains
Sanity loss is rarely random. Almost every drain is something you can avoid by playing carefully or reacting fast. The single biggest hit comes from admitting an anomaly, because once it awakens into a Skinwalker and attacks you or a patient, you lose a large chunk at once. Prevention at the desk is far cheaper than dealing with the consequences inside.
| Source | Sanity effect |
|---|---|
| Admitting an anomaly | Large loss once it becomes a Skinwalker and attacks |
| Job Stress | Passive 1 point every minute, cannot be prevented |
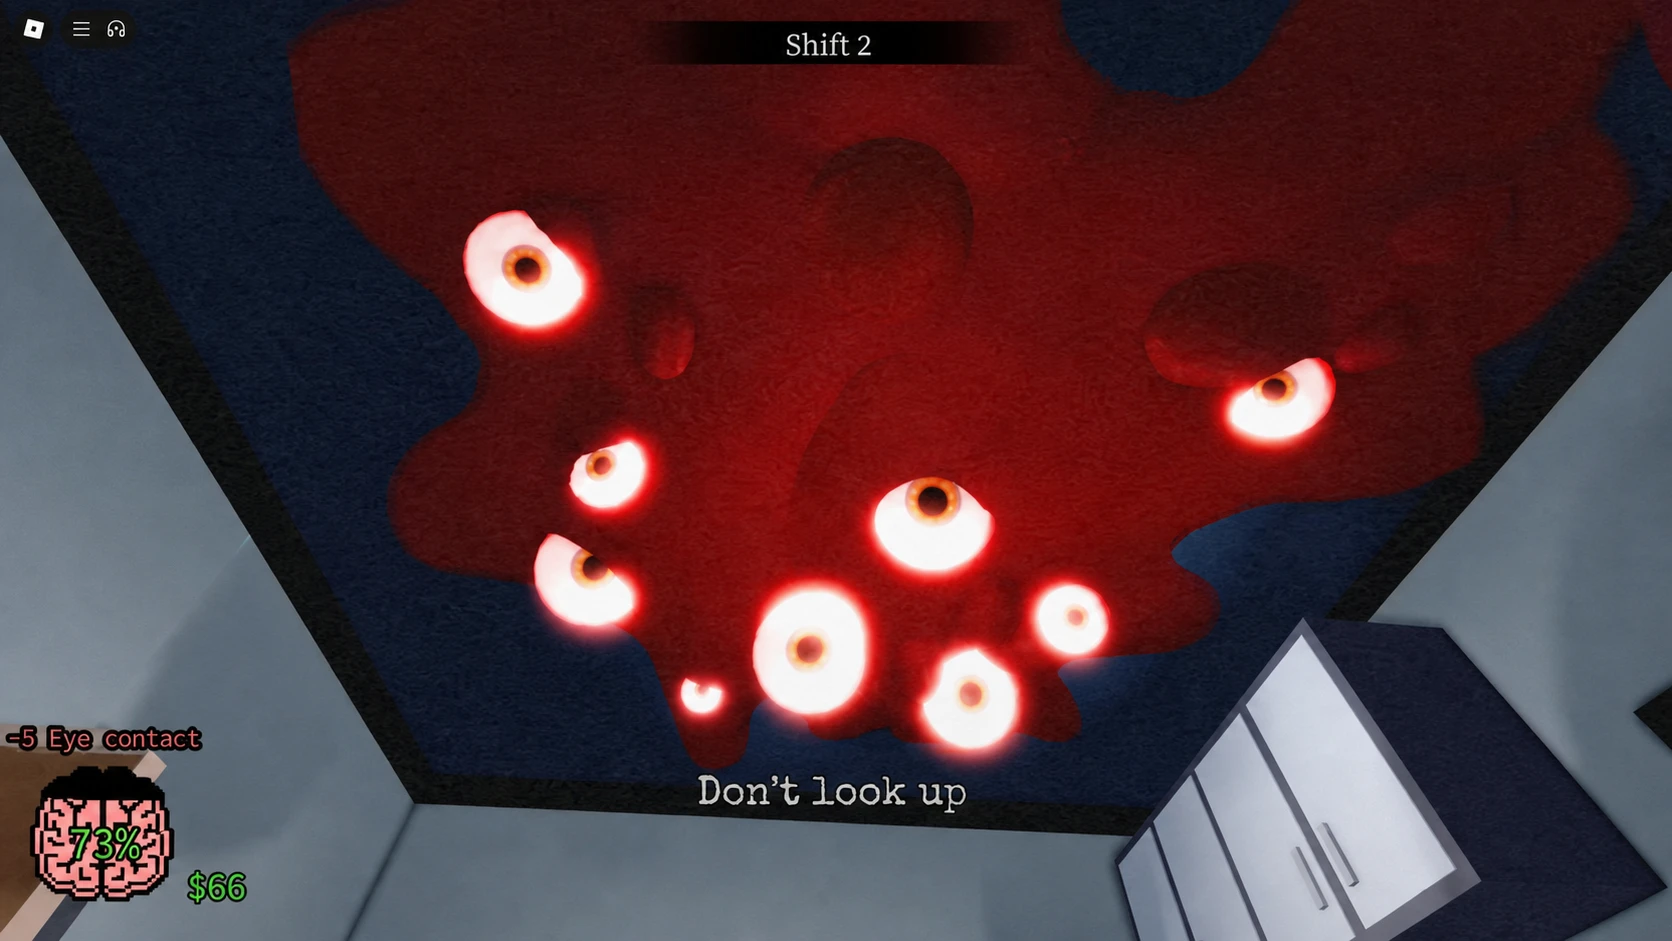
| Ceiling Monster (“Don’t look up”) | 4% per second while you look at it |
| Black Bunny | 3–5% if you look directly at it for a couple of seconds |
| Eyeless (empty-handed) | 10% if you interact without a coffee cup |
| Camera dark-figure zoom | Heavy loss, can be fatal if you keep watching |
| Cursed photos | Unavoidable loss once you view a bloodshot, grinning photo |
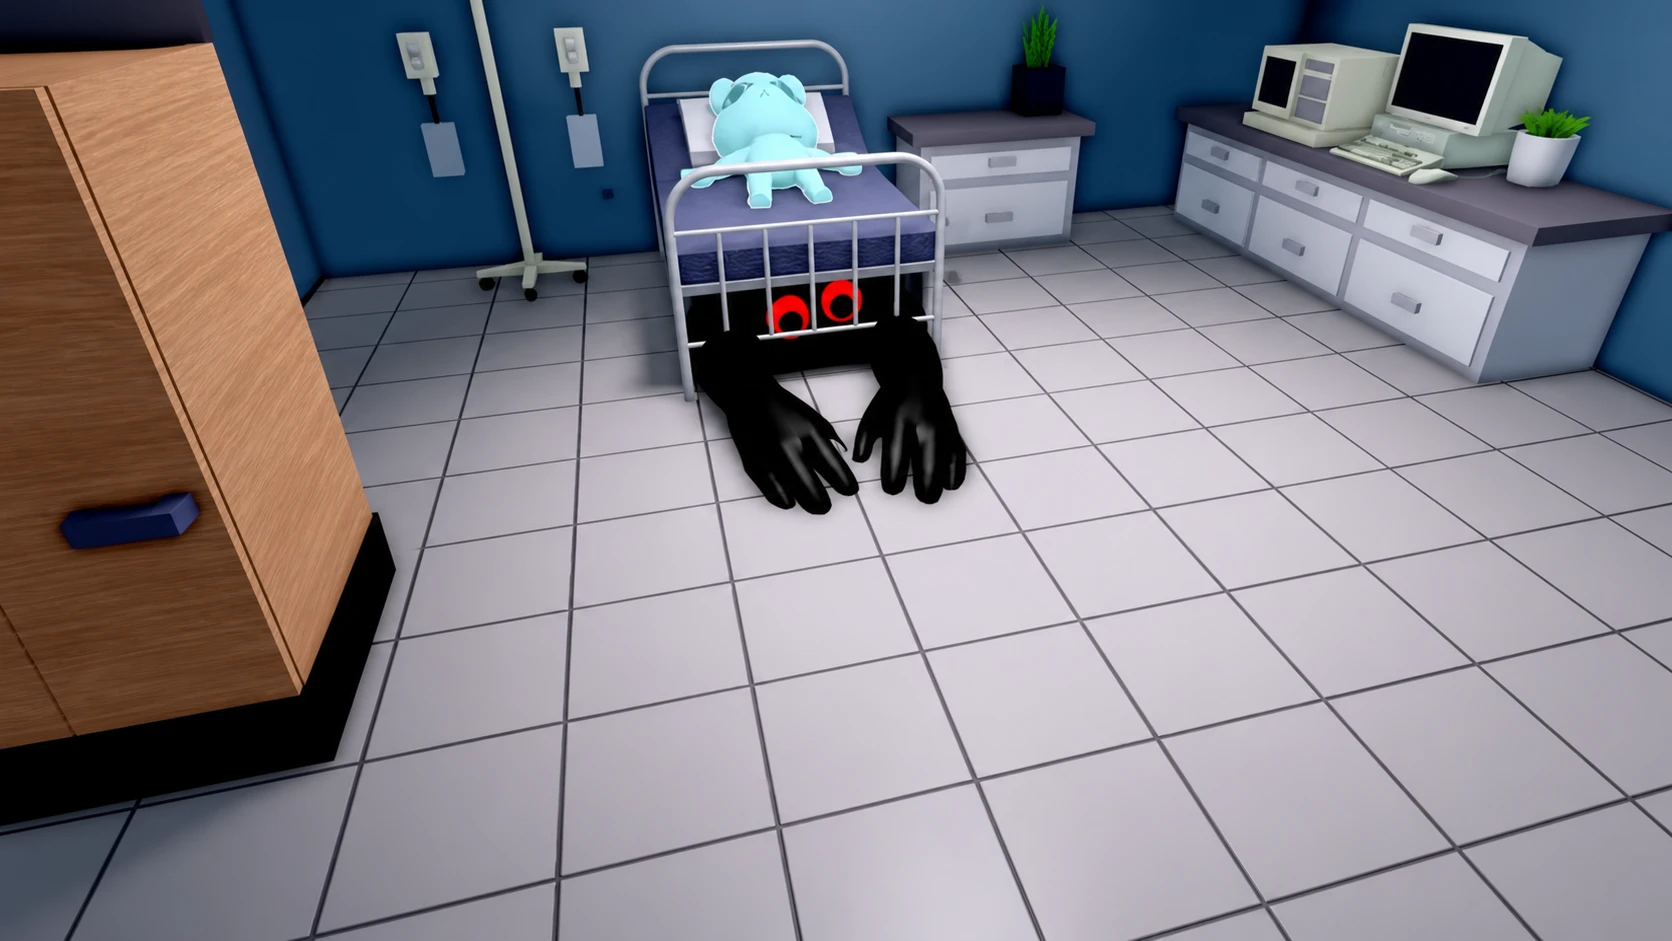
| Bed Monster / Wall Monster | Massive loss while grabbed or attacked |
| Fire emergency | 1 Sanity per second standing in flames |
| Death Ritual | 1 Sanity per candle |
| Tasing a normal patient | 15 point loss |
| Being tased by a teammate | 2 point loss |

A few quick habits cut most of these losses. Break eye contact the instant the camera zooms toward a dark figure, tilt your view down when the “Don’t look up” warning appears, and skip the photo entirely if you have already spotted a visual or camera tell. For the Eyeless at the check-in window, equip a coffee cup and press E to send it away instead of interacting empty-handed.
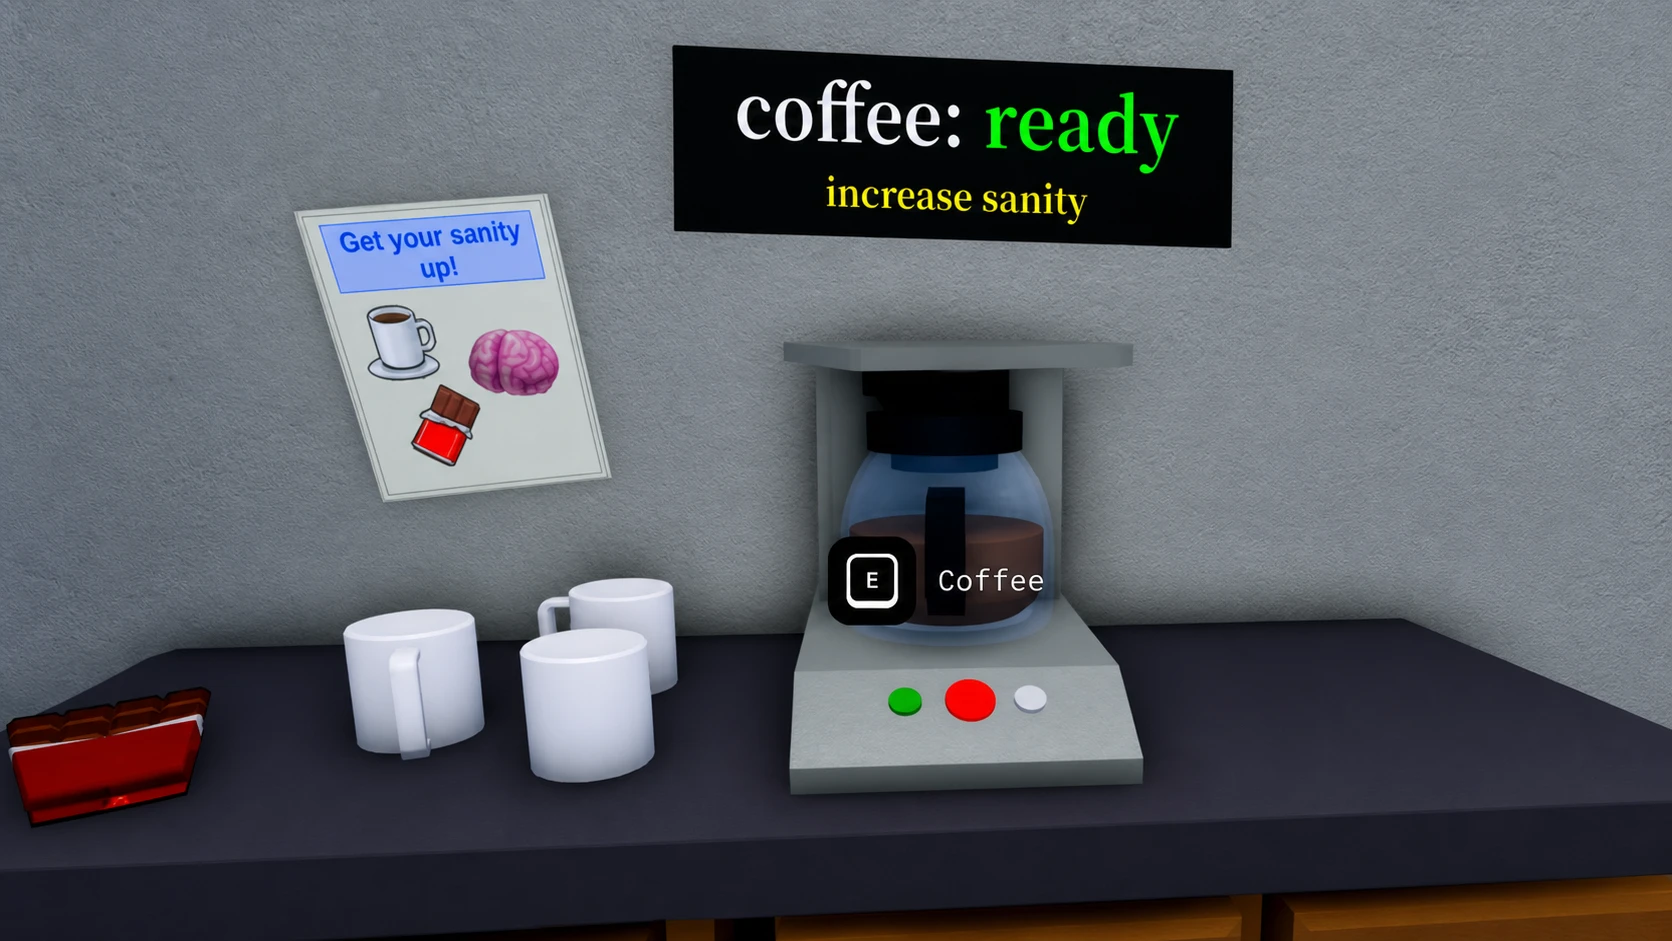
How to restore Sanity
Coffee is your most reliable and renewable recovery tool. Each sip from the Coffee Machine restores 5 Sanity, and you get three cups before the machine enters a cooldown, for 15 total per cycle. Chocolate is the heavier option, restoring 20 per bite across three bites for 60 total, but it is not free. You buy Chocolate for 29 Robux at the coffee station, or with Cash in the Supplies Shop that opens after most shifts.
| Item | Per use | Uses | Total |
|---|---|---|---|
| Coffee | 5 Sanity | 3 sips | 15 Sanity |
| Chocolate | 20 Sanity | 3 bites | 60 Sanity |
You can also gain small amounts of Sanity by fighting back. Shooting a Skinwalker with a Gun or electrocuting it with a Taser raises Sanity slightly, around 1% to 2%. The Taser unlocks for free after the third shift, while the Gun comes from Robux or the Secret Agent class. Unlocking a second Coffee Machine through the Barney event adds a passive restore source that makes long marathons far more manageable.
The most important habit is keeping a buffer. Do not spend down to your last Coffee, because hits like cursed photos and candle-heavy Death Rituals cannot be avoided once they start, and you want recovery ready the moment they land.
The 40% Coffee threshold rule
A predefined threshold removes hesitation. The common rule is to drink before dropping under 40%, rather than waiting for a crisis. Late reactive sips refill the bar but fail to restore coordination fast enough, because by then the sloppy admits have already happened. Decide your number before the shift starts and treat reaching it as an automatic action, not a debate.
In co-op, plan recovery order around impact, not just whoever is lowest. The player making the highest-consequence decisions, usually whoever holds the desk during heavy queues, should be kept stable first when several teammates need support at once. Stock at least two Coffee per player heading into the mid shifts, and more before long pushes, so the whole lobby does not hit critical at the same moment with no clear order for who recovers and who covers.
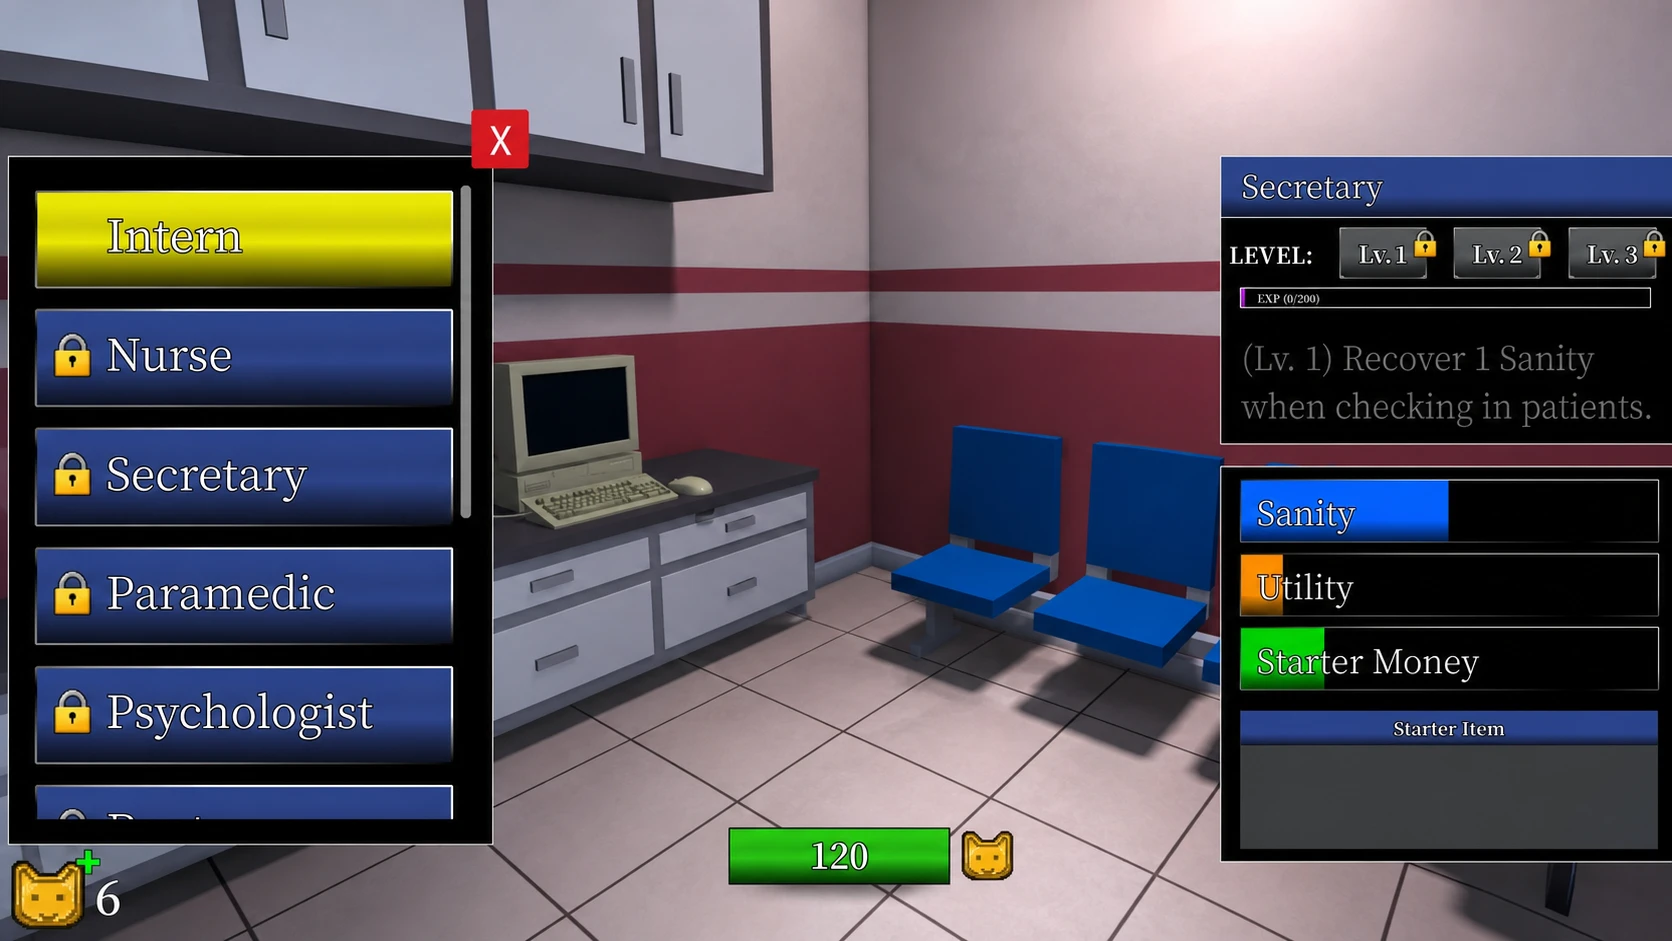
Best classes for Sanity management
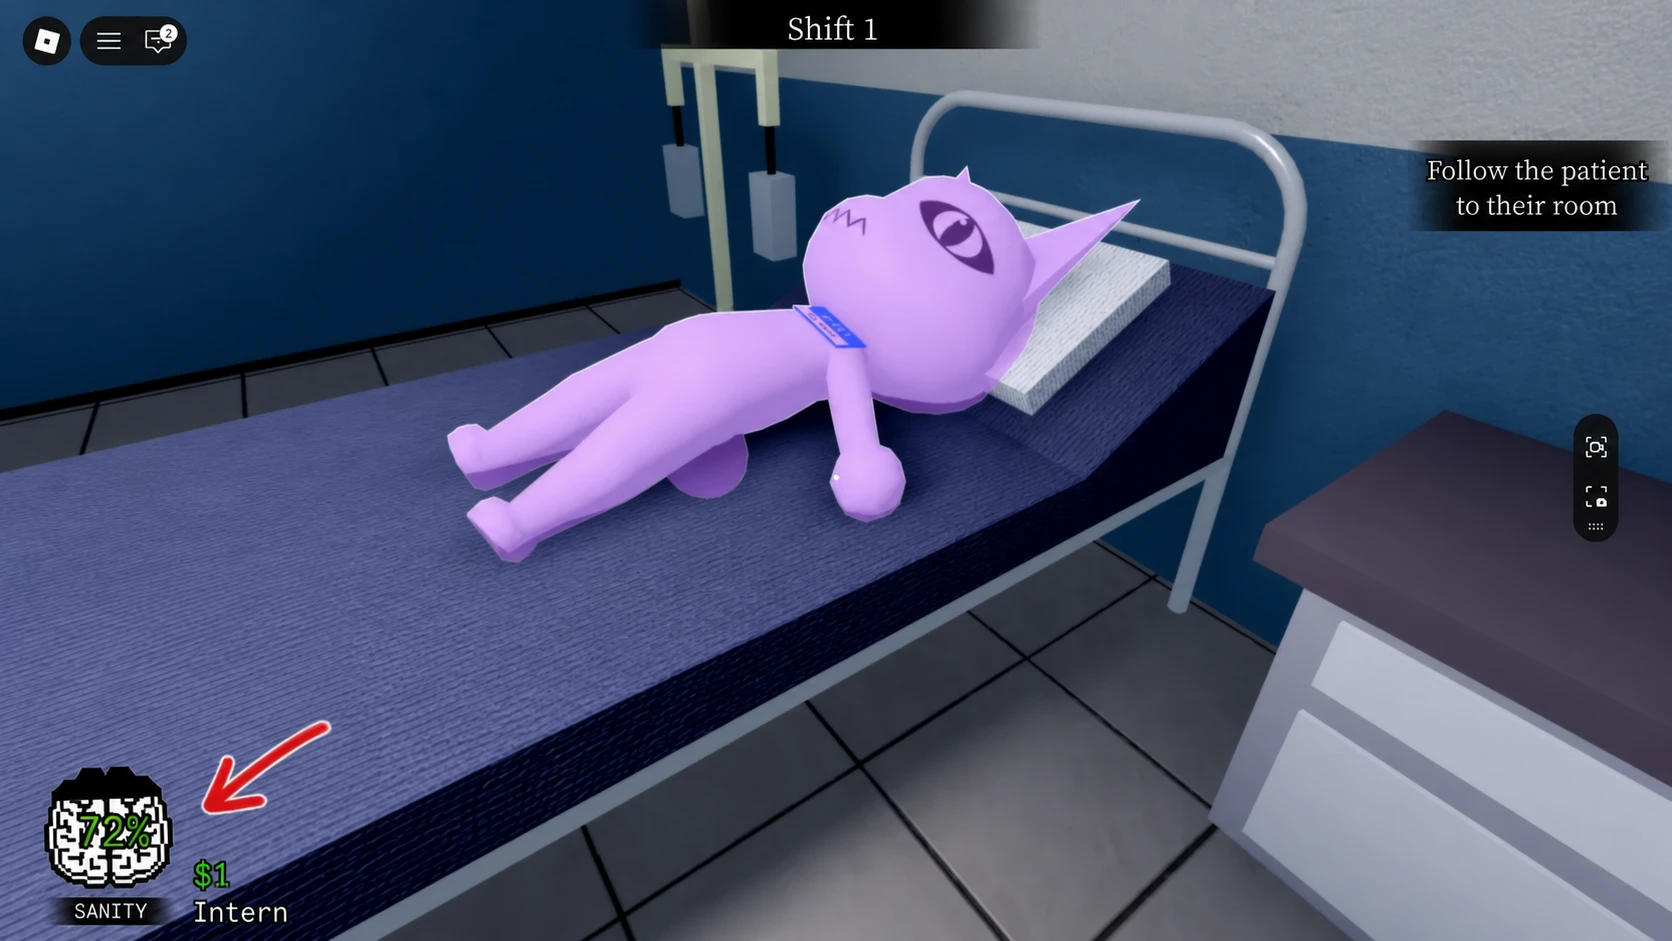
Several classes turn Sanity from a constant worry into a passive income. The Intern gives a comfortable starting buffer, while the treatment-focused classes let you generate Sanity through normal play. The Doctor and Surgeon also amplify Coffee value, since they recover Sanity on heals, which stretches a limited supply further.
| Class | Sanity perk |
|---|---|
| Intern | Start with +10 bonus Sanity |
| Secretary | Recover 1 Sanity per patient check-in |
| Doctor | Recover 1 Sanity per patient healed |
| Surgeon | Sanity plus a short speed boost after each heal |
| Psychologist | All Sanity effects doubled, both positive and negative |
The Psychologist is a double-edged pick. It doubles both gains and losses, so coordinated teams can use it for huge burst recovery, but only if they manage both extremes deliberately. The Surgeon’s speed boost also cuts the time you spend in scary rooms where ambient drain applies, which makes it a strong endurance choice.
Recovering after a Sanity collapse
When the whole team’s Sanity crashes, resist the urge to force instant full speed. Rebuild in layers instead, restoring one system before adding the next, because your bandwidth is already gone.
Note: Never open the Shutter during hallucination distortion. Admitting an anomaly because you mistook a real tell for a Sanity effect is a known wipe cause, so hold the window closed until your meter stabilizes. Avoid blame discussions during active danger, since they delay stabilization without solving anything.
How Sanity scales across shifts
Early shifts drain Sanity slowly enough that Coffee alone keeps you stable, so the main lesson is simply forming the habit of drinking before you hit critical. Once you push past Shift 7, ambient horror drain ticks even during quiet moments, events stack on top of each other, and the meter becomes a genuine resource to budget. Teams that carry early-game complacency into the mid game tend to collapse the first time three events fire at once.
On endurance runs, real-time fatigue becomes its own threat, because a tired player makes the same sloppy admits that low in-game Sanity does. Rotate the desk to a fresh player and take short breaks between shifts during long pushes. Scale your Coffee stockpile and monitoring discipline up as the shift number climbs, and the meter stops collapsing on its own.
The best Sanity save is still the one you make at the desk. Reject anomalies before they turn into hallway hunters, keep a drink in reserve, and handle each emergency the moment it appears, and your shifts will run far longer than any panic refill could buy you.