System instability, application crashes, or unexplained restarts in Windows 11 often require a crash dump file for effective troubleshooting. These files capture the state of system memory at the time of a failure, providing critical data for diagnosing root causes. By default, Windows 11 may not generate these files unless configured to do so, but you can manually set up and trigger crash dump creation using system settings or registry modifications.
Enable Crash Dump Creation via System Settings
C:\. Crash dump files can be large, especially full memory dumps.advanced system settings, and select it from the results.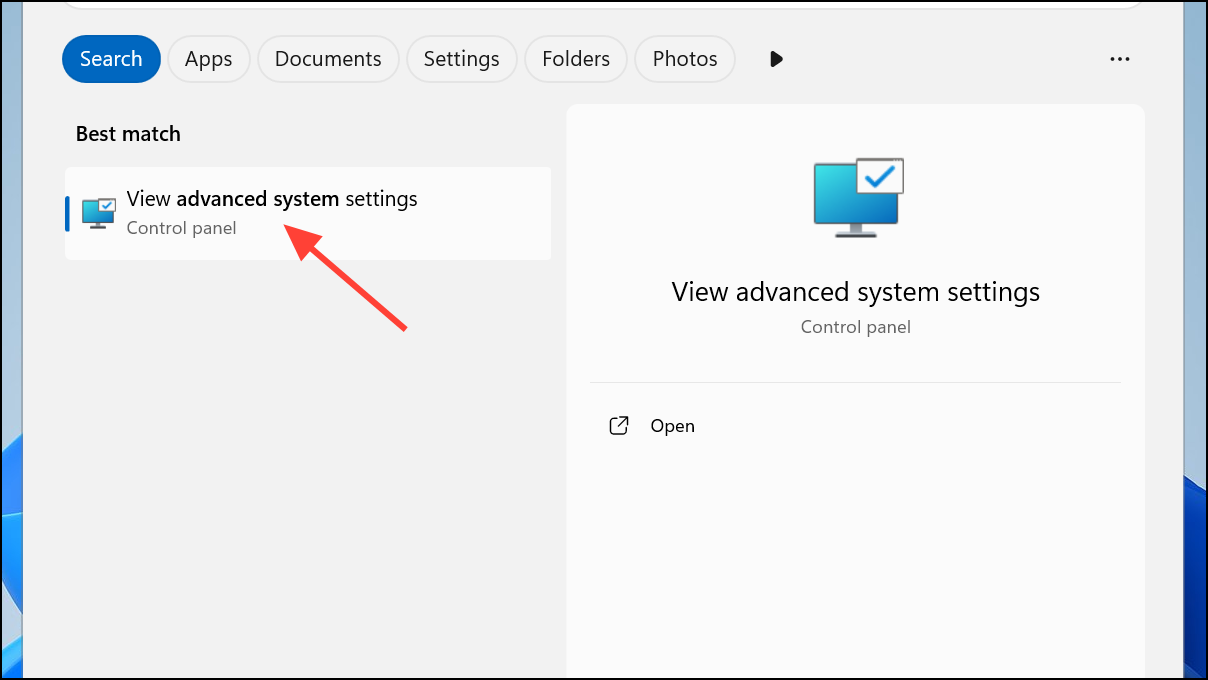


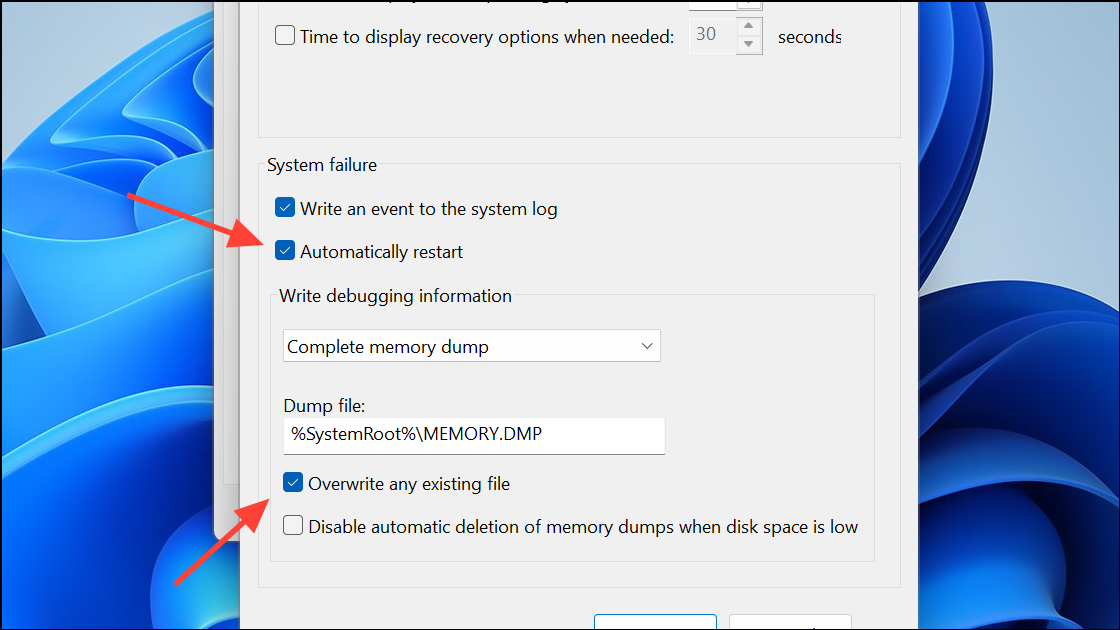
Once these steps are complete, Windows 11 will create a MEMORY.DMP file in the C:\Windows directory the next time a system crash (BSOD) occurs.
Manually Trigger a Crash Dump Using Keyboard Shortcut
When you need to collect a crash dump on demand—such as when diagnosing intermittent issues or at the request of support—you can configure Windows to allow manual triggering of a crash dump using a keyboard shortcut.
ManualDump.zip utility from a trusted source (such as Kaspersky or Microsoft support). Extract the files to a folder on your computer.ManualDump_ON.reg to enable manual dump collection via keyboard shortcut. Accept any prompts to add the information to your registry.Right Ctrl key and then press the Scroll Lock key twice in quick succession. This will force a blue screen and the system will generate a crash dump file.C:\Windows\MEMORY.DMP has been updated with the current date and time.ManualDump_OFF.reg to disable the manual dump trigger, then restart your PC again.This method is especially useful for capturing the exact state of the system during a problematic event, as it does not require waiting for an unexpected crash.
Enable Crash Dumps via Registry Editor
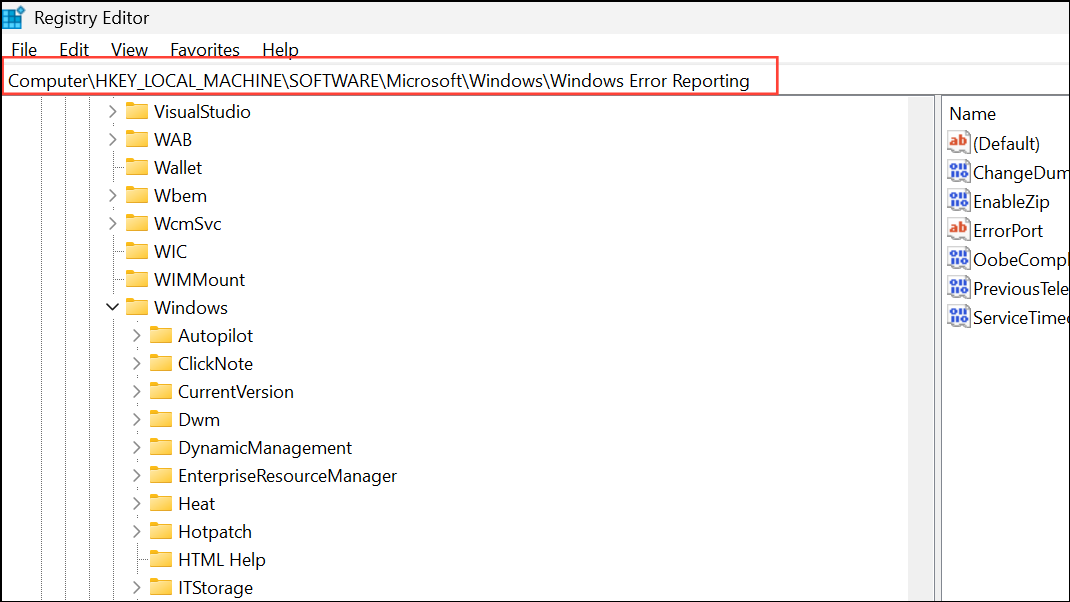
For advanced control over crash dump settings—such as specifying dump file location, count, or type—you can modify the Windows registry. Caution: Editing the registry incorrectly can cause system instability. Always back up relevant registry keys before making changes.
Win + R to open the Run dialog, type regedit, and press Enter. Approve any User Account Control prompts.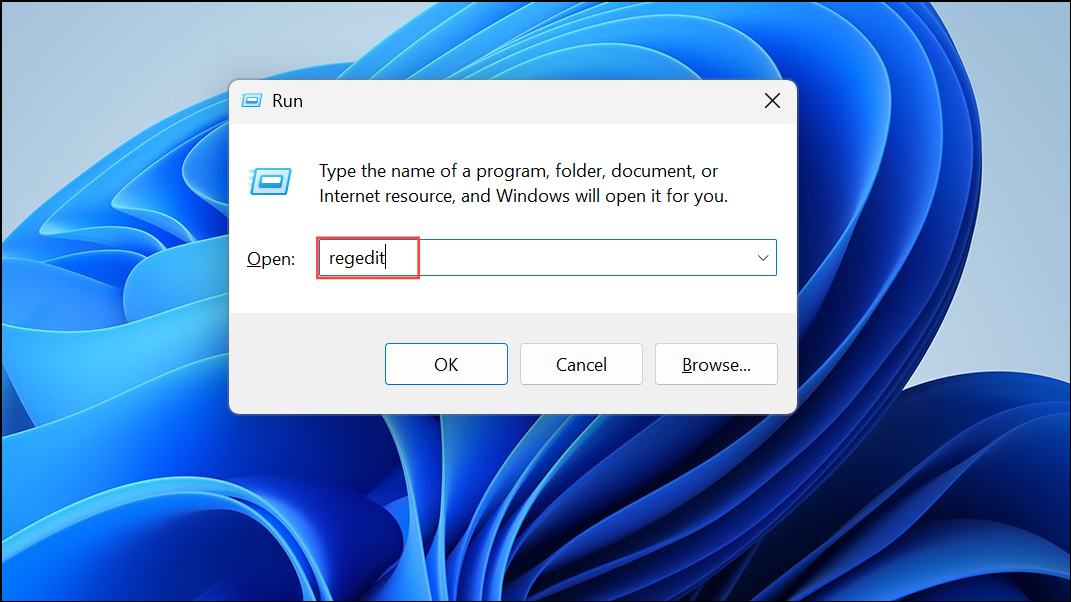
LocalDumps if it does not already exist.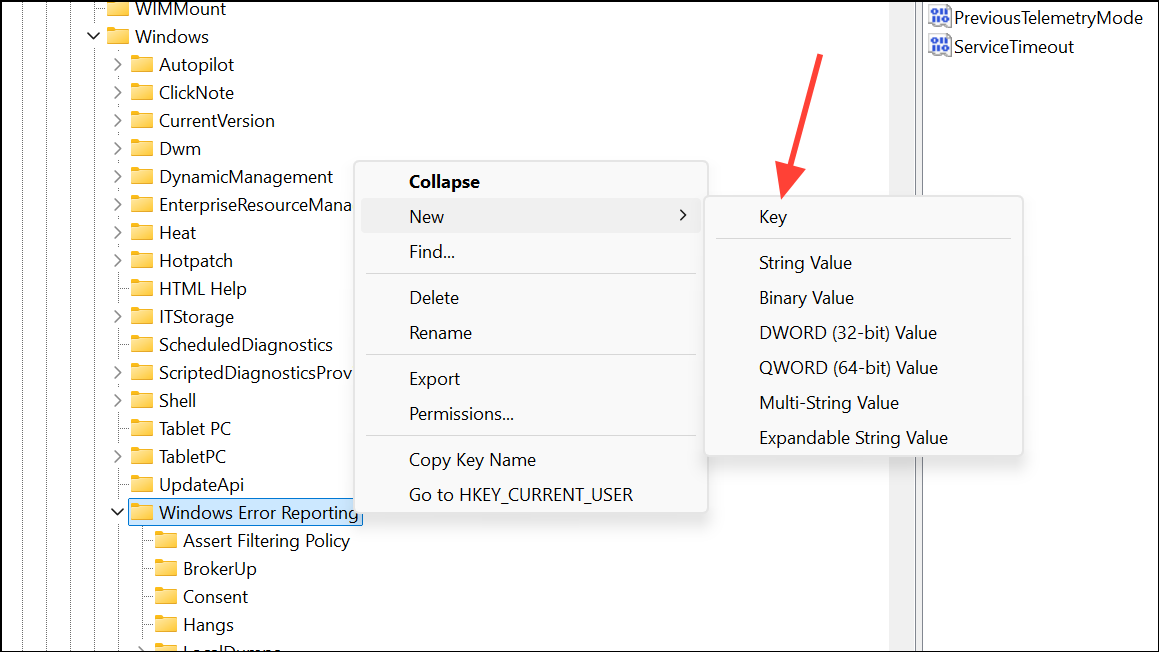
DumpFolder.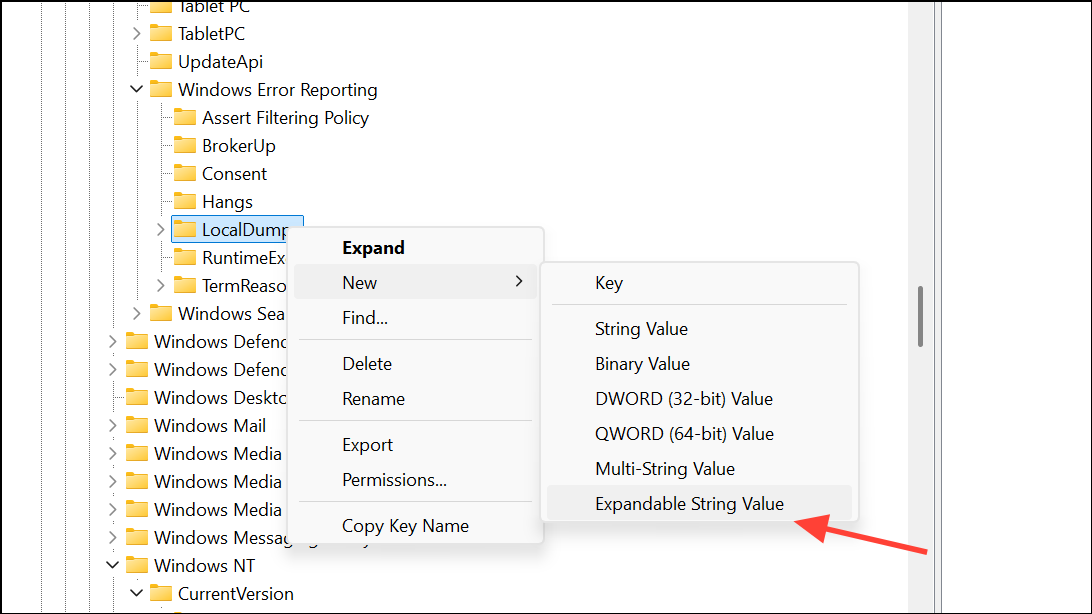
%LOCALAPPDATA%\CrashDumps to store dumps in your user profile’s CrashDumps folder.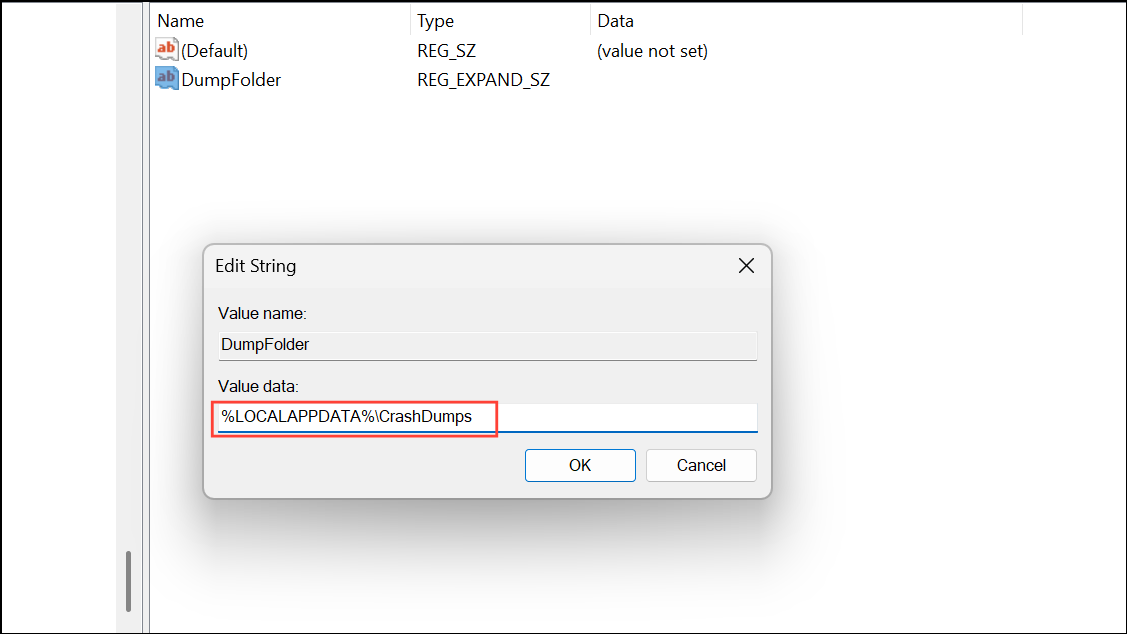
DumpCount, and set its value to 10 (or your preferred number of dump files to retain).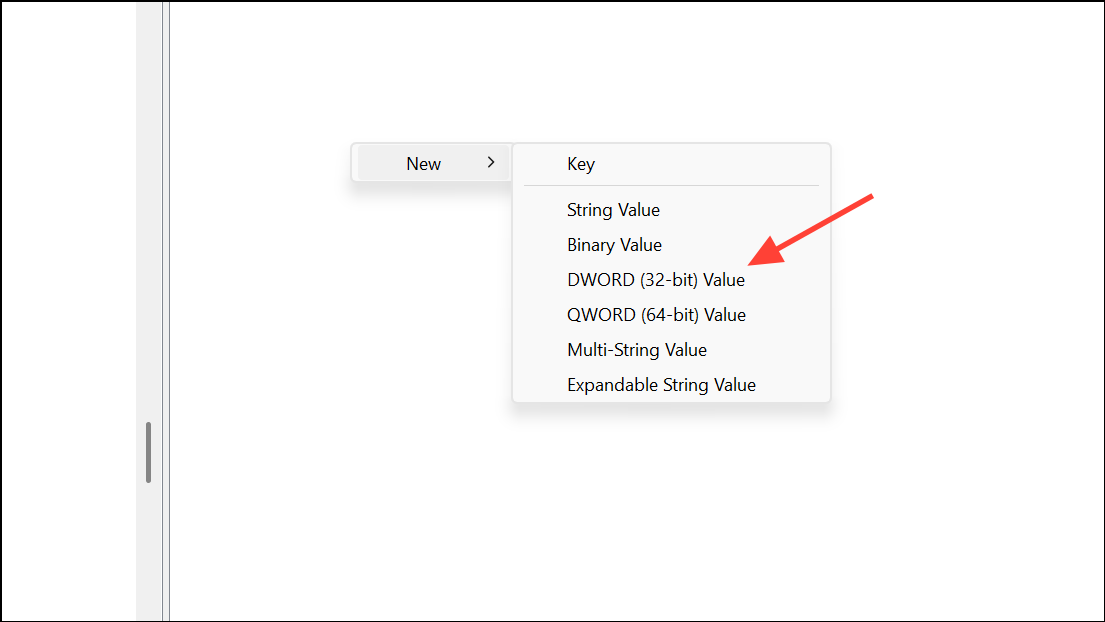
DumpType and set its value to 2 for full dumps or 1 for mini dumps.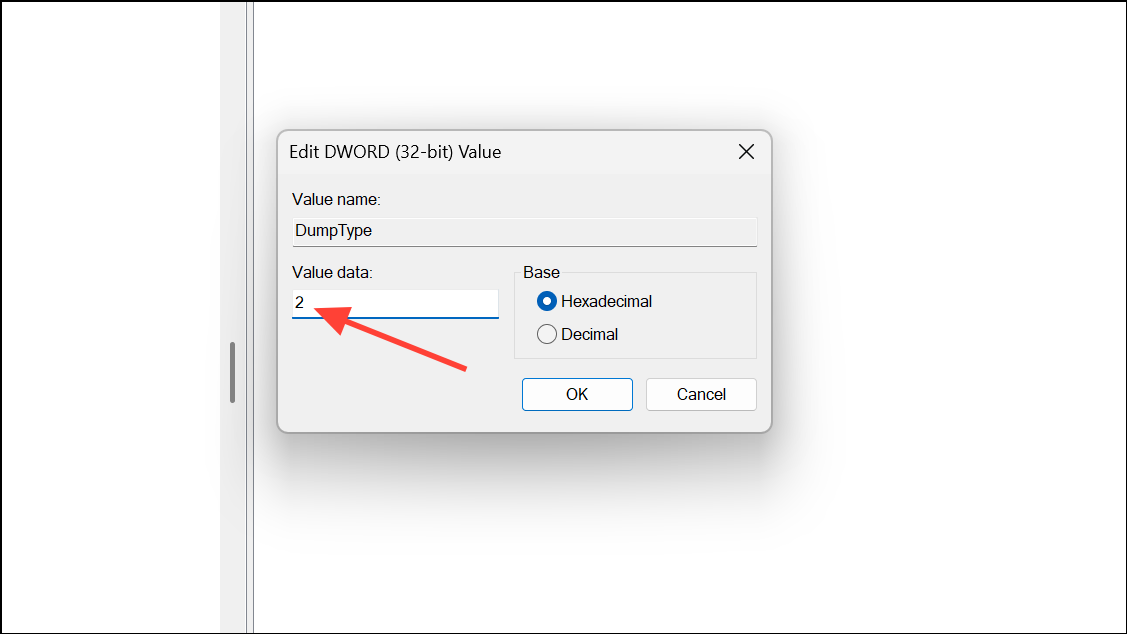
%LOCALAPPDATA%\CrashDumps for the new dump files.This registry approach provides flexibility in dump file management and is particularly useful for application-level crash diagnostics.
Locate and Access Crash Dump Files
After a crash or manual dump trigger, the dump file is typically saved as MEMORY.DMP in C:\Windows or as an application-specific dump in %LOCALAPPDATA%\CrashDumps. To view these files:
- Open File Explorer and navigate to the relevant folder.
- Ensure hidden files and system files are visible by going to View > Show > Hidden items, and disabling Hide protected operating system files in Folder Options.
- Use debugging tools like WinDbg Preview to analyze the dump file contents.
If the dump file is missing, double-check that crash dumps are enabled and that the system has sufficient free space. For laptops with BitLocker enabled, ensure the drive is unlocked before attempting to analyze dump files.
Configuring and manually creating crash dump files in Windows 11 streamlines troubleshooting for crashes and critical errors, giving you the diagnostic data needed to identify and resolve issues faster.