BitLocker encryption protects data on Windows 11 devices by securing entire drives, but certain updates or hardware changes require you to temporarily pause (suspend) this protection. Failing to suspend BitLocker before firmware or third-party updates can trigger repeated recovery key prompts or even lock you out of your system. Resuming BitLocker after maintenance or updates restores full security. Here’s how to properly suspend and resume BitLocker encryption on Windows 11 using the most effective and reliable methods.
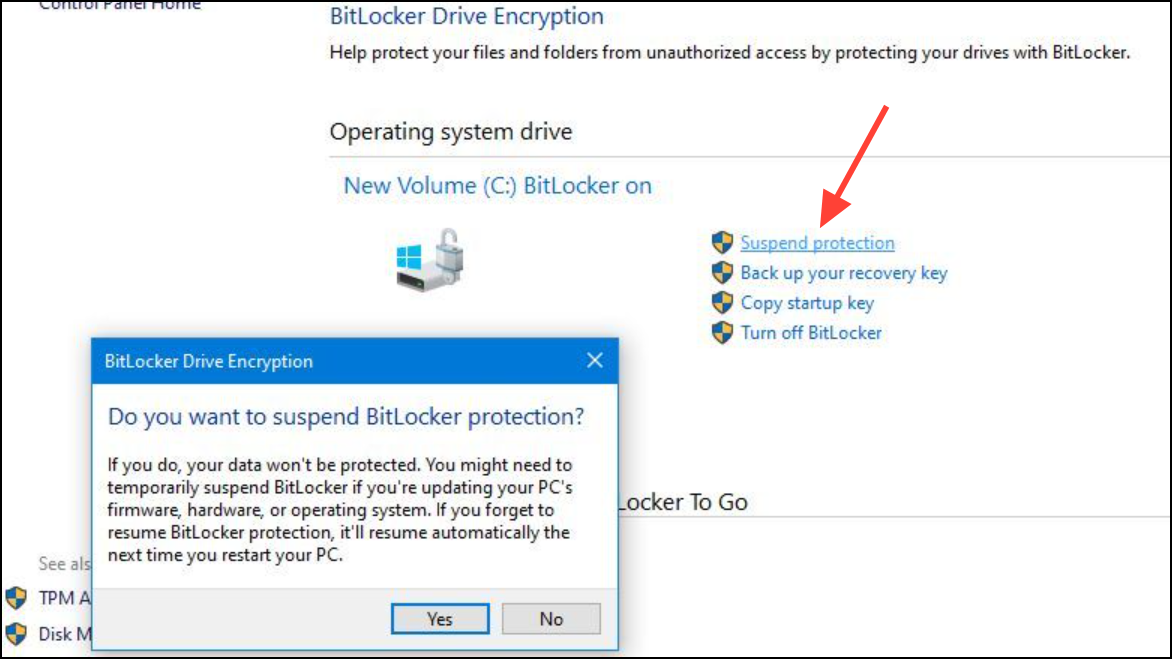
Suspending and Resuming BitLocker Encryption via Control Panel
Windows + R, typing control, and pressing Enter. Alternatively, search for “Control Panel” in the Start menu.

Using File Explorer to Resume BitLocker Protection
Suspending and Resuming BitLocker with PowerShell
PowerShell provides precise control, especially useful for advanced users or when managing multiple drives.
Suspend-BitLocker -MountPoint "C:"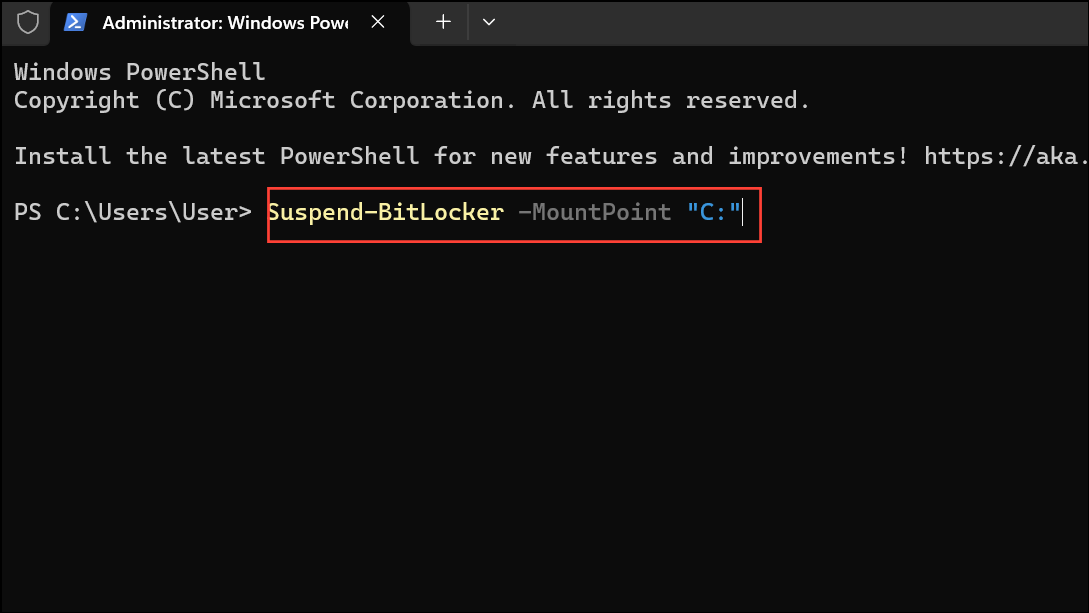
This command pauses protection until you manually resume it. To limit the suspension to a specific number of reboots, use:
Suspend-BitLocker -MountPoint "C:" -RebootCount 1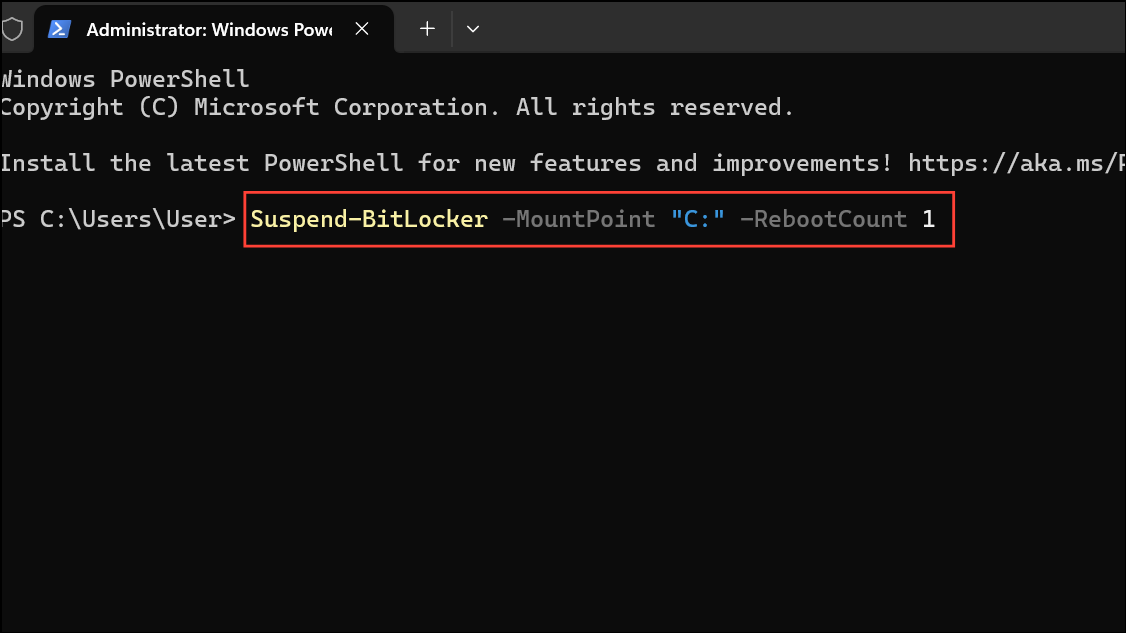
Replace 1 with the number of restarts you need BitLocker to remain suspended. A value of 0 keeps BitLocker suspended until manually resumed.
Resume-BitLocker -MountPoint "C:"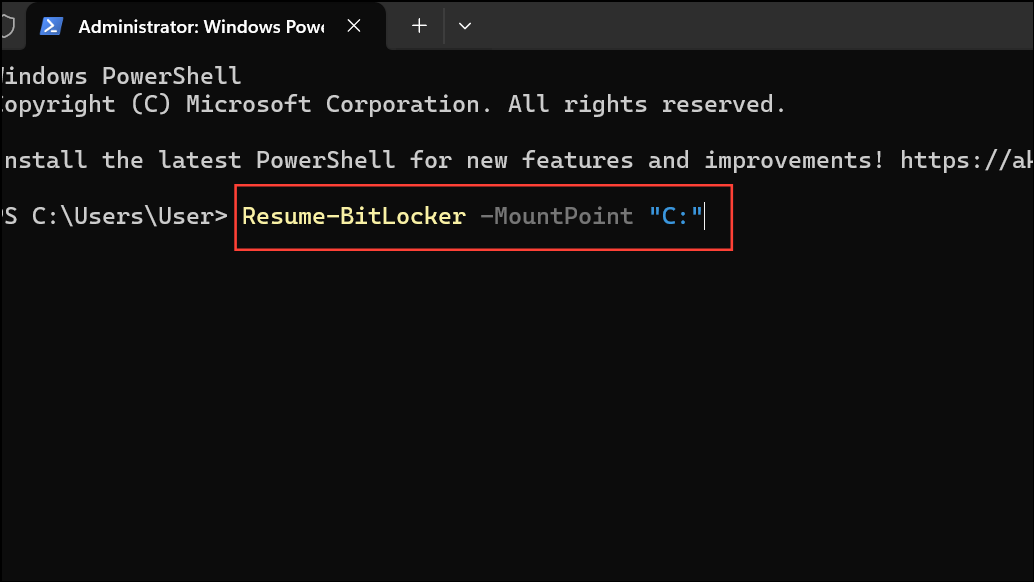
This command immediately restores BitLocker security on the specified drive.
Suspending and Resuming BitLocker with Command Line (manage-bde)
The manage-bde command-line tool offers another way to control BitLocker, especially when scripting or troubleshooting.
manage-bde -protectors -disable D: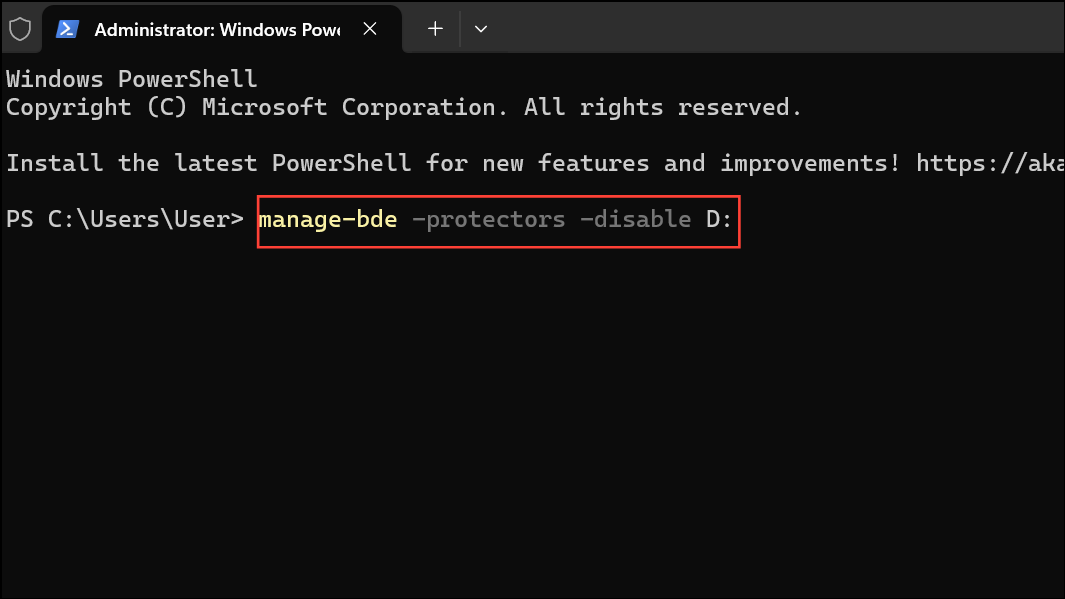
This disables BitLocker protectors and leaves the drive unprotected until resumed.
manage-bde -protectors -enable D: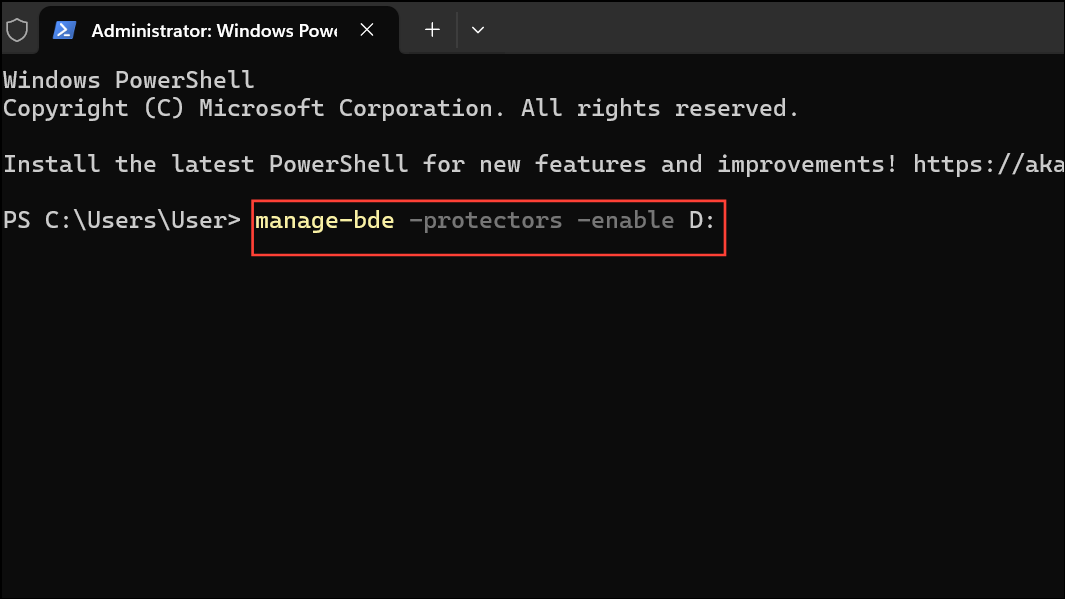
This reactivates BitLocker protection for the drive.
Device Encryption on Windows 11 Home
Windows 11 Home uses Device Encryption, which is a streamlined version of BitLocker. Device Encryption is automatically enabled when you sign in with a Microsoft account, and it applies to all internal drives. If Device Encryption is suspended or appears stuck, check encryption status using the command:
manage-bde -status C:
If encryption is incomplete, wait until it reaches 100%. If needed, use:
manage-bde -protectors -add C: -tpm
manage-bde -protectors -enable C: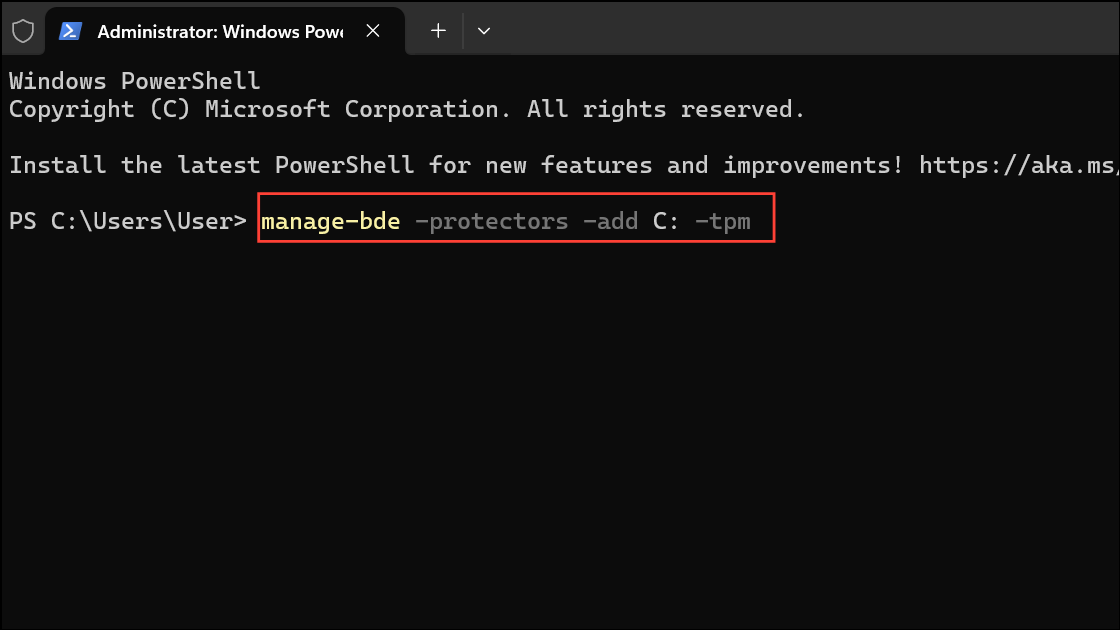
This ensures the drive is fully protected and resumes encryption if it was suspended.
When and Why to Suspend BitLocker
Suspending BitLocker is necessary before:
- Updating BIOS/UEFI or firmware that could affect boot components.
- Installing non-Microsoft software that modifies boot or security settings.
- Performing hardware upgrades or repairs that involve the motherboard or TPM.
Skipping this step can cause Windows to prompt for a recovery key on every restart, or even lock you out if the key is unavailable. Always resume BitLocker protection after completing maintenance to restore drive security.
Suspending and resuming BitLocker on Windows 11 keeps your system secure while avoiding unnecessary lockouts during updates or hardware changes. Regularly check BitLocker status and ensure recovery keys are safely backed up for reliable data protection.