The Gunslinger is the ranged physical damage advancement from the Scout class in SpiritVale, and its strongest farming setup is built entirely around one skill. With the right weapons and a heavy Dexterity investment, Panic Burst hits every enemy in a wide area for large critical damage, letting you delete packed mob groups with almost no windup.
Quick answer: Dual-wield two Triple Barrel Revolvers, socket them with House Fly Nom cards for critical rate, stack Dexterity as your main stat, and max Gun Mastery plus Panic Burst. Wear Plasma Boots for flinch resistance and Rusted Binocs for extra range.
Stat priority: DEX first, then AGI
Every Gunslinger weapon and skill scales with Dexterity, so it is the stat you pump first and hardest. It raises your physical damage and accuracy, which keeps your hits landing on higher-level enemies.
Agility comes second because Panic Burst, the skill you spam most, deals more damage based on your AGI. After that, spend a moderate amount in Luck to push your critical rate, then dump whatever is left into Vitality for survivability.
| Priority | Stat | Why it matters |
|---|---|---|
| 1 | Dexterity | Scales weapons and all Gunslinger skills; adds accuracy |
| 2 | Agility | Boosts Panic Burst damage and attack speed |
| 3 | Luck | Raises critical rate |
| 4 | Vitality | Extra health with leftover points |
Weapons: two Triple Barrel Revolvers plus a shotgun
The core of the build is dual-wielding two Triple Barrel Revolvers. Each revolver directly increases Panic Burst damage and its area, and because the effect stacks from wielding two of them, you cover a large radius while hitting every enemy inside it for heavy physical damage.
Socket the revolvers with House Fly Nom cards to raise their critical rate, which pairs directly with your Luck investment. Keep a shotgun as a secondary weapon so you can switch into close-range burst skills like Point Blank and Shrapnel when a pack is right on top of you.
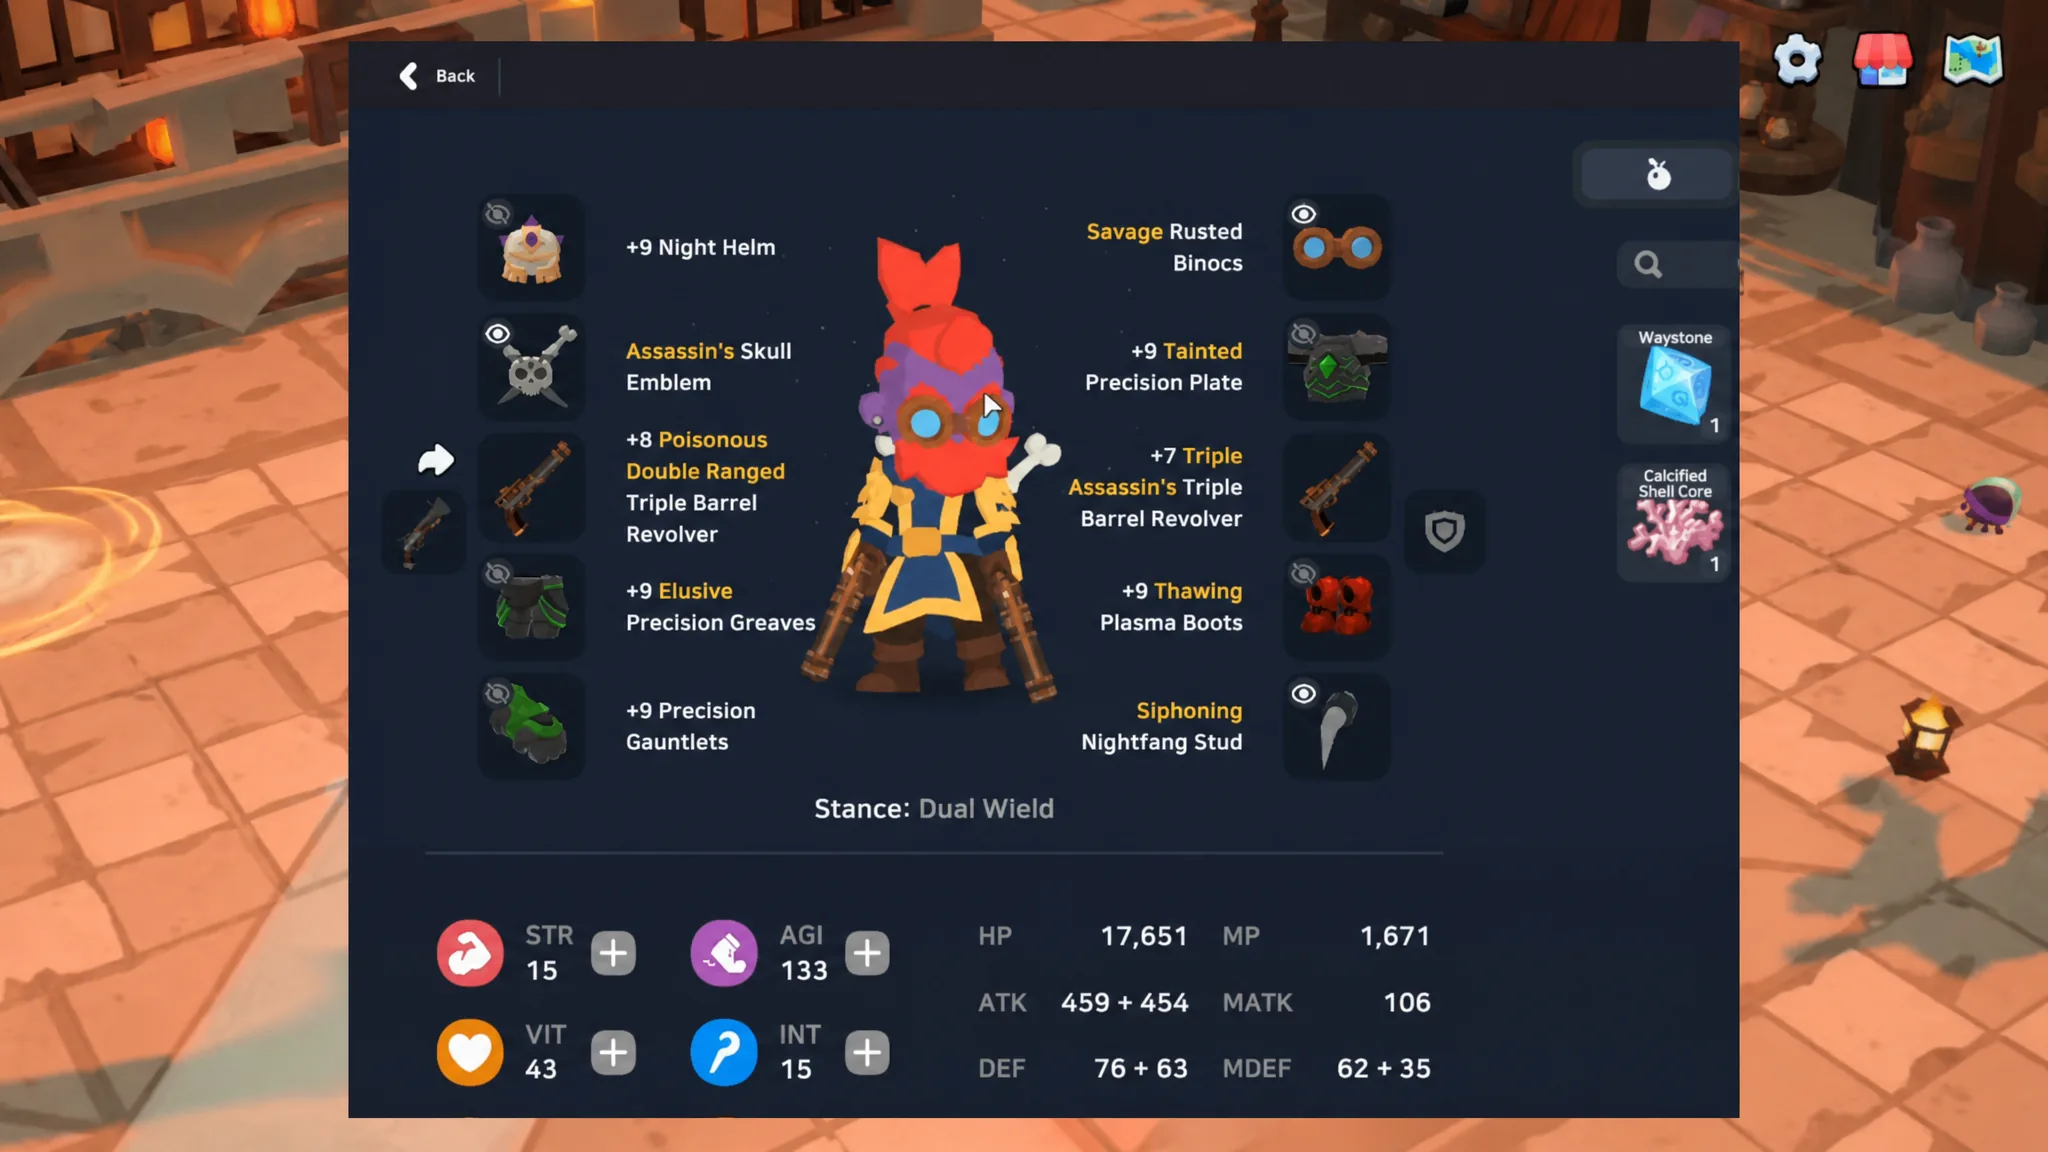
Armor and gear
Your gear solves two problems at once, more Dexterity and enough utility to keep firing without getting pinned. The Precision Set anchors the setup, while a few standout pieces cover range, sustain, and crowd control resistance.
| Slot | Gear | Effect |
|---|---|---|
| Shoes | Plasma Boots | Flinch resistance so mobs cannot pin you down |
| Headgear | Night Helm | All Stat boost |
| Face | Rusted Binocs | Increases ranged damage and range |
| Chest, Legwear, Accessory | Precision Set | Raises overall DEX, your main damage stat |
| Accessory | Nightfang Stud | Health leech for self-sustain in fights |
| Utility | Skull Emblem | Increases critical rate |
Plasma Boots are the piece you should not skip. Without flinch resistance, a large pack can lock you in place long enough to interrupt your rotation, which is where this build loses its speed.
Artifact sets
The Eternis Artifact Set is the default choice. It grants a large All Stat boost, which feeds your Dexterity and amplifies your physical damage across the board.
If you want an elemental angle, the Corporeal Set lets you run Hole element damage on your weapon instead. Pick one direction rather than splitting between them.
Skill allocation for the Panic Burst rotation
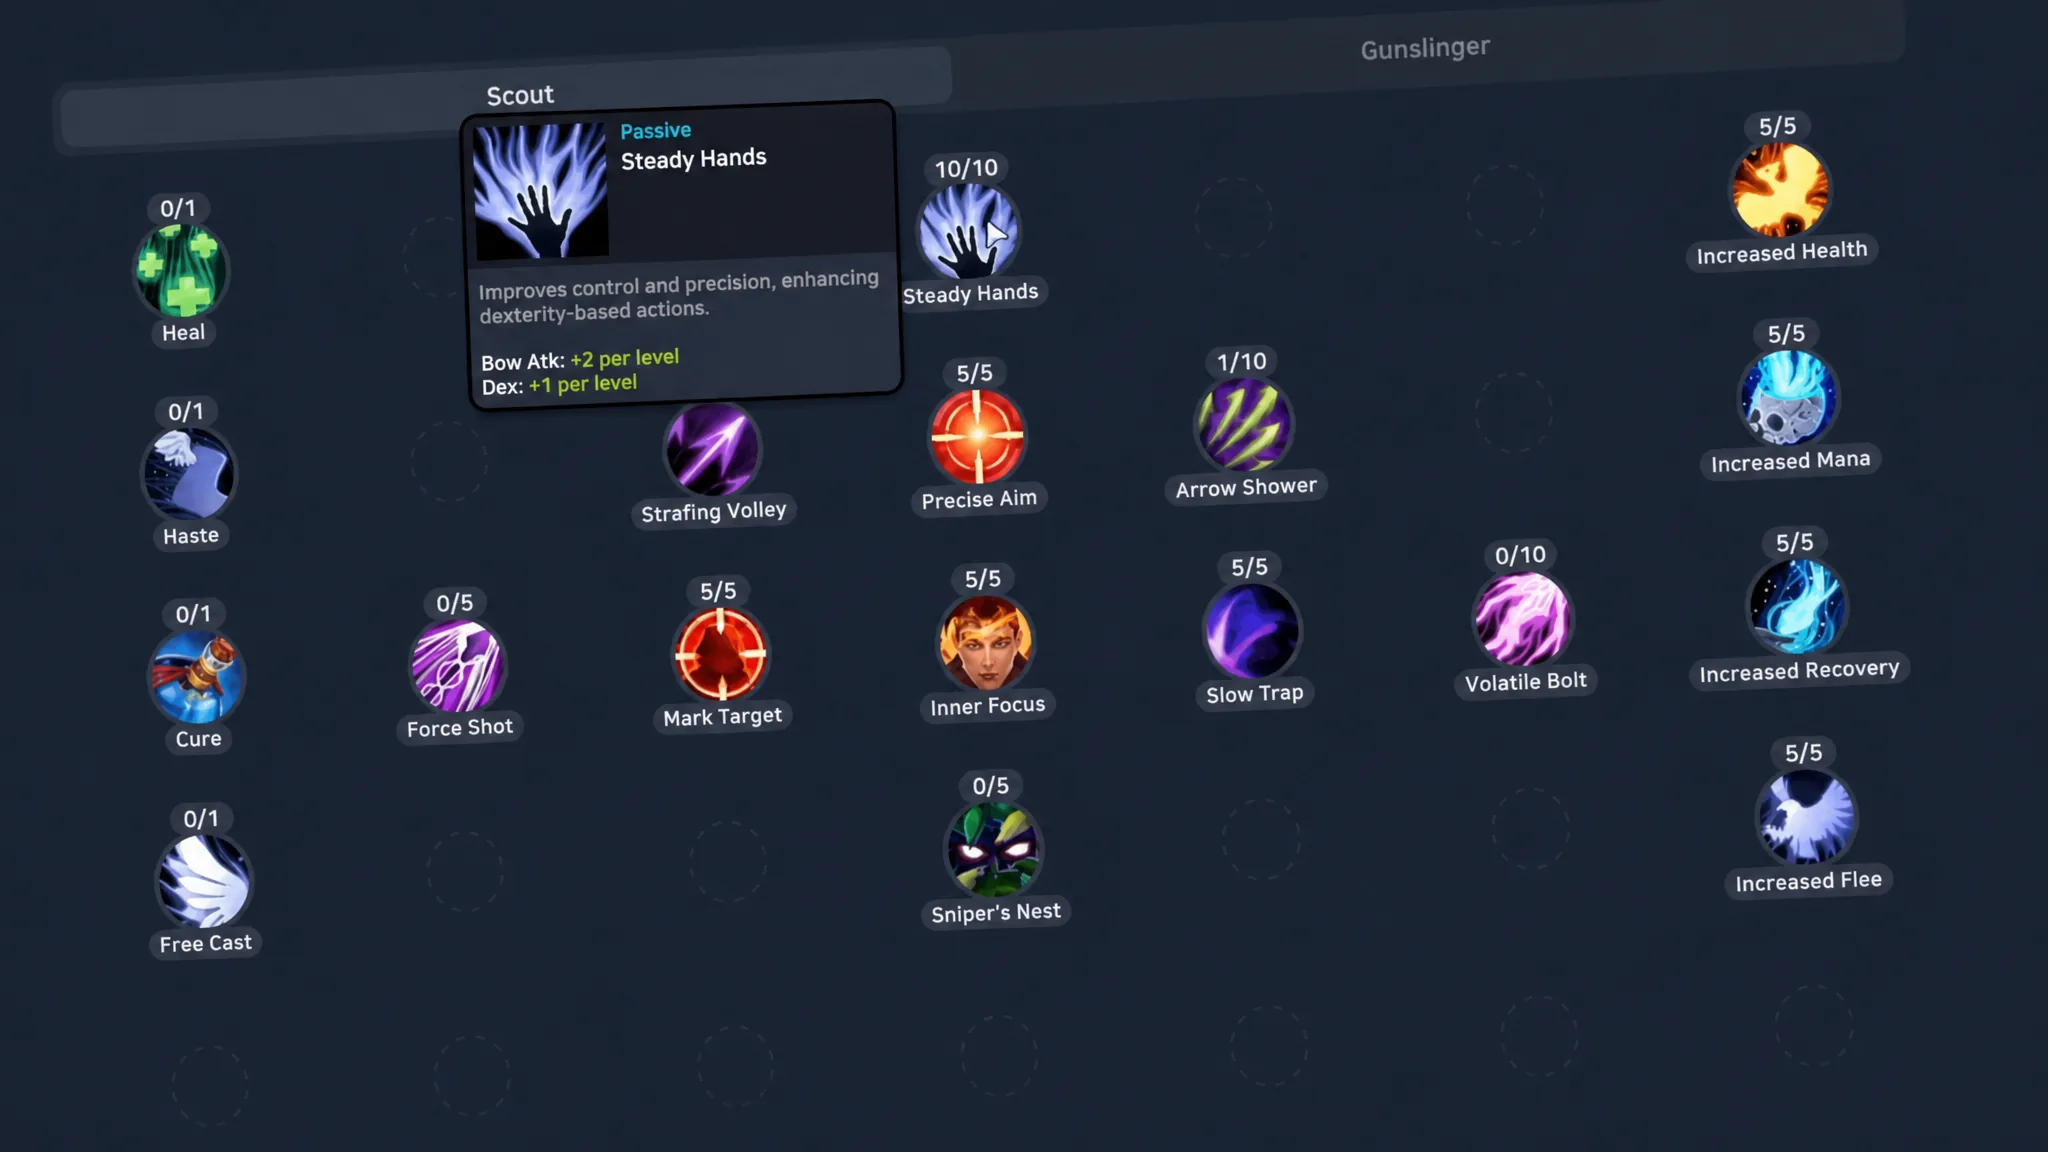
Two trees feed this build. The Scout tree provides passive stat gains and control, while the Gunslinger tree carries your damage and mobbing tools. Maxing Gun Mastery and Panic Burst is the priority for raw output.
Scout tree
- Steady Hands — grants 10 DEX
- Precise Aim — increases your range
- Inner Focus — grants more DEX, Agility, and Mana
- Mark Target
- Slow Trap
Max these passives to collect their stat bonuses. They quietly add a large amount of Dexterity and range before you spend a single point in the Gunslinger tree.
Gunslinger tree
- Gun Mastery — max for overall damage
- Panic Burst — max, your main spam skill
- Trigger Happy — slows enemies, essential for mobbing
- Aerial Shot
- Flash Bang — stuns enemies
- Point Blank — close-range shotgun damage
- Shrapnel — close-range shotgun damage
- Suppressive Shot
Trigger Happy is what makes mob farming smooth, since slowing a pack keeps it stacked inside your Panic Burst radius. Flash Bang is optional and mainly useful if you did not invest in Slow Trap, so pick one form of control rather than both.
Point Blank and Shrapnel only become available because you keep a shotgun in your second weapon slot. Both scale up your damage when enemies are close, giving you a reliable answer when a group closes the gap.
SpiritVale is in Early Access, so weapon values, skill scaling, and card effects can shift with future balance patches. If a stat spread or skill point split stops performing, you can reset both stats and skills at the Waybinder NPC near the Waypoint in Nevaris, then re-tune the DEX and AGI balance around your current gear.