
Disabling unnecessary startup programs immediately reduces system resource usage and shortens boot times. Many pre-installed applications and background processes launch automatically, slowing down performance and cluttering your workspace.
Step 1: Open Task Manager by pressing Ctrl + Shift + Esc. Click the Startup apps tab to view a list of programs that start with Windows.
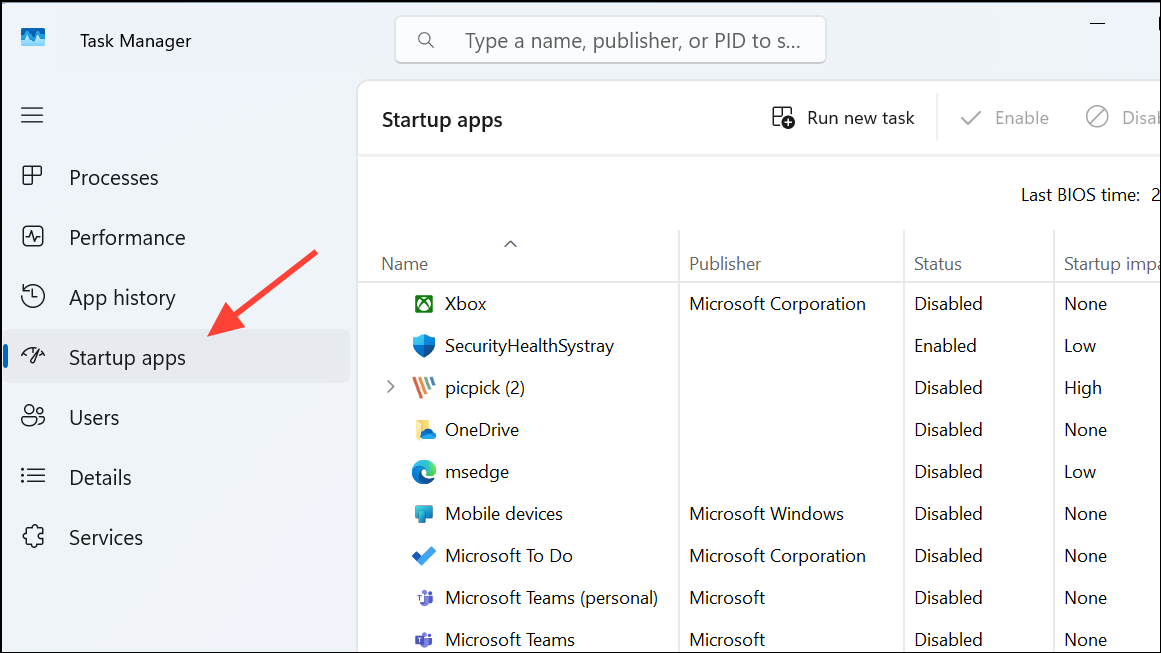
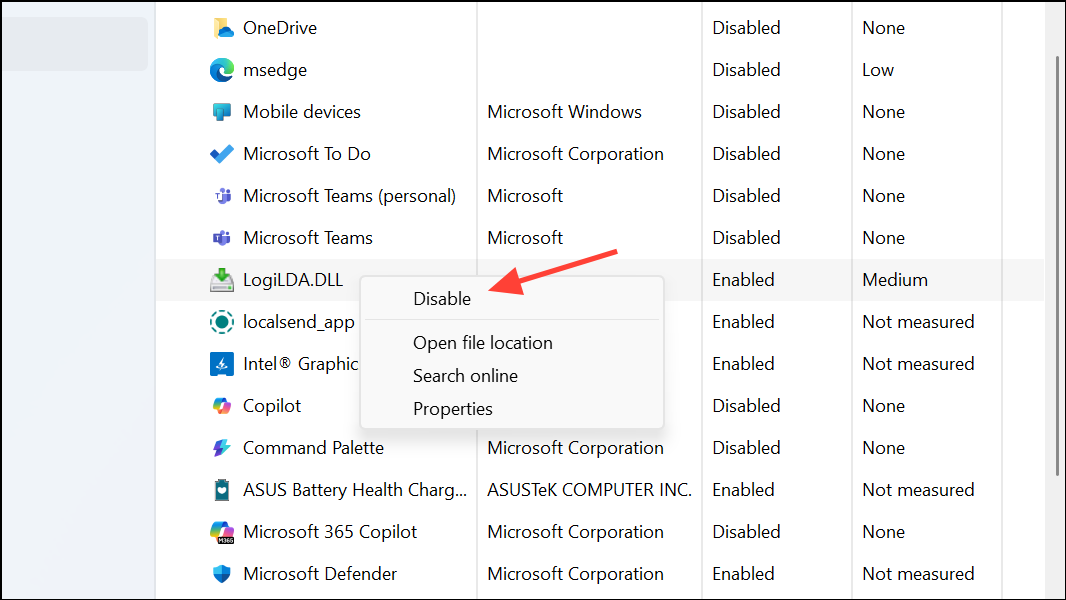
Step 2: Review each entry and right-click and disable any non-essential applications. Disabling these programs prevents them from running in the background, freeing up memory and CPU resources.
Step 3: Restart your computer to confirm that only critical programs launch at startup. This change speeds up boot times and creates a cleaner desktop environment.
Uninstall Pre-Installed and Unwanted Apps
Windows 11 comes with bundled applications, often referred to as "bloatware," which can take up storage and distract from your workflow. Removing these apps reclaims disk space and declutters the Start menu.
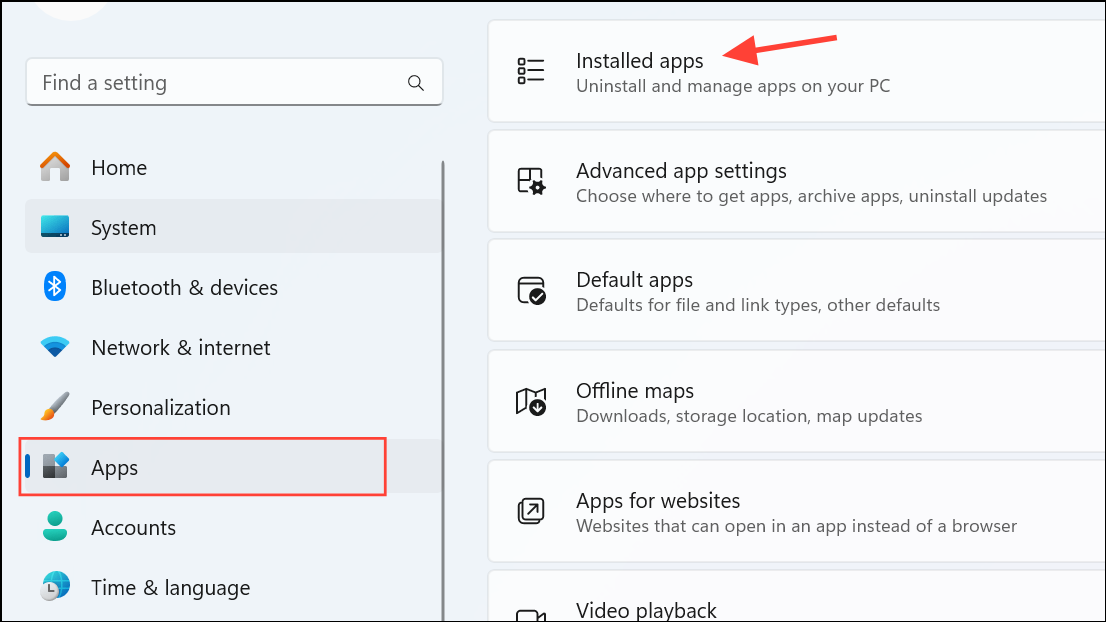
Step 1: Open Settings by pressing Windows + I. Go to Apps > Installed apps.
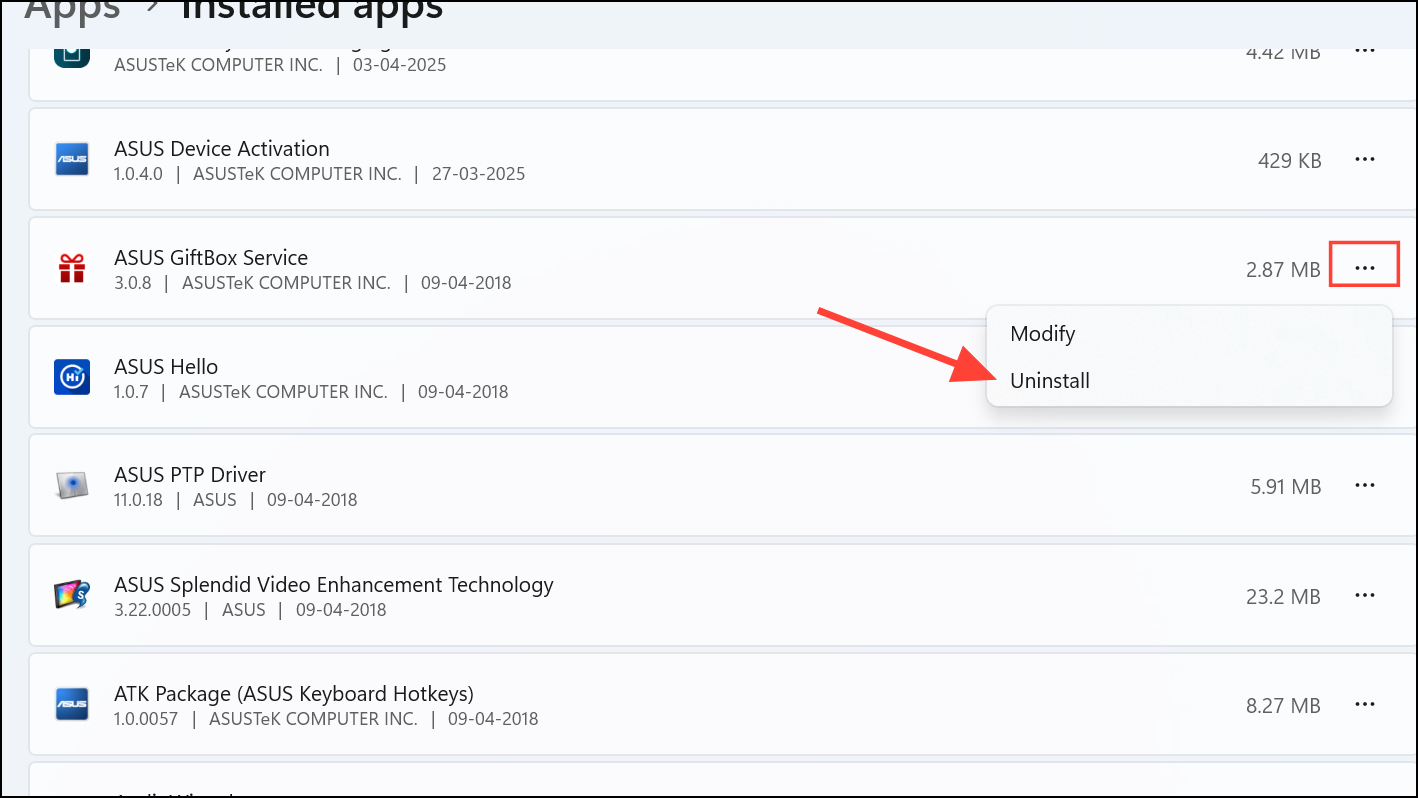
Step 2: Scroll through the list and click the three-dot menu next to any unwanted application, then select Uninstall. Follow the prompts to complete its removal.
Step 3: For stubborn or system apps that do not offer an uninstall option, use Windows PowerShell. Right-click the Start button and select Windows Terminal (Admin).
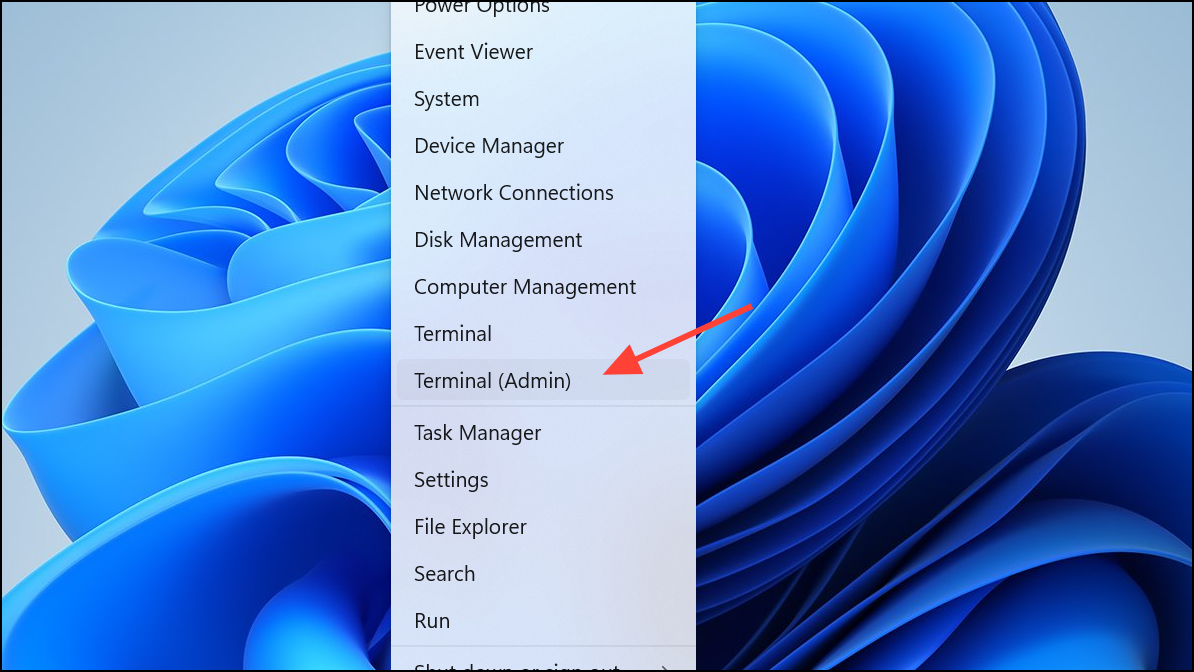
Step 4: Then, enter the appropriate command to remove specific apps. For example, to remove Xbox, use:
Get-AppxPackage *xbox* | Remove-AppxPackage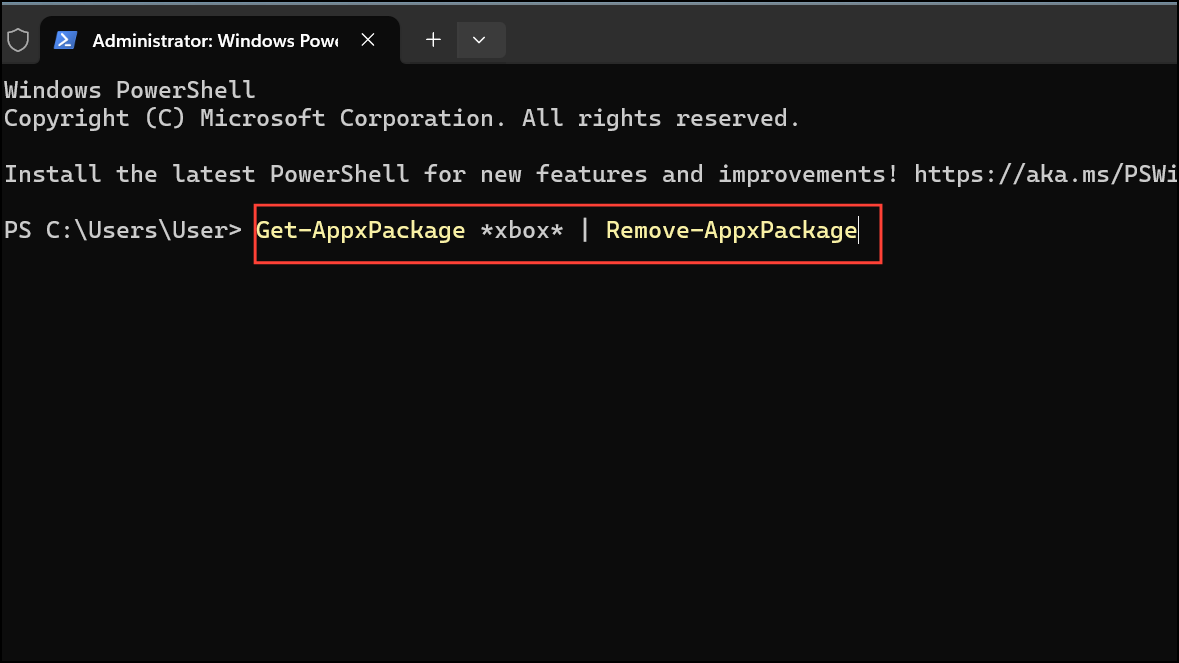
Be cautious when removing system apps, as some may be required for core Windows features.
Customize the Start Menu and Taskbar
A cluttered Start menu and Taskbar can slow down navigation and make it harder to access frequently used programs. Customizing these elements tailors your workspace to your needs and reduces distractions.
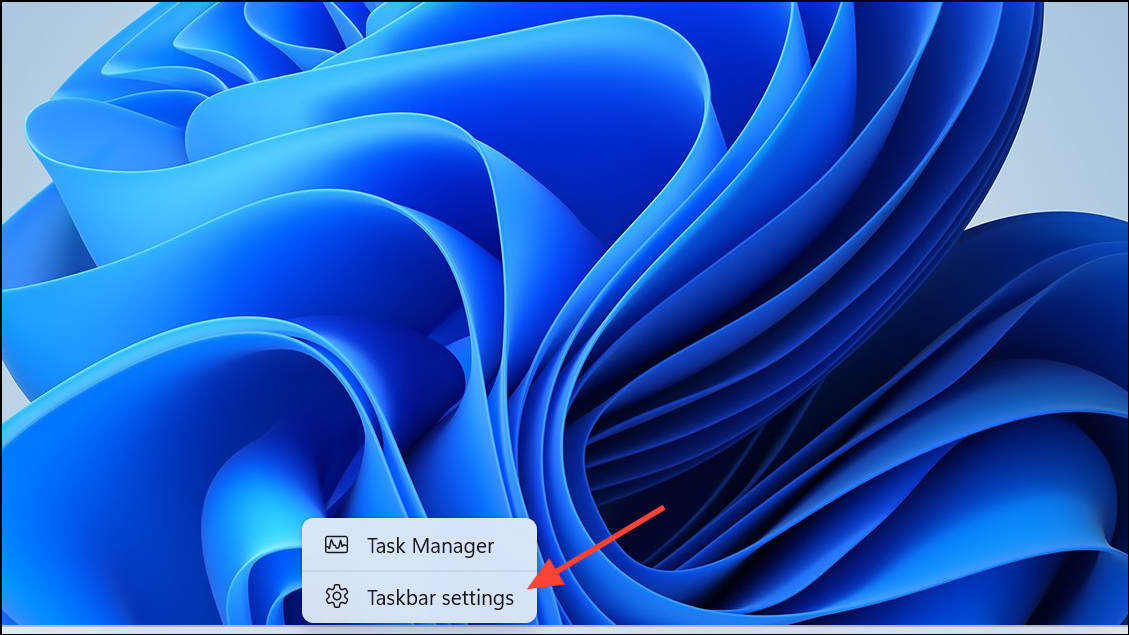
Step 1: Right-click the Taskbar and select Taskbar settings.
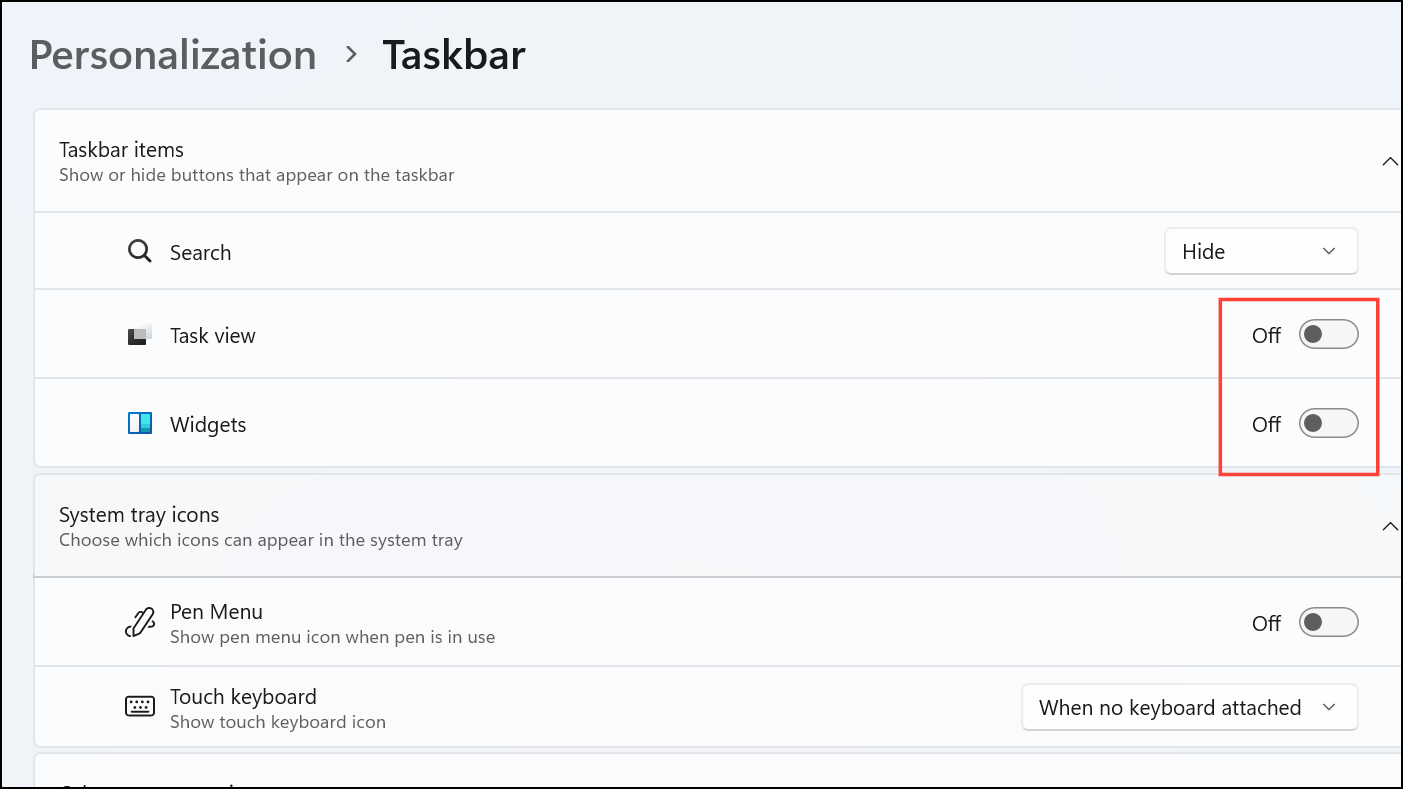
Step 2: Turn off widgets, chat, or other unused features by toggling their switches. This action removes unnecessary icons and streamlines the Taskbar.
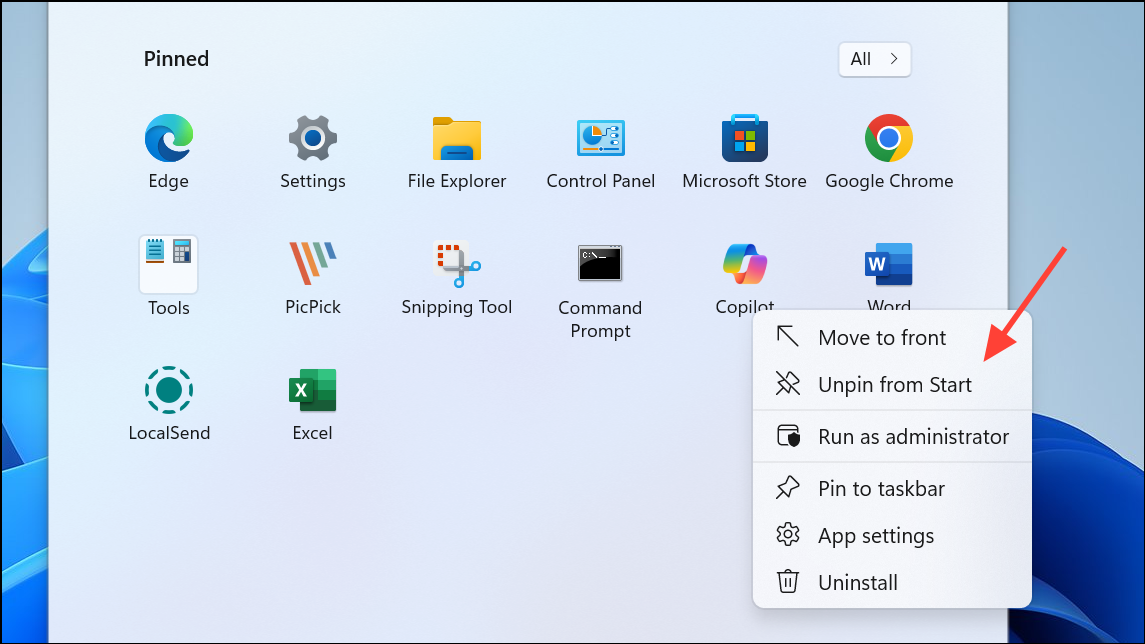
Step 3: Open the Start menu, right-click any unwanted pinned apps, and select Unpin from Start. Pin your most-used apps for quicker access. This makes the Start menu less crowded and more relevant to your workflow.
Disable Unnecessary Visual Effects
Windows 11 includes several visual effects that can make the interface feel sluggish, especially on older hardware. Disabling these effects improves responsiveness and reduces distractions.
Step 1: Press Windows + I to open Settings. Go to System > About.
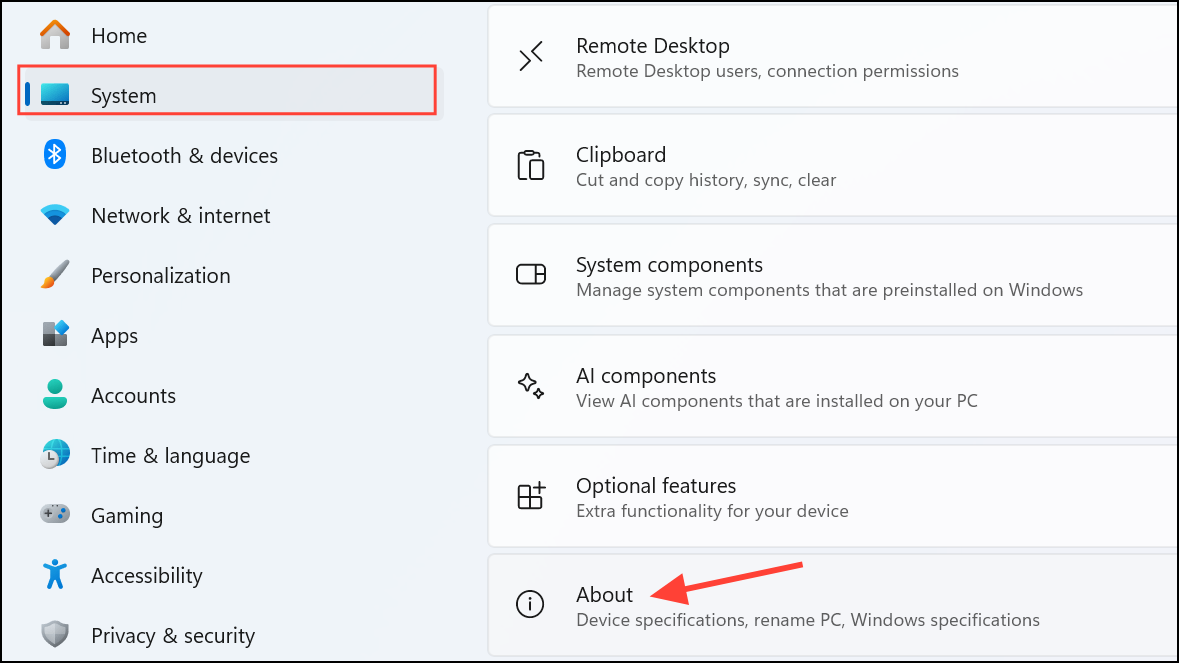
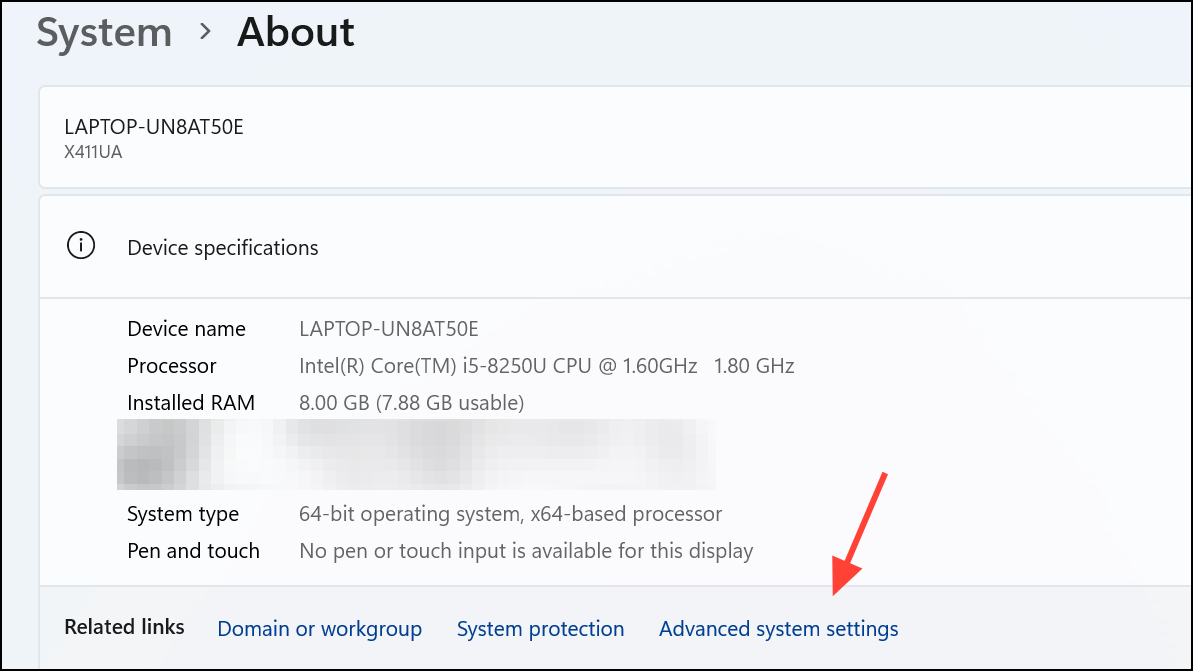
Step 2: On the About Page, click on Advanced system settings.
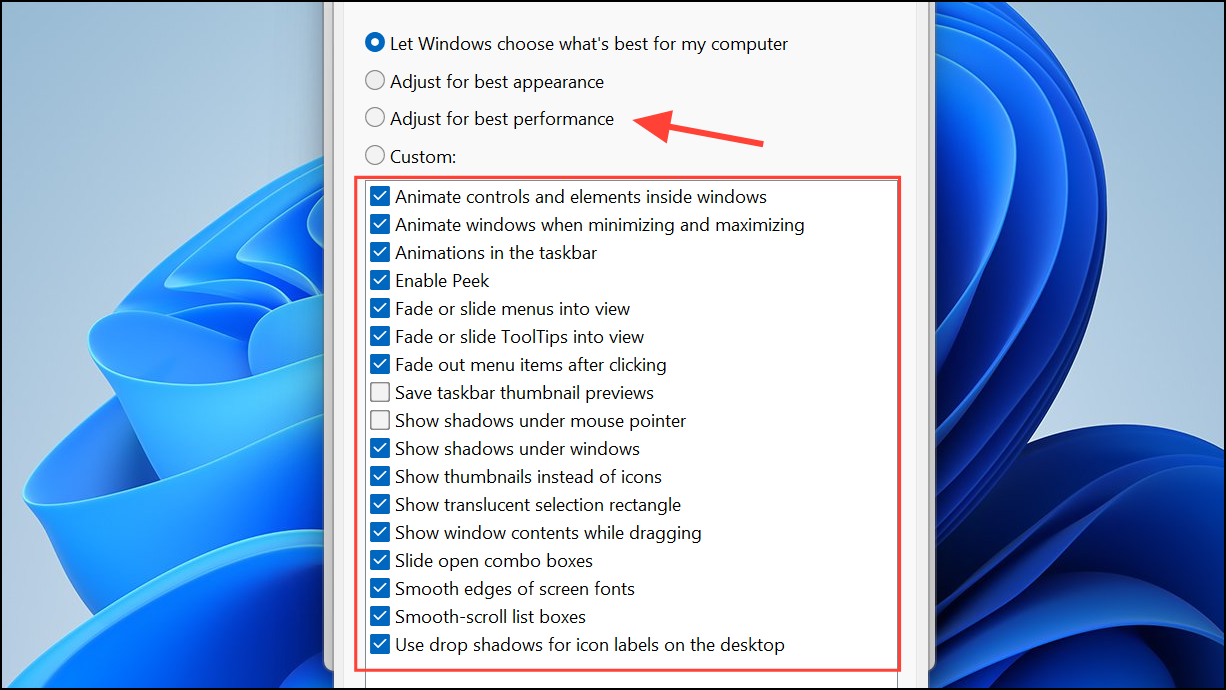
Step 3: In the System Properties window, click Settings under the Performance section.
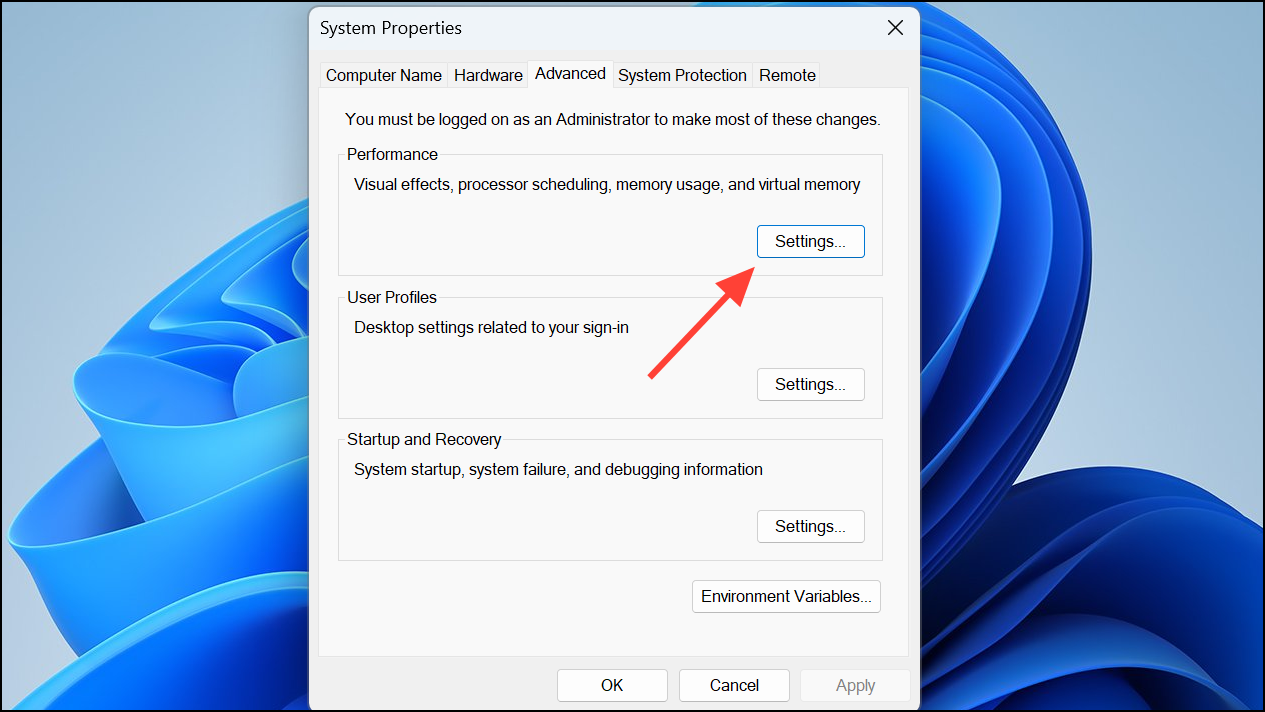
Step 4: Select Adjust for best performance or manually disable specific effects like animations and transparency. Click Apply to save changes. The desktop will feel snappier, and system resources will be freed up for other tasks.
Manage Notifications and Focus Assist
Frequent notifications can interrupt your workflow and clutter the Action Center. Adjusting notification settings and using Focus Assist reduces interruptions and creates a more streamlined experience.
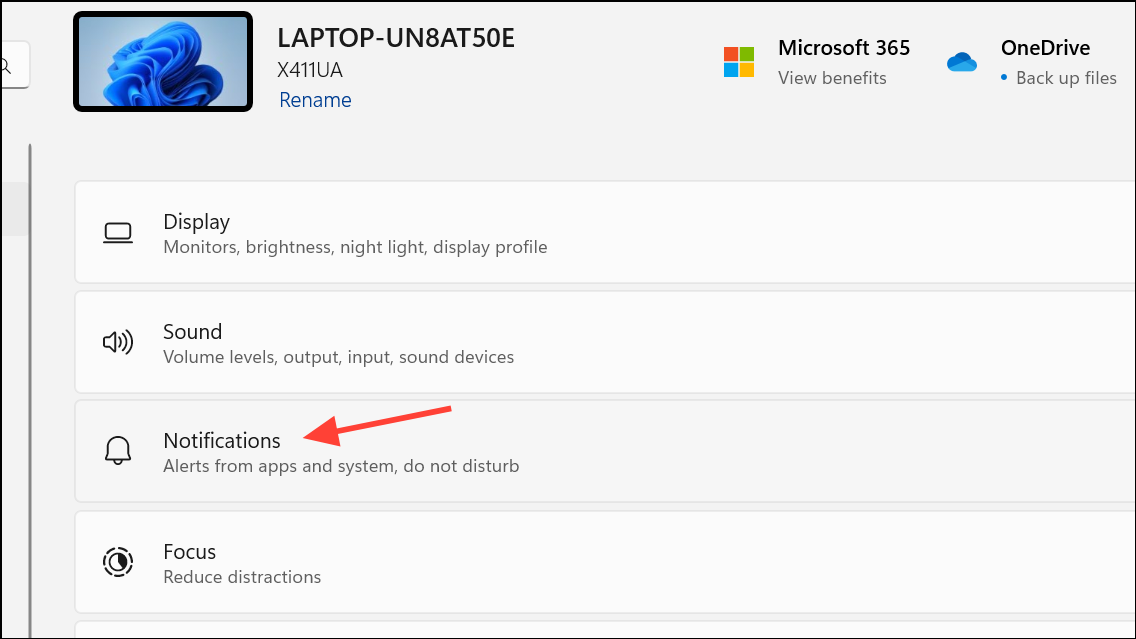
Step 1: Open Settings and navigate to System > Notifications.
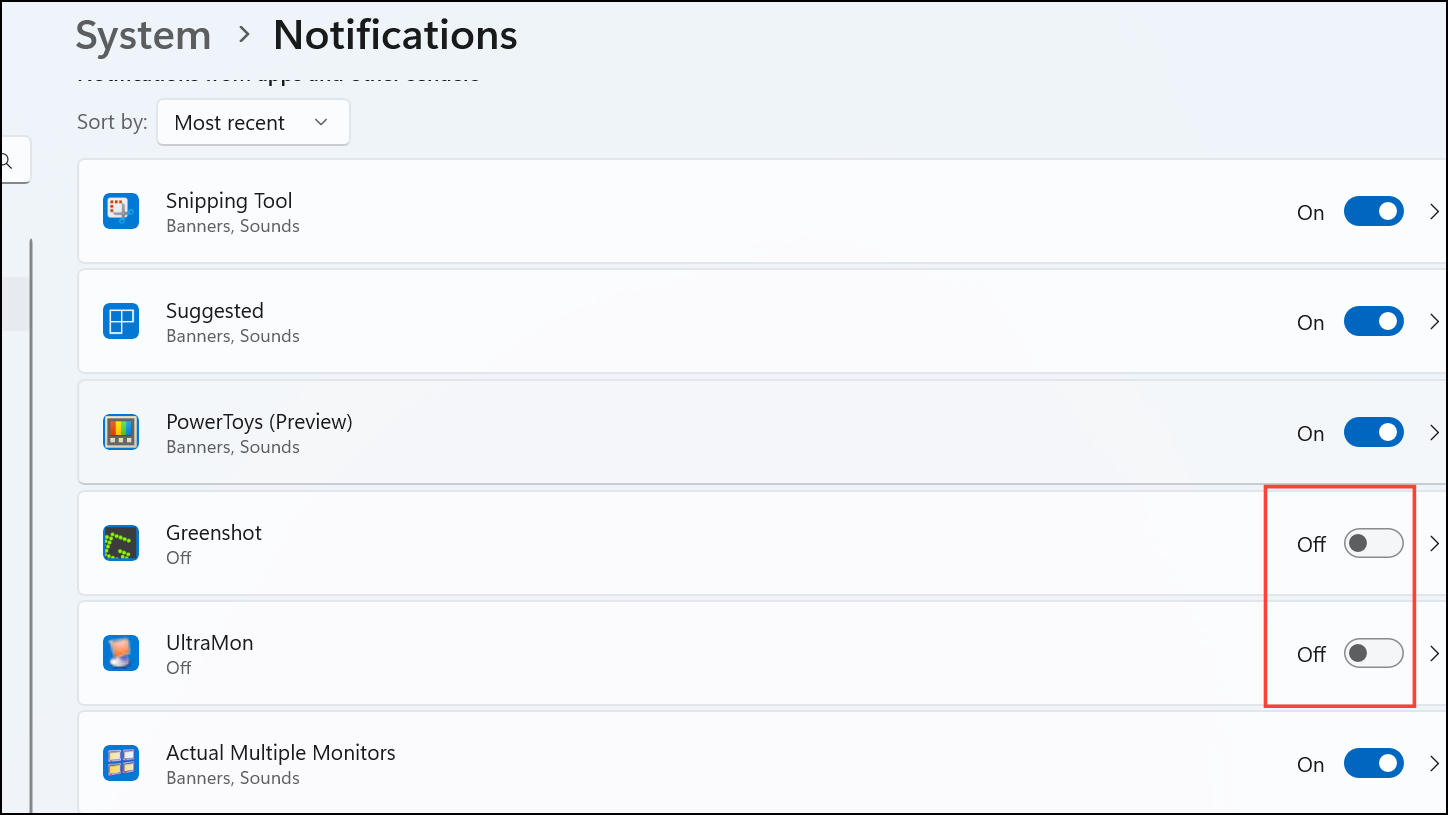
Step 2: Scroll down to the Notifications from apps and other senders section and turn off notifications for non-essential apps by toggling their switches. This limits pop-ups and keeps your attention on important tasks.
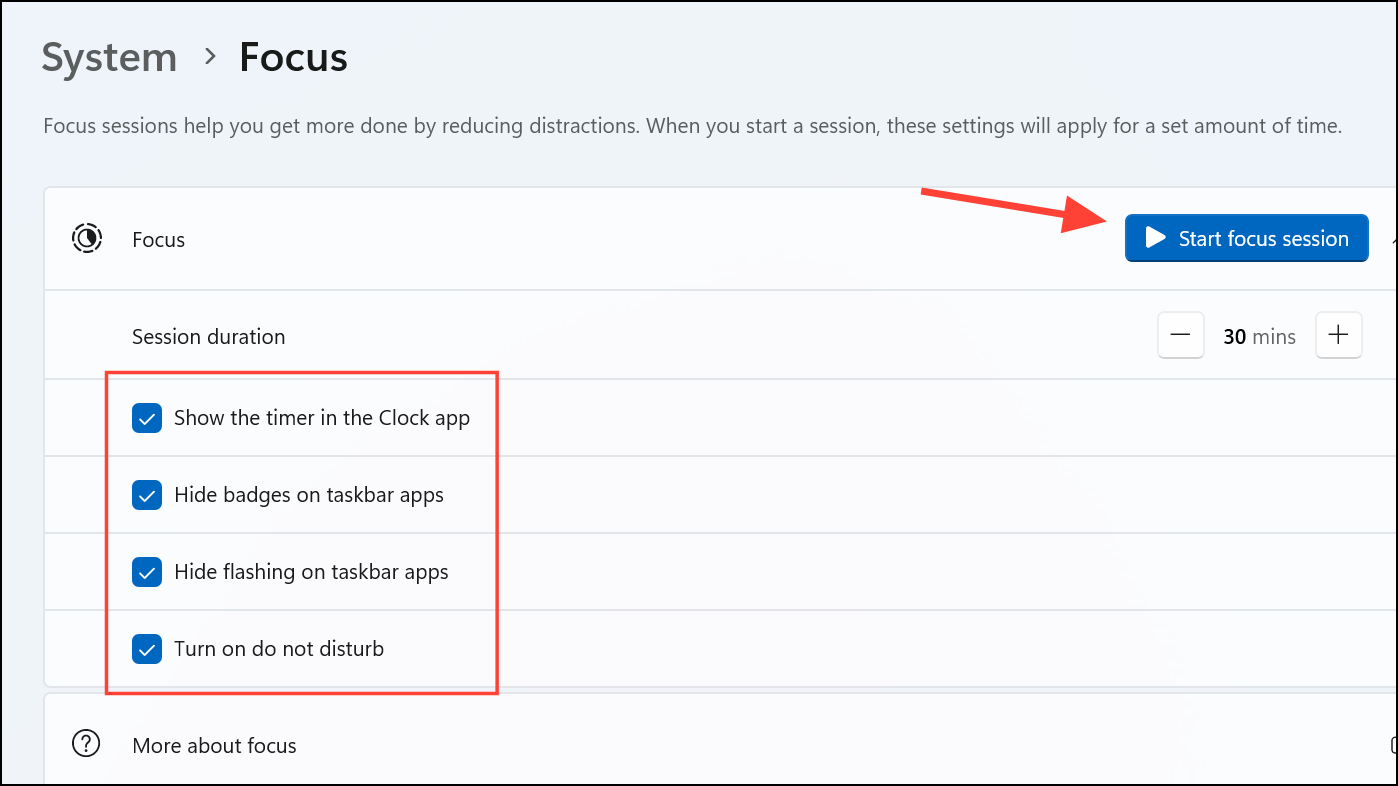
Step 3: Go back up and click on Focus.
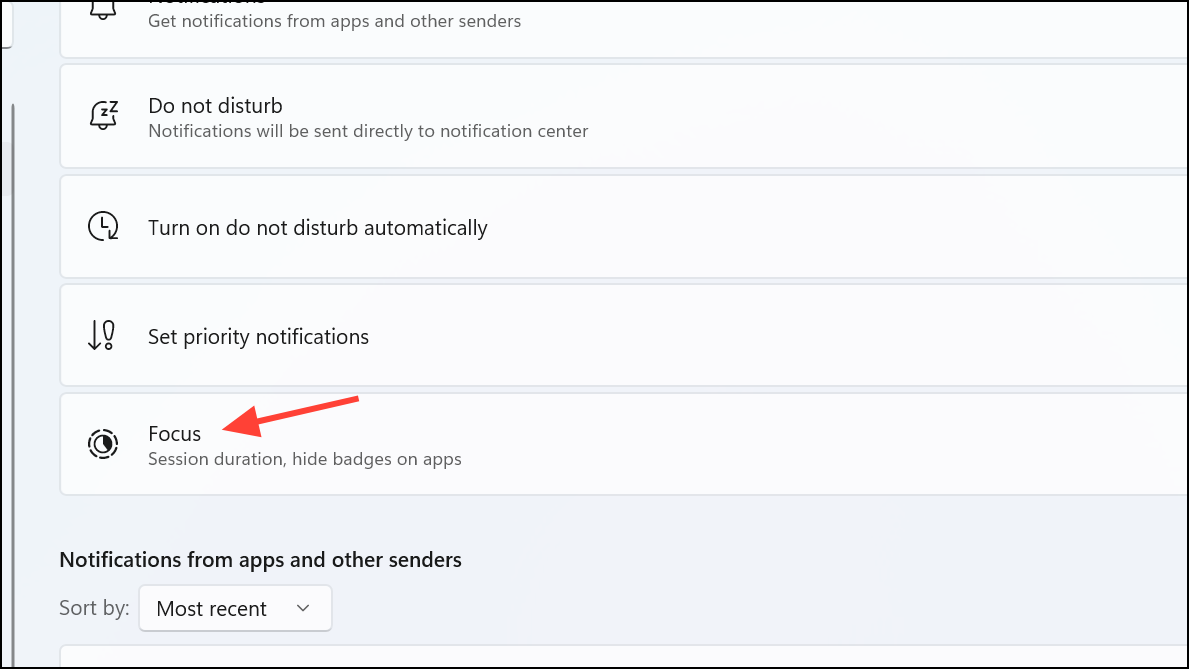
Step 4: You can then set up and customize Focus sessions, which will block notifications and other interruptions, preventing you from getting disturbed. Focus mode also lets you turn on Do Not Disturb mode for specific periods, such as work hours or presentations, which suppresses unnecessary alerts. This feature ensures you remain focused and undisturbed.
Clean Up Storage and Temporary Files
Over time, Windows 11 accumulates temporary files and unused data that can take up valuable disk space. Cleaning up these files improves system performance and prevents storage warnings.
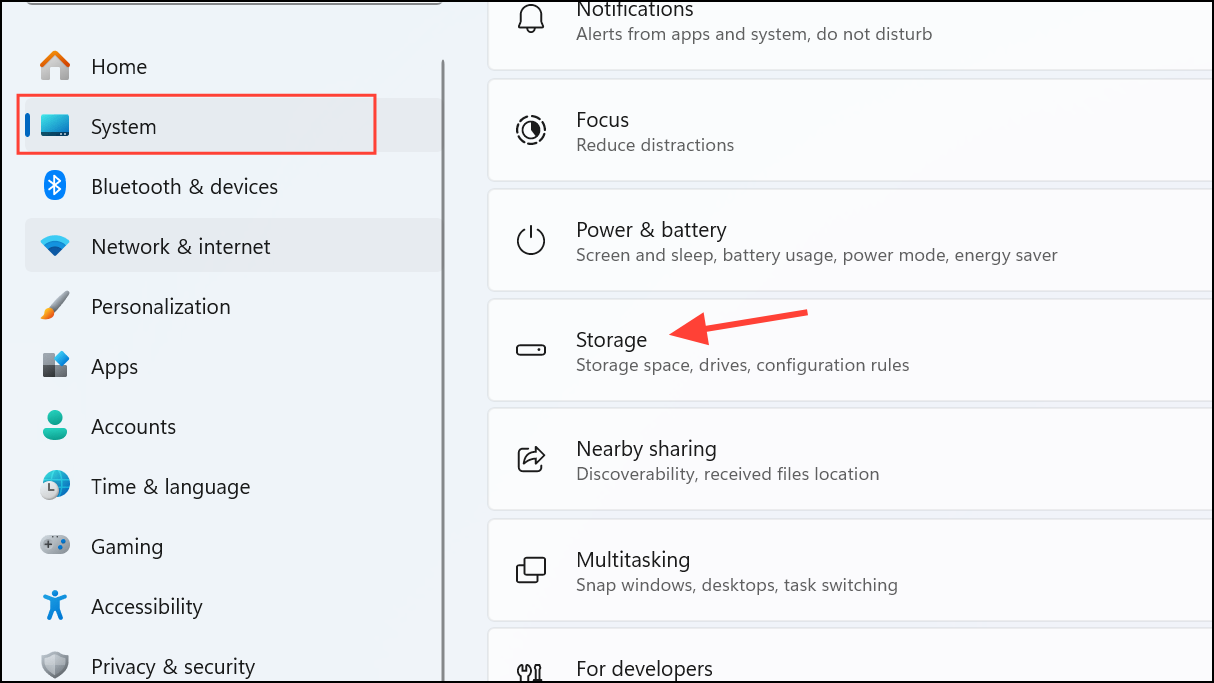
Step 1: Open Settings and go to System > Storage.
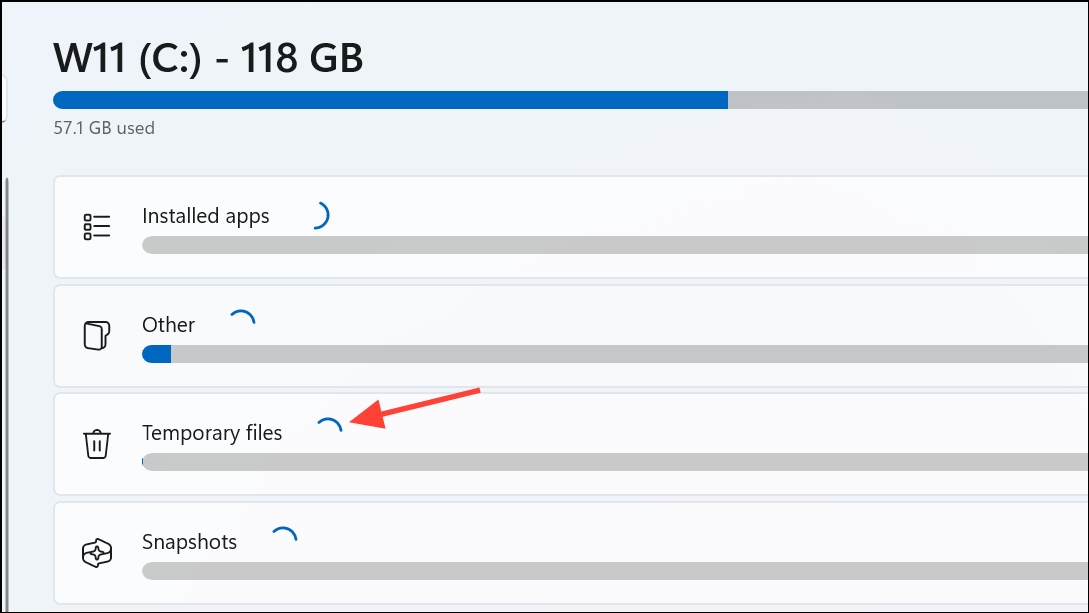
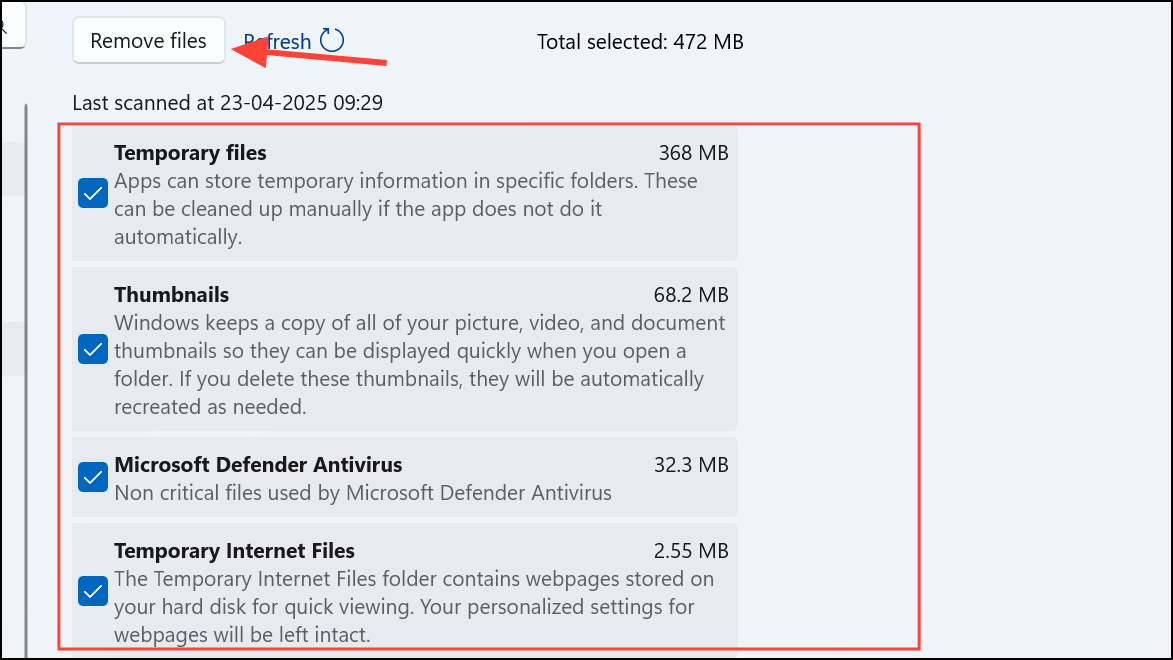
Step 2: Click Temporary files and review the list of items that can be deleted, such as Windows Update cleanup, Recycle Bin, and temporary internet files.
Step 3: Check the boxes for items you want to remove and click Remove files.
Step 4: For ongoing maintenance, go back and turn on Storage Sense to automatically delete temporary files and manage space in the background.

Regularly revisiting these steps keeps your Windows 11 system running smoothly and your workspace free from distractions. A cleaner setup means faster performance and a more enjoyable computing experience.