
Windows 11 can quickly accumulate unnecessary files and data that consume valuable storage space, potentially slowing down your system and limiting your ability to install updates or save new files. Adjusting specific settings allows you to instantly clear storage, reclaiming gigabytes without additional software or hardware upgrades. The following methods guide you through key settings and features designed to automate and optimize storage management.
Enable and Configure Storage Sense for Automatic Cleanup
Storage Sense is a built-in Windows 11 feature that automatically deletes temporary files, clears the Recycle Bin, and removes old downloads based on your preferences. Activating Storage Sense puts your system on autopilot for storage maintenance, reducing manual cleanup efforts.
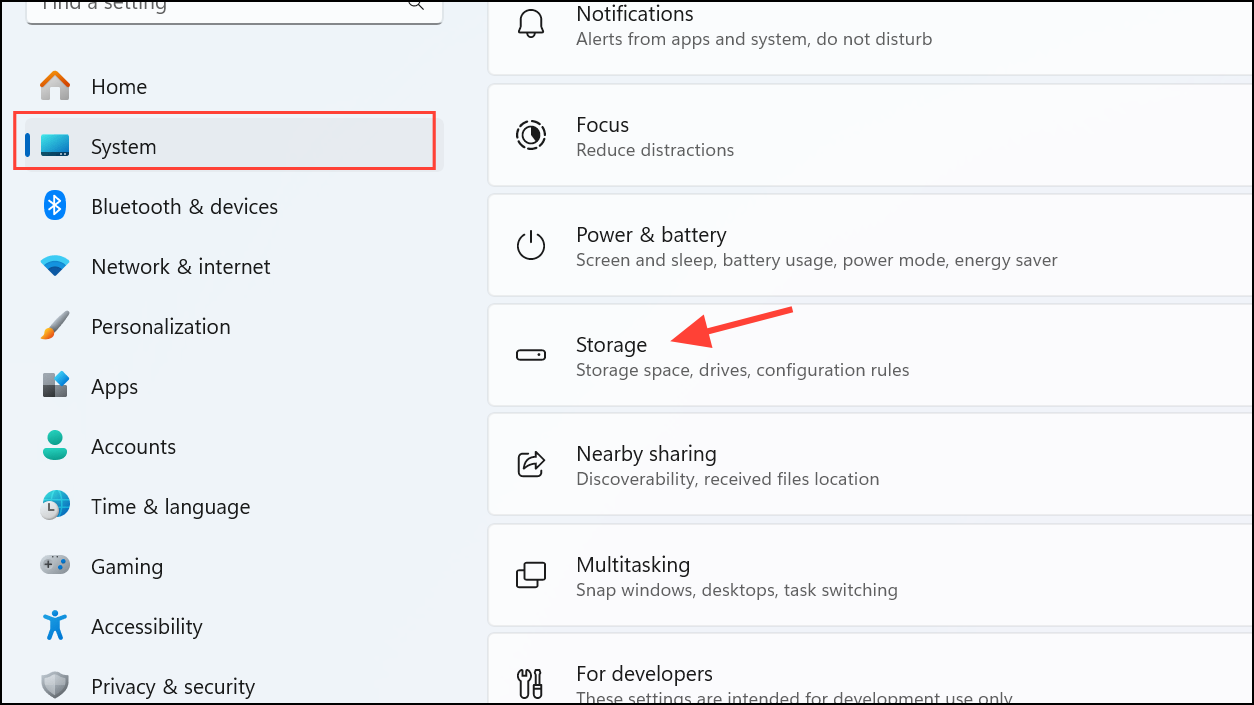
Step 1: Press Win + I to open the Settings app.
Step 2: Navigate to System and then select Storage.
Step 3: Toggle on the switch for Storage Sense.
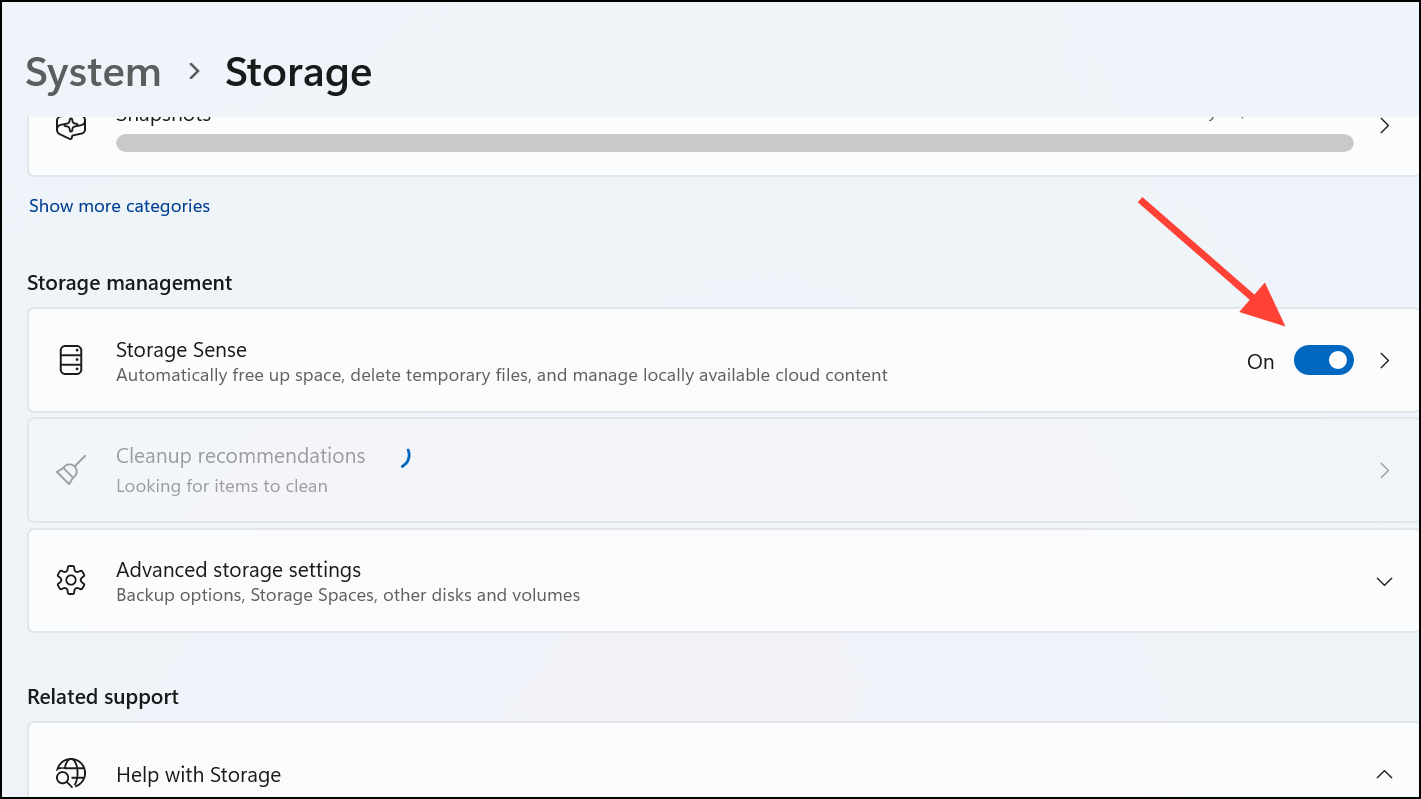
Step 4: Click on Storage Sense to access its detailed settings. Here, you can specify how often Storage Sense runs (daily, weekly, or monthly), choose whether it deletes files from your Downloads folder, and set the retention period for files in the Recycle Bin.
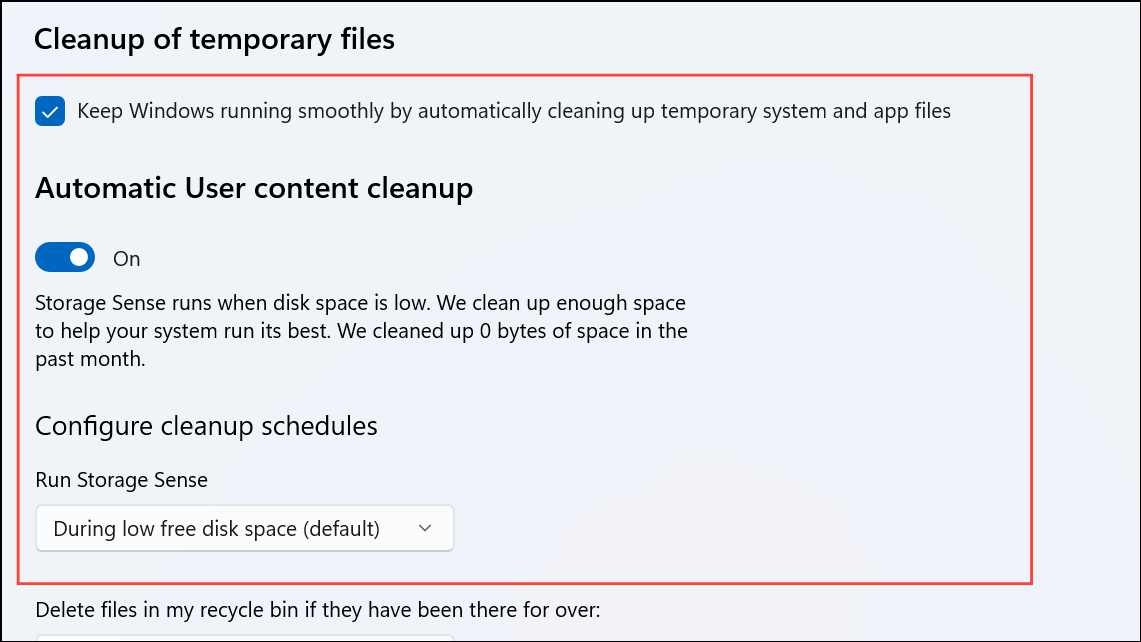
By customizing these options, you ensure Storage Sense removes clutter efficiently without deleting important files prematurely.
Change Default Save Locations to Free Up the System Drive
The default save location for new files, such as documents, pictures, videos, and downloads, is usually the system drive (C:), which can fill up quickly. Redirecting these folders to another drive with more free space prevents the system drive from becoming overloaded.
Step 1: Open File Explorer by pressing Win + E.
Step 2: Right-click on a folder such as Downloads, Documents, or Pictures, and select Properties.
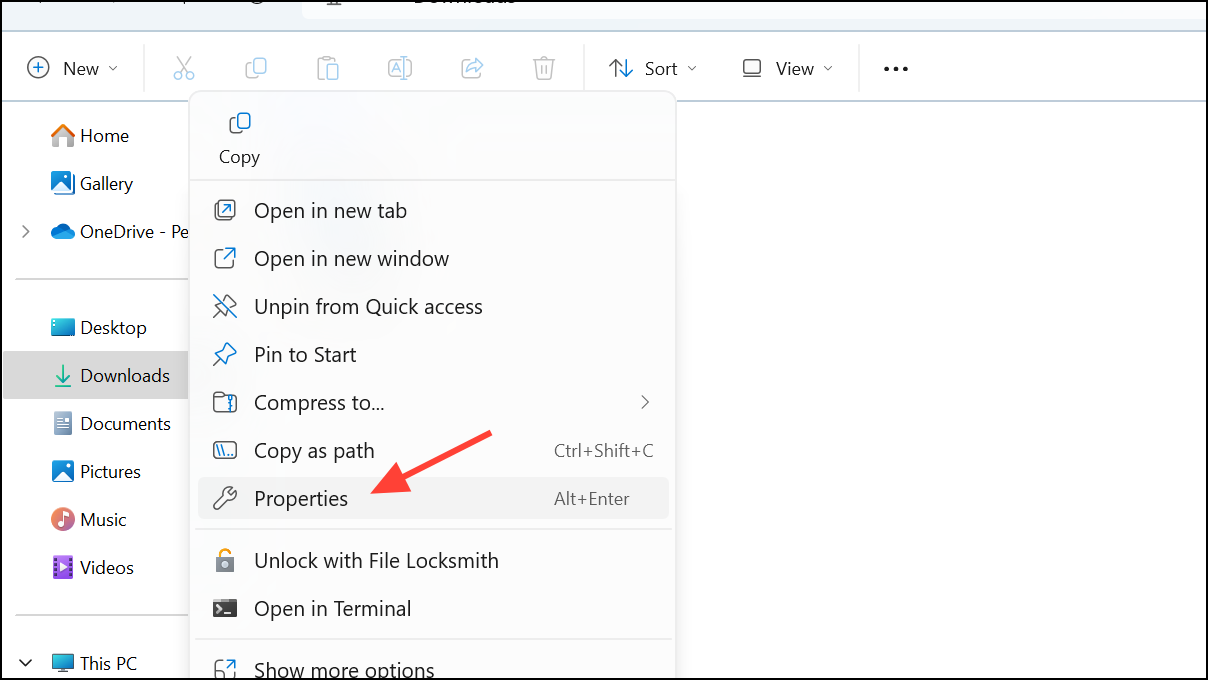
Step 3: Go to the Location tab and click Move.
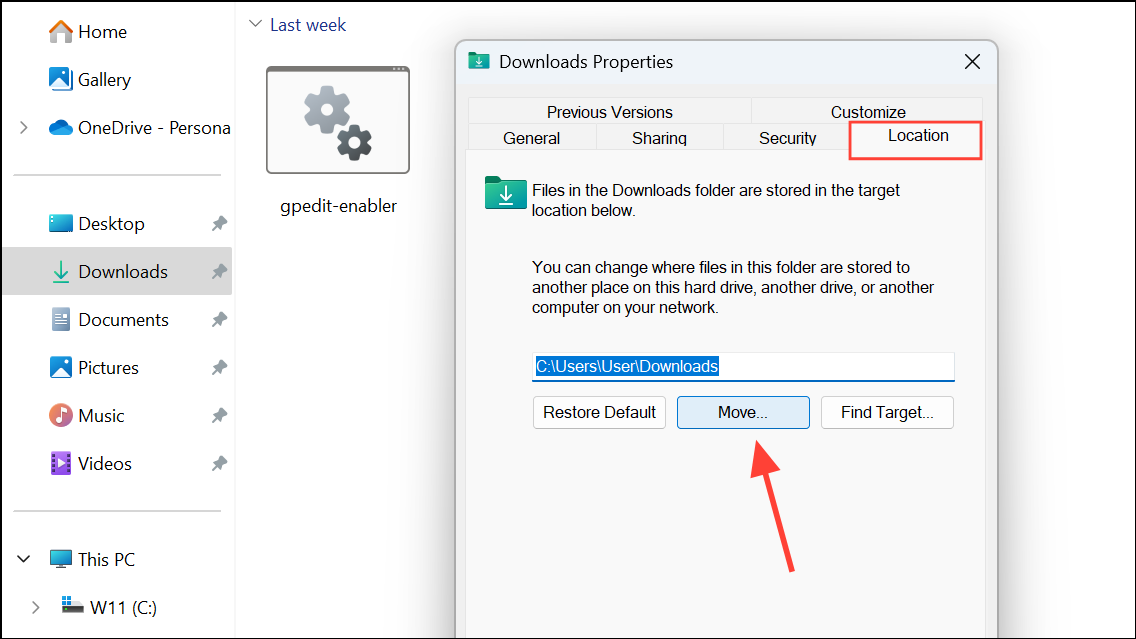
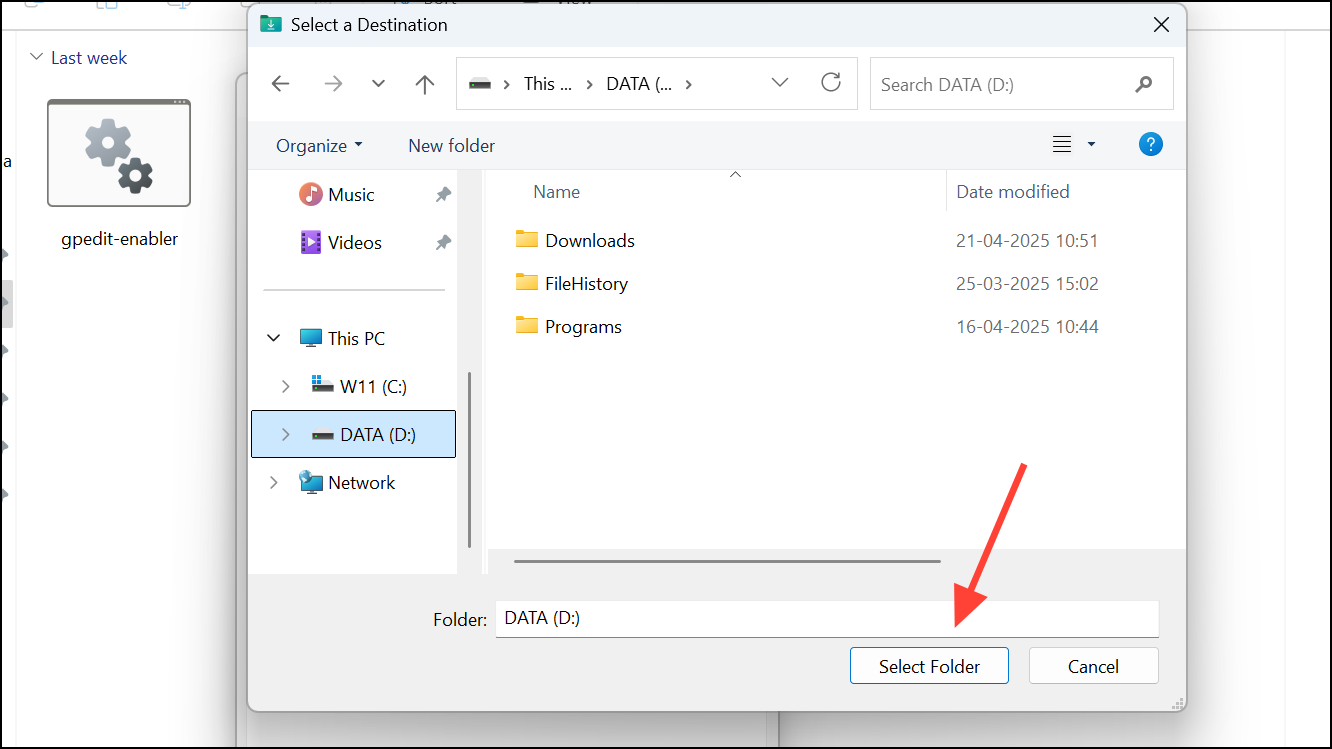
Step 4: Choose a folder on a different drive with sufficient space, then click Select Folder and apply the changes. When prompted, allow Windows to move existing files to the new location.
This adjustment prevents the system drive from filling up with personal files, improving overall storage management.
Disable Hibernation to Remove the Hibernation File
Hibernation mode saves the system state to a file named hiberfil.sys on your drive, which can consume several gigabytes. If you do not use hibernation, disabling it deletes this file and frees up storage.
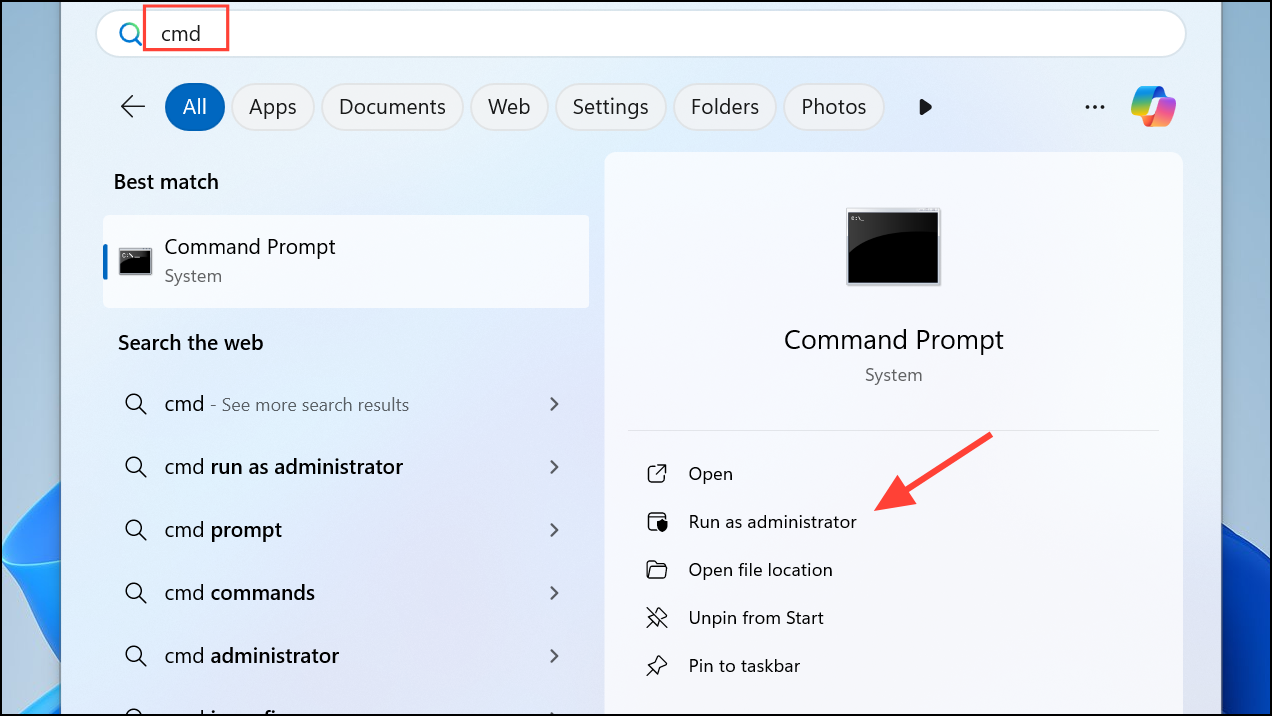
Step 1: Search for Command Prompt in the Start menu, right-click it, and select Run as administrator.
Step 2: Type the following command and press Enter:
powercfg -h off
This command disables hibernation and removes the associated file immediately.
powercfg -h on instead.Reduce Disk Space Used by System Restore
System Restore saves snapshots of your system to allow recovery after problems, but it can reserve up to 10% of your drive by default. Lowering this allocation frees up storage while still maintaining restore points.
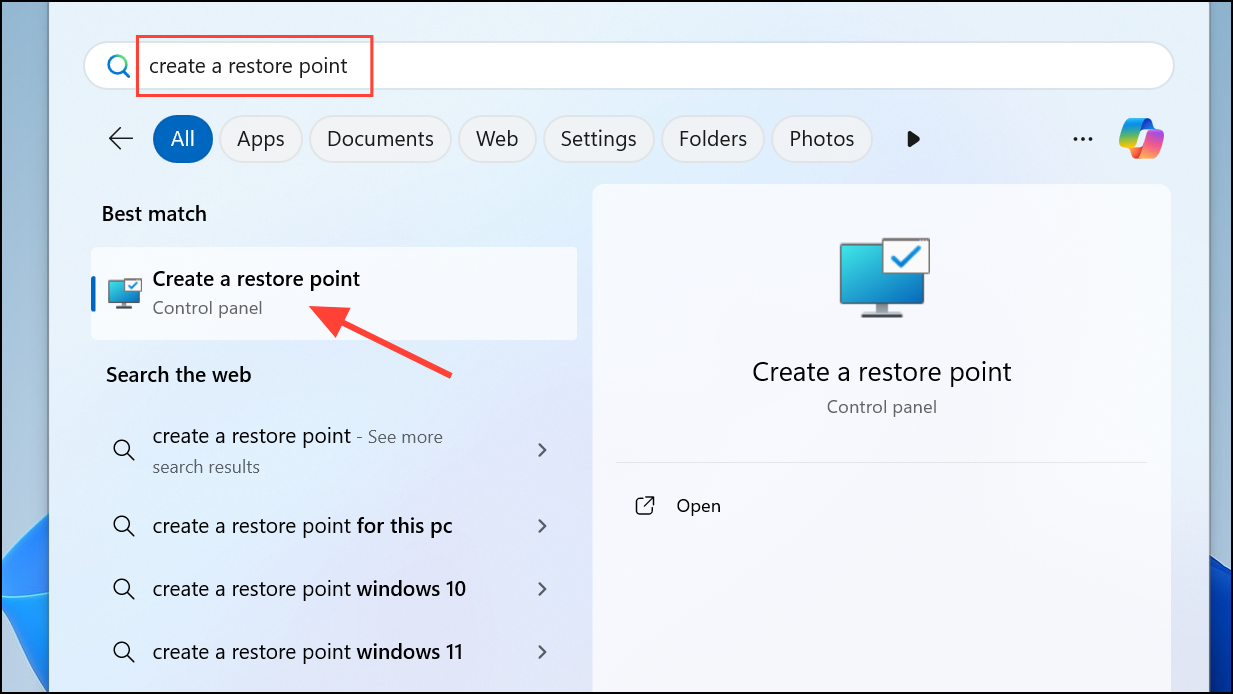
Step 1: Type Create a Restore Point in the Windows search bar and open the corresponding control panel.
Step 2: Under the System Protection tab, select your system drive (usually C:) and click Configure.
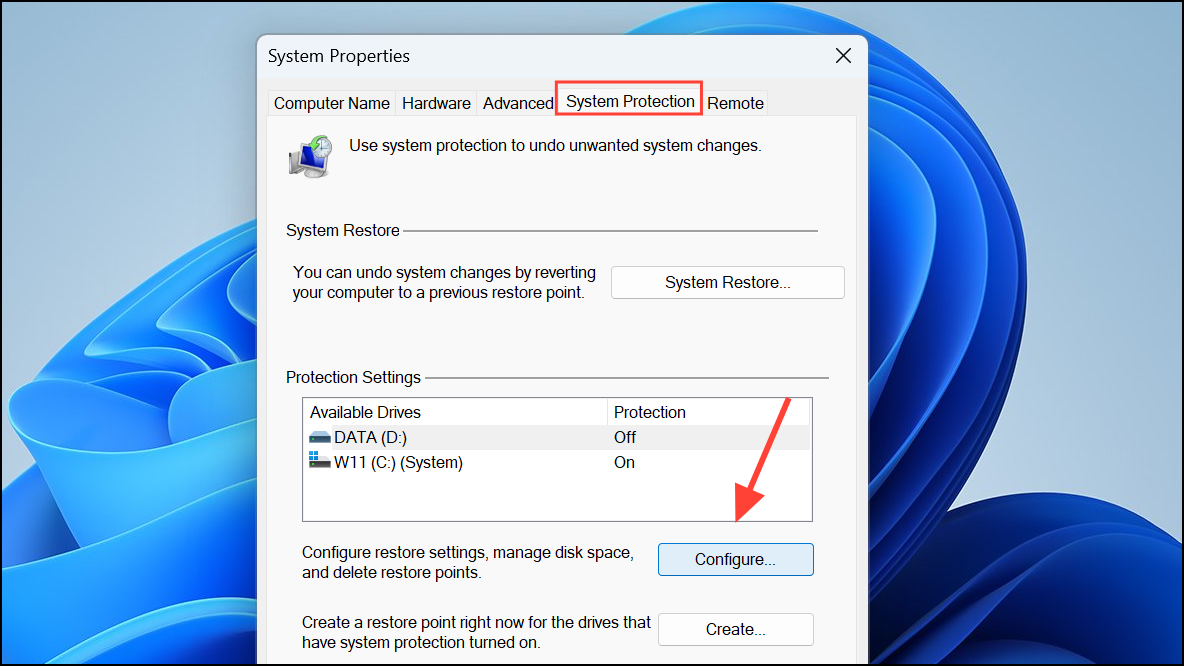
Step 3: Adjust the Max Usage slider to a lower percentage, such as 1–2%, then click Apply and OK.

This change limits the disk space reserved for restore points, freeing more storage for other uses.
Use Compact OS to Compress System Files
Compact OS compresses Windows system files, reducing their size by 2–3 GB. This is especially useful for devices with limited storage capacity.
Step 1: Open Command Prompt as an administrator.
Step 2: Check the current status by typing:
compact /compactos:query
Step 3: To enable compression, enter:
COMPACT.EXE /CompactOS:always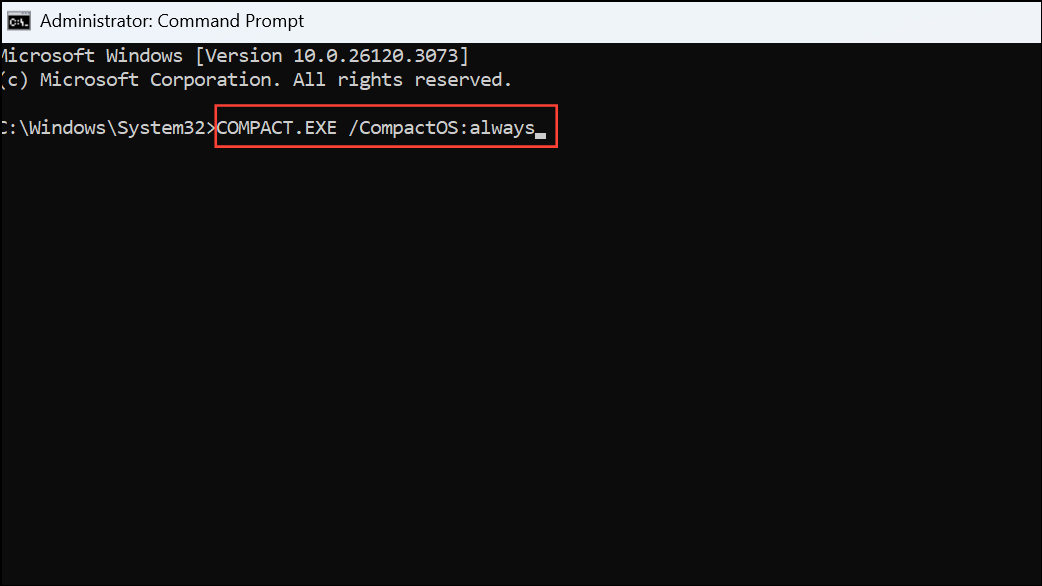
Step 4: To disable compression later, use:
COMPACT.EXE /CompactOS:never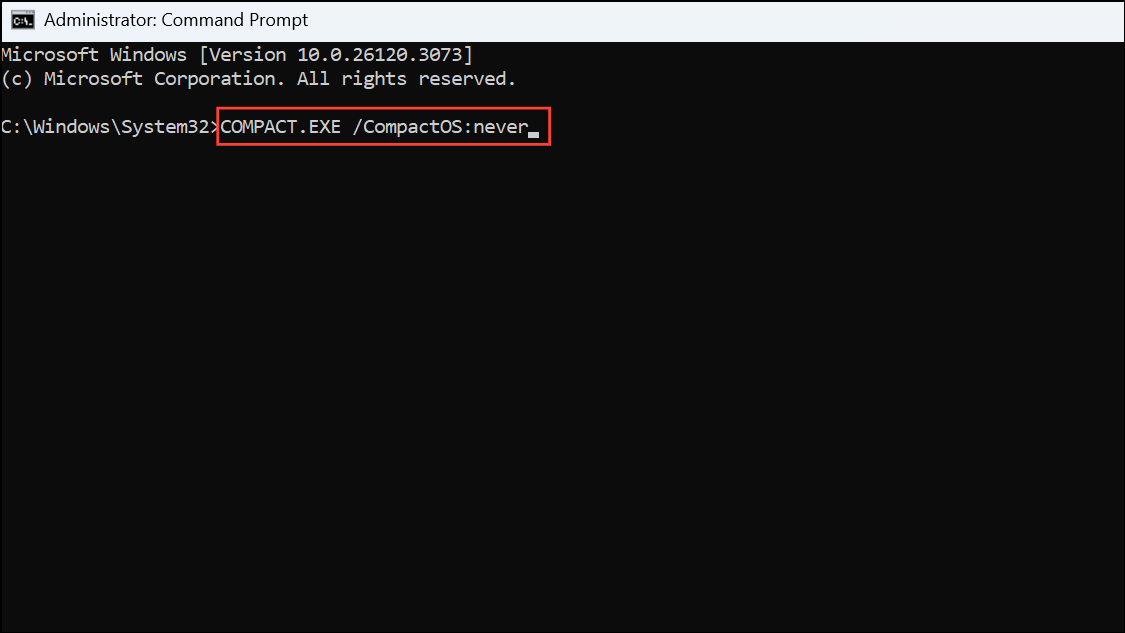
Compact OS works by compressing system files without deleting them, allowing you to reclaim space without affecting system stability.
Clear Temporary Files from Apps and System
Applications such as browsers, media players, and editors accumulate temporary files and caches that consume storage. Regularly clearing these files helps maintain free space.
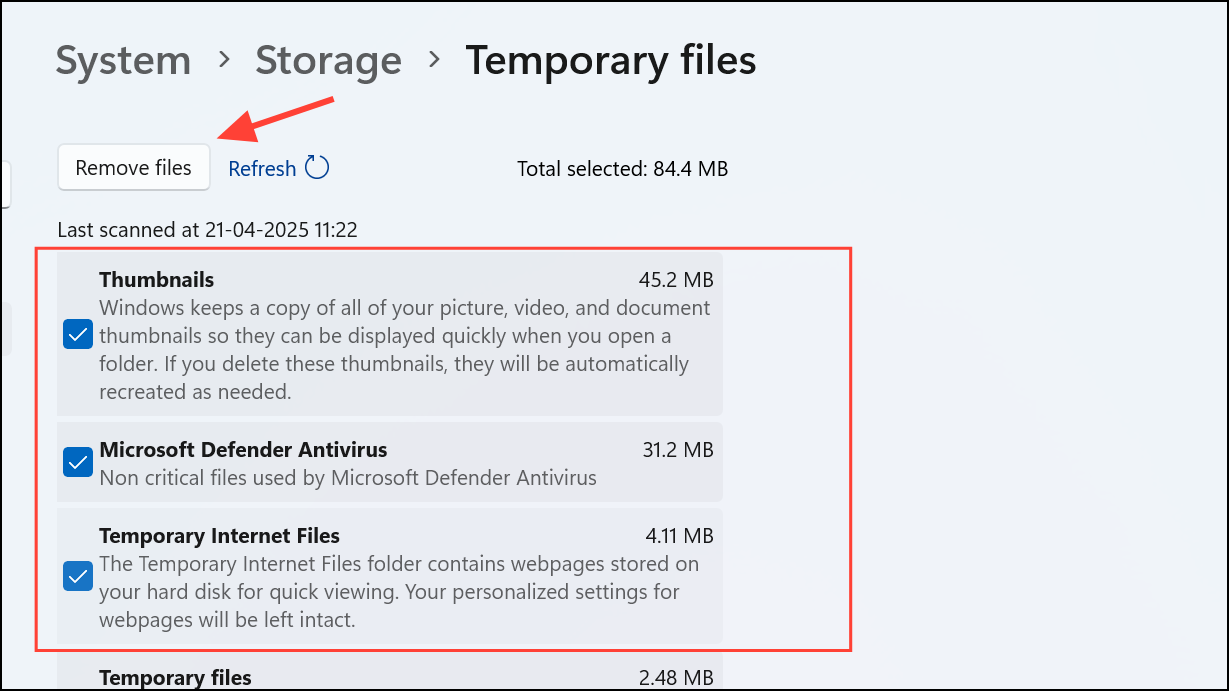
Step 1: Open Settings and navigate to System > Storage.
Step 2: Click on Temporary Files to view categories like app caches, thumbnails, and previous Windows installations.
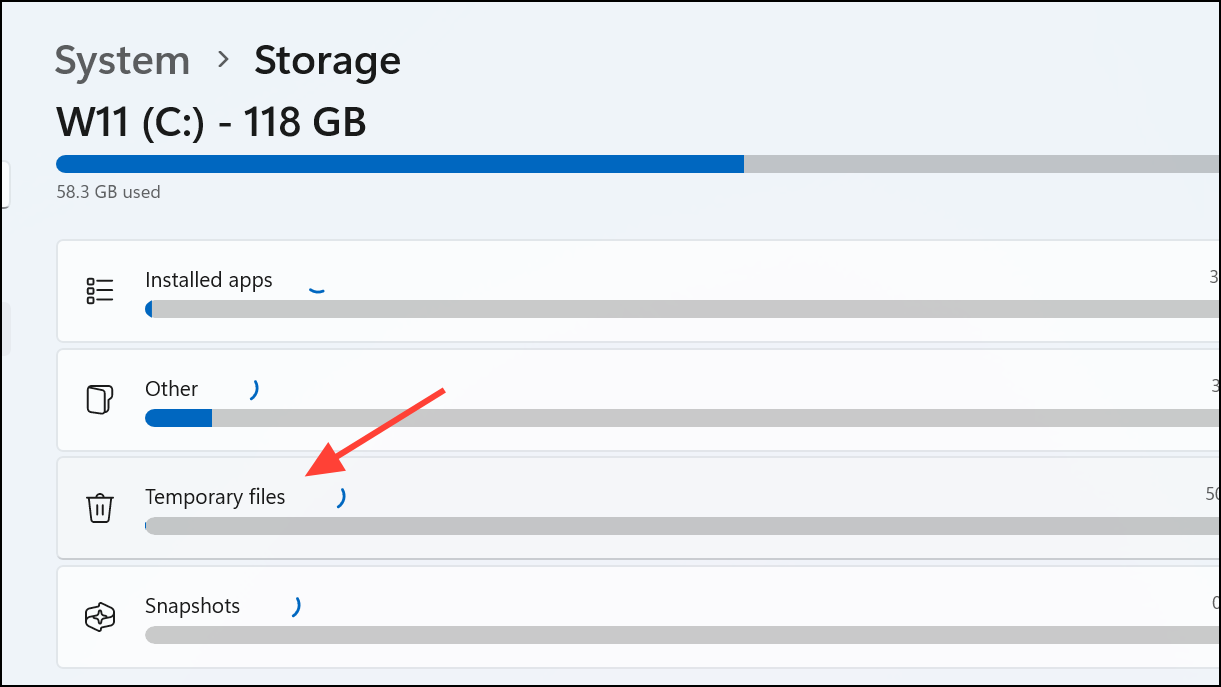
Step 3: Select the types of temporary files you want to remove and click Remove files.
For browsers such as Chrome or Edge, you can also clear cache directly through their history or privacy settings to recover additional space.
Uninstall Unused Applications and Windows Features
Unused programs and Windows features occupy disk space and may slow system updates or startup. Removing them streamlines your system and frees storage.
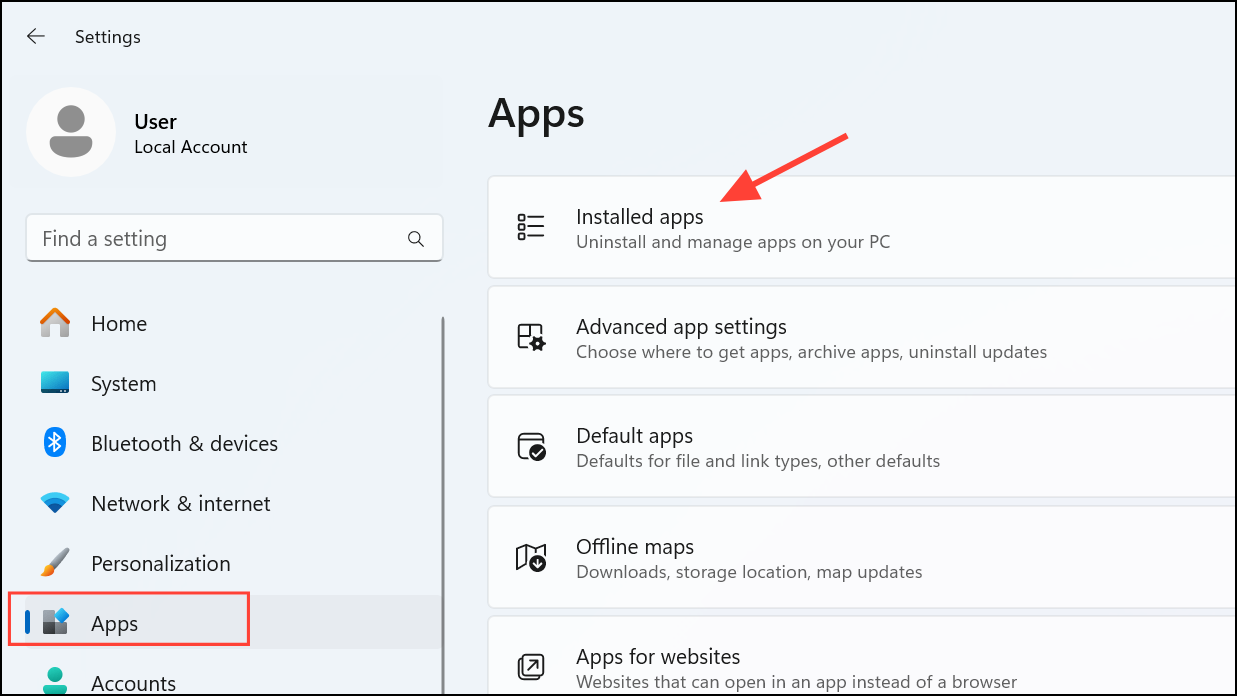
Step 1: Go to Settings > Apps > Installed Apps.
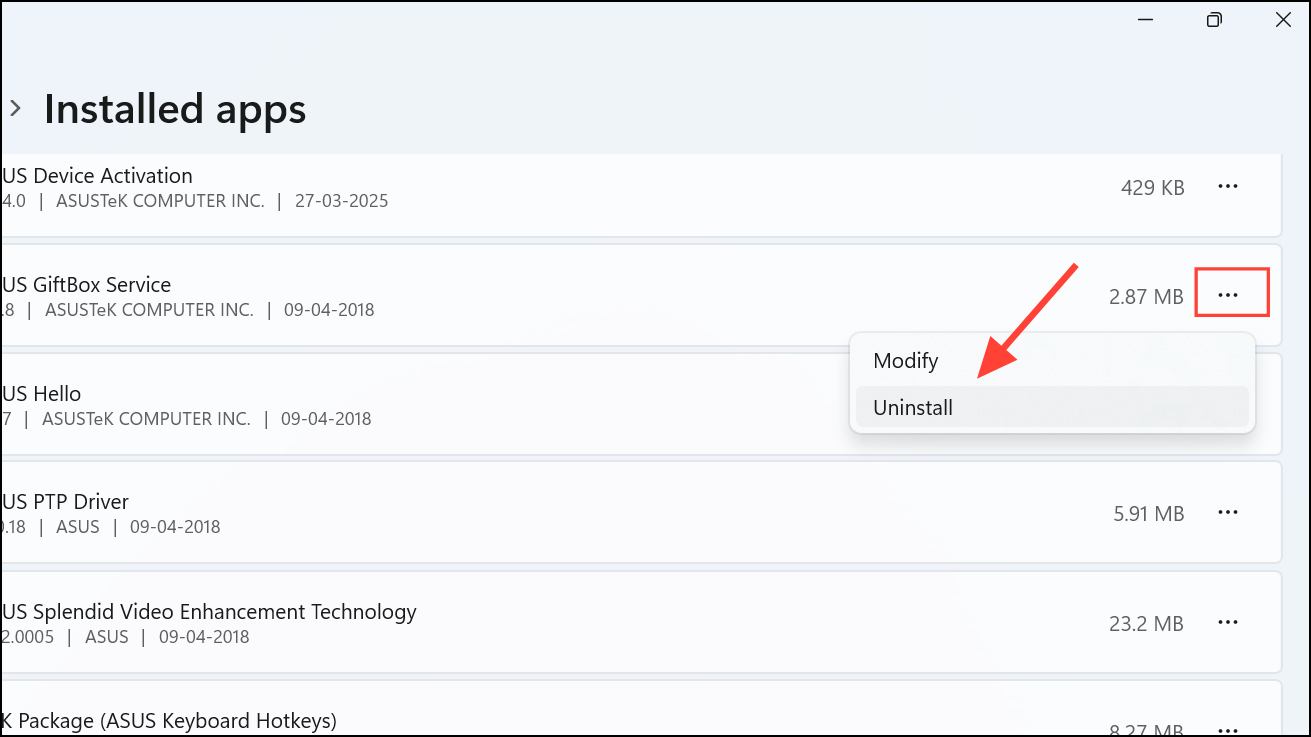
Step 2: Review the list and click the three-dot menu next to apps you no longer need, then select Uninstall.
Step 3: To remove optional Windows features, navigate to Settings > Apps > Optional Features, select unneeded features, and uninstall them.
Regularly auditing and removing unused software prevents unnecessary storage consumption.
Adjusting these settings in Windows 11 provides an effective way to clear storage instantly and sustain smooth system operation. Periodically revisiting these configurations ensures your device remains responsive and ready for updates without storage constraints.