
Excessive disk or CPU usage in Windows 11 often traces back to SysMain, a built-in service that preloads frequently used apps into memory. While this feature—formerly known as Superfetch—was designed to accelerate application launch times, it can sometimes slow down systems, especially those with limited RAM or older hardware. On modern PCs with SSDs, SysMain’s benefits are usually marginal, and disabling it can immediately reduce lag and free up system resources.
Disabling SysMain via Services Console
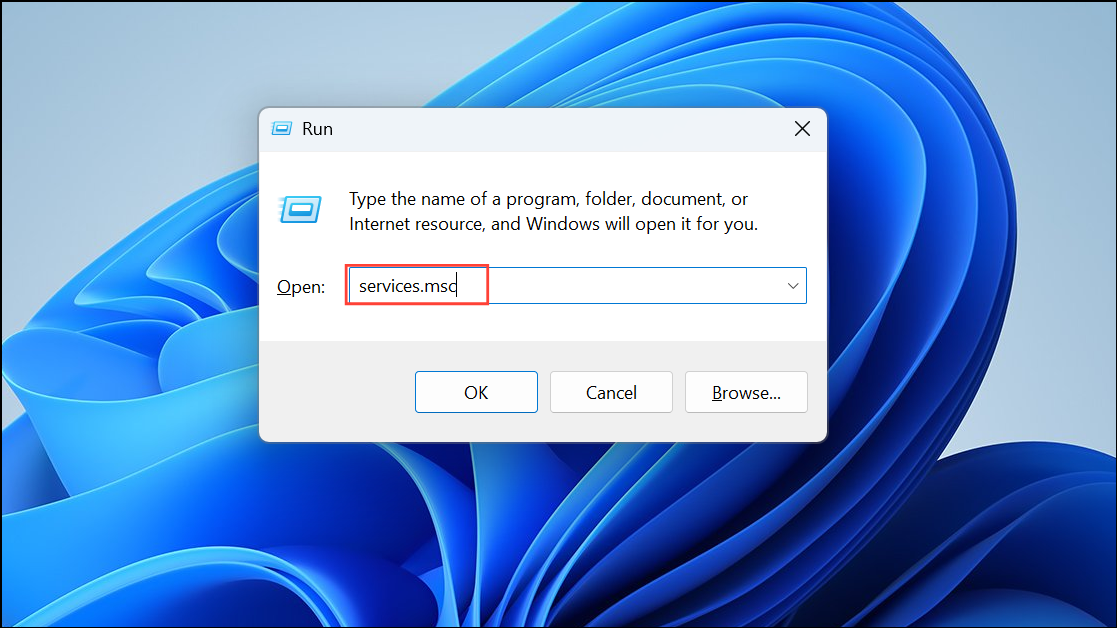
Step 1: Press Windows + R to open the Run dialog box. Type services.msc and press Enter. This action opens the Services management console, which lists all running and available Windows services.
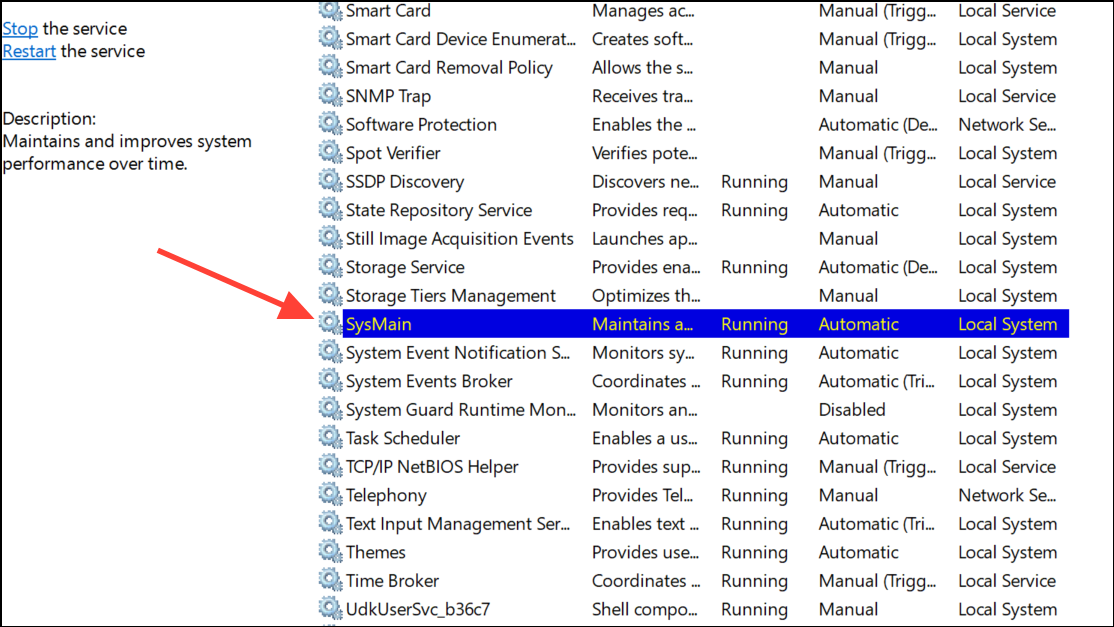
Step 2: Scroll through the list and locate the entry labeled SysMain. This is the service responsible for preloading applications and managing memory caching.
Step 3: Double-click SysMain to open its properties window. In this window, you can view the current status and configure how the service starts.
Step 4: Click the Stop button to halt the service immediately. Next, in the Startup type dropdown, select Disabled. This change prevents SysMain from starting automatically each time Windows boots.
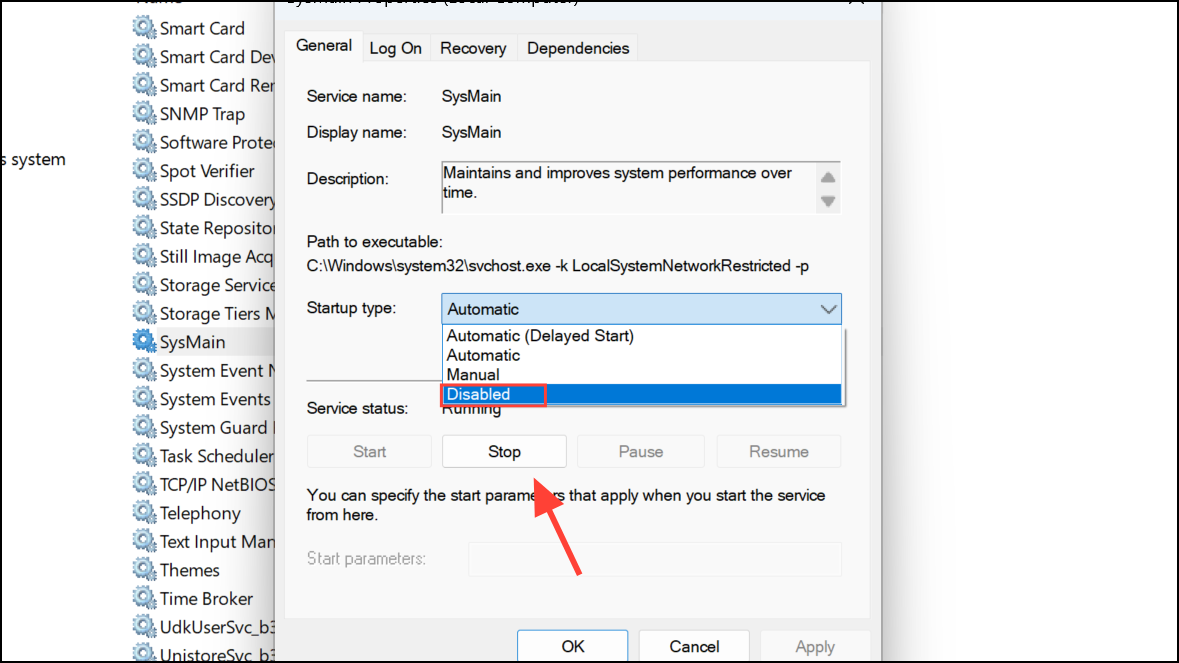
Step 5: Click OK to apply and save your changes. The SysMain service is now disabled and will not consume system resources until re-enabled.
Disabling SysMain Using Command Prompt
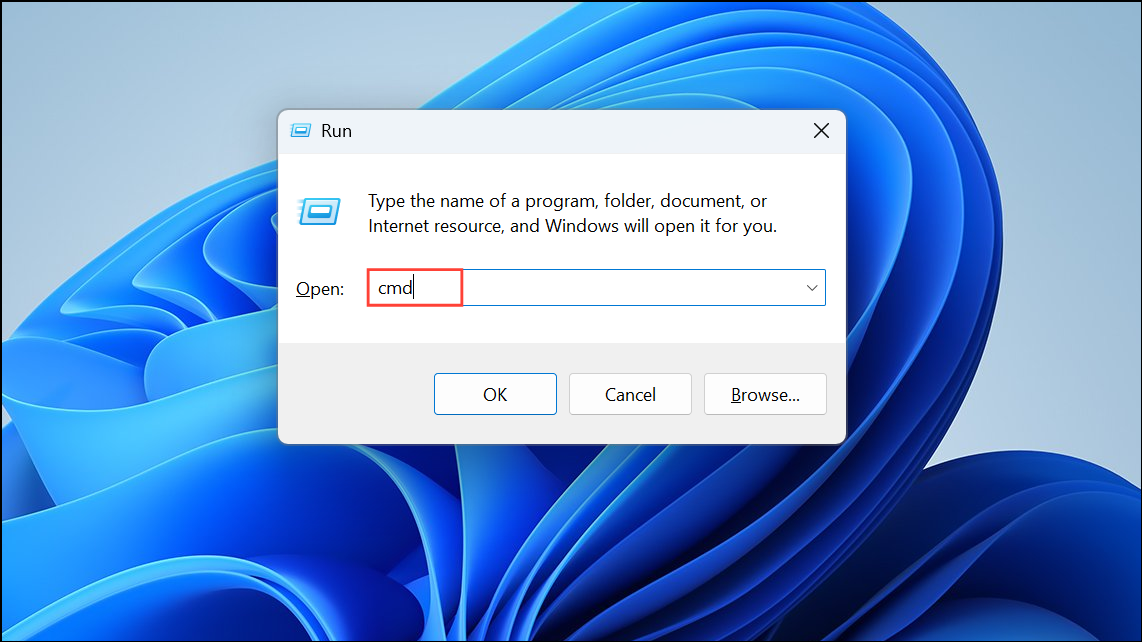
Step 1: Press Windows + R, type cmd, then press Ctrl + Shift + Enter to open an elevated Command Prompt with administrator rights. This step is necessary because stopping system services requires elevated permissions.
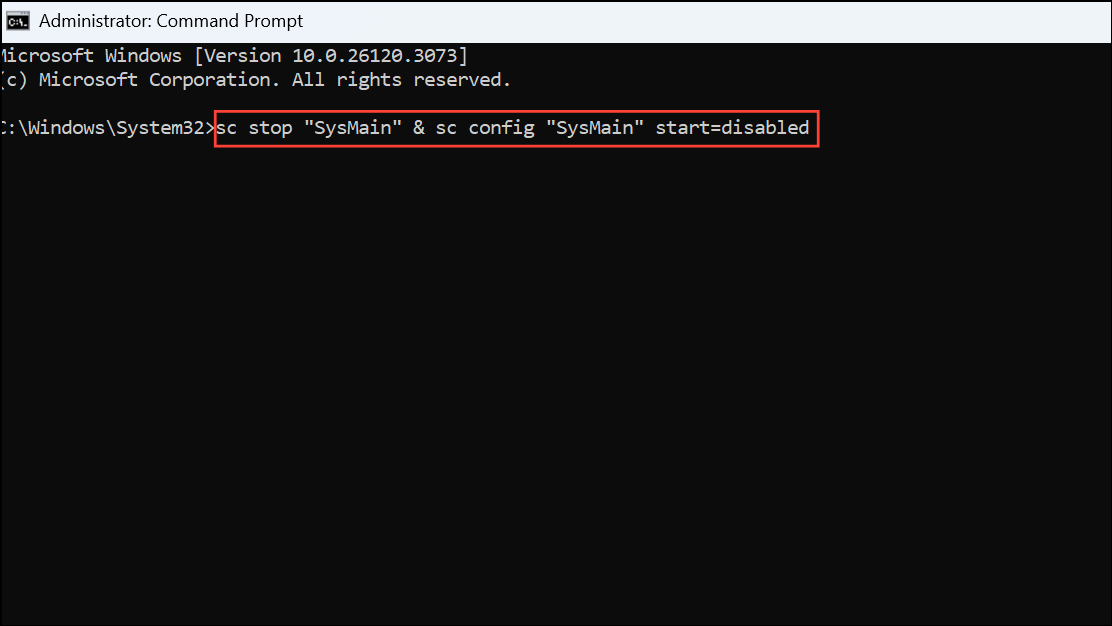
Step 2: Enter the following command to stop and disable SysMain in one action:
sc stop "SysMain" & sc config "SysMain" start=disabledThis command halts the running service and sets its startup mode to disabled, ensuring it won’t restart after a reboot.
Disabling SysMain Through the Registry Editor
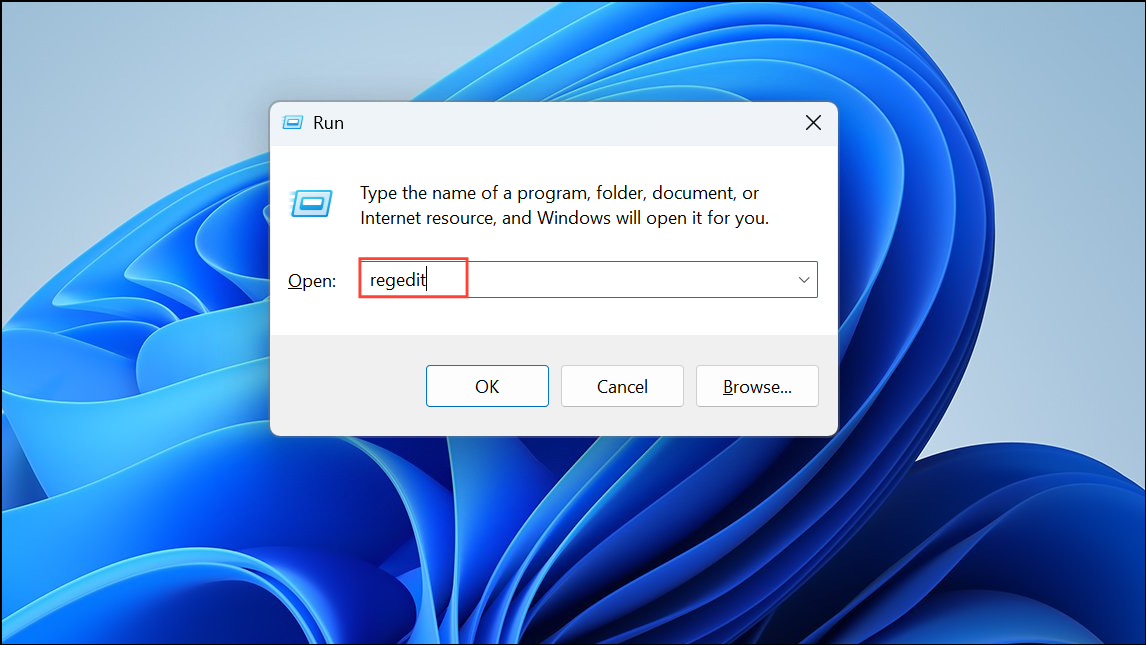
Step 1: Press Windows + R, type regedit, and press Enter to open the Registry Editor. Editing the registry allows for more granular control over Windows services, but changes should be made carefully.
Step 2: Navigate to the following path in the left sidebar:
HKEY_LOCAL_MACHINE\SYSTEM\CurrentControlSet\Services\SysMain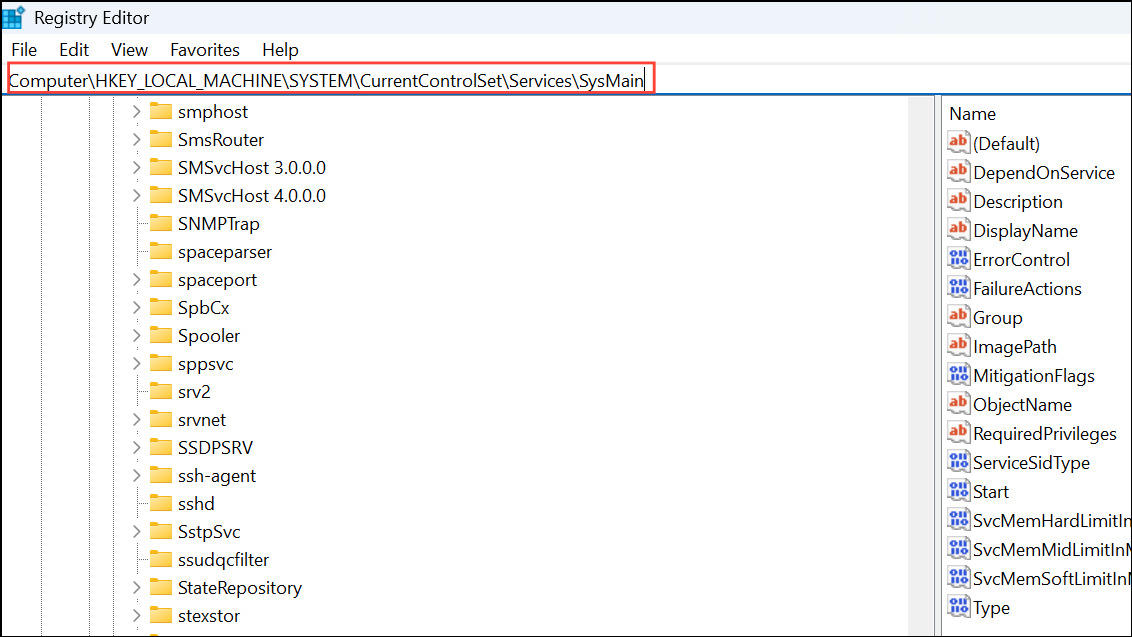
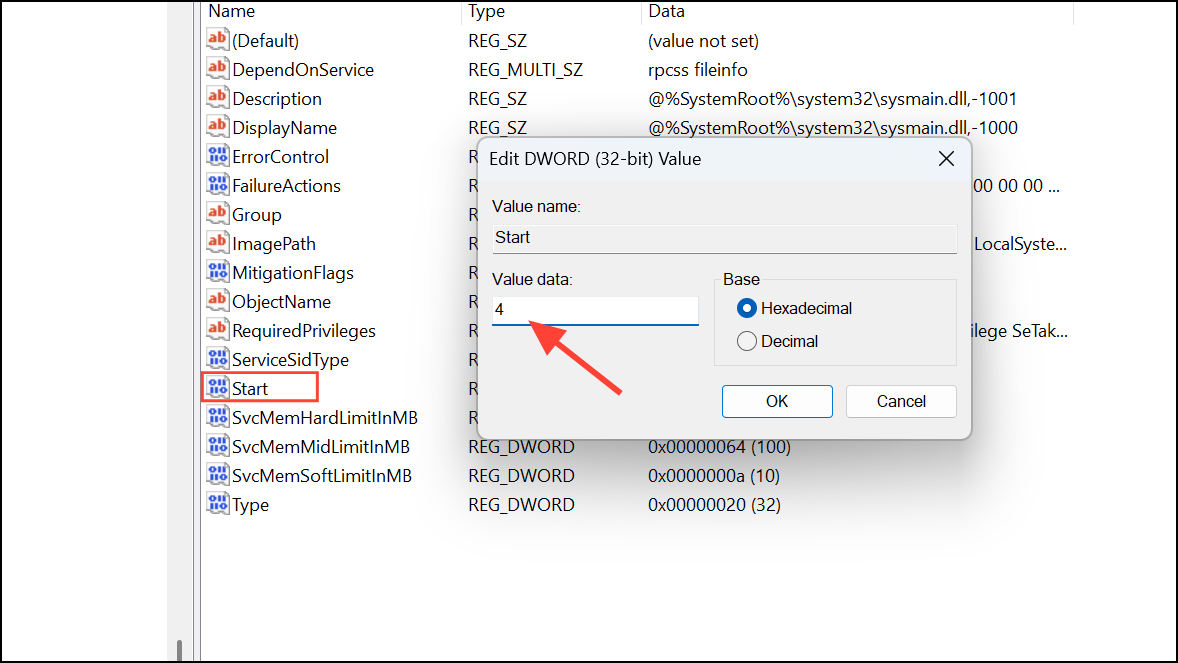
Step 3: In the right pane, double-click the Start value. Set the Value data to 4 and click OK. This setting disables the SysMain service at the system level.
Step 4: Close the Registry Editor and restart your computer. The SysMain service will remain disabled until you revert this setting.
Running System File Checker (SFC) to Address High Resource Usage
Corrupted system files can sometimes cause SysMain to misbehave, leading to high disk or CPU usage. Running the System File Checker can repair these files without disabling SysMain.
Step 1: Open an elevated Command Prompt by pressing Windows + R, typing cmd, and pressing Ctrl + Shift + Enter.
Step 2: Enter the following command and press Enter:
sfc /scannow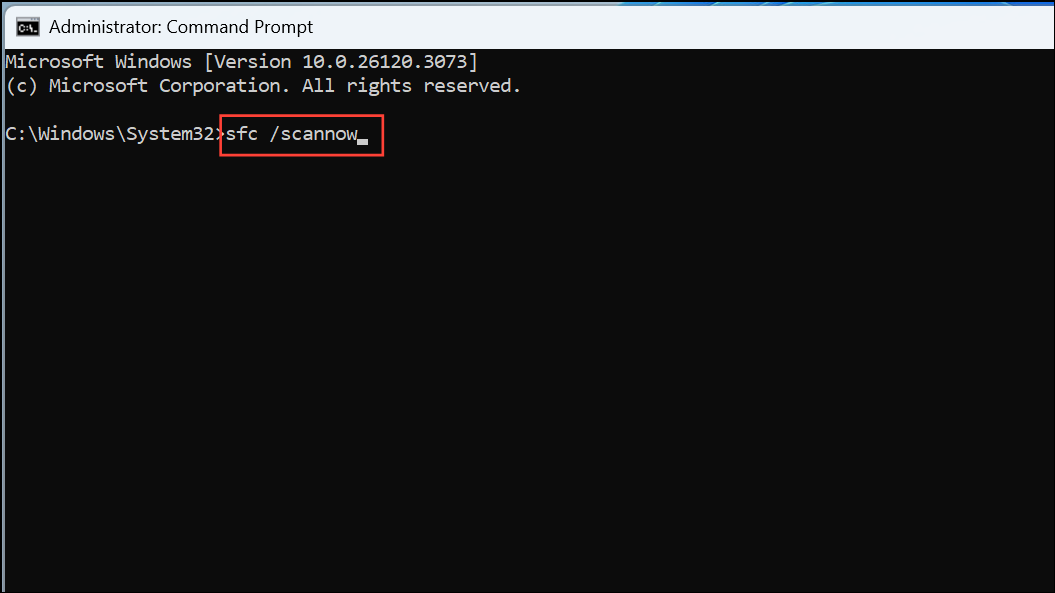
This process scans for and repairs corrupted system files. Once the scan completes, restart your PC. If SysMain’s high resource usage was due to file corruption, this may resolve the issue while keeping the service enabled.
Updating Windows for Performance Fixes
Outdated system files or bugs in Windows 11 can sometimes cause SysMain to consume more resources than intended. Installing the latest updates can address these issues.
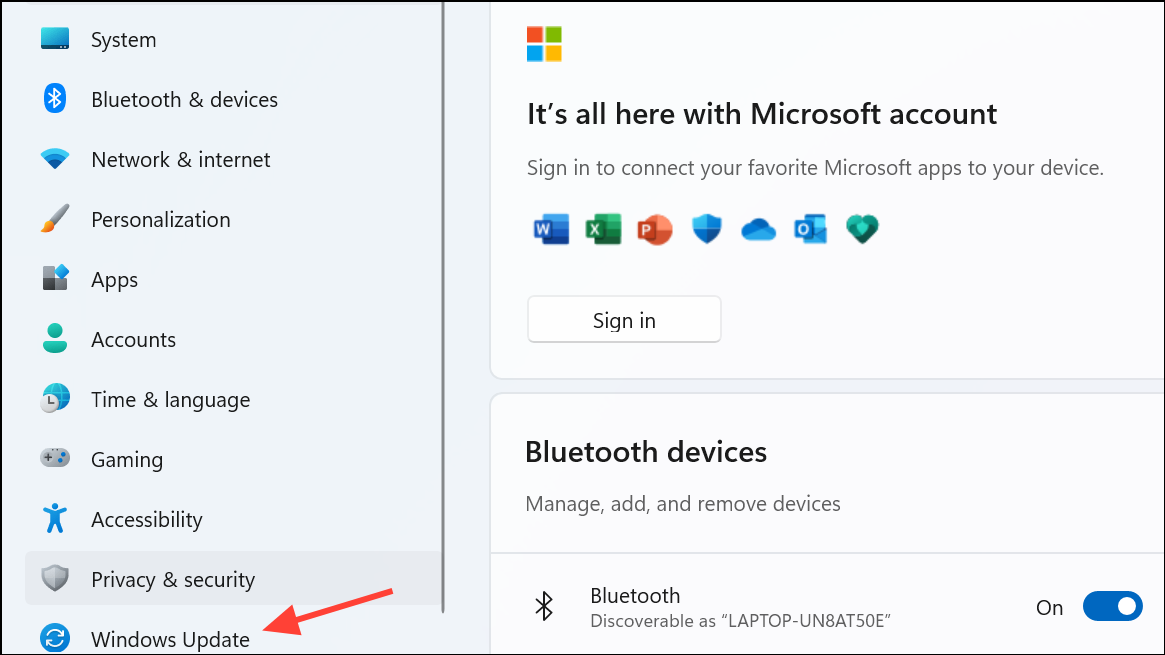
Step 1: Press Windows + I to open Settings. Select Windows Update from the sidebar.
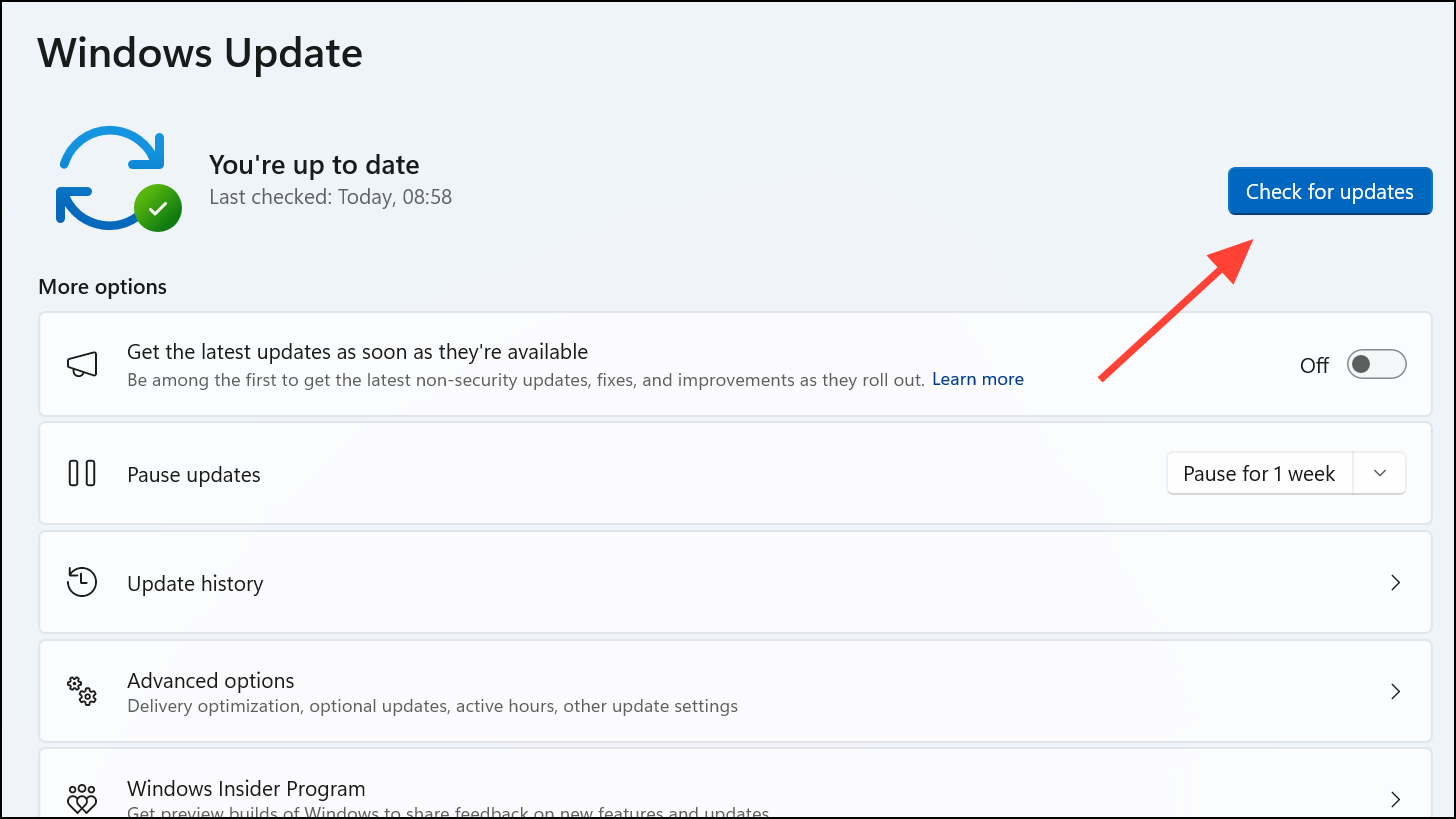
Step 2: Click Check for updates. If updates are available, click Download & install. Restart your PC after updates are installed to ensure all fixes take effect.
Replacing a Hard Drive with an SSD for Lasting Improvements
Mechanical hard drives are much slower than SSDs, and SysMain’s disk activity can exacerbate slowdowns. Upgrading to a solid-state drive dramatically reduces disk latency and can resolve persistent high disk usage—even if SysMain remains enabled.
- Check your PC’s specifications to confirm SSD compatibility.
- Use disk cloning or a clean Windows installation to migrate your data.
- Once installed, most users notice immediate improvements in boot times, application launches, and overall responsiveness.
Should You Keep SysMain Enabled or Disabled?
The impact of SysMain depends on your system’s hardware. On modern PCs with at least 8GB RAM and an SSD, the service rarely provides a noticeable speed boost and may be safely disabled if it causes issues. On older hardware or systems with limited RAM, disabling SysMain can free up resources and reduce lag. If you’re unsure, try disabling SysMain and monitor your PC’s performance—re-enabling it is always possible through the same steps.
Disabling or adjusting SysMain is a direct way to address high disk and CPU usage on Windows 11, especially if your system feels sluggish or unresponsive. Regularly updating Windows and considering a hardware upgrade can further optimize your PC’s speed and reliability.
Experimenting with these SysMain adjustments can quickly reveal what works best for your setup—don’t hesitate to reverse changes if your system feels slower or less stable.