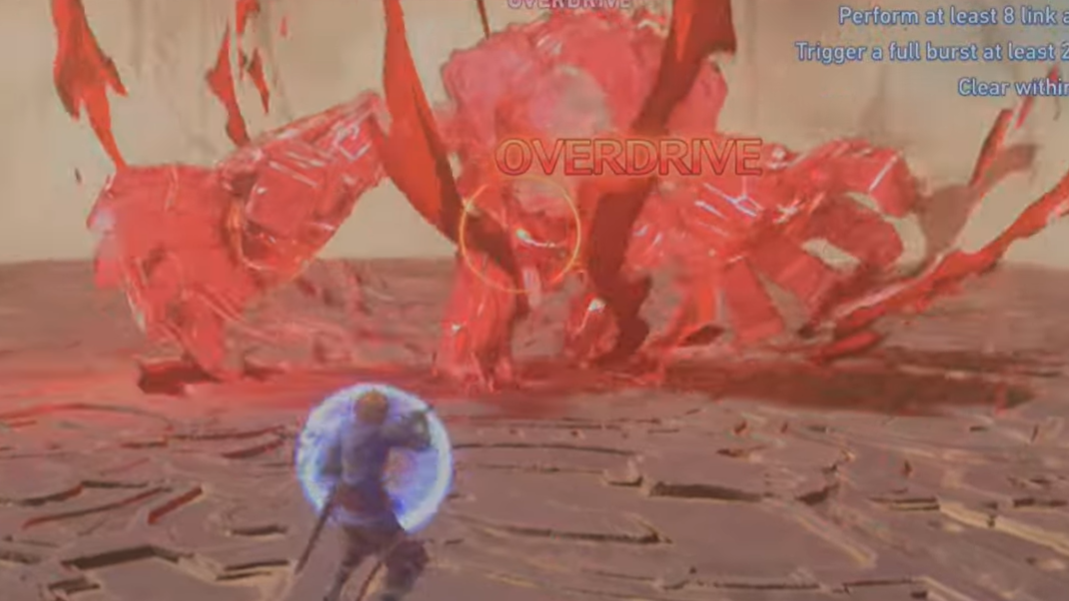
The Aquila Ruby Golem is the showcase Chaos-difficulty fight in the Endless Ragnarok open beta for Granblue Fantasy Relink, sitting behind the Sephira’s Sanguine Glimmer quest. It’s a recolored Ruby Golem tuned to Chaos parameters, locked permanently in Overdrive, and paired with the new summon and Primal Burst systems that the expansion introduces.

What makes this fight different
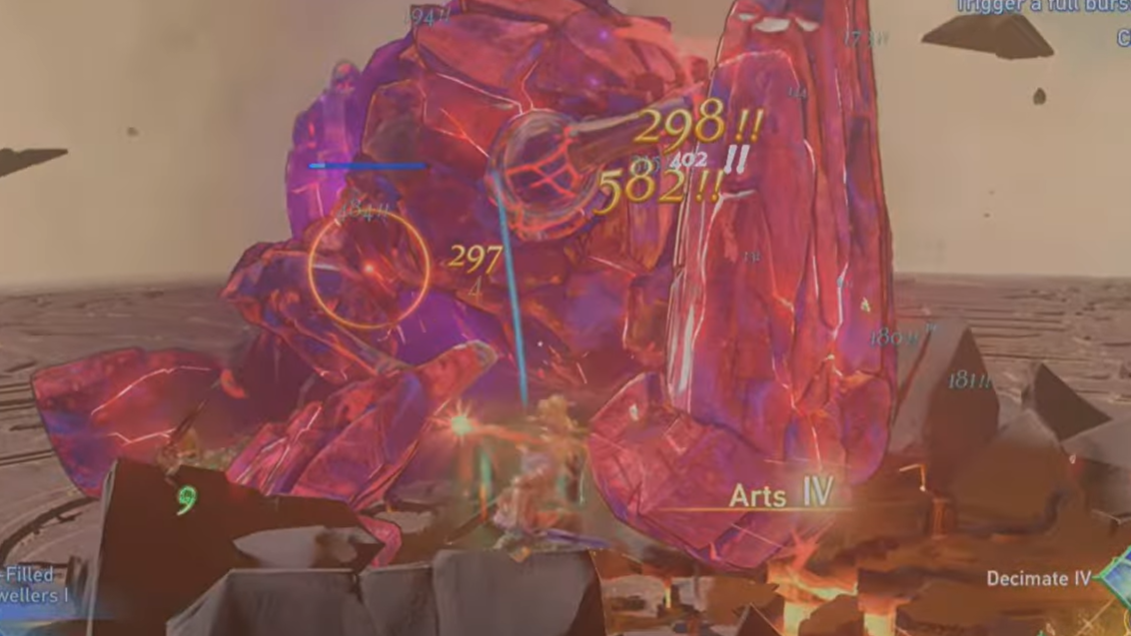
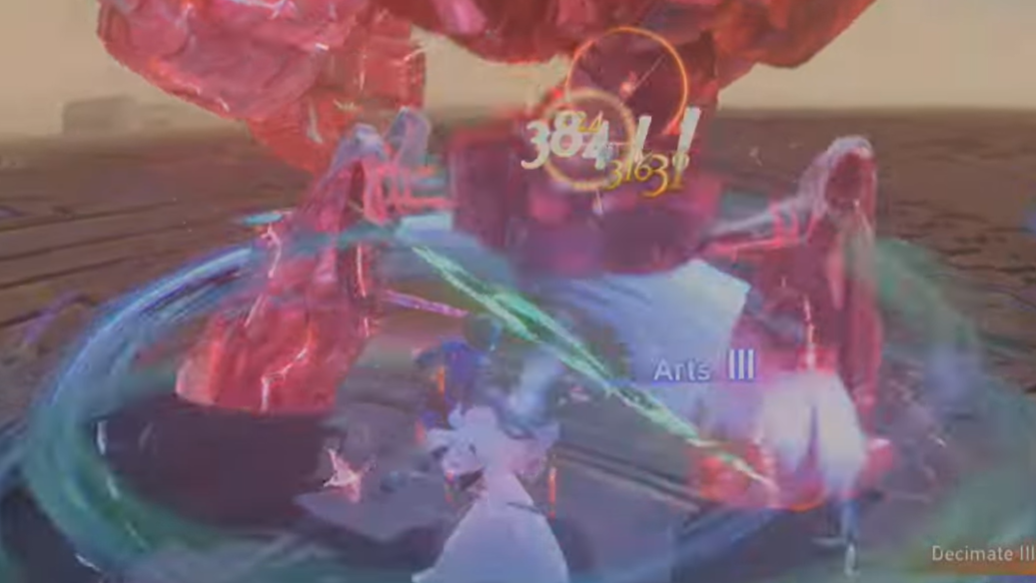
The Ruby Golem reskin keeps the original moveset’s speed but is scaled to Chaos tuning while your party is capped around level 10 with weak weapons, no character sigils, and only a handful of mastery nodes unlocked. That mismatch is the entire identity of the encounter. Your damage per hit is small, but summons and Primal Bursts hit for roughly 1,200 to 2,000 per tick, doing the heavy lifting in place of fully geared SBAs.
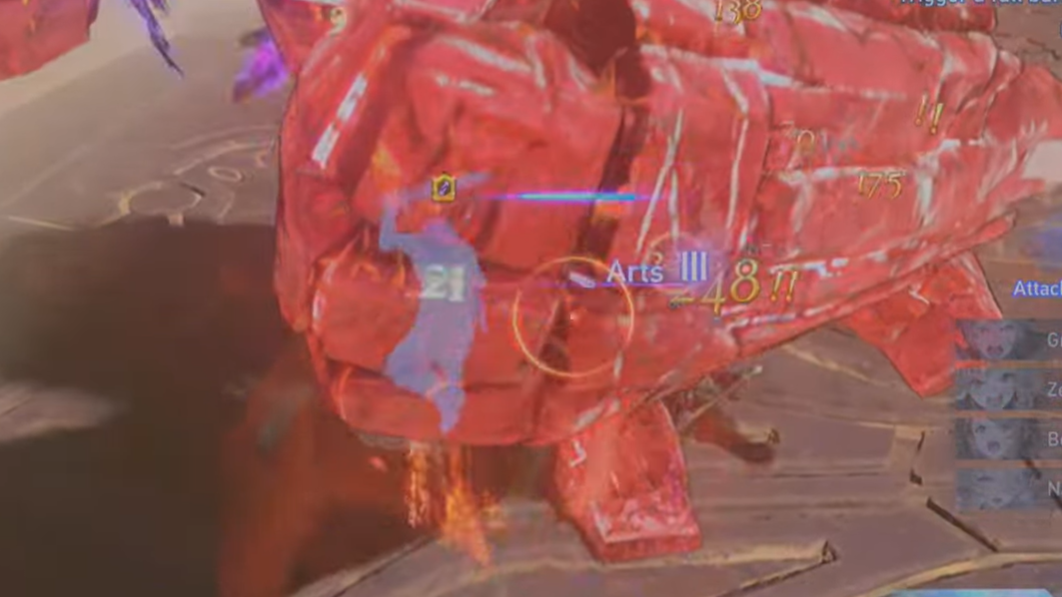
The boss stays in Overdrive for the whole fight. Stun-focused skills and high-stun builds have no payoff here because the break bar effectively doesn’t exist. Damage debuffs, paralysis, slow, and clean perfect-dodge or perfect-guard play matter far more than raw output.
Recommended characters for the beta lineup
Because gear and sigils are stripped down, character utility decides the run. The standout picks are buff and debuff carriers, plus anyone who can survive the boss’s pressure without finishing long combo strings.
| Character | Role | Why they work |
|---|---|---|
| Katalina | Support | Phalanx invulnerability and healing keep AI or random teammates alive through Overdrive pressure. |
| Captain (Gran/Djeeta) | Buffer | Phalanx, Panacea, and Slow swing the fight; also raises element-weak SBA chance. |
| Zeta | Debuffer | Reliable paralysis windows let the team free-cast on a boss that won’t break. |
| IO | Ranged DPS | Concentration grants Stout Heart, and her range lets you charge Stargaze safely. |
| Ghandagoza | Melee DPS | Attack buffs and rage building from perfect parries during punches. |
| Lancelot / Charlotta | Melee DPS | Mobile melee that benefits from the stationary boss positioning. |
Siegfried is workable but punishing here, since getting clipped on the finisher of his perfect combo is common, given the boss’s tempo. If you prefer him, lean on the new ability to perfect-guard mid-animation rather than committing to full combo strings.
Sigil priorities in the beta
You won’t have duplicate I–III sigils or character-exclusive sigils like Warpath, so the usual late-game stacks aren’t available. A few specific picks still pull weight.
- Guts — strongly recommended for online runs, since one knockdown can end the match against the 4-minute clear target.
- Precise Wrath — perfect parries are now rewarded heavily, so SBA gauge fills fast even with a weak weapon.
- Nimble Onslaught — feeds into the same SBA-spam plan against a boss that gives you many parry windows.
- Potion Hoarder — extra potions matter more than usual since healing options are limited.
Overdrive Assassin isn’t available in the beta build, but it’s worth flagging for the full release: a permanent-Overdrive boss is exactly the use case it was designed for.
Summon order and damage contribution
Summons are essentially mini-SBAs in this fight. Each time you fire one, the cost of every other summon drops by 1, so the optimal opener is your cheapest summon first to cascade the rest into usability. A 1 / 2 / 3 / 3 cost loadout is the cleanest setup.
| Summon | Effect | Notes |
|---|---|---|
| Timber Wolves I | Level 6 Regen | Strong primary slot pick for sustainability in the beta. |
| Furycane II | Level 3 Link Together | High raw damage; commonly seen as default but shouldn’t always be lead. |
| Nazarbonju II | Level 3 Combo Finisher | Damage uptick on finishers, useful given low base attack. |
| Skydwellers / Skyfarer Hope | Aegis | Health buffer that helps survive a missed dodge. |
| Wyvern | Improved Guard (lvl 6) | Skippable with only six summon slots available. |
| Quakadile | Uplift (lvl 3) | Skippable for this fight; low return on the slot. |
Common online mistake: players leave Furycane II as the primary high-cost summon and never get to fire it. Demote your highest-cost summon and put a 1-cost option in the lead slot so the rotation actually goes off.
Combat tactics that work on the Ruby Golem
The perfect-dodge invulnerability window feels generous in this build. Dodging into the boss and sticking close lets you ignore entire attack cycles, which is especially strong on Katalina while supporting teammates. Perfect guard is also now usable mid-animation on most characters, which is a major shift from base Relink.
One important caveat: charged attacks appear to cancel if you perfect-guard during the charge. That’s relevant for Vaseraga, Gran’s Y-charge, and any other charge-heavy kit. Plan parries between charges rather than during them.
Slow is exceptionally strong on the Golem. Pair it with paralysis windows from Zeta or IO’s Concentration setups to chain free damage phases.
The 4-minute clear target
The time-attack goal is tight. Hitting it with AI teammates is realistic up to about an A rank without a coordinated team. To push higher, you need three things lined up: every summon used on cooldown, an element-weak SBA chain (running Captain plus an off-element DPS like Yodarha increases the odds), and clean perfect-parry uptime to keep SBA gauge ahead of the AI.
There is no Hold SBA setting in the beta, so whoever fills first fires first. If you’re chasing the time, pick the character most likely to generate gauge fastest and trust the team to follow.
Matchmaking and login issues
Crossplay matchmaking has been unreliable during the beta, with long queues that sometimes never resolve. A workaround that’s been working: load an offline session of the quest first, complete or exit it, then return to online matchmaking. Login errors after unlocking the quest often clear after one offline run.
If you’re struggling to find a group, an offline AI clear is fully viable for the basic completion. The time-attack ranks are where a real team becomes necessary.
How to confirm the clear
The quest resolves with a standard victory screen, and Sephira’s Sanguine Glimmer is marked complete on the quest counter. Time-attack medals are awarded based on clear time against the 4-minute benchmark. If the timer expires or two players go down simultaneously, the run fails, and no progress is recorded toward time-attack ranks.
The fight is the clearest preview of what Chaos difficulty in the full Endless Ragnarok expansion is aiming for: faster pacing, permanent Overdrive, summons as a real damage layer, and Primal Bursts breaking up the rhythm. If the rest of the reskinned roster lands at this tuning, the expansion’s combat loop will feel meaningfully different from base Relink endgame.