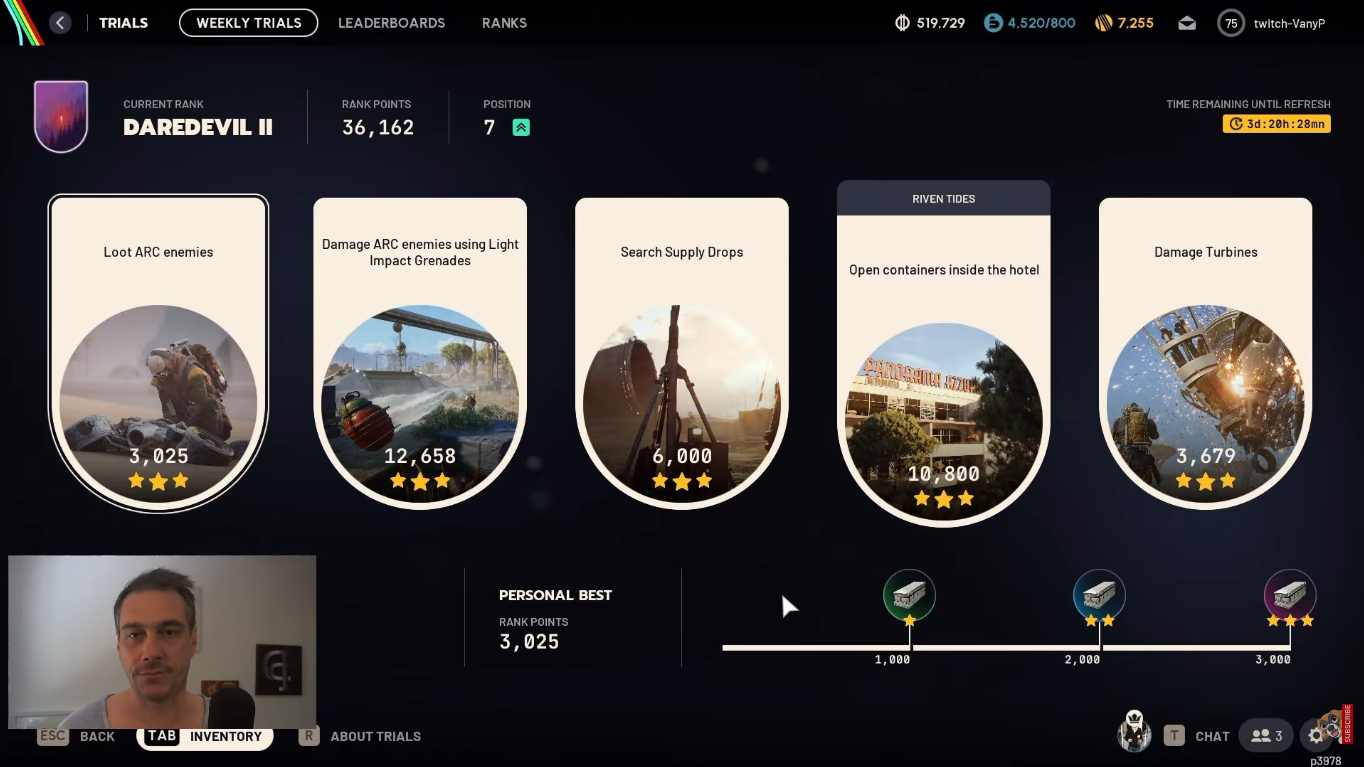
Season 4 of ARC Raiders Trials reshapes how Raiders chase three stars. The active weekly slate runs from May 4 to May 11, 2026, and asks for five completions on Dam Battlegrounds, Stella Montis, Buried City, and Blue Gate. Each challenge resets on Monday, and only your best extracted run per challenge counts toward your division leaderboard.
Quick answer: Hit 3,000 points on a challenge in a single run and extract successfully to earn three stars and the Epic-tier reward for that challenge. Failing extraction wipes the run to zero, even if the threshold was reached mid-match.
Season 4 Trials scoring and three-star threshold
Season 4 removed the 2x point multipliers that Night Raid, Electromagnetic Storm, and similar conditions used to grant. To compensate, the point thresholds were lowered. The new three-star bar sits at 3,000 points per challenge, with one and two stars at 1,000 and 2,000, respectively. Each tier corresponds to a guaranteed loot drop quality.
| Stars | Points needed | Reward tier |
|---|---|---|
| 1 star | 1,000 | Uncommon item or blueprint |
| 2 stars | 2,000 | Rare item or blueprint |
| 3 stars | 3,000 | Epic item or blueprint |
Rewards are claimed automatically once you extract. If you die in the raid, none of the points register, regardless of how close you were to the threshold.
Week 2 challenges at a reference
| Challenge | Best map | Points per action |
|---|---|---|
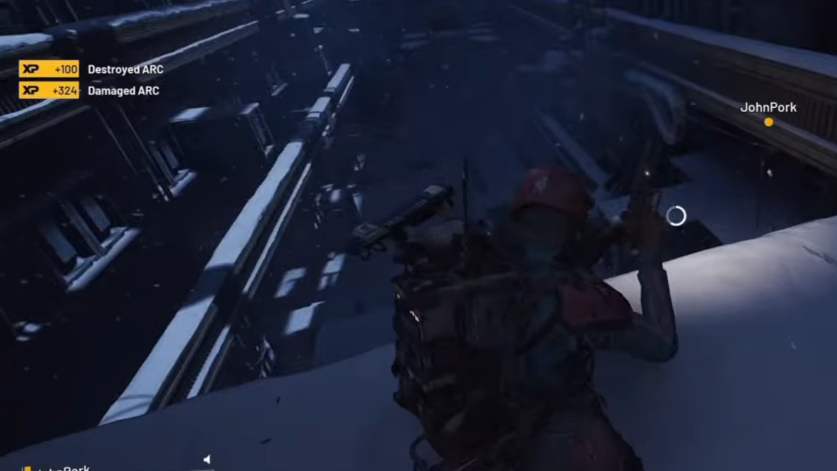
| Destroy Fireballs | Stella Montis | 364 per kill |
| Destroy ARC enemies in the Swamp | Dam Battlegrounds (only) | 200 per kill |
| Search Kitchen Cabinets | Buried City or Dam Battlegrounds | 270 per cabinet |
| Damage any ARC enemies | Dam Battlegrounds | 0.7 per damage |
| Deal melee damage to ARC enemies | Blue Gate (Matriarch event) | Varies by target |
Destroy Fireballs: Stella Montis route
Each Fireball kill awards a flat 364 points, so nine clean eliminations clear the three-star bar. Stella Montis offers the most reliable density. Stay in a tight rotation between Robotic Sandboxes, Lobby, Atrium, Cultural Archives, Metro, Communications, and Business Center. Skip Medical Bay, Loading Bay, and Assembly because the walk dilutes your respawn cycle.
Watch for chained pops. If a Fireball’s death AoE damages another Fireball, the second one yields reduced points or vanishes entirely. Always shoot the rear Fireball first when two are stacked, so the front one stays intact for a clean kill. An Anvil with armor-piercing rounds handles them at distance, and a Hullcracker is useful for clearing Shredders that wander into your route.
Destroy ARC enemies in the Swamp: Dam Battlegrounds
This one only counts inside the Swamp zone in the southwest of Dam Battlegrounds. Every ARC killed inside the boundary awards a flat 200 points regardless of size, which means 15 eliminations equal three stars. The Hydroponic Dome Complex sits at the center of the area and pulls the most consistent spawns.
Rotate between the three sub-locations if respawns slow down, since spawn timers are tied to player proximity. Smaller ARCs go down fast and count the same as a Bastion for this objective, so don’t burn ammo on heavy units unless they cross your path. An Anvil or Renegade is enough to handle the grind without risking a high-value kit in PvP.
Search Kitchen Cabinets: route, RNG, and the cabinets that count
Only double-door wall cabinets (upper and lower) count toward this challenge. Drawers, refrigerators, and single-door units do not register, which makes the route narrower than it looks. Each valid cabinet awards 270 points, so 12 clean searches hit the three-star bar. RNG controls whether a cabinet actually spawns lootable inside a kitchen, so expect some empty rooms.
Buried City has the densest viable route, with Dam Battlegrounds as a close second. On Dam, hit Pell Apartments, Ruby Residence, and the Pattern House near the Power Generation extraction. Join only full-length matches. If you load in past the 45-second mark, the join-in-progress timer typically cuts you short before you can finish the route.
Note: If a kitchen produces no cabinet spawns, move on rather than re-searching. Cabinets do not refresh within a single raid.
Damage any ARC enemies: high-value targets on Dam Battlegrounds
This pays 0.7 points per damage, so the path to 3,000 runs through the heaviest ARC units in the game. Bombardiers and Bastions deliver the highest single-target value, with Rocketeers and Vaporizers close behind. A night raid on Dam Battlegrounds is the most reliable setup, but daytime works once you understand the rotation.

Deal melee damage to ARC enemies: Matriarch core farm
The fastest path is the Matriarch boss event, currently most consistent on Blue Gate. The Matriarch’s exposed core, once the central armor plate is broken, lets you stack thousands of melee points in a short window. The leg-joint pocket on the underside is the safest spot if you don’t want to ride the head.


How to know a three-star run registered
The tally only locks after a successful extraction at Speranza. On the post-raid screen, each challenge shows its star count and the loot drop attached to it. Epic-tier rewards arrive automatically into your stash when the three-star bar is met. If the screen shows a lower tier than expected, the threshold either wasn’t reached on a single run, or a death during the raid voided the score.
Each weekly challenge tier can only be claimed once. Beating 3,000 points a second time on the same challenge in the same week does not produce another Epic reward. The leaderboard score, however, keeps your best run on file and that’s what determines division placement on Monday’s rank update.
Common failure reasons
- Dying before extraction. Every point on that run is voided.
- Joining a match past the 45-second mark on cabinet routes, leaving too little time to clear the buildings.
- Letting Fireball AoE chain-kill nearby Fireballs, which reduces or removes points for the secondary kills.
- Searching drawers, refrigerators, or single-door cabinets, which never count toward the Kitchen Cabinets objective.
- Killing Bombardiers before damaging their Spotters, which can halt the spawn cycle for follow-up runs.
Three stars across all five challenges in Week 2 pulls in five Epic-tier rewards plus the cumulative score needed to push toward Tryhard, Wildcard, and beyond on the Season 4 Recon Outfit track. Lock the threshold, extract clean, and the rest is rank math.