The ARC Turbine is the flying machine added to Arc Raiders with the Riven Tides update, and it punishes anyone who tries to brute-force it. Its hull shrugs off bullets while it’s airborne, and the moment you tag it, it answers with proximity mines, homing missiles, and lightning grenades. The fight only becomes winnable when it touches down and exposes its core.
What the ARC Turbine is
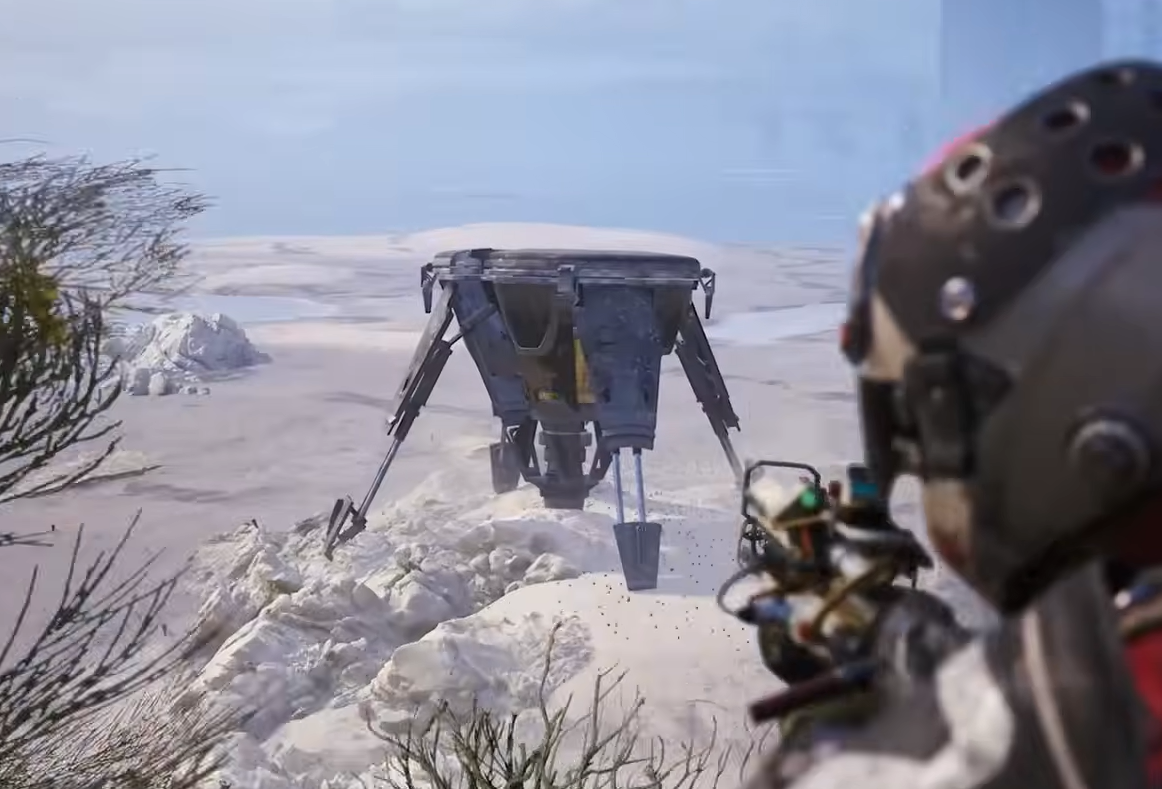
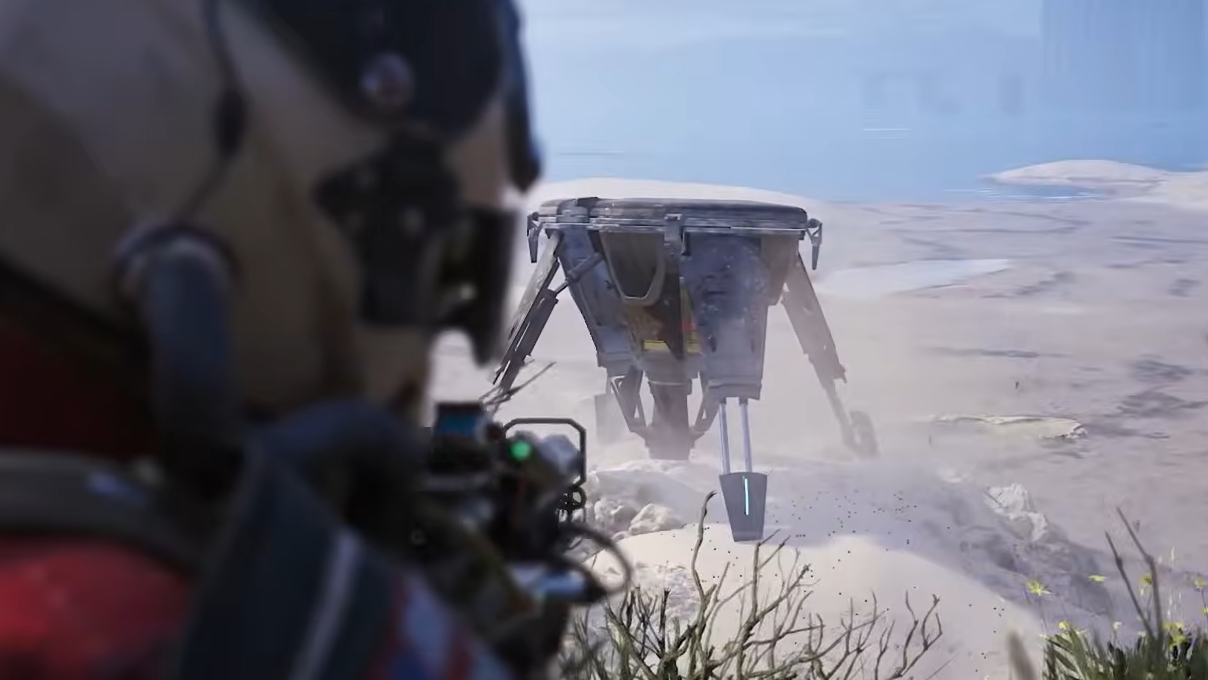
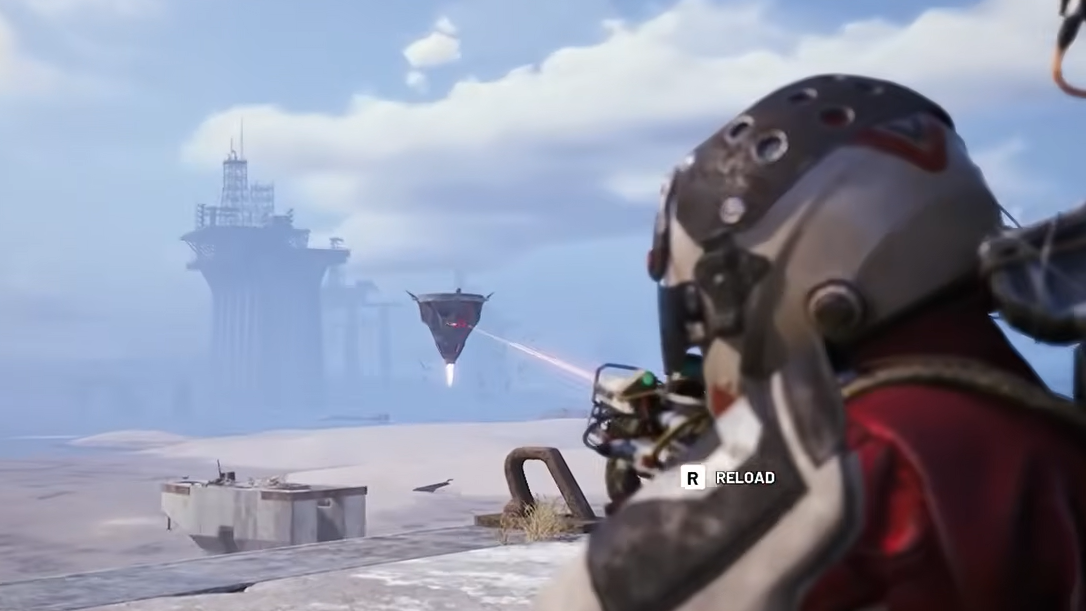
The Turbine is a heavy-armor flying ARC enemy that drifts across the Riven Tides map. Players around Hotel Paronama Azzuro tend to spot it most often, though it isn’t locked to a single landing spot and rotates between zones after patrolling. It’s tied to the Riven Tides map regardless of map condition, so Beachcombing or a clean run both work.
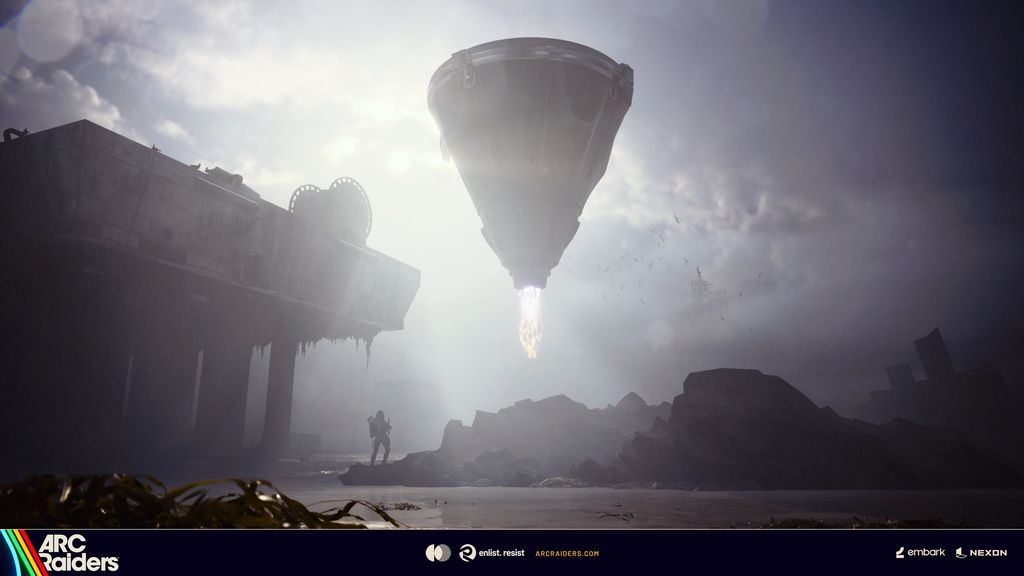
It only spawns once a match has been running for roughly 15 minutes. You’ll know it’s arriving from a loud re-entry sound and a meteor-like descent trail, which means every player on the map can see it coming too.
| Stat | Detail |
|---|---|
| Threat level | Critical |
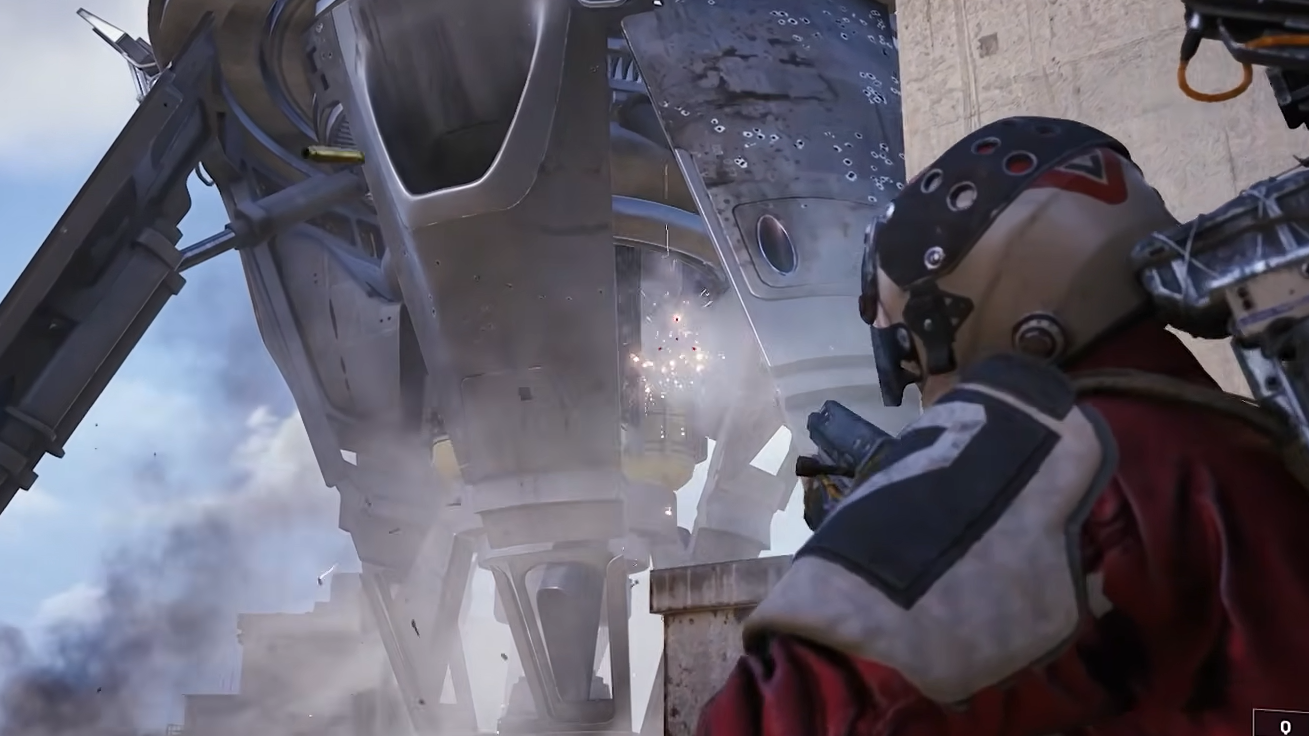
| Armor | Heavy plating, impenetrable while airborne |
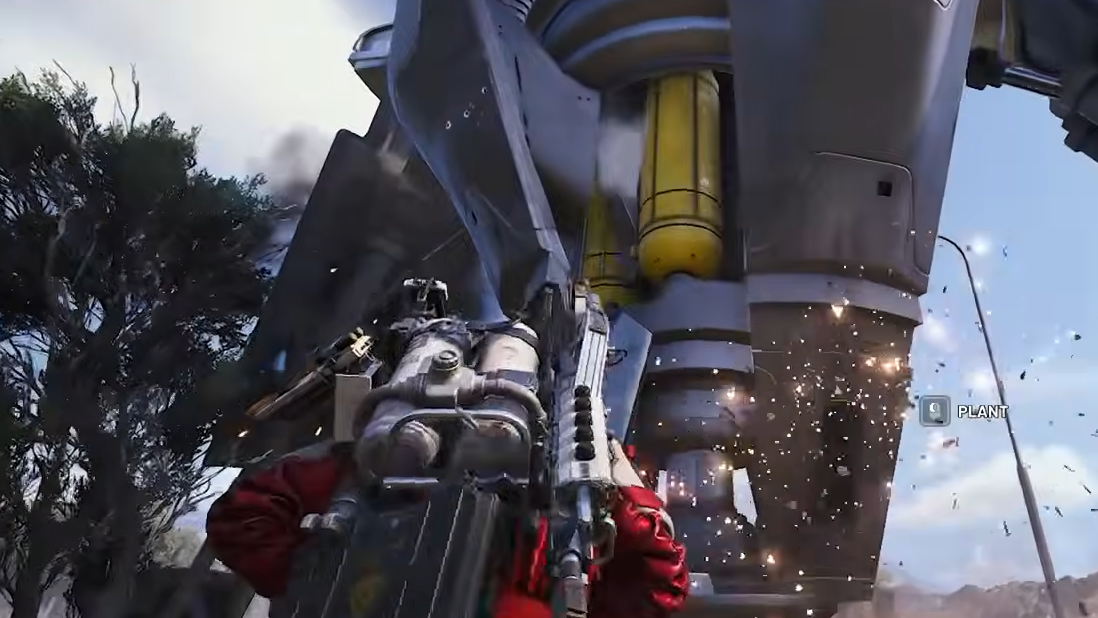
| Weak point | Three spinning yellow canisters in the core |
| Spawn condition | Riven Tides map, after ~15 minutes into a match |
| Primary drop | Turbine Compressor |
Recommended loadout
You need weapons that deal a lot of damage in a short window, because the canisters are only exposed for a few seconds at a time. Slow reloads and low-damage guns waste the opening. A medium or heavy shield is strongly preferred, which means running a Combat MK.2 augment or higher.
| Slot | Pick |
|---|---|
| Primary | Hullcracker, Bettina, or Jupiter |
| Secondary | Anvil, Equalizer, or a fully upgraded Renegade |
| Shield | Medium or heavy, plus Shield Rechargers |
| Healing | Vita Spray, Vita Shots, sterilized and herbal bandages |
| Utility | Barricade Kit, Snap Hook, Deadline Mine |
| Heavy options | Wolfpack grenades for backup damage |
Skip throwables aimed at the Turbine itself. Players who tried climbing on top of it to plant a Deadline got torched almost immediately, and the attack pattern leaves no clean window to land a grenade on the canisters. Keep grenades for clearing other Raiders or smaller ARC support if it shows up.
Reading the phases
The Turbine cycles between an airborne phase, a landing phase, and a lightning attack phase. The trick is knowing when to shoot and when to hide. Shooting at the wrong time accomplishes nothing and gives away your position.
| Phase | What it does | What you do |
|---|---|---|
| Airborne | Drops proximity mines, fires homing missiles, calls lightning strikes | Stay behind hard cover, hold fire |
| Landing | Sets down on three legs, opens core, exposes yellow canisters | Empty heavy damage into the canisters |
| Lightning attack | Lobs grenades upward that split into multiple lightning bolts | Get behind solid cover, wait it out |
How to bring it down
Loot and what it’s for
Defeating the Turbine drops a Turbine Compressor along with standard ARC materials. Other players heard the entire fight and saw the meteor entry, so the wreckage is a hot zone. Grab the loot and rotate to extract immediately.
| Drop | Use |
|---|---|
| Turbine Compressor | Avian Alarm Project Stage 5 (requires 2), Powered Descender blueprint |
| ARC Alloy | Standard ARC crafting material |
| ARC Synthetic Resin | Standard ARC crafting material |
| ARC Thermo Lining | Advanced crafting |
| ARC Motion Core | Advanced crafting |
| Advanced ARC Powercell | High-tier components |
| Launcher Ammo | Heavy weapon ammunition |
The Powered Descender also requires a Level 3 Utility Station to craft, so the Compressor alone doesn’t unlock it. ARC Couriers can occasionally drop Compressors as well, but the Turbine is the direct farming route.
The fight rewards patience over aggression. Hold fire while it’s in the air, commit fully during the brief grounded windows, and treat the wreckage as the second half of the encounter rather than the finish line. Bring a squad if you can; soloing the Turbine works, but a coordinated team can clear multiple cycles before another player even reaches the area.