
Battlefield 6 can saturate the CPU, especially in large matches, leading to frame pacing spikes, stutter, and underused GPUs. High CPU usage by itself isn’t automatically bad, but once threads hit their ceiling, you’ll feel it in hitches and inconsistent frame times. A straightforward configuration file can rebalance how the game schedules work across cores and threads and dramatically reduce CPU saturation on affected systems.
Fix Battlefield 6 high CPU usage by setting thread counts (User.cfg)
This method tells the game exactly how many CPU cores and threads are available. On impacted PCs, it often drops CPU utilization from the 80–90% range into roughly the 50–60% range and smooths heavy moments.
- Find your CPU’s core and thread counts:
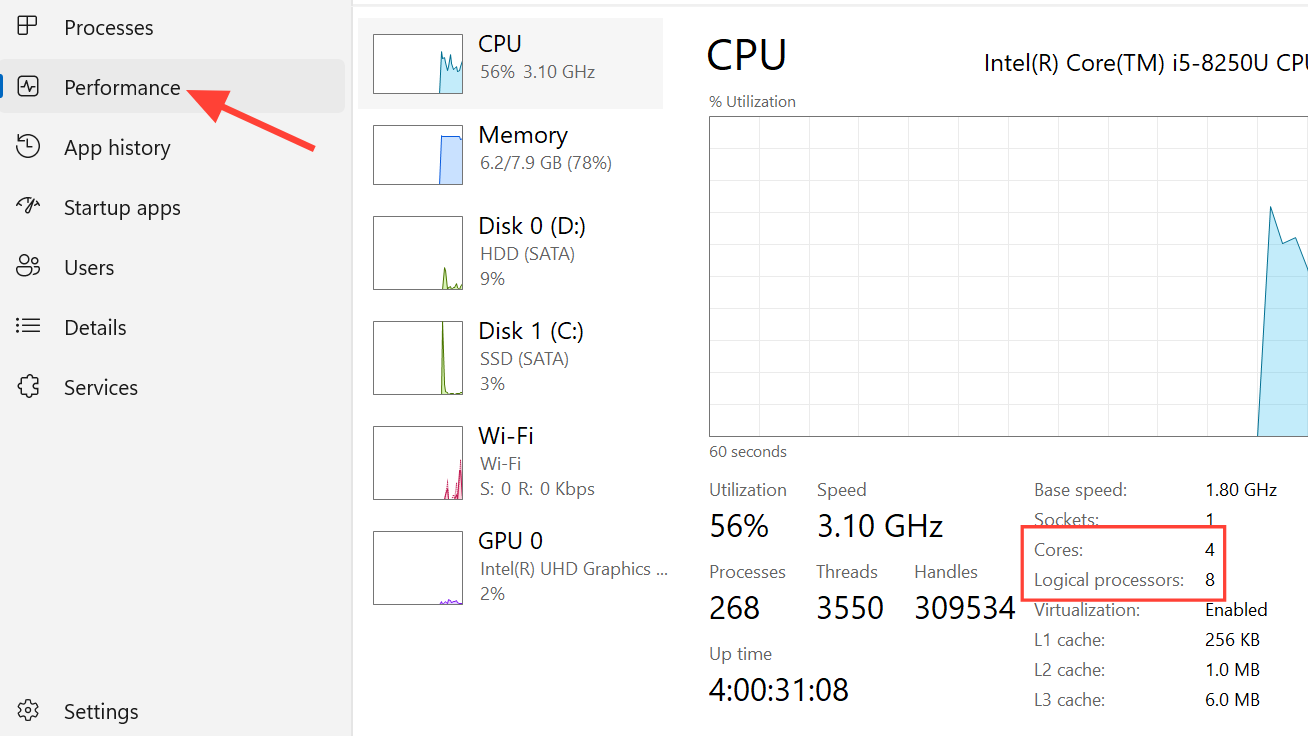
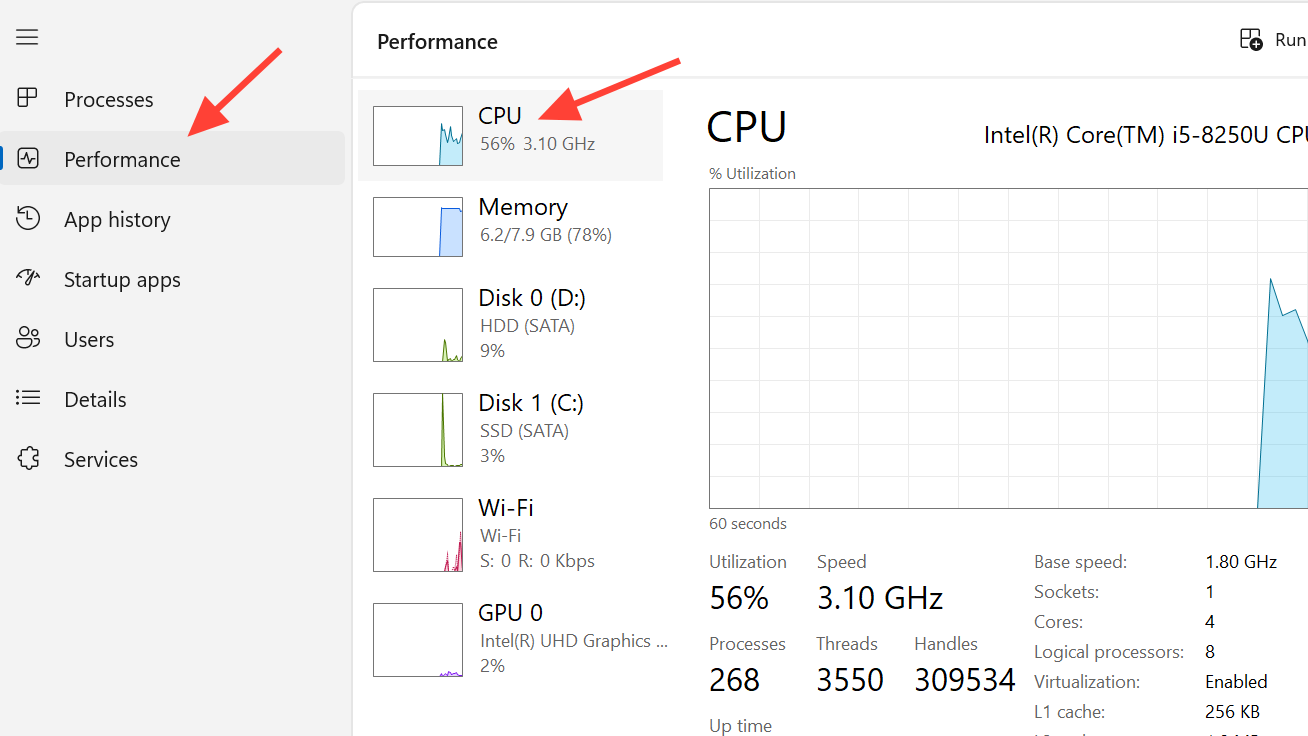
- On Windows: open Task Manager, go to Performance → CPU, and note “Cores” and “Logical processors” (threads).
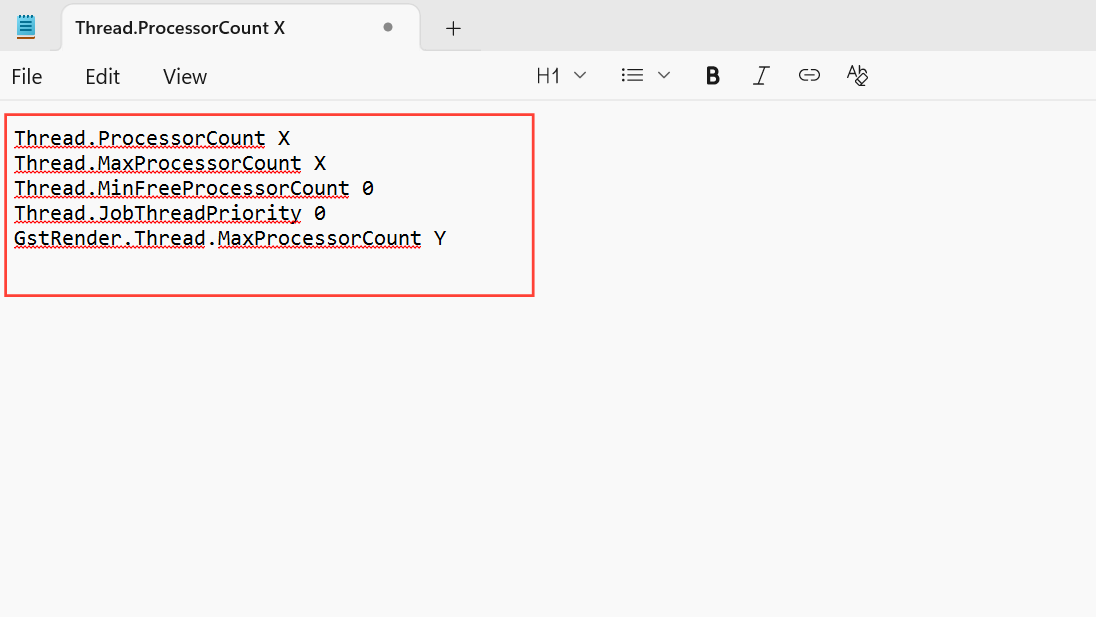
- Open Notepad and paste these lines:
Thread.ProcessorCount X
Thread.MaxProcessorCount X
Thread.MinFreeProcessorCount 0
Thread.JobThreadPriority 0
GstRender.Thread.MaxProcessorCount Y
- Replace
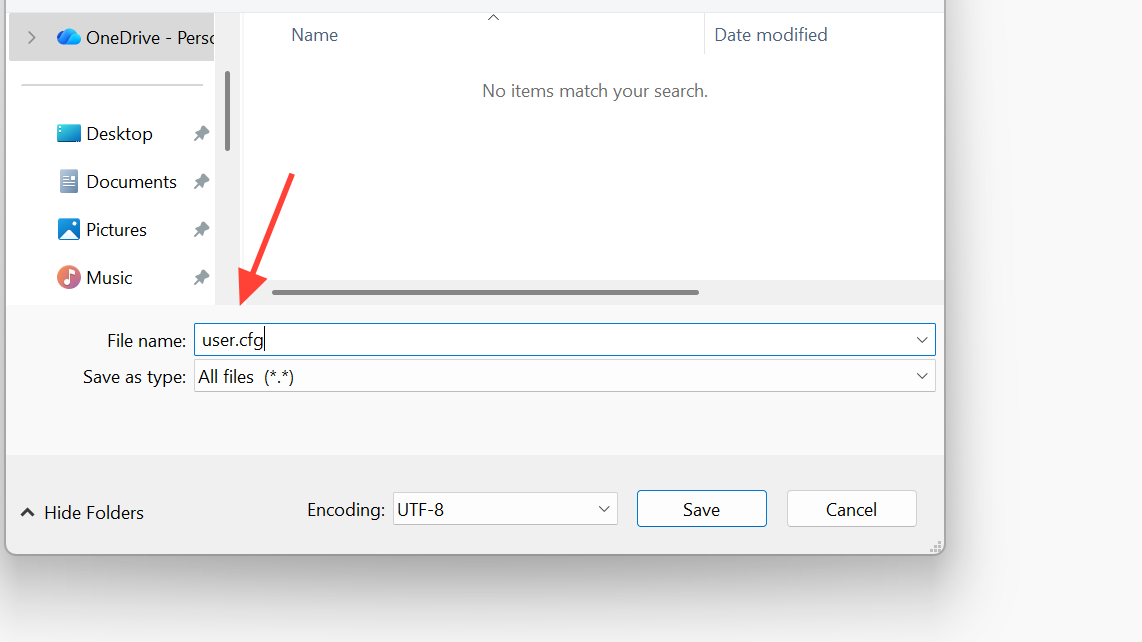
Xwith your number of cores andYwith your number of threads (logical processors). Keep the zeros unchanged. - Save the file as
User.cfg(capital U) in the Battlefield 6 installation folder next to the game’s.exe.- EA app: Battlefield 6 → Manage → View properties → Open folder.
- Steam: Battlefield 6 → Properties → Installed Files → Browse.
- Launch the game and play for a few minutes on a busy server; monitor CPU usage again.
Example mappings:
| CPU cores | CPU threads | Values to put in User.cfg |
|---|---|---|
| 4 | 8 | Thread.ProcessorCount 4, Thread.MaxProcessorCount 4, GstRender.Thread.MaxProcessorCount 8 |
| 6 | 12 | Thread.ProcessorCount 6, Thread.MaxProcessorCount 6, GstRender.Thread.MaxProcessorCount 12 |
| 8 | 16 | Thread.ProcessorCount 8, Thread.MaxProcessorCount 8, GstRender.Thread.MaxProcessorCount 16 |
| 12 | 24 | Thread.ProcessorCount 12, Thread.MaxProcessorCount 12, GstRender.Thread.MaxProcessorCount 24 |
Thread.ProcessorCount/Thread.MaxProcessorCount and your total logical processors for GstRender.Thread.MaxProcessorCount.What this change does (and doesn’t do)
- It doesn’t throttle or cap your CPU. It instructs the engine to use all available cores and threads efficiently.
- Better distribution across cores can reduce percentage utilization while maintaining or improving frame rate, especially during effects-heavy or player‑dense moments.
- The benefit is most obvious on systems that were pegged near 100% CPU with intermittent stutter or low GPU usage.
Use the in‑game Performance preset to ease CPU load
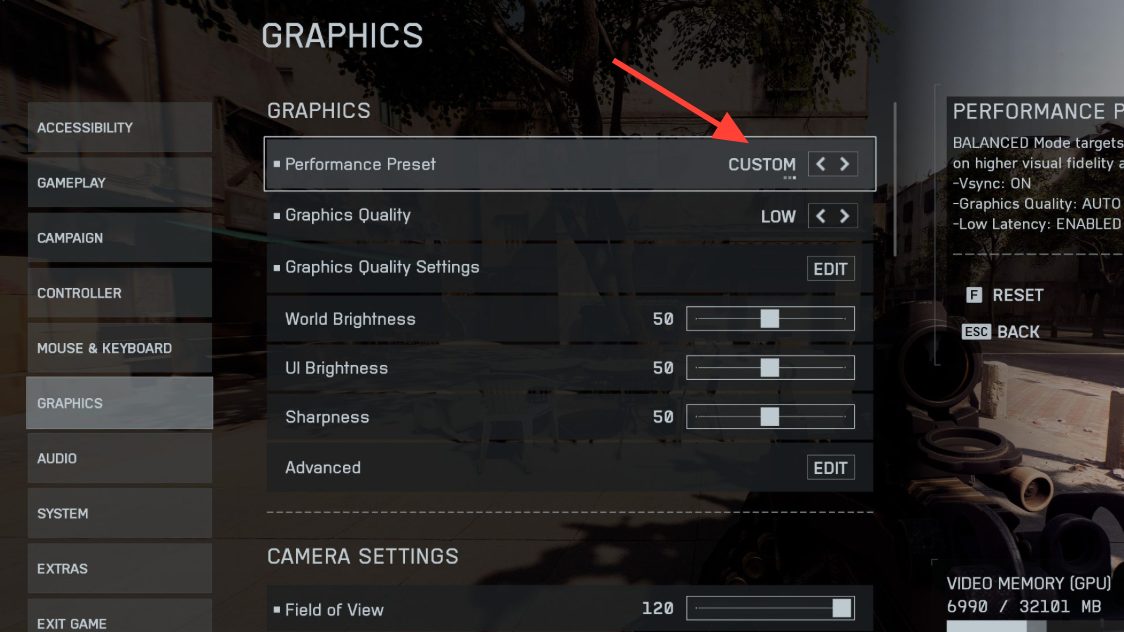
If you’re still hitting high usage after the config change, switch the graphics preset to Performance in the in‑game settings. On some systems, this step alone reduces CPU pressure enough to stop frame time spikes, even before dialing in individual options.
How to confirm the fix worked
- Open Task Manager → Performance → CPU and leave it visible on a second screen (or check after a match).
- Join a large match with lots of vehicles and effects. Compare average CPU utilization and peak spikes before and after the change.
- Watch for smoother frame pacing in busy scenes and fewer hitches when explosions, destruction, or heavy firefights kick off.
Revert or adjust later
- To undo the change, delete
User.cfgfrom the game folder (or rename it). - If you upgrade your CPU, update the file with the new core and thread counts.
If you’re still CPU‑bound after these steps, you’re likely hitting a genuine processor limit for your target frame rate. In that case, the best options are lowering CPU‑heavy settings via the Performance preset or aiming for a slightly lower frame target to keep frame times stable.