In Windows 11, the traditional Command Prompt is integrated into the modern Windows Terminal application by default. This change streamlines the command-line experience but also alters the method for customizing its appearance, such as the background and text colors. The primary way to apply persistent color changes is now through the Windows Terminal's own settings menu, which offers more flexibility than the legacy properties window.
Set a Default Color Scheme
If you want a consistent appearance across all your command-line tools within Windows Terminal, you can set a global default color scheme.
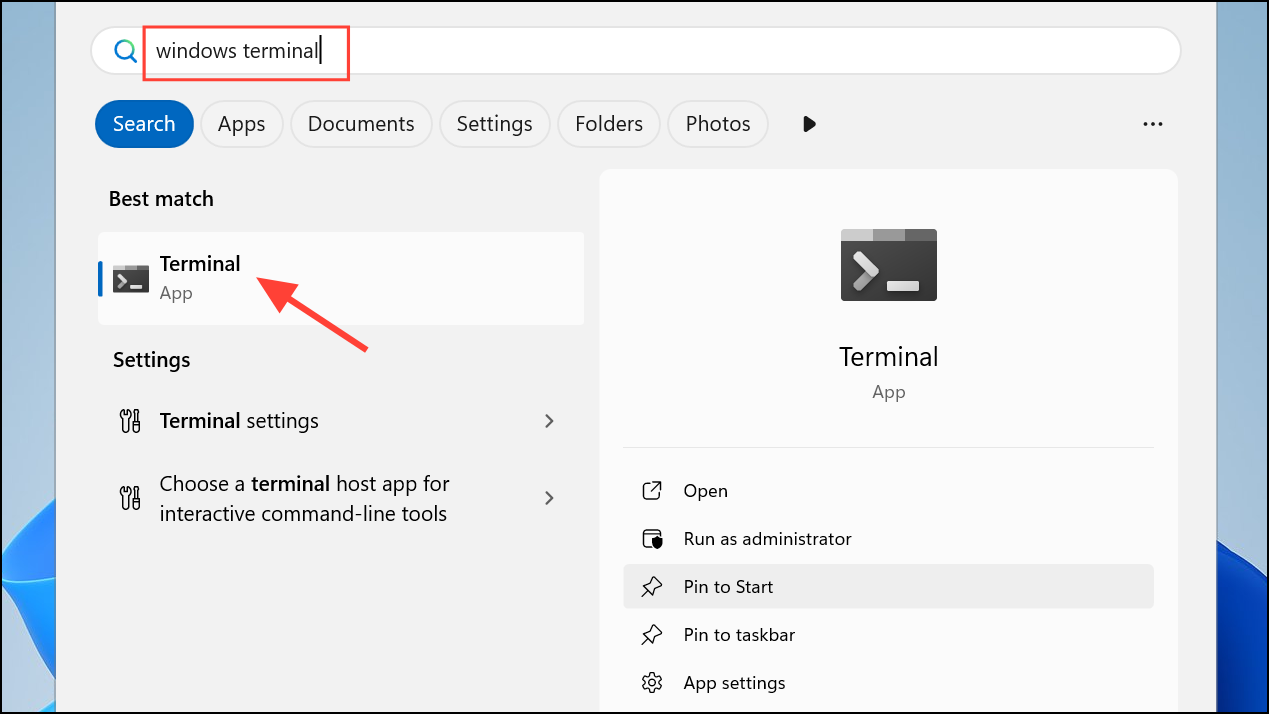
Step 1: Open the Start Menu, search for Windows Terminal, and launch the application. If Command Prompt is not the default profile, open a new Command Prompt tab by clicking the down-arrow icon in the title bar and selecting "Command Prompt."
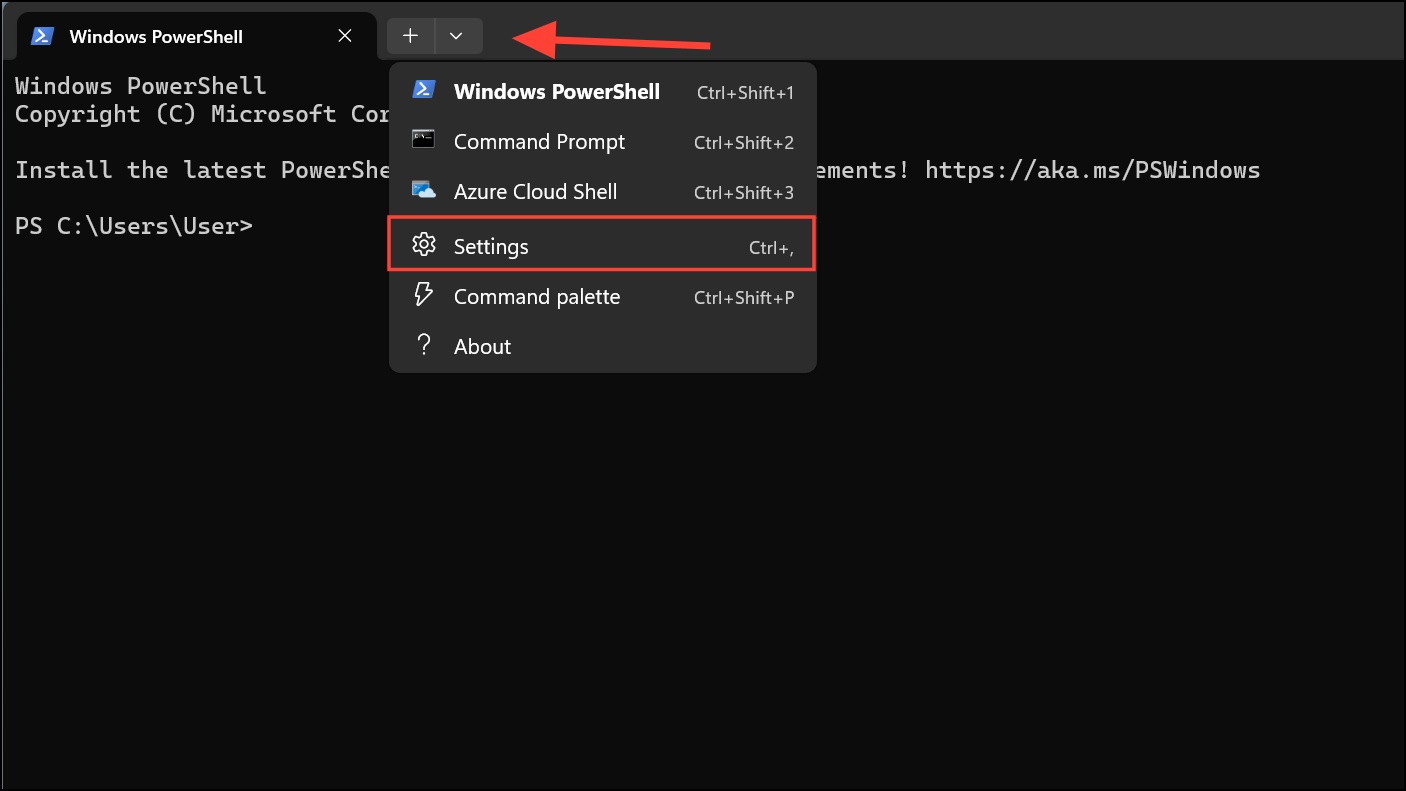
Step 2: Access the settings menu by clicking the same down-arrow icon and choosing "Settings" from the dropdown list. Alternatively, you can use the keyboard shortcut Ctrl + , (comma).
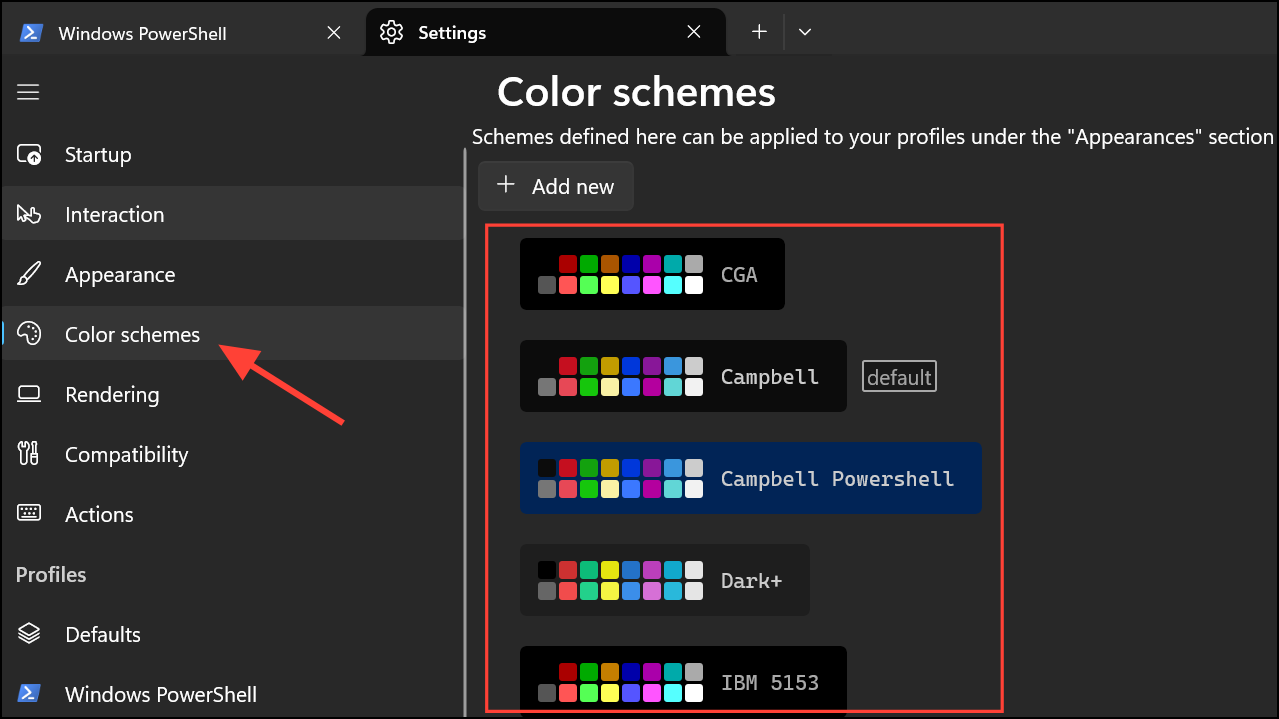
Step 3: In the left-hand navigation pane, click on "Color schemes." This page lists all available schemes and allows you to create new ones.
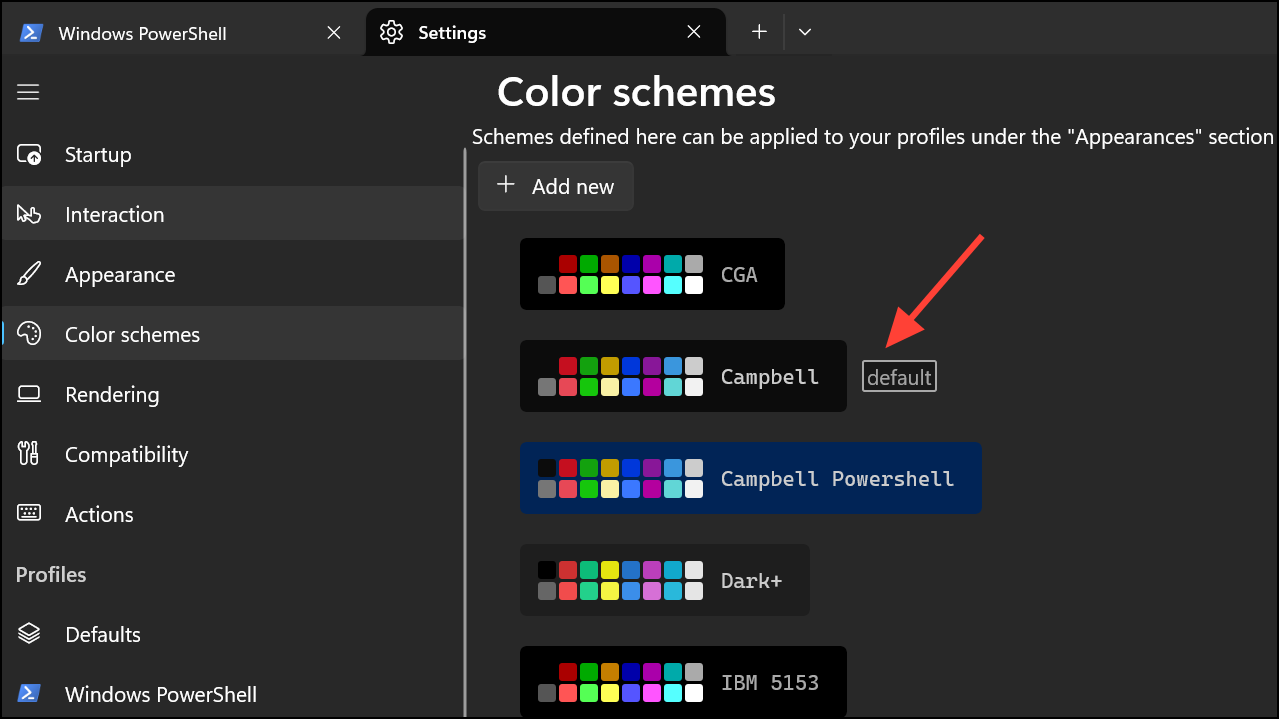
Step 4: Review the list of available color schemes. The current default will be marked with a "(default)" label. Click on any other scheme to select it.
Step 5: After selecting your desired scheme, a "Set as default" button will appear. Click this button to make your selected scheme the new default for all profiles that do not have a specific color scheme already assigned.
Use the `color` Command for Temporary Changes
For quick, session-specific adjustments, you can use the built-in color command. This method changes the colors only for the active Command Prompt window and does not save the settings once the window is closed.
Step 1: Open a Command Prompt window.
Step 2: Type the command color followed by two hexadecimal digits with no space in between. The first digit specifies the background color, and the second specifies the foreground (text) color. For example, to get a black background with light green text, you would type color 0a and press Enter.
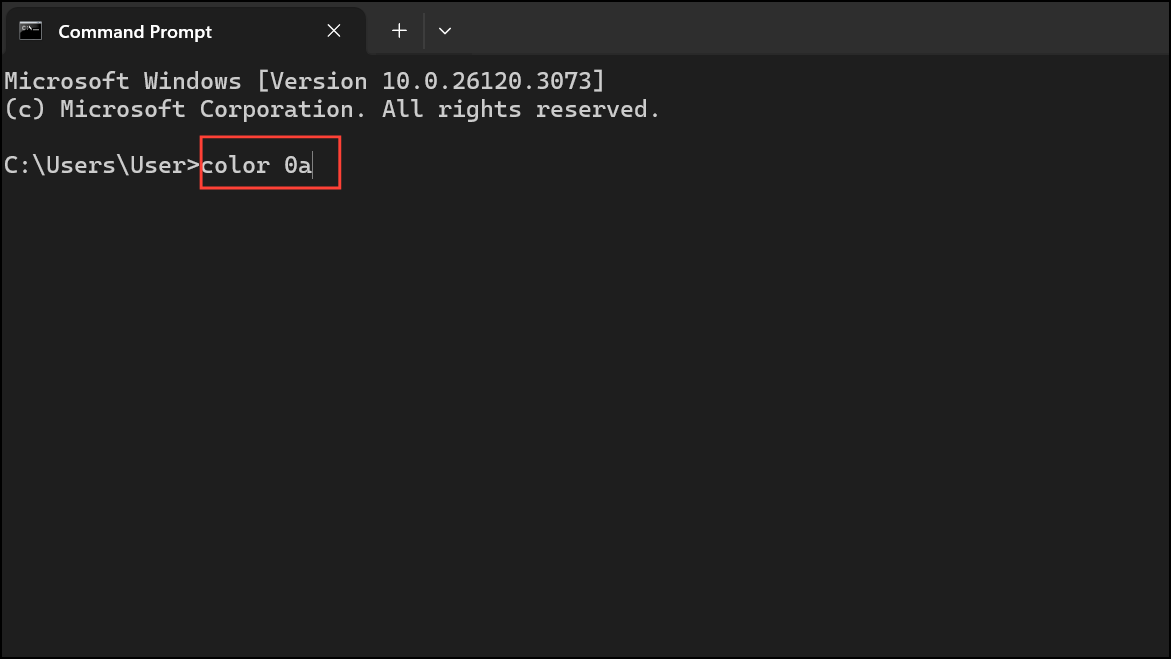
Step 3: You can use the following color codes to create your desired combination. Specifying only one digit will change the foreground color and set the background to the default (usually black).
0 = Black       8 = Gray
1 = Blue        9 = Light Blue
2 = Green       A = Light Green
3 = Aqua        B = Light Aqua
4 = Red         C = Light Red
5 = Purple      D = Light Purple
6 = Yellow      E = Light Yellow
7 = White       F = Bright White
Step 4: To make this change persistent for every new Command Prompt session, you can modify the profile's command line in Windows Terminal settings. Go to Settings > Command Prompt and append /k color 0a (or your chosen color code) to the "Command line" field. This executes the command automatically every time you open a new Command Prompt tab.
Revert to the Legacy Windows Console Host
If you prefer the classic Command Prompt experience and its method of customization, you can configure Windows 11 to use the legacy Windows Console Host instead of Windows Terminal.
Step 1: Open the Windows Settings app by pressing Windows Key + I.
Step 2: Navigate to the "Startup" tab on the left.
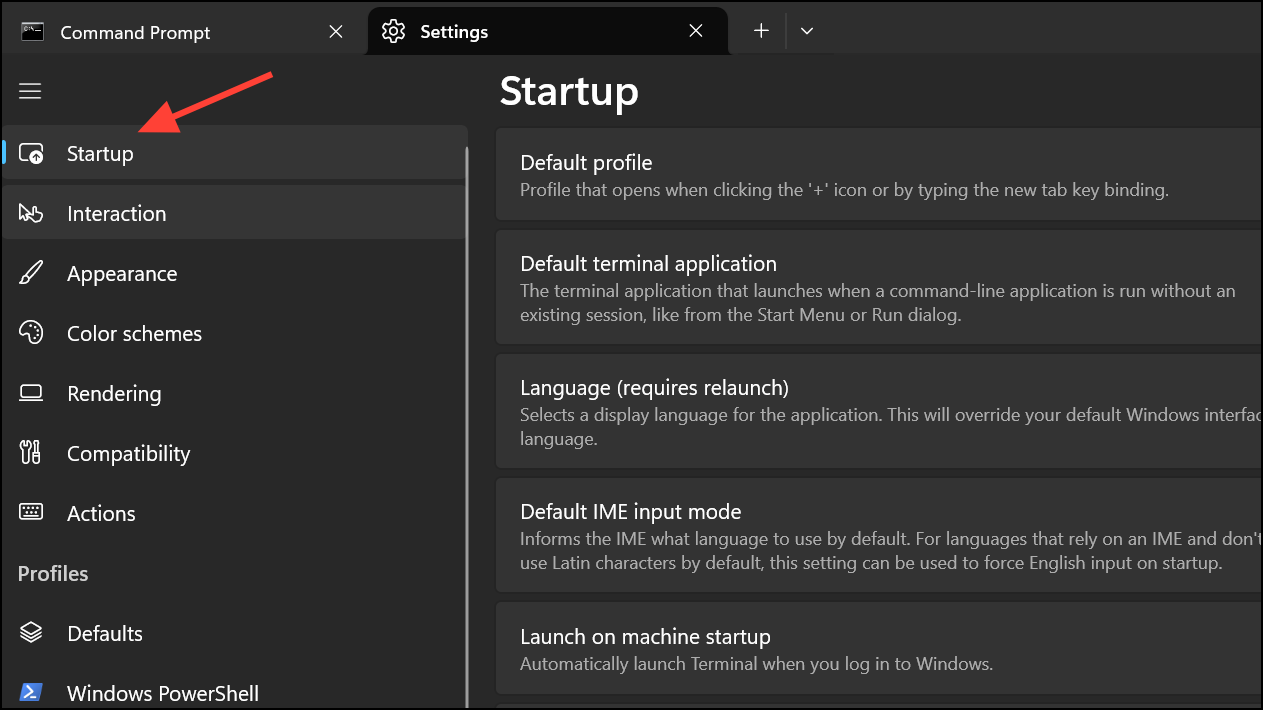
Step 3: On the right, find the "Default Terminal Application" setting. Click on it to reveal a dropdown menu.
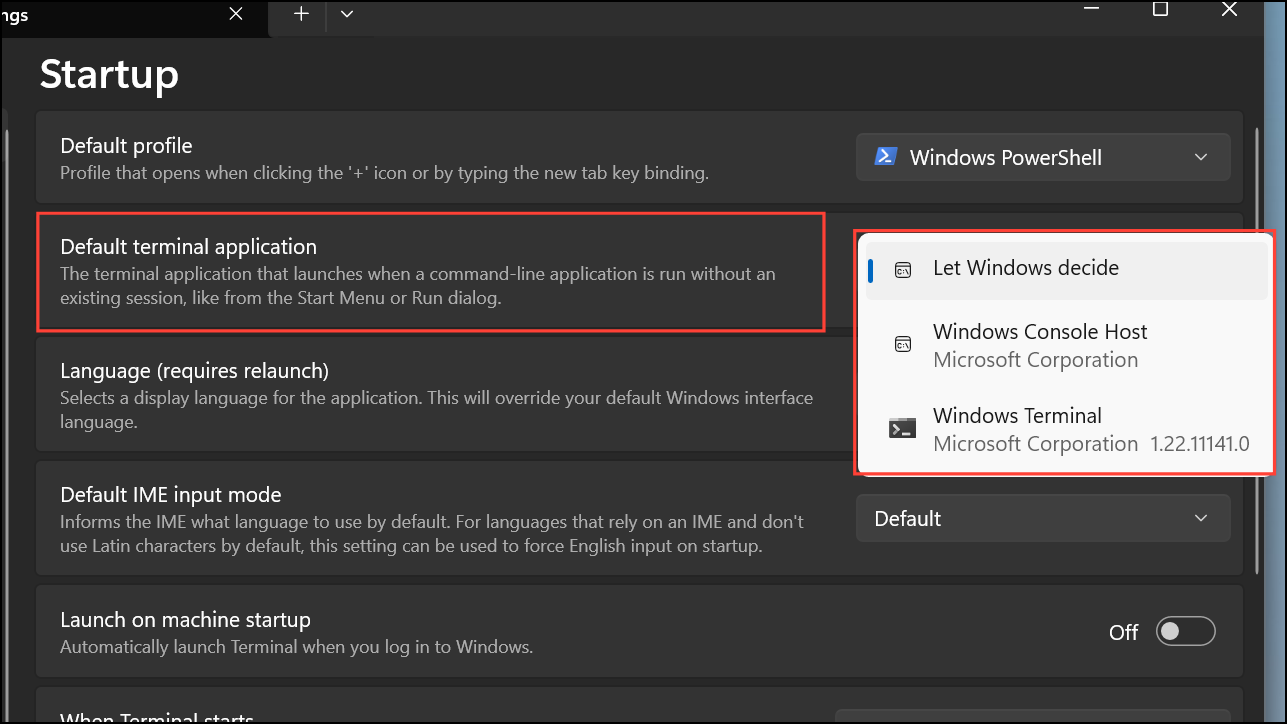
Step 4: Change the setting from "Let Windows decide" or "Windows Terminal" to "Windows Console Host."
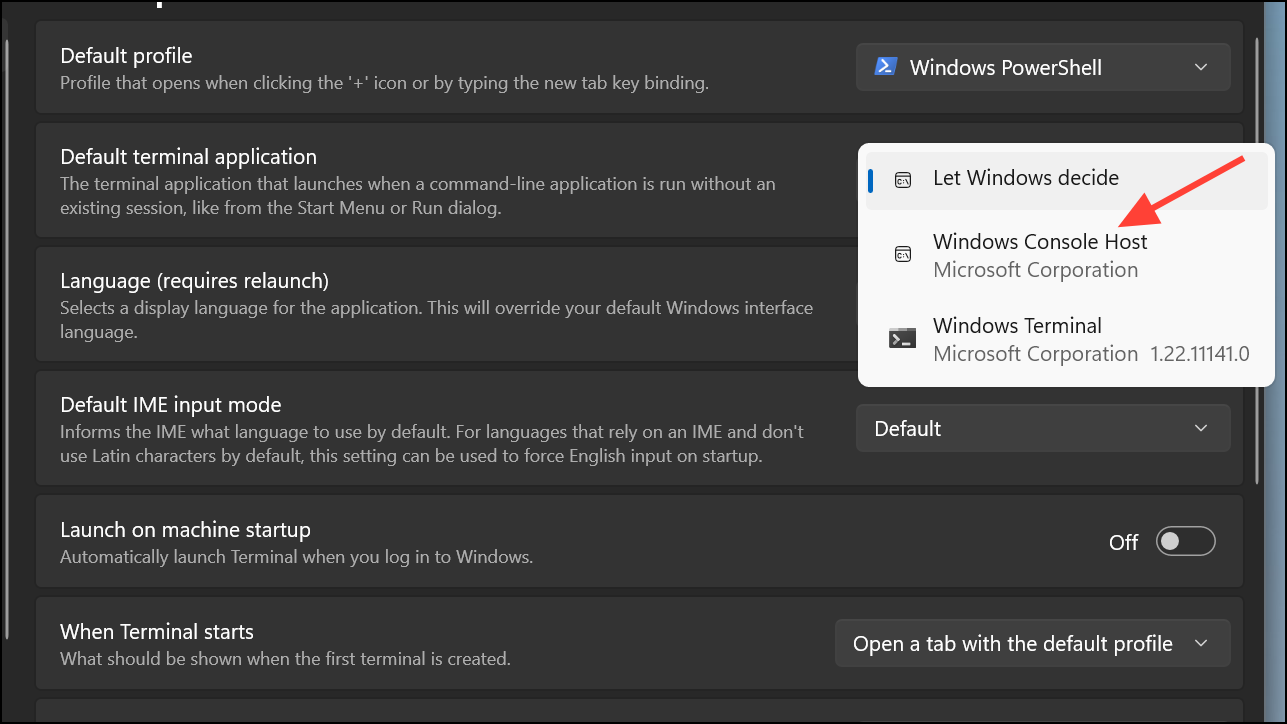
Step 5: After making this change, any new instance of Command Prompt will open in the traditional, standalone console window. You can then right-click its title bar, select "Properties," navigate to the "Colors" tab, and adjust the Screen Text and Screen Background colors as you would in older versions of Windows.
With these different approaches, you can easily adjust the Command Prompt colors in Windows 11 to suit your personal preferences and improve readability during your command-line tasks.


