
Windows 11 allows users to connect multiple monitors for an expanded workspace, gaming, or multitasking. However, when the system assigns the wrong monitor as the primary display, desktop icons and new app windows may appear on the unintended screen. Adjusting which monitor acts as the primary or secondary display and arranging their positions directly impacts productivity and user comfort.
Changing the Primary Monitor in Windows 11
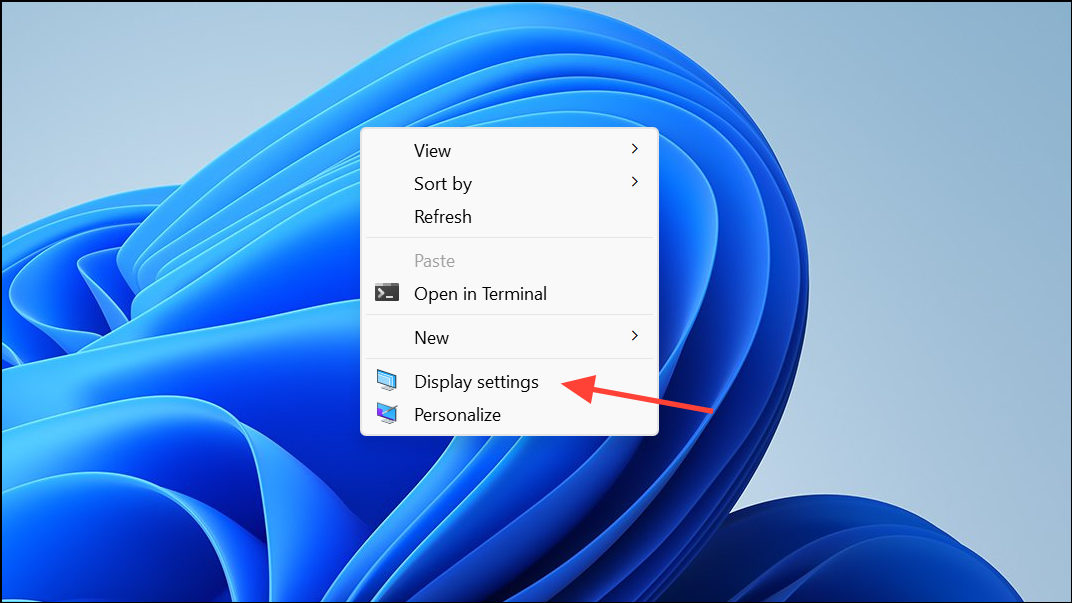
Step 1: Right-click on an empty area of your desktop and choose Display settings from the context menu. This opens the system’s display configuration panel.
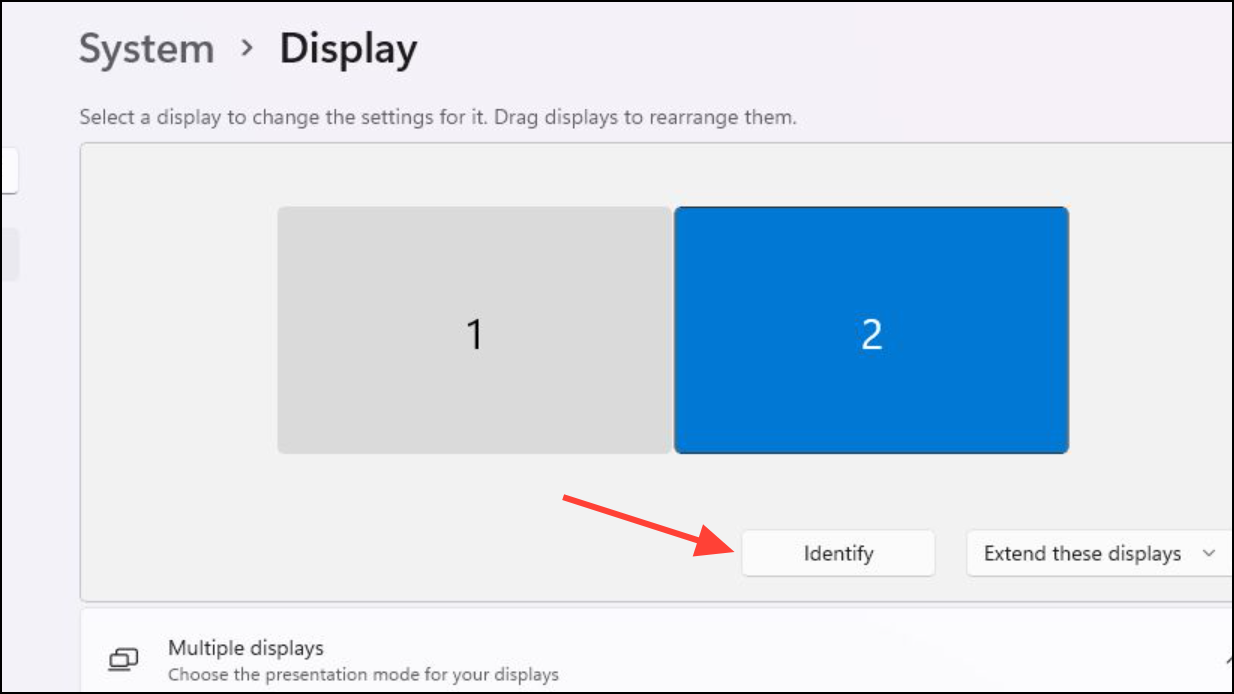
Step 2: In the Display settings window, you’ll see a visual representation of your connected monitors, each labeled with a number. If you’re unsure which monitor corresponds to which number, select the Identify button. A large number will appear on each screen, matching the display arrangement in settings.
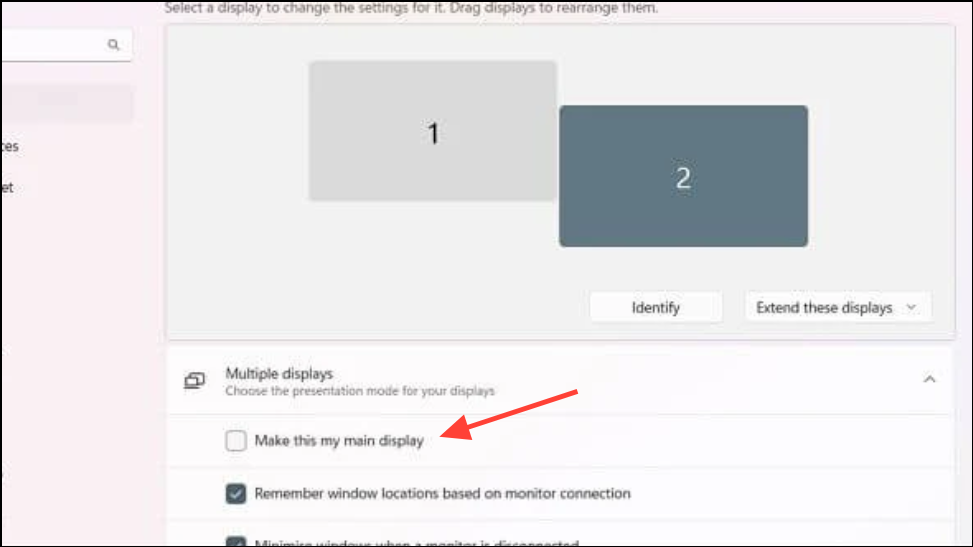
Step 3: Click on the monitor you want to set as your primary display. The selected monitor box will be highlighted. Scroll down to find the option labeled Make this my main display and check the box. Once selected, Windows will immediately switch your desktop icons, taskbar, and most application windows to the chosen monitor.
Step 4: If you wish to change this setting again, repeat the above steps and select a different monitor as the main display. The change takes effect instantly, allowing you to quickly adjust your setup as your needs change.
Arranging Monitor Positions and Orientation
Step 1: In the same Display settings window, you can click and drag the monitor boxes to match the physical arrangement of your screens on your desk. For example, if your second monitor is physically to the left of your main monitor, drag its box to the left of the primary monitor’s box in the settings panel.
Step 2: After arranging the monitor boxes, select Apply to save the new layout. Move your mouse pointer between screens to confirm the arrangement matches your physical setup. This adjustment ensures seamless cursor movement and window dragging across monitors.
Step 3: If a connected monitor does not appear, scroll down to the Multiple displays section and click Detect. This prompts Windows to search for additional connected displays.
Keyboard Shortcuts and Quick Switching Methods
While Windows 11 does not offer a built-in keyboard shortcut to instantly swap the primary display, you can speed up window movement and display switching with these tools:
- Use
Win + Shift + Left/Right Arrowto move the active window between monitors. - The
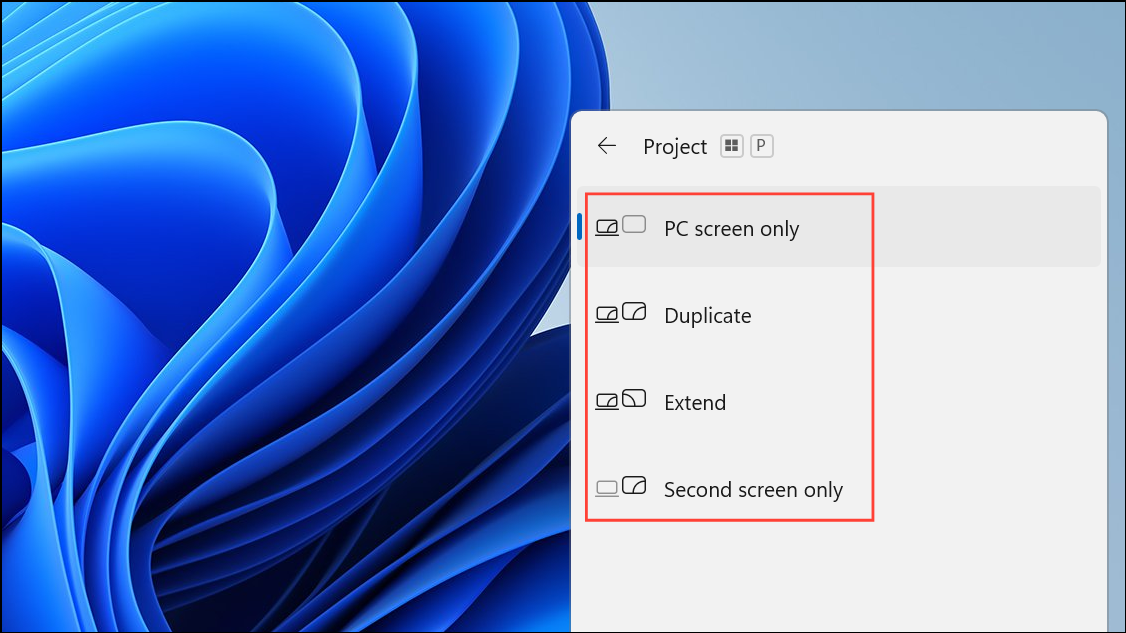
Win + Pshortcut opens the projection menu, letting you quickly choose between display modes: PC screen only, Duplicate, Extend, or Second screen only.
- For advanced users, third-party utilities like NirCmd or MultiMonitorTool allow batch files or command-line operations to switch primary monitors. Assigning these scripts to custom shortcuts can streamline the process, but requires downloading and configuring external tools.
Troubleshooting and Tips
If your main monitor is labeled as “2” and your secondary as “1,” this is usually due to the order of connections on your graphics card. The numbering itself does not affect functionality; what matters is which display is set as the main. Use the Make this my main display checkbox to control where your desktop and new apps appear, regardless of the monitor number.
For wireless displays or TVs, ensure the adapter is properly connected and recognized in the Display settings. If using a TV as a gaming display, set it as the main display before launching games to ensure they open on the correct screen.
Adjust further display options such as resolution, orientation, and scaling in the Display settings for each monitor to optimize clarity and usability based on your preferences and hardware capabilities.
Switching your primary and secondary monitors in Windows 11 is a straightforward process that can be tailored to your setup. Take a few minutes to arrange your displays for a more efficient and comfortable workspace.