
Regional misconfiguration during Windows 11 setup often results in a date format that doesn’t match personal or workplace standards. This can cause confusion, especially in environments where the day and month order matters for scheduling or documentation. Adjusting the date format not only prevents misunderstandings but also streamlines daily operations, ensuring your system displays dates in the way you expect.
Change Date Format Using the Settings App
Step 1: Open the Settings app by pressing the Windows key + I or by right-clicking the date and time on the taskbar and selecting “Adjust date and time.” This action brings up the main configuration area for time and region.
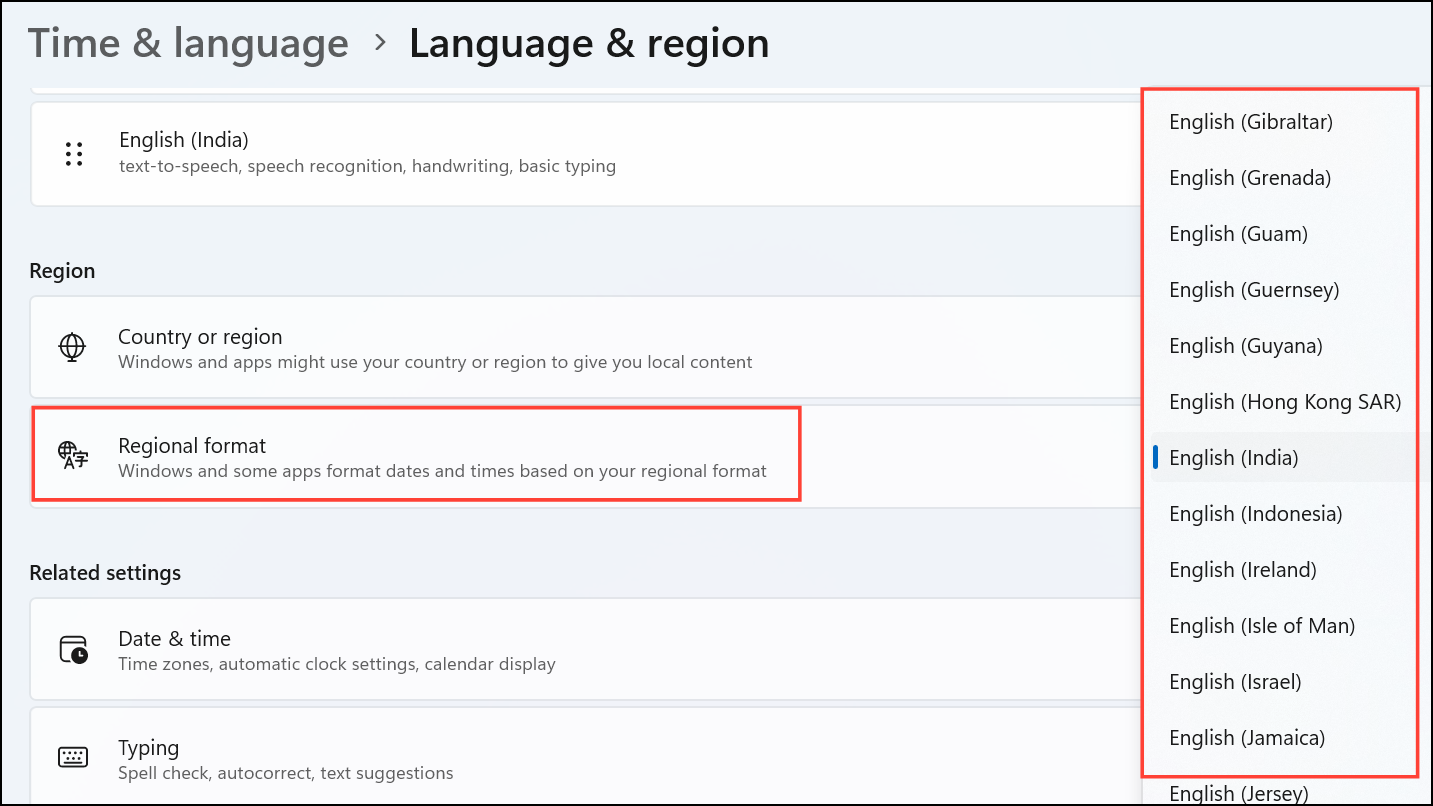
Step 2: In the Settings window, navigate to Time & Language in the sidebar, then choose Language & Region from the options on the right. This section manages all regional preferences, including language and date formats.

Step 3: Scroll to the Regional format section. Select your preferred country or region from the dropdown menu. Windows 11 will instantly apply the default date and time formats associated with that region, reducing the chance of misinterpreted dates.
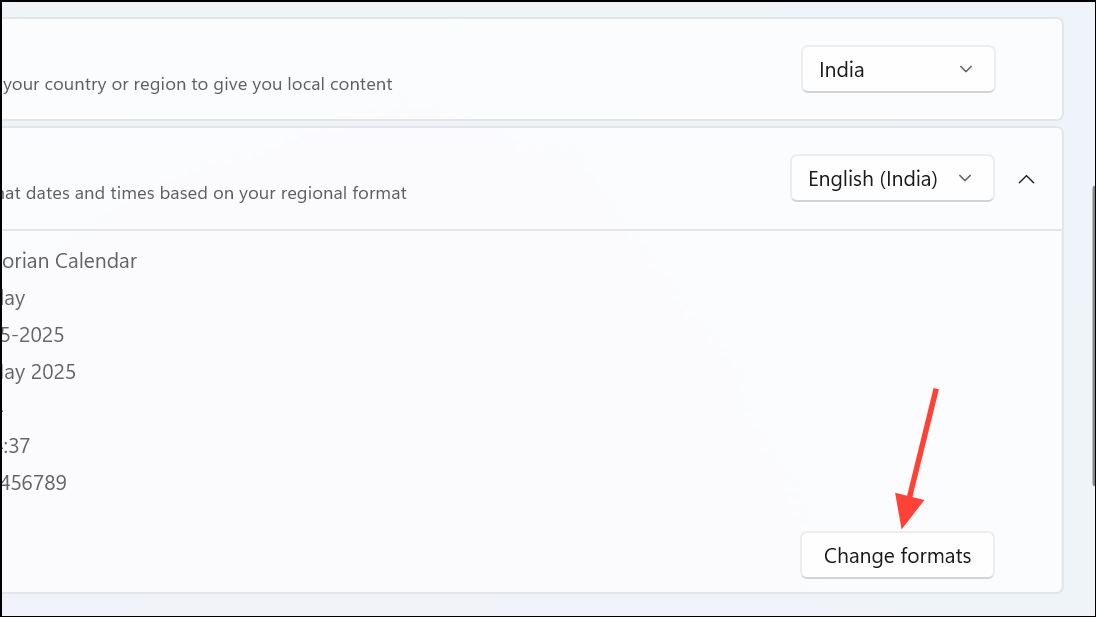
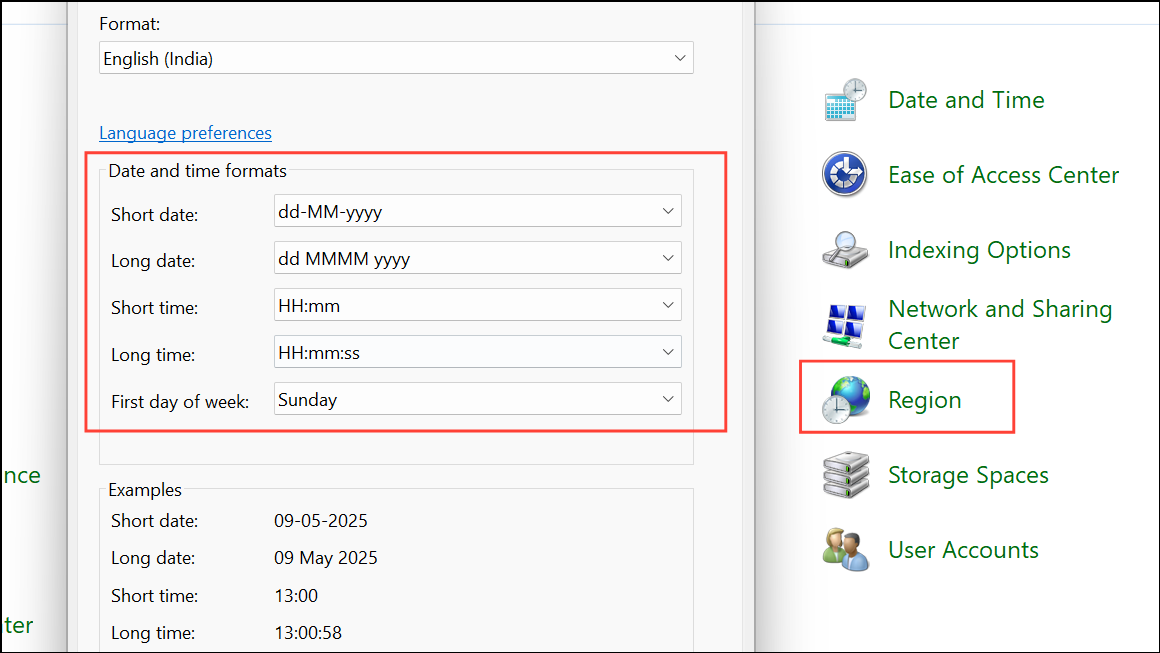
Step 4: For more control, expand the Regional format section and click Change formats.
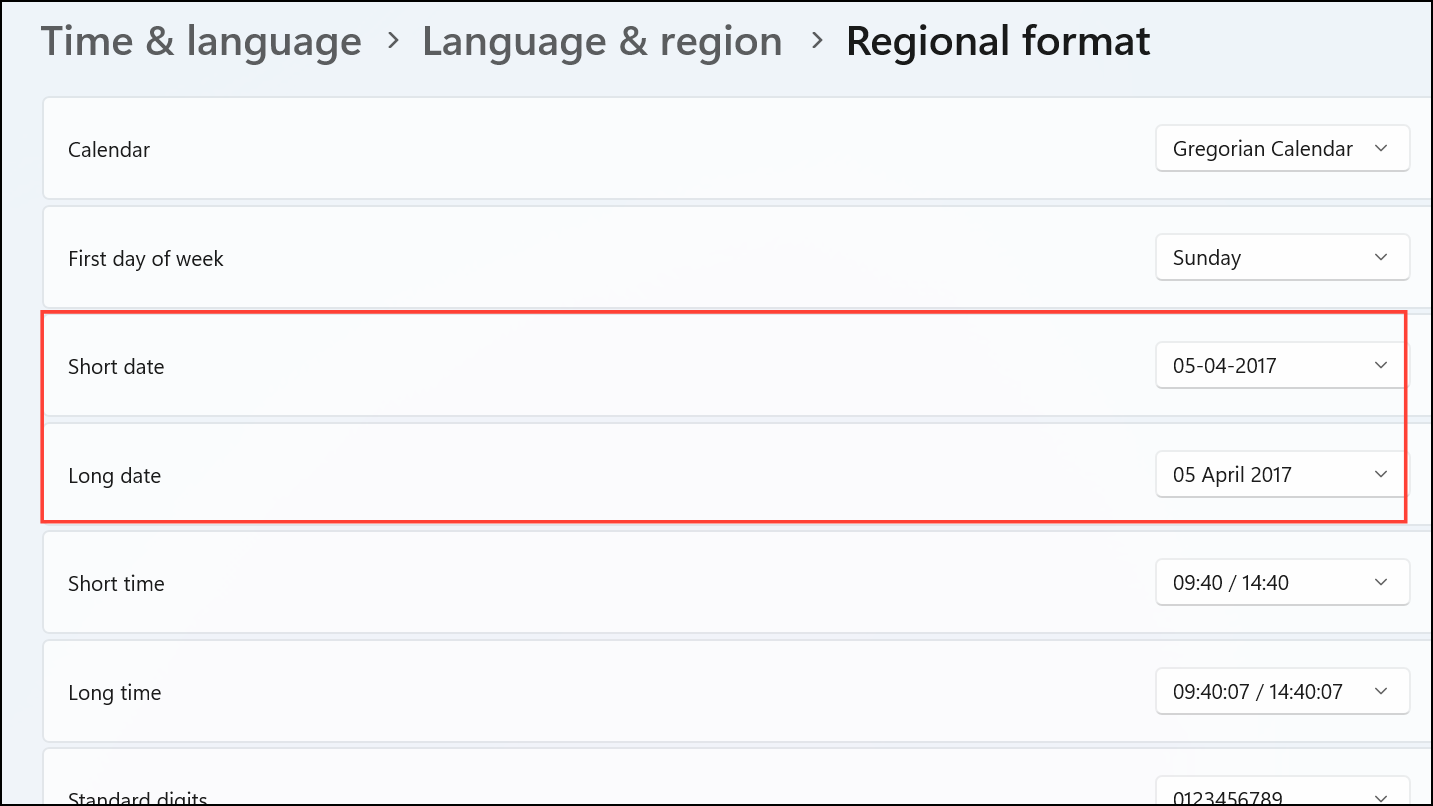
Step 5: Here, you can select your desired format for Short date and Long date from the respective dropdowns. The “Short date” format directly affects how dates appear on the taskbar and in most apps. Review the sample outputs next to each option to confirm your choice.
Step 5: Once you’ve made your selection, simply close the Settings app. Your changes are saved automatically, and the new date format takes effect immediately on the system clock and in compatible applications.
Set a Custom Date Format Using Control Panel
For users who require a date format not available in the Settings app dropdowns—such as including the weekday, using different separators, or custom year/month/day arrangements—the Control Panel offers more granular options.
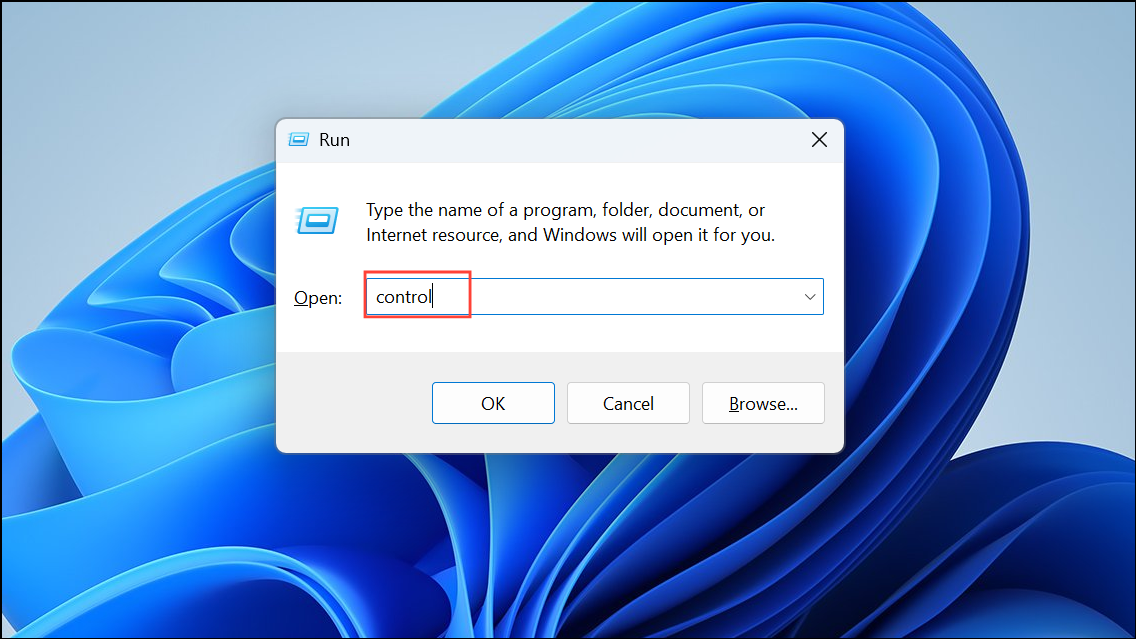
Step 1: Press Windows key + R to open the Run dialog, then type control and press Enter. This launches the classic Control Panel interface.
Step 2: Set the “View by” option in the top-right to Large icons for easier navigation, then click on Region. This opens the panel for all region-specific settings, including date and time formats.
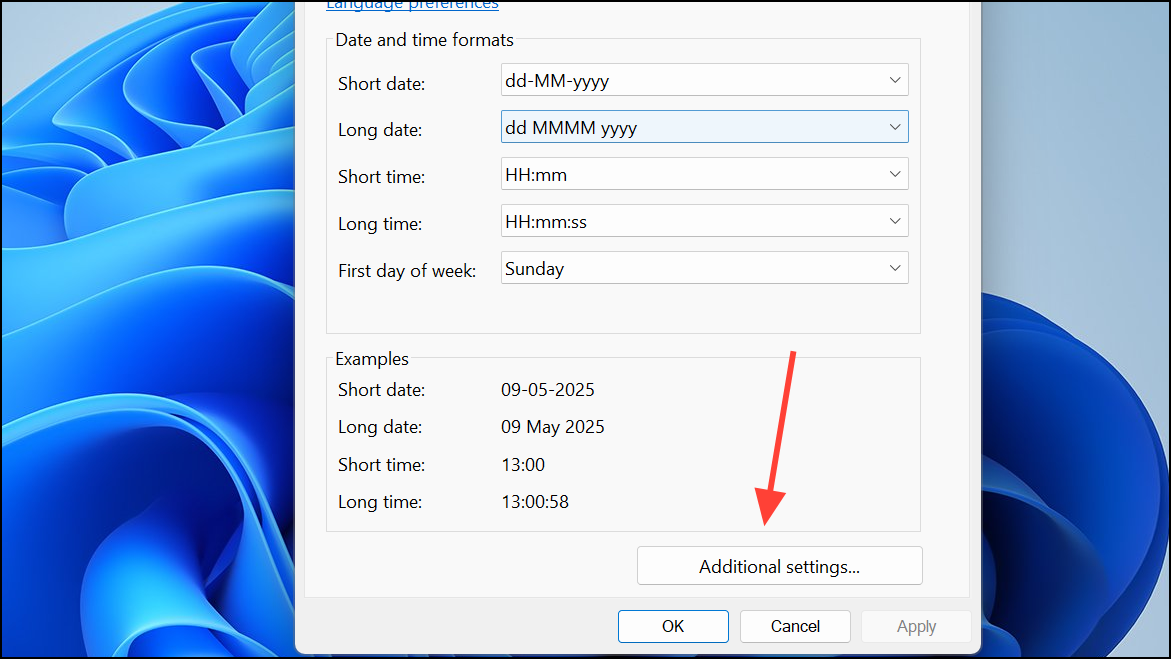
Step 3: In the Formats tab, click Additional settings at the bottom. This action allows access to advanced customization for numbers, currency, time, and date.
Step 4: Switch to the Date tab. In the Short date field, enter your preferred format using the provided notations. For example, dd-MM-yyyy displays as 31-12-2025, while ddd, dd/MM/yy displays as Tue, 31/12/25. You can use:
d,ddfor day.ddd,ddddfor day of week.M,MMfor month.y,yy,yyyyfor year.
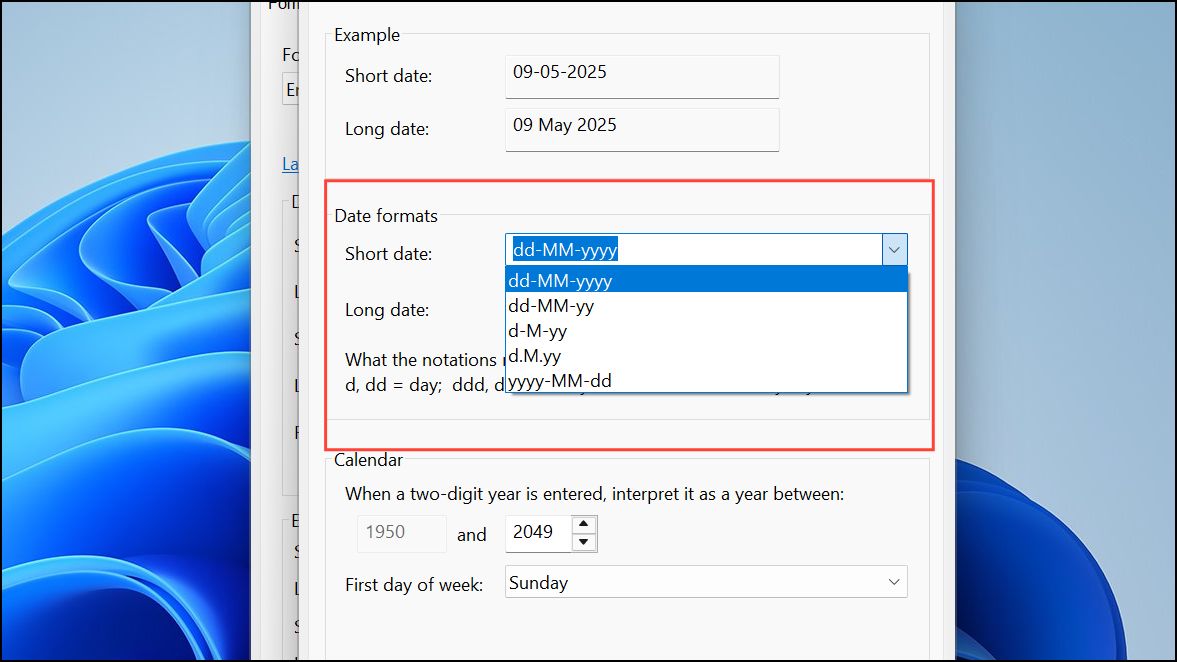
Step 5: Click Apply and then OK to save your custom format. Close the Control Panel. The new format will appear throughout Windows 11, wherever the short date is used.
Maintain Consistent Date Formats Across Languages and Regions
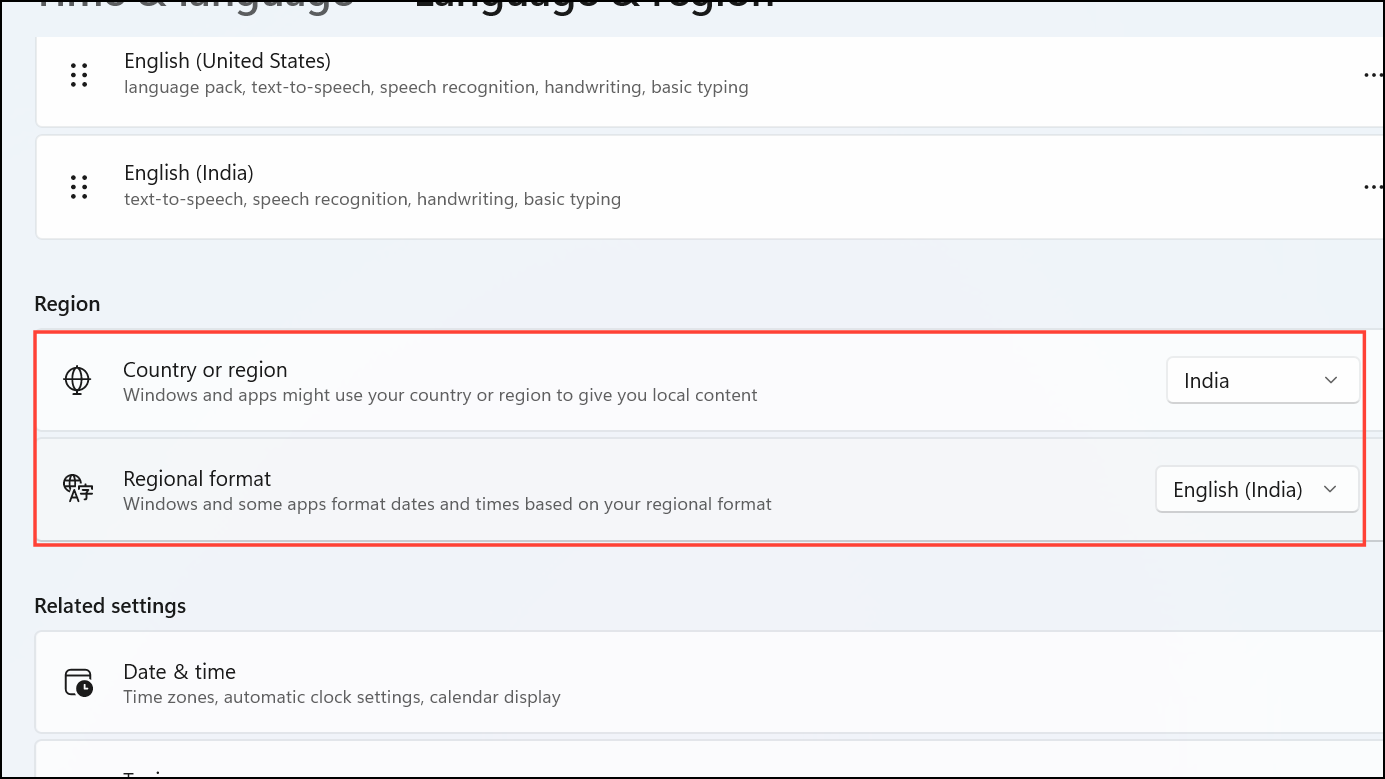
If you frequently switch your system’s country or region, Windows 11 may automatically revert to that region’s default date format. To prevent this, set both your “Country or Region” and “Regional Format” to your preferred settings in the Language & Region area of the Settings app.
Also, ensure your “Windows Display Language” matches your preference. For those who travel or use multiple languages, double-check these settings after any regional change.
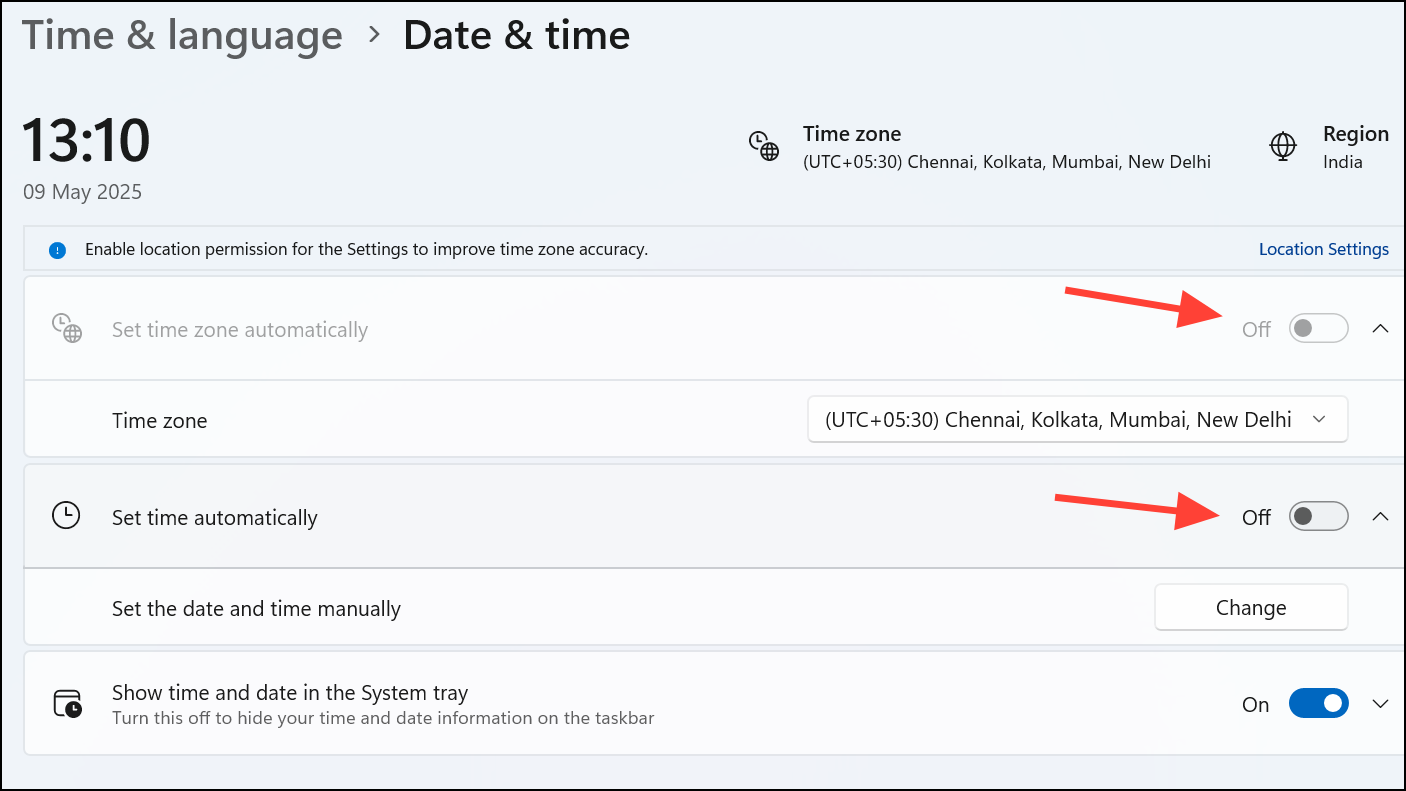
Disabling automatic time zone and time adjustment can also help retain your chosen format. Right-click the time on the taskbar, select “Adjust date and time,” and turn off the first two options for automatic time and time zone. This keeps your chosen format stable, though you’ll need to manually update these settings if you move to a new time zone.
Switching the date format on Windows 11 removes confusion and ensures your system matches your workflow. With these steps, you can quickly adjust or customize the display to suit your needs.