
Accumulating files in the default Downloads folder on the C: drive often leads to wasted storage space and slower system performance. Shifting your download location to another drive or a custom folder helps keep your main drive clear, reduces clutter, and makes it easier to manage files, especially if you regularly download large installers, videos, or work documents. This simple adjustment also prevents system updates from failing due to low space and makes backing up important files more straightforward.
Change the Default Download Location Using File Explorer
Step 1: Open File Explorer by pressing Win + E or by selecting the folder icon on your taskbar. File Explorer is the central tool for navigating files and folders in Windows.
Step 2: Locate the Downloads folder in the left sidebar. If you have trouble finding it, use the Run dialog with Win + R, then type shell:downloads and press Enter. This command opens your system’s recognized Downloads folder.
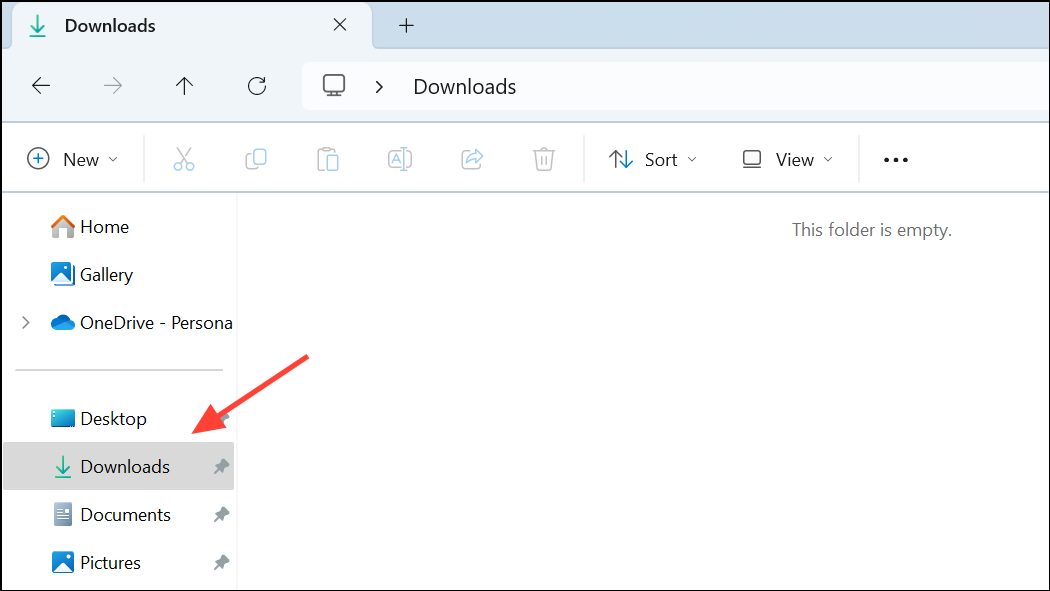
Step 3: Right-click the Downloads folder and select Properties from the context menu. The Properties window provides advanced options for managing folder settings.

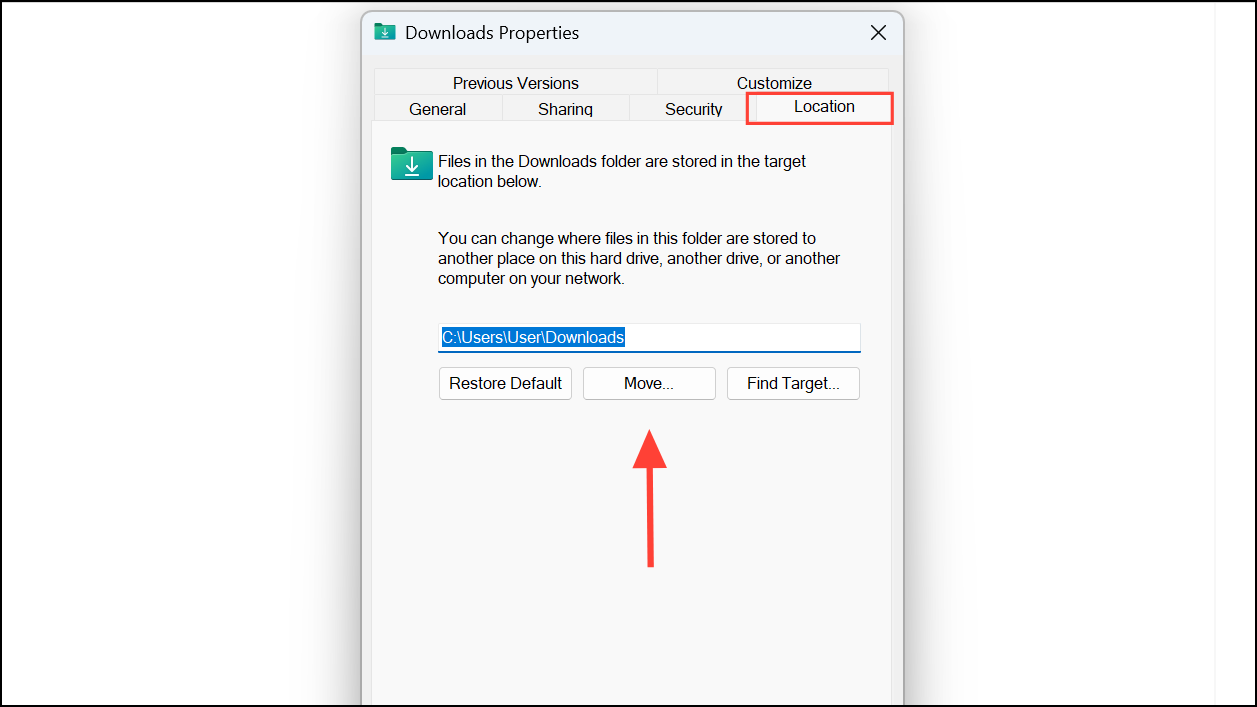
Step 4: Go to the Location tab. This tab displays the current path of your Downloads folder and allows you to redirect it elsewhere. Click Move.
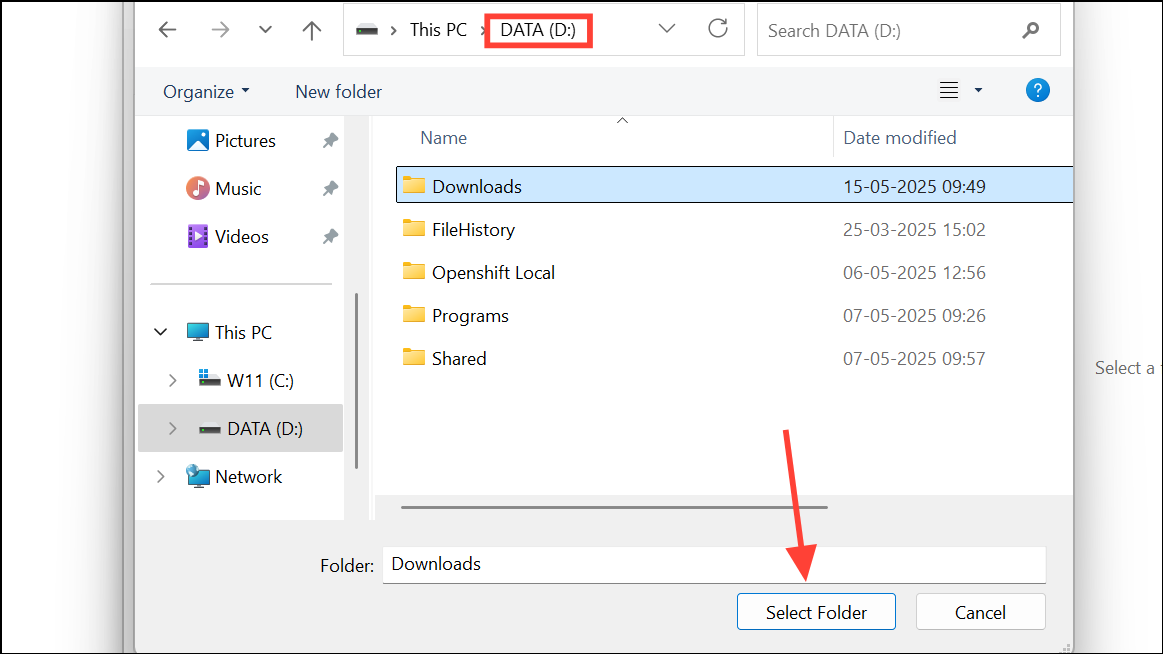
Step 5: In the dialog that appears, browse to the drive or folder where you want new downloads to be saved. For example, you might select a folder on your D: drive or an external storage device. Click Select Folder to confirm your choice.
Step 6: Click Apply. You’ll be prompted to move existing files from the old Downloads folder to the new location. Select Yes to transfer all files, ensuring nothing is left behind. Choosing No keeps the old files in their original spot, but future downloads will go to the new folder.
Step 7: Click OK to finalize the change. All future downloads will now be saved in your chosen location, and the Downloads shortcut in File Explorer will point to the new folder.
Set Download Locations in Your Web Browser
Most browsers, including Chrome, Edge, and Firefox, let you specify a custom download folder. Adjusting these settings ensures downloads initiated through your browser go to the correct location, especially if you use multiple browsers or want each to save files in different places.
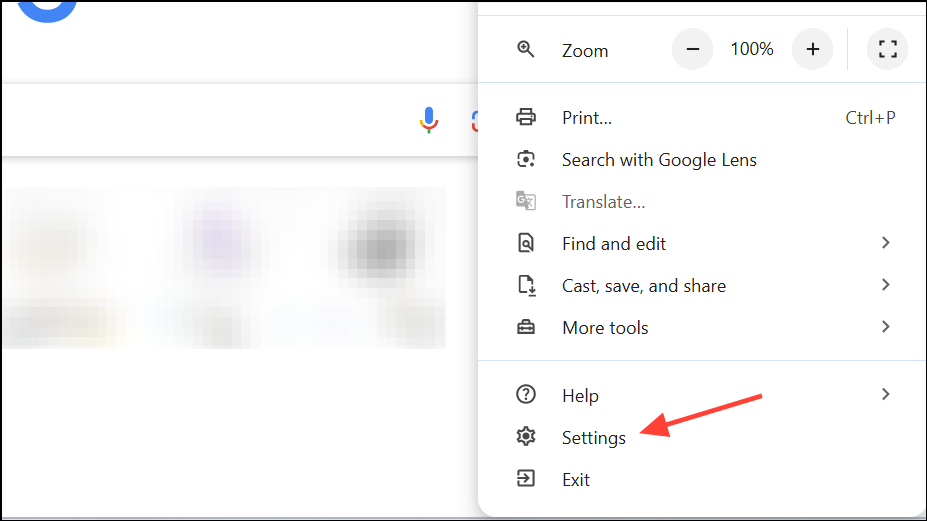
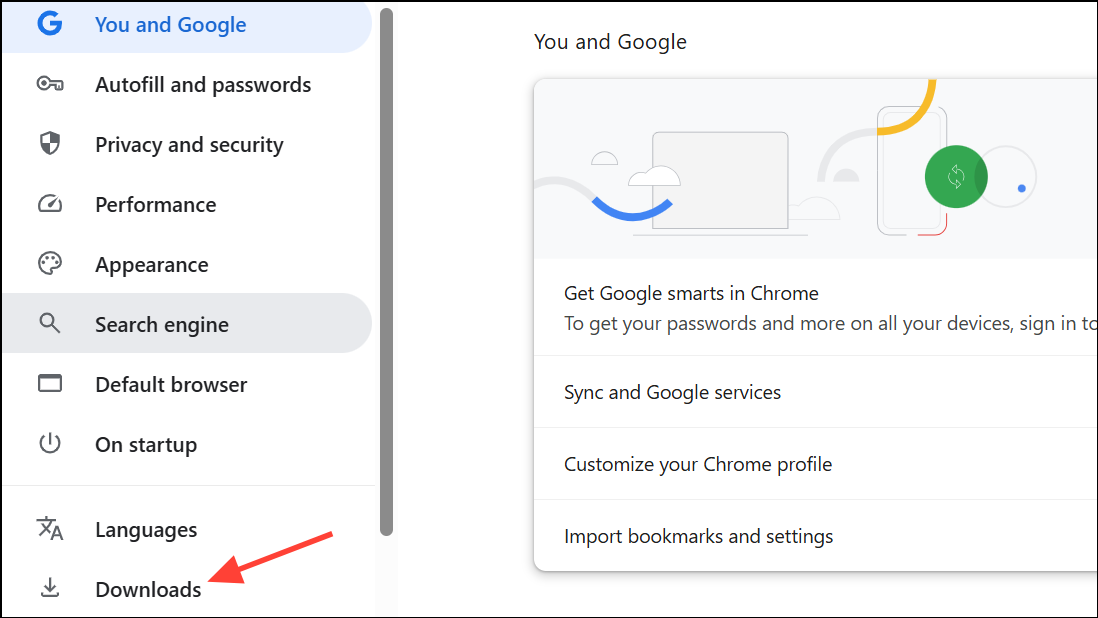
Step 1: Open your browser’s settings. In Chrome and Edge, click the three-dot menu in the top-right corner and select Settings. In Firefox, click the three horizontal lines and choose Settings.
Step 2: Find the Downloads section. In Chrome and Edge, look for Downloads in the sidebar. In Firefox, scroll to the Files and Applications section.
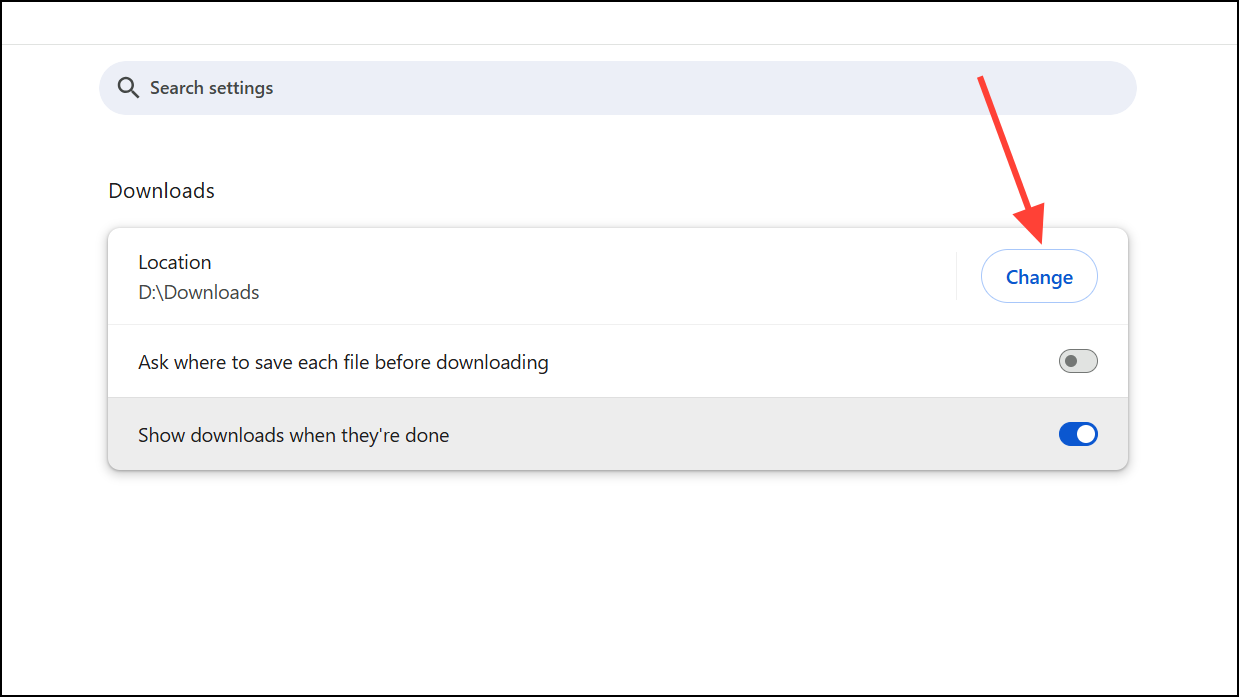
Step 3: Click the option to change the download location. In Chrome and Edge, click Change next to the download path, select your new folder, and confirm. In Firefox, click Browse next to Save files to, choose your folder, and confirm.
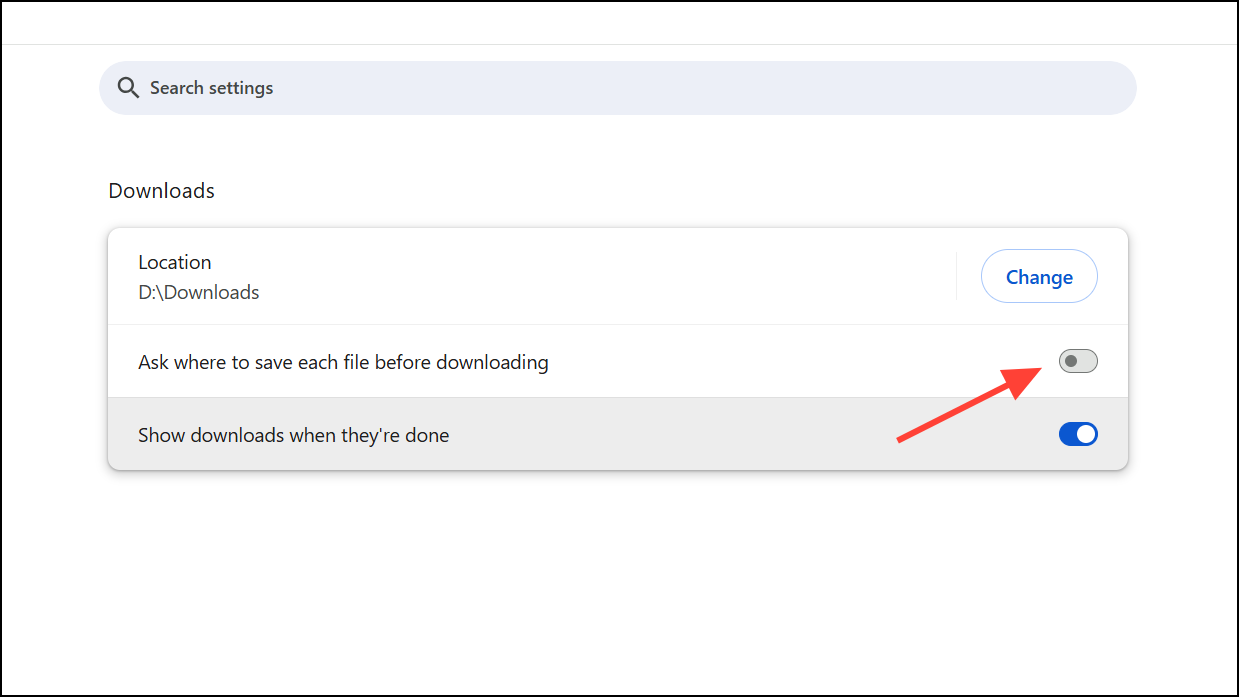
Step 4: (Optional) Enable prompts for each download. If you prefer to pick a location every time, turn on the option labeled Ask where to save each file before downloading (Chrome/Edge) or Always ask you where to save files (Firefox).
Automate Download Folder Cleanup with Storage Sense
Even after moving your Downloads folder, old files can accumulate and fill up your new drive. Windows 11 offers a feature called Storage Sense that periodically deletes unused files from the Downloads folder and other temporary locations. This tool is especially useful for keeping storage usage low without manual intervention.
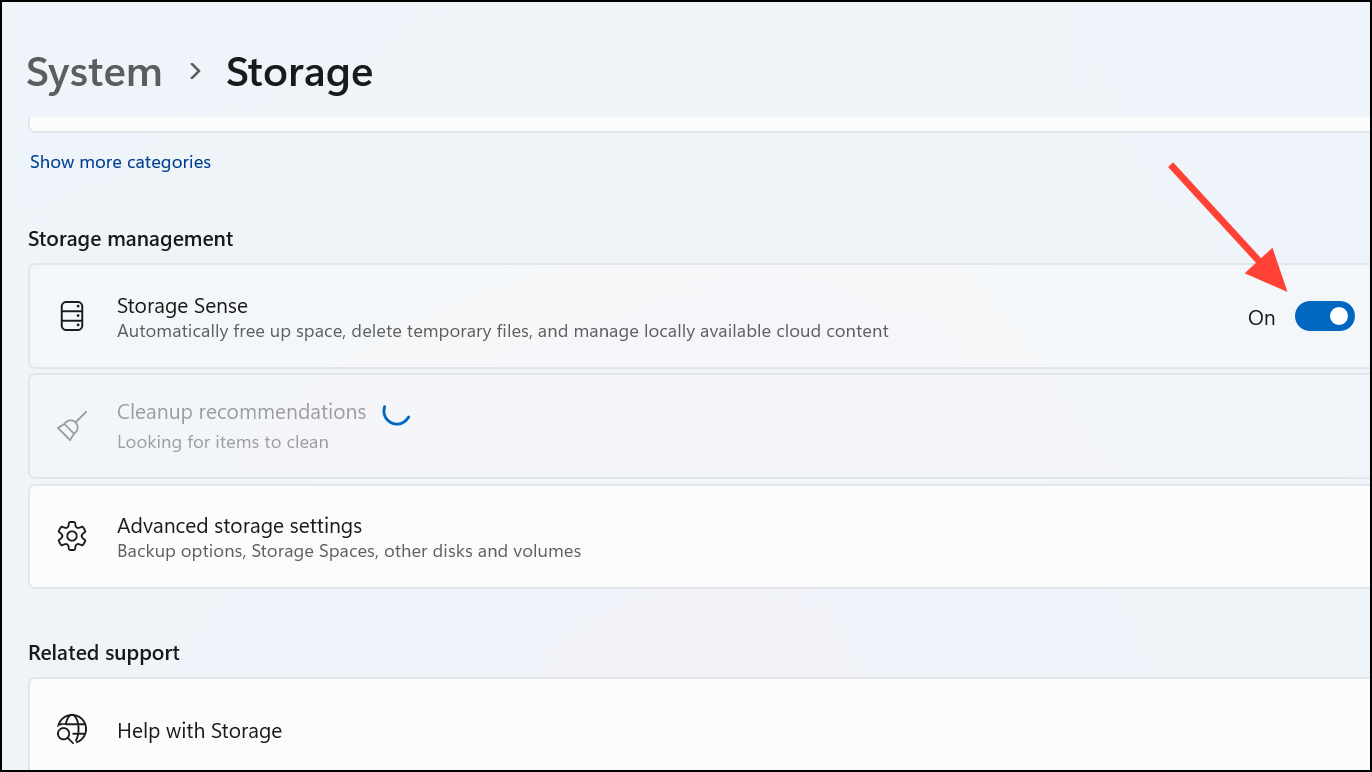
Step 1: Open Settings by pressing Win + I. Go to System and select Storage.
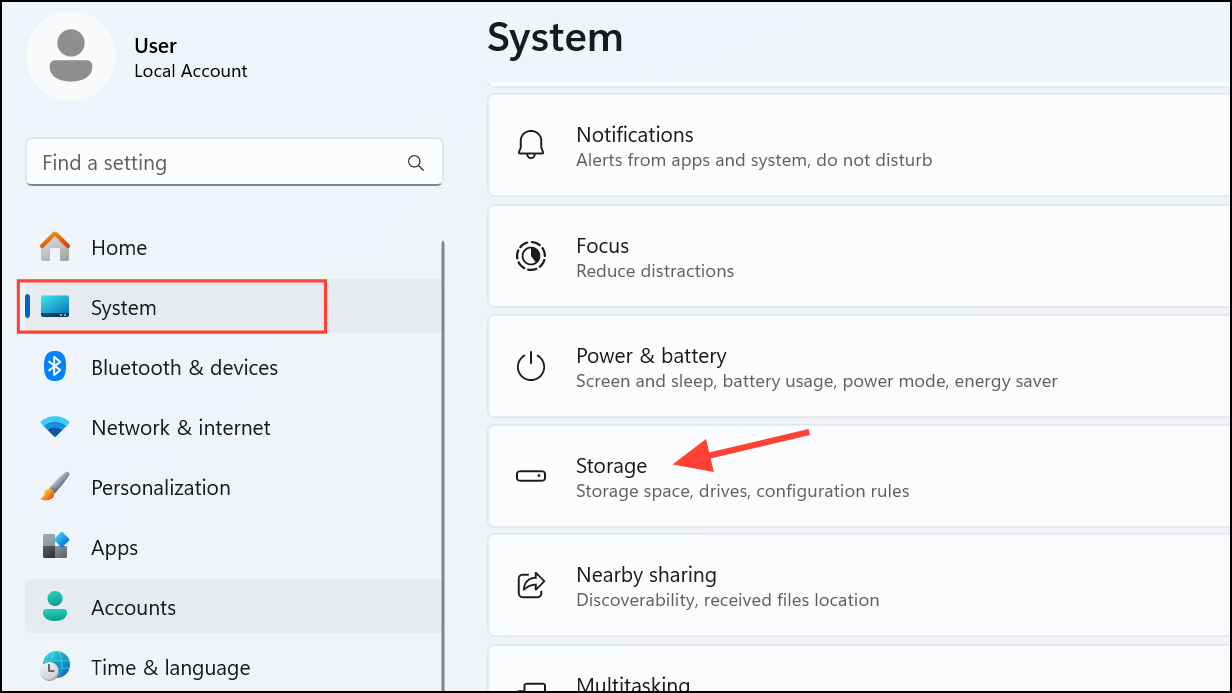
Step 2: Locate Storage Sense and turn it on. Click the option to configure how Storage Sense works, including how often it runs and what types of files it should delete.
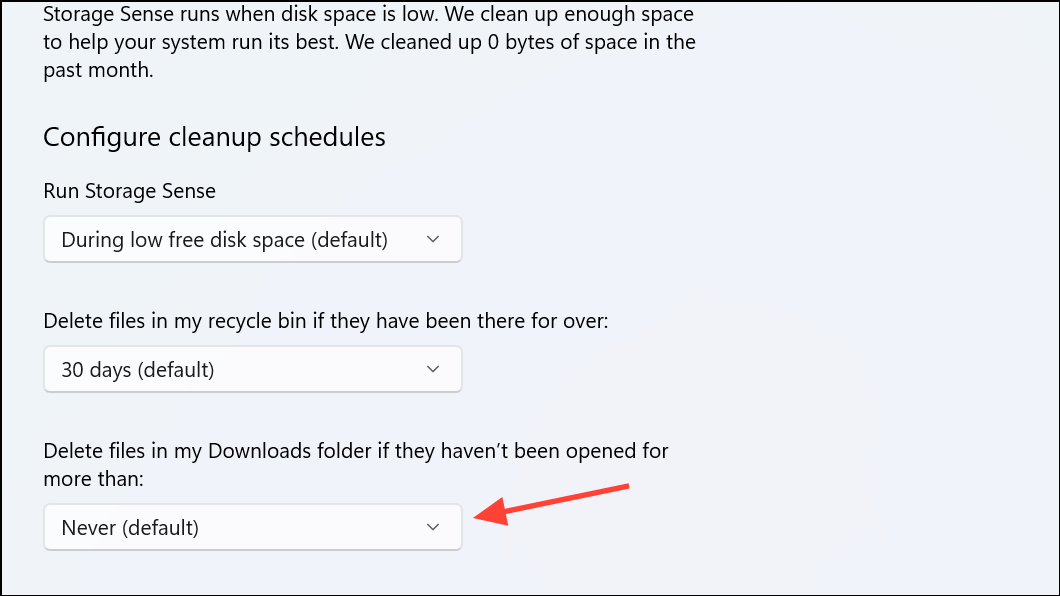
Step 3: Set preferences for deleting files in the Downloads folder. You can specify how long files must be unused before they’re removed, such as 30 or 60 days. Adjust these settings to match your workflow and storage needs.
Step 4: Save your settings. Storage Sense will now automatically manage old downloads and other temporary files, keeping your chosen download location tidy and preventing storage bloat.
Alternative Methods: Registry Edits and Symbolic Links
Advanced users may prefer to redirect the Downloads folder using Windows Registry edits or symbolic links. These approaches provide more control but carry risks if not done carefully. Editing the registry incorrectly can cause system instability, and symbolic links may confuse some applications.
To change the Downloads folder via the registry, update the HKCU\Software\Microsoft\Windows\CurrentVersion\Explorer\User Shell Folders entry for Downloads to your desired path. Always back up the registry before making changes. For symbolic links, you can use the mklink command in Command Prompt to point the original Downloads folder to a new location, but this method is best reserved for experienced users.
Moving your default Downloads folder in Windows 11 streamlines file management, keeps your system drive clear, and improves update reliability. Adjusting browser settings and automating cleanup with Storage Sense further simplifies the process, making your PC run smoother with less effort.