
Processor cache memory—specifically the L2 and L3 cache—directly impacts how quickly your system can process instructions and access frequently used data. On Windows 11, knowing your CPU’s cache size can help you make informed decisions about performance troubleshooting, software compatibility, and upgrade planning. Several built-in tools and third-party utilities allow you to check your processor’s cache memory size quickly and accurately, without restarting your computer or accessing the BIOS.
Check Processor Cache Memory Size Using Task Manager
Step 1: Open Task Manager by pressing Ctrl + Shift + Esc on your keyboard. If Task Manager launches in compact mode, click More details at the bottom to expand the view.
Step 2: Click the Performance tab found near the top of the window. In the left sidebar, select CPU to display processor-related statistics.
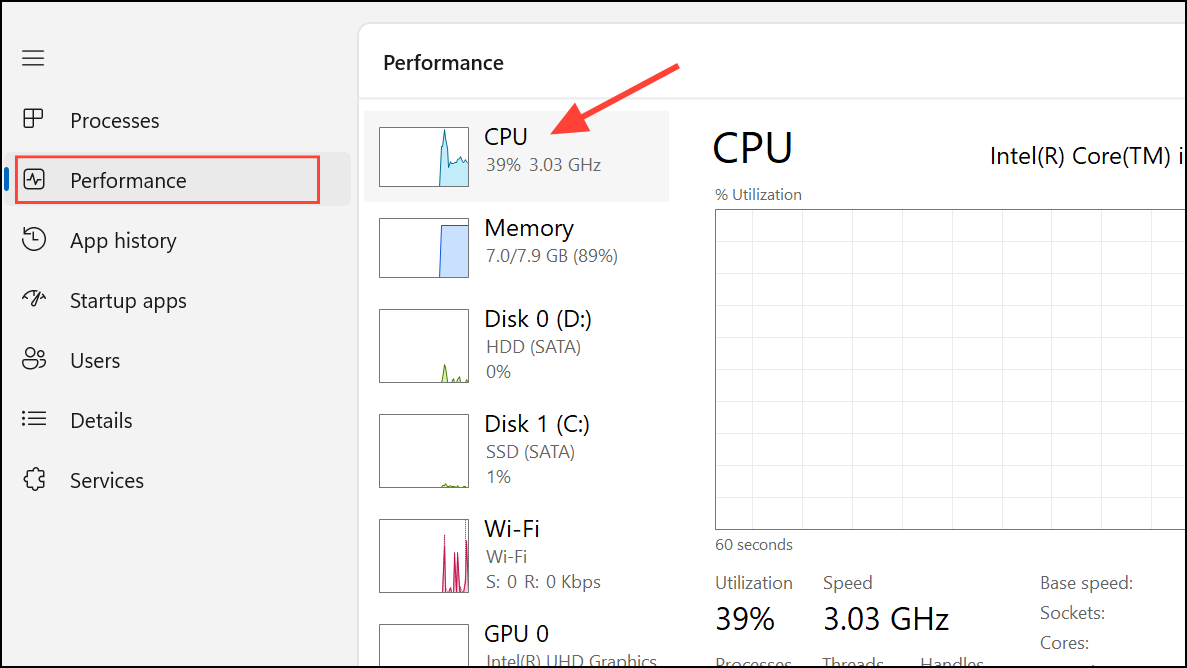
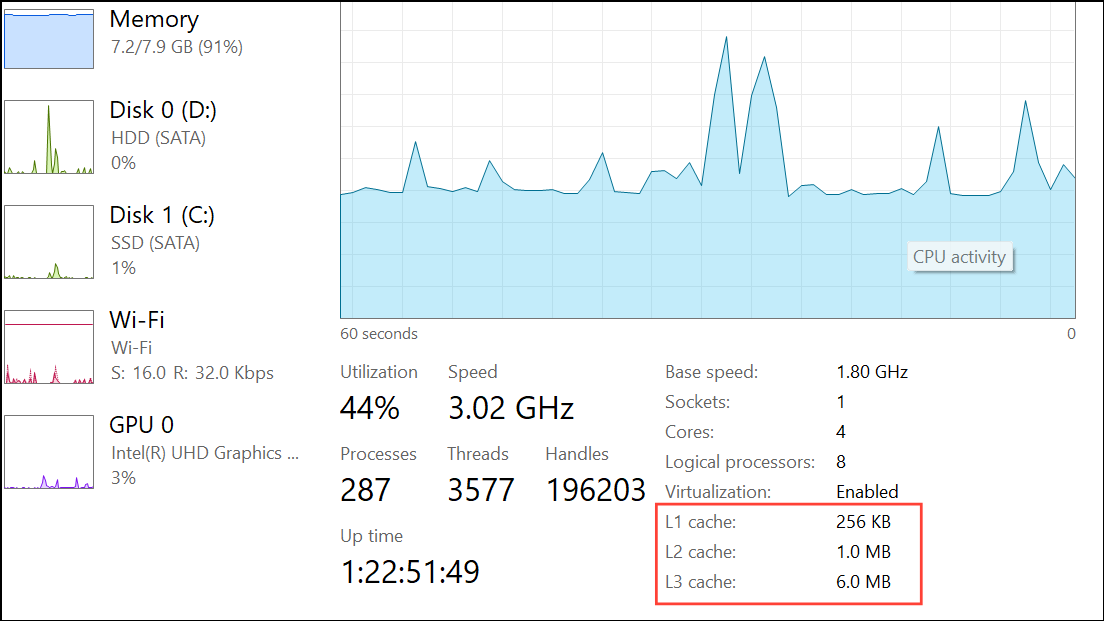
Step 3: At the bottom right of the CPU panel, you’ll see the cache memory sizes listed for L1, L2, and L3. These values are displayed in kilobytes (KB) or megabytes (MB) and reflect the total cache available on your processor.
This method provides a straightforward, graphical overview of your CPU’s cache configuration, making it ideal for quick checks and comparisons.
Check Processor Cache Memory Size Using Command Prompt
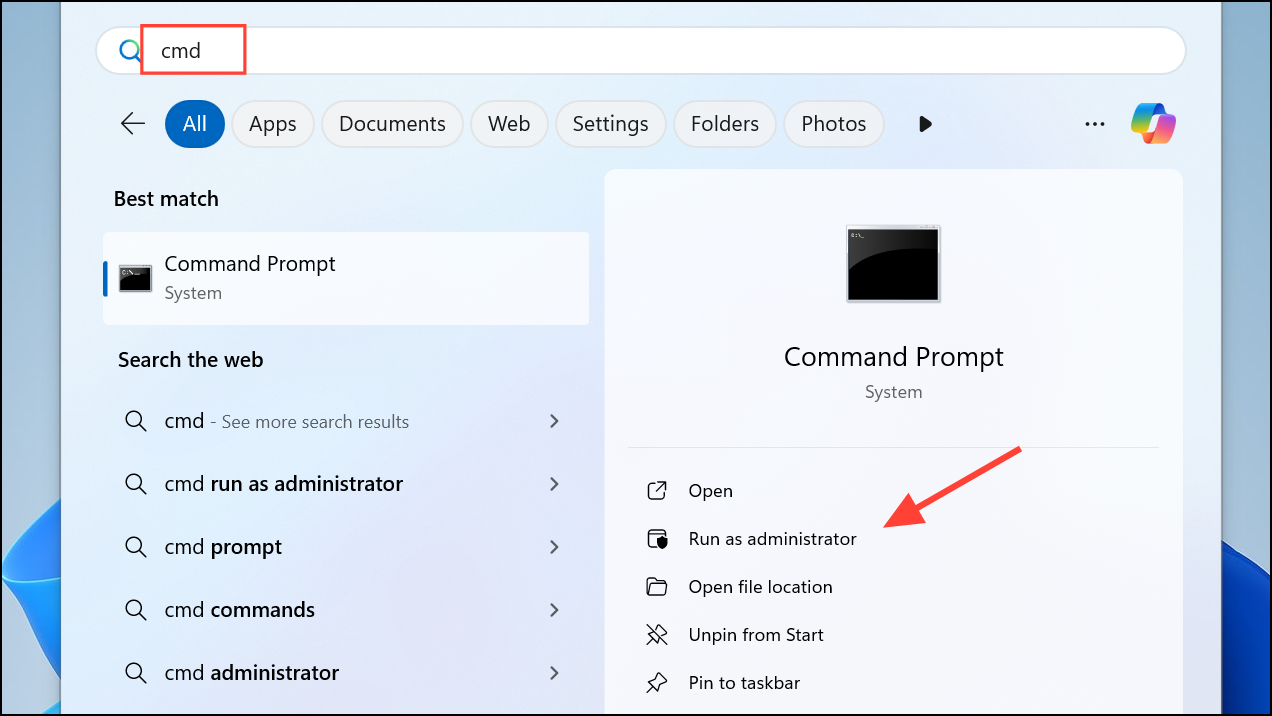
Step 1: Open the Start menu or Windows Search. Type cmd and press Enter to launch Command Prompt. To open Command Prompt with admin privileges, click Run as administrator.
Step 2: In the Command Prompt window, enter the following command and press Enter:
wmic cpu get L2CacheSize, L3CacheSize
Step 3: The output will display the L2 and L3 cache sizes for each processor in your system, typically in kilobytes (KB). For example, a result of 2560 8192 indicates 2.5MB of L2 cache and 8MB of L3 cache.
This approach is efficient for users comfortable with command-line tools or when working on remote systems without a graphical interface.
Find Processor Cache Size Using System Information and Web Search
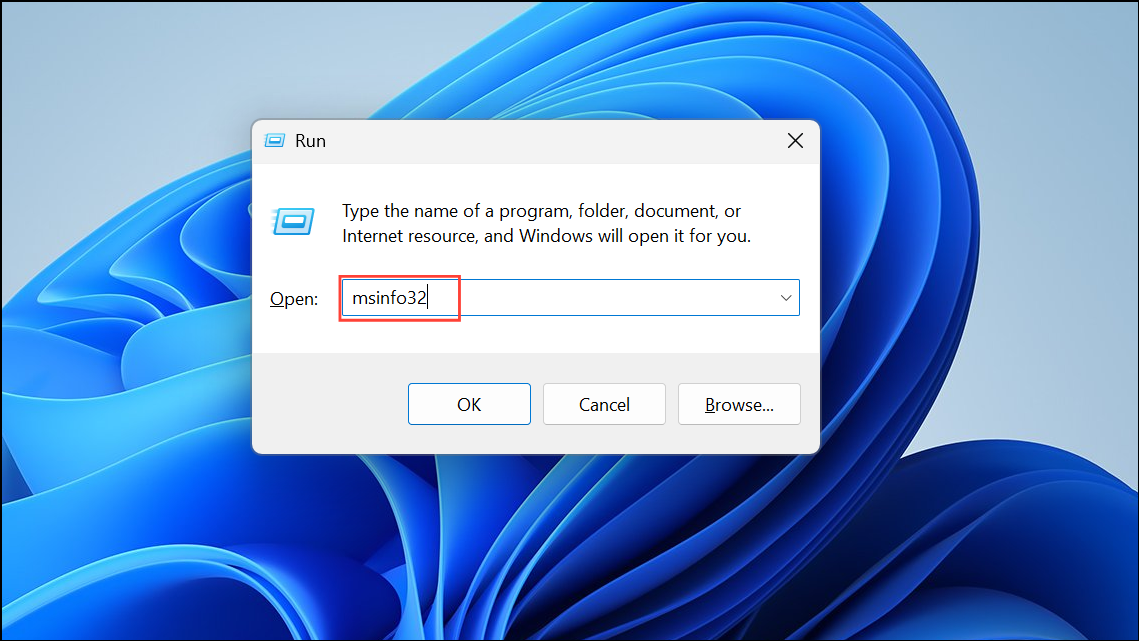
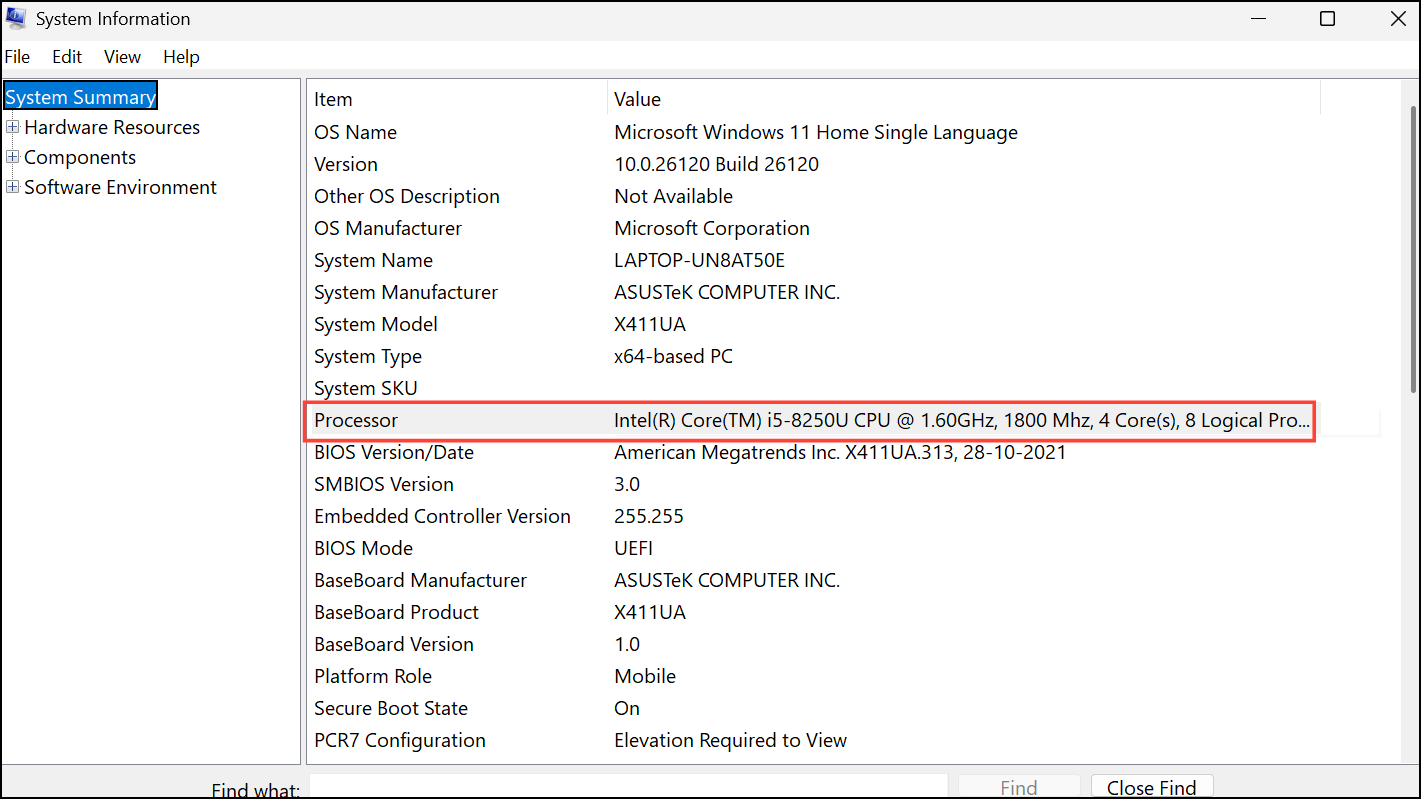
Step 1: Press Windows key + R, type msinfo32, and press Enter to open the System Information window.
Step 2: In the System Summary, look for the Processor entry. Note the exact processor model listed (for example, Intel Core i7-12700K).
Step 3: Open your web browser and search for your processor model on the manufacturer’s website (such as Intel ARK or AMD’s specifications page). Locate the technical specifications for your CPU to find detailed cache information, including L2 and L3 sizes.
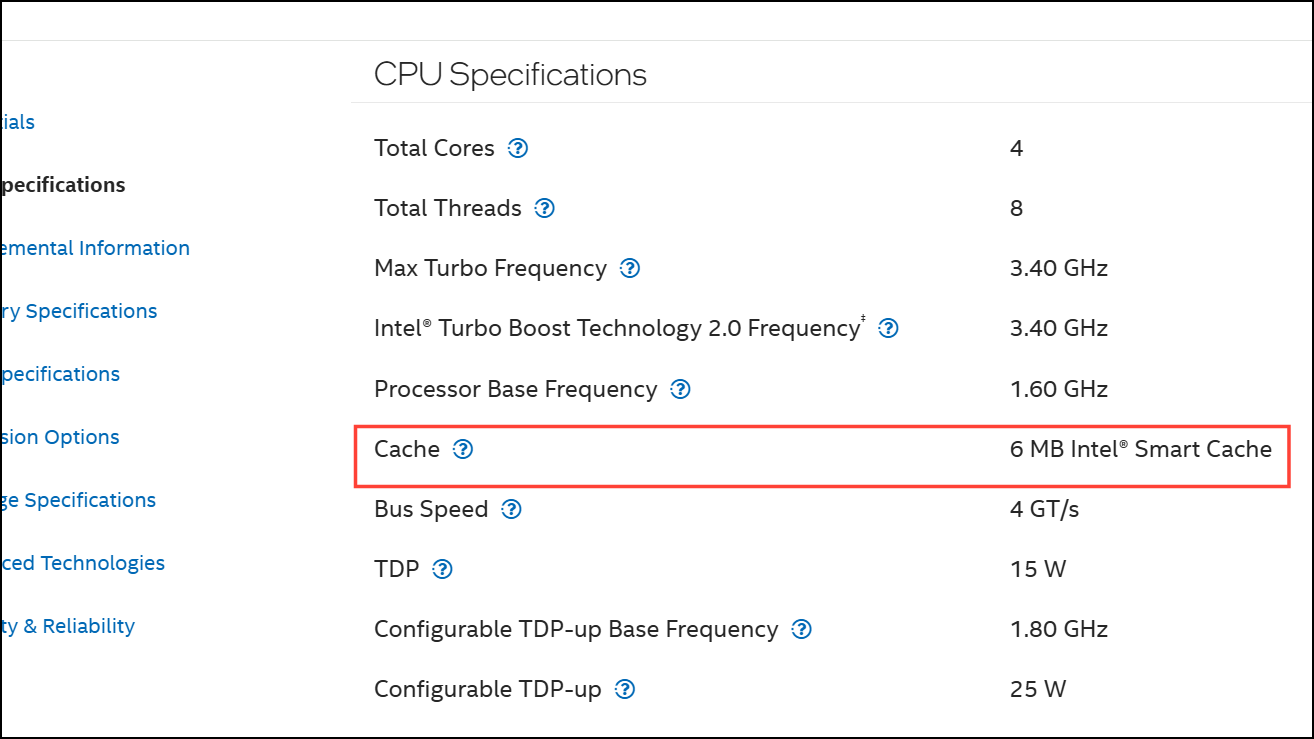
This method is useful when you need the most precise hardware specifications, especially for less common CPUs or when built-in tools provide incomplete cache details.
Check Processor Cache Memory Size Using Third-Party Utilities
Step 1: Download and install a hardware information tool such as CPU-Z or the Intel Processor Identification Utility.
Step 2: Launch the utility after installation. In CPU-Z, click the Caches tab to view detailed information about your processor’s L1, L2, and L3 cache sizes. The Intel utility displays cache sizes in its main summary window.
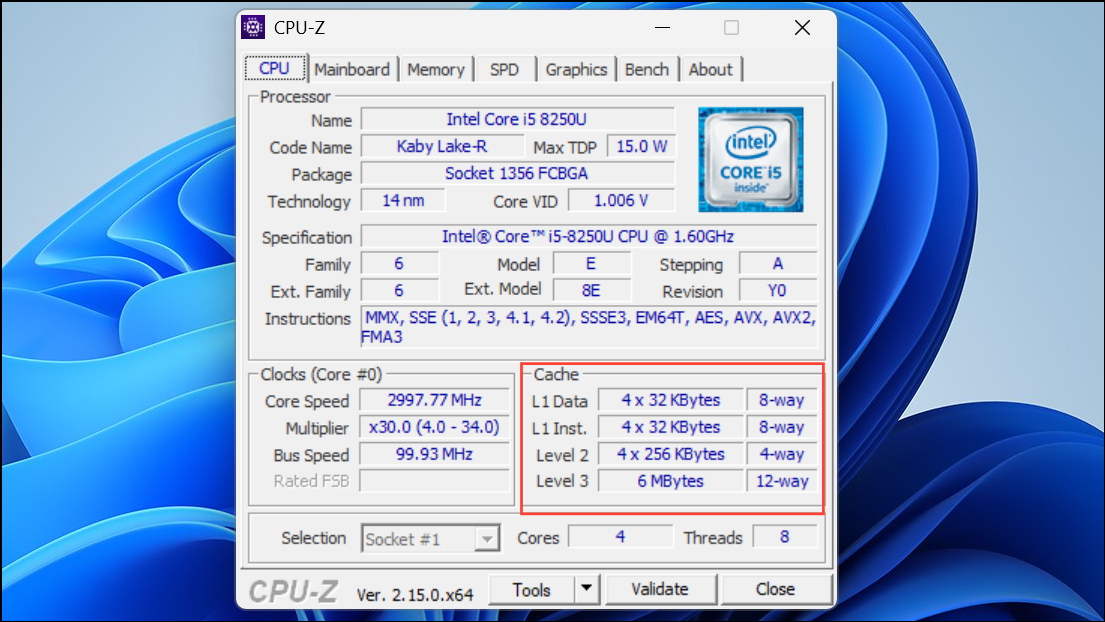
These third-party tools offer a comprehensive view of your CPU, including cache levels, core counts, and additional features. They are especially useful when you want a deeper dive into processor architecture or need to verify advanced attributes like virtualization support.
Alternative Methods and Tips
Step 1: Some processor vendors provide their own diagnostic tools with extensive cache and feature reporting. For example, AMD’s Ryzen Master or Intel’s XTU utility can display cache information alongside tuning options.
Step 2: If you’re troubleshooting system performance or planning upgrades, compare your cache sizes to those of newer CPUs. Generally, higher L2 and L3 cache values allow your processor to retrieve frequently used data more quickly, which can improve multitasking, gaming, and certain productivity workloads.
Step 3: For server environments or licensing questions, distinguish between physical and logical cores, as well as cache per core versus total cache. Use the wmic or msinfo32 output to verify these details accurately.
Checking your processor’s cache memory size in Windows 11 is straightforward with Task Manager, Command Prompt, System Information, or third-party tools. Regularly reviewing this data helps optimize your PC’s performance and guides upgrade decisions.