The Corrupted Reaper is the seasonal Lair Boss for Diablo 4 Season 14, the Season of Death Awakening, and she sits at the top of the loot chain. She lives at the Pandemonium Threshold in Zarbinzet, on the south side of Hawezar, and she is the most reliable source of Mythic Uniques and Pandemonium Fragments in the game right now. Killing her is free once she is unlocked, but the best rewards are locked behind a cache you have to pay to open.
Quick answer: Reach Torment 1 or higher, complete the Season 14 questline (Rising Tide, Setting Sun and The Looming Night), then interact with the Summoning Altar in Zarbinzet to fight her for free. To claim the Mythic Uniques and Pandemonium Fragments, open her Hoard Cache with a Superior Lair Key farmed from Deathtoll Chambers.
Requirements before you can summon the Corrupted Reaper
Access is gated behind two things, and you cannot skip straight to the boss room. You need a character at Torment 1 difficulty or higher, and you need to clear the seasonal story so the Pandemonium Threshold activates for you.
How to summon her at the Summoning Altar in Zarbinzet

After the questline, return to Zarbinzet and head into the Pandemonium Threshold. Interact with the Summoning Altar to start the fight. Summoning and fighting her costs nothing, so you can practice the encounter as many times as you like.
The catch is the Hoard Cache that appears after she dies. That cache holds the guaranteed Mythic and Pandemonium Fragment rewards, and it only opens with a Superior Lair Key. Kills without a key still drop standard loot, but you miss the best payout. Reports on the exact cost vary between one and two Superior Lair Keys per cache, so stock more than you think you need before a session.
Farming Superior Lair Keys from Deathtoll Chambers
Superior Lair Keys drop from the Deathtoll Chamber, a new one-room mini-dungeon that does not spawn on the map by itself. A portal to it opens in one of two ways.
- Defeat a Realmwalker that spawns from a Pandemonium Rupture.
- Clear a Nightmare Dungeon that carries the Rupture affix by closing enough Tears inside it.
The Realmwalker path is the main loop because it feeds off the same Ruptures you run for reputation and other seasonal progress. Not every Rupture can spawn one, so pick the right variant.
| Rupture type | Where it appears | Realmwalker spawn |
|---|---|---|
| Normal Rupture | Overworld, common in Helltides | Cannot spawn one |
| Surging Rupture | Replaces local Helltide events | Chance on Mastery completion |
| Colossal Rupture | Fields of Desecration, southeast of Zarbinzet | Guaranteed spawn |
Run Helltides for Surging Ruptures, keep each one open as long as possible, and complete its Mastery to roll for a Realmwalker. Take any Colossal Rupture that appears in the Fields of Desecration, since it guarantees a Realmwalker and therefore a chamber portal. Use a Rupture-affix Nightmare Dungeon as backup between cycles.
Inside the Deathtoll Chamber, clear it fast. Grave Hounds drop floating energy orbs when they die, and elite Exarchs chase those orbs to grow stronger. Grab the orbs yourself before an Exarch does. That keeps the elites weaker and hands you a temporary combat buff. Finishing the chamber gives a reliable Superior Lair Key.
Tip: stockpile keys before you sit down to grind the Reaper. Chasing a fresh Realmwalker between every cache opening burns minutes that add up across a full session.
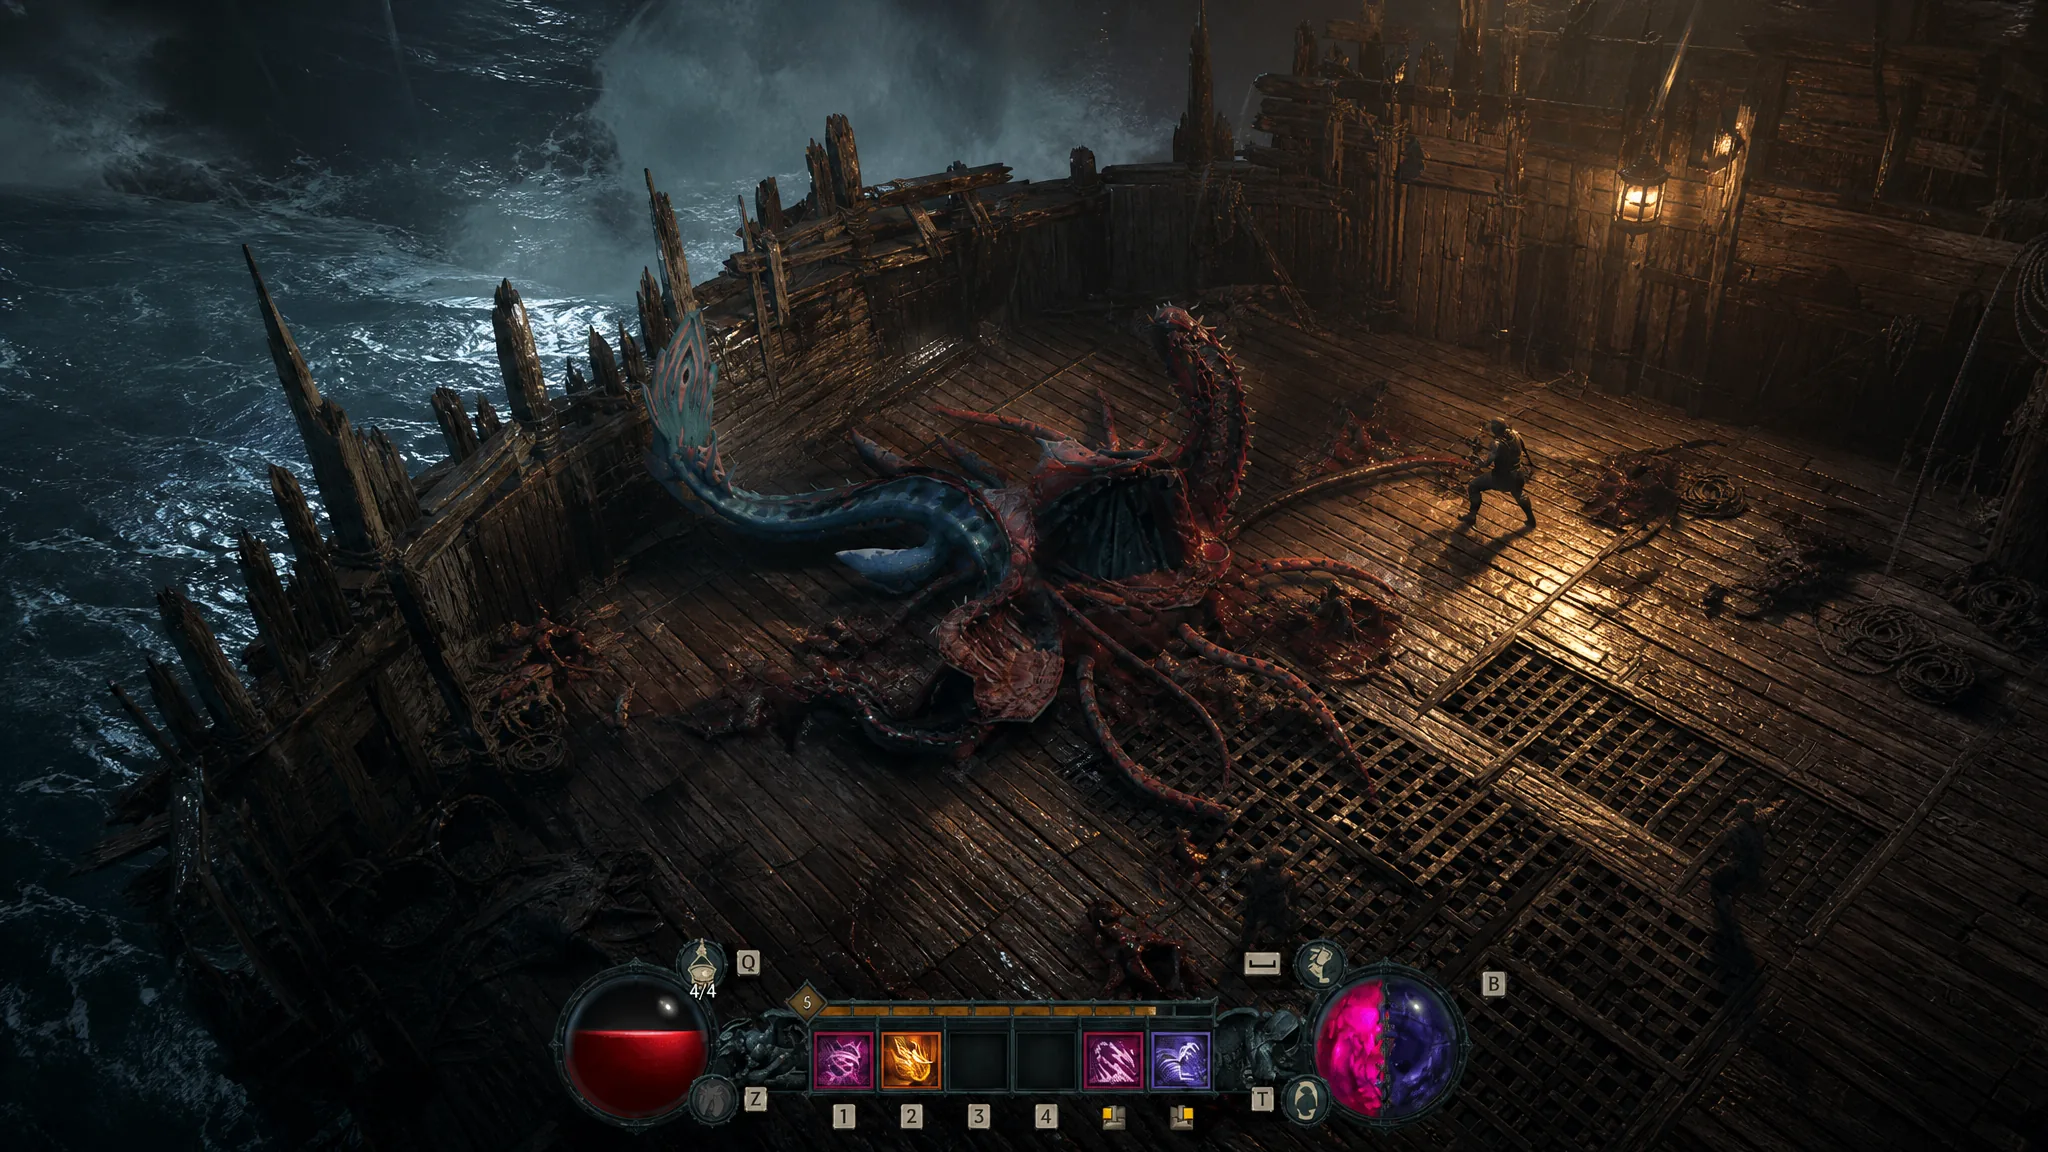
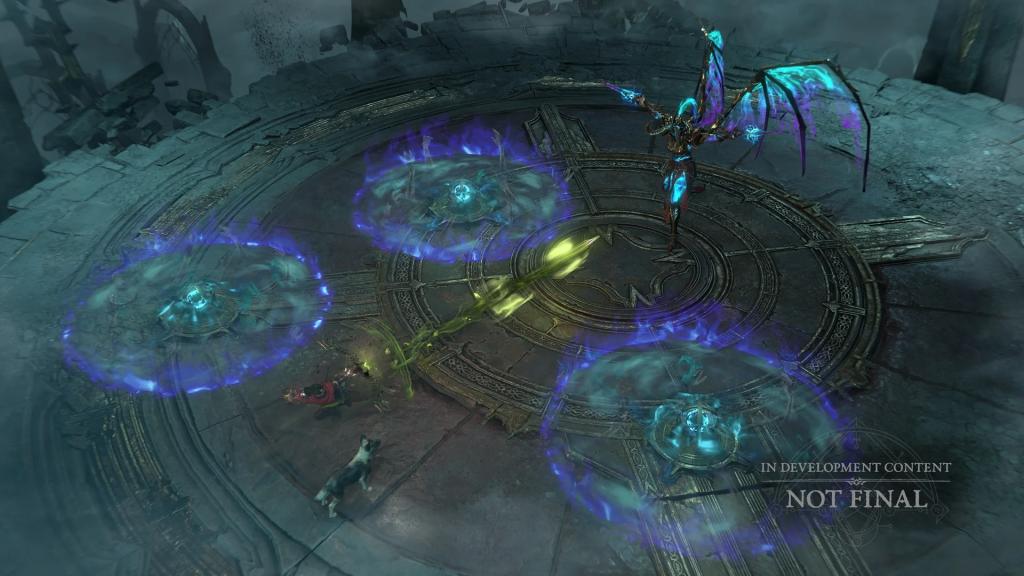
Corrupted Reaper attacks and how each phase changes
The fight splits into three phases tied to her health, and there are no immunity windows at any point. You can deal damage from start to finish, so your kill speed depends mostly on damage uptime and clean positioning. The arena is circular, and staying near the edge by default keeps you out of most trouble.
| Attack | What it does | Phase behavior |
|---|---|---|
| Soul Projectiles | Slow shots fired in a straight line | 4 shots at 100–66%, 6 fanned shots at 66–33%, dropped below 33% |
| Teleport to center | Crouches, then blinks to the middle for AoE damage on impact | All phases; the crouch is your only tell |
| Soul Traps | Three circular floor markers that arm, then detonate | All phases; detonate if you stand in them ~3 seconds or she dashes through |
| Soul Rush (dash) | Straight-line charge that hurts anything in the path | Single dash at 100–66%, faster back-and-forth double dash at 66–33% |
| Trap + Rush combo | Lays a line of traps, then dashes through to chain-detonate them | Below 33% only; the deadliest attack in the fight |
You can control Soul Traps instead of reacting to them. Step in and quickly step out once a trap arms to trigger it on your own terms, which stops it from being chained later. Staggering the boss clears every active trap at once and opens a damage window.
How to survive each phase
Phase 1 (100% to 66%)
This is the calm phase, so use it to lock in your habits. Sidestep the four projectiles, move away from the center the moment she crouches, and leave each Soul Trap circle as it arms. Step out of the single dash path and keep applying damage. A geared character should be deep into this phase within a minute.
Phase 2 (66% to 33%)
The arena gets busy. Projectiles fan wider, the dash speeds up and doubles back between two points, and traps pile up faster. Do not walk back into the dash lane right after the first pass, because the return dash follows quickly. Manually trigger traps to keep the floor clean, and hold your heavy cooldowns for the final phase.
Phase 3 (below 33%)
She drops the projectiles and gains the Trap + Rush combo, which is the only mechanic that reliably kills well-geared players. When a line of traps spawns, sprint to the edge of the arena and position perpendicular to her charge direction. Do not try to tank the chain of overlapping explosions. Save unstoppable effects, movement skills, or invulnerability for this window, and stagger the boss if the floor is still cluttered with leftover traps. Burst her down during the short recovery between combos.
Build traits that clear her fastest
Because there are no immunity phases, raw sustained damage converts directly into kills per hour. Any build that can keep damage flowing while dodging traps can farm her. A few traits stand out.
- Mobile builds with movement speed, teleports, or unstoppable dodge every mechanic, including the Trap + Rush combo. This is the strongest farming setup.
- Stagger-heavy builds wipe the arena of traps on demand and create damage windows, giving the most consistent low-death runs.
- Ranged builds read mechanics from a safe distance and rarely get caught in trap clusters.
- Tanky builds can eat single trap hits and dash paths, but they still cannot survive the Phase 3 combo, so treat movement as your defense.
Rewards and how to confirm the kill paid out
You know the run counted when the Hoard Cache appears after her death and prompts you for a Superior Lair Key. Spend the key and the cache delivers the seasonal payout. Every opening guarantees Pandemonium Fragments and at least one piece of gear at 850 Item Power, plus a chance at Mythic Uniques whose odds scale with your Torment tier.
| Reward | Detail |
|---|---|
| Mythic Uniques | Highest drop chance of any Season 14 activity, with maxed affixes and a 30% stat boost over standard Uniques |
| Pandemonium Fragments | Used in the Horadric Cube to upgrade regular Uniques to Mythic quality |
| Guaranteed gear | At least one 850 Item Power item per cache |
| Seasonal extras | Reputation progress, Ancestral Uniques, and crafting materials |
Torment 12 gives the most balanced mix of Pandemonium Fragment volume and Mythic drop chance, while higher tiers push quality and quantity further. If you are chasing one specific Mythic, plan for roughly 30 to 40 kills using the Fragment crafting path, a large improvement over the old blind grind of 100 or more with no guarantee. Keep your key supply ahead of your kill pace, hold defensive cooldowns for the Trap + Rush window, and the Corrupted Reaper turns from a wall into a steady part of your seasonal rotation.