The exact sequence to bring down the airborne fortress, clear its puzzles, and kill the H.A.L.L. boss inside.
The exact sequence to bring down the airborne fortress, clear its puzzles, and kill the H.A.L.L. boss inside.
by Pallav Pathak
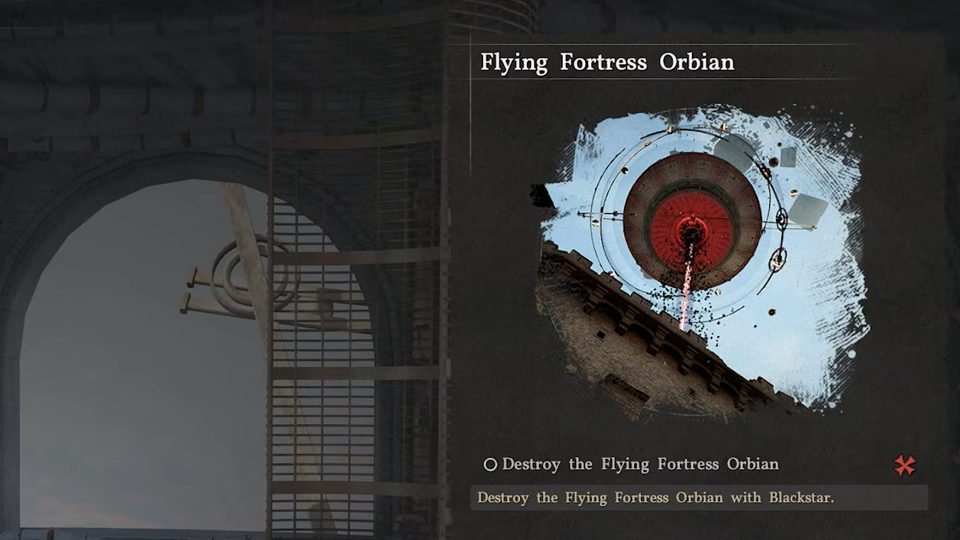
The Flying Fortress Orbian is the closing Chapter 11 objective in Crimson Desert, a sky-bound dungeon that mixes a dragon-riding attack run with interior stab puzzles and a projectile-heavy boss fight against H.A.L.L. The mission has no save points once it begins, and the final room punishes players who arrive without arrows.
⚡
Quick answer: Fly in on Blackstar and destroy six yellow-glowing turrets with fireballs, stab the central pillar inside to rotate its grates open, break the green glass dome in the chamber, climb the cables up to the roof, pierce every glass bulb plus the central console, then enter the south tower and use Focused Shot with the bow to stagger H.A.L.L. The fight is near-impossible without arrows.
Image credit: Pearl Abyss (via YouTube/@TroubleChute Basics)
Before you start: requirements and constraints
The Orbian sequence assumes you have already completed the preceding Chapter 11 beat that grants Blackstar, the Wyvern dragon mount. Saving is disabled during this mission, and Blackstar has roughly a half-day in-game cooldown if you reload or die, so prepare your loadout before engaging.
The single most important loadout check is ammunition. The final boss, H.A.L.L., takes massive damage from Focused Shot volleys and staggers almost instantly when struck, but has very high effective defense against melee. Without arrows, you will need to leave, restock, and redo the entire interior puzzle.
Requirement
Detail
Chapter
11 (final main quest of the chapter)
Mount
Blackstar (Wyvern dragon)
Key skills
Stab (Sprint + Heavy), Pierce, Force Palm, Focused Shot
Critical consumable
Arrows (bring a full stock)
Save points
None during the mission
Location
Valley of Grief, eastern Crimson Desert sky
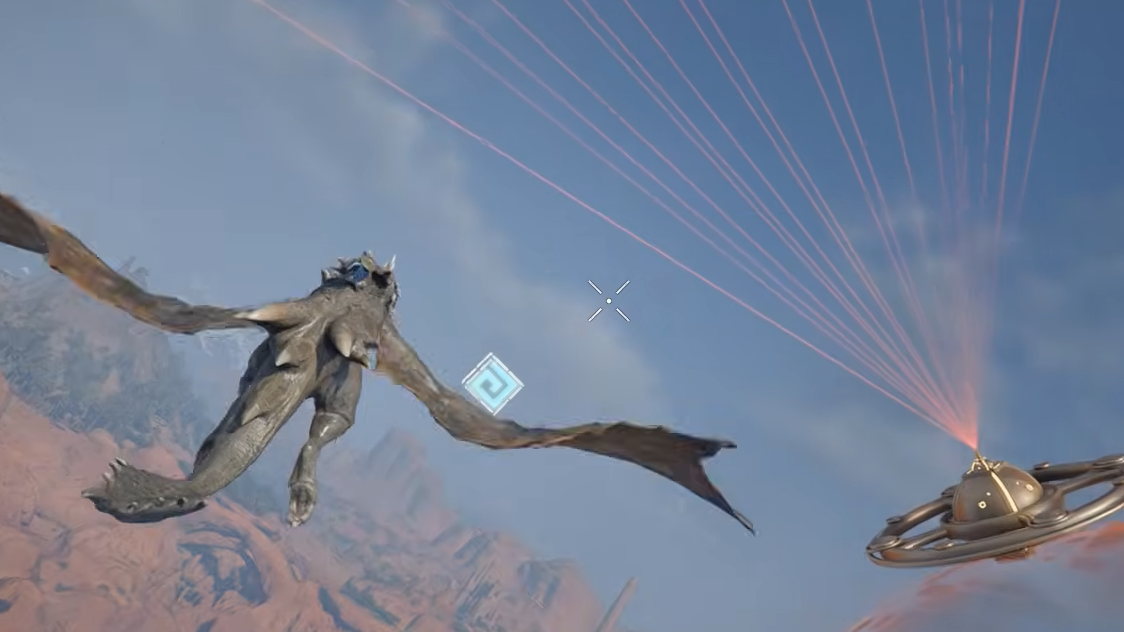
Reach the fortress on Blackstar
If you continue directly from the prior quest, you are already mounted and in position. If you reloaded a save, open the character/mount radial menu and select Blackstar. If the dragon is on cooldown, fast travel to an Abyss Nexus in the sky and jump down so you can summon the dragon mid-air near the fortress.
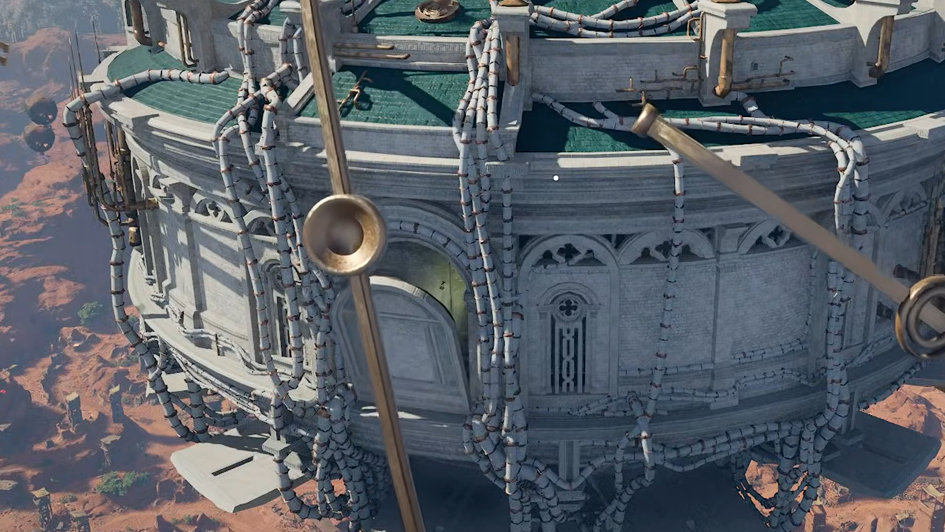
Destroy all six glowing turrets, dodging return fire with a double-tap barrel roll. A cutscene triggers after the last one and drops Kliff onto a lower platform of the fortress.
Destroy all six glowing turrets | Image credit: Pearl Abyss (via YouTube/@PowerPyx)
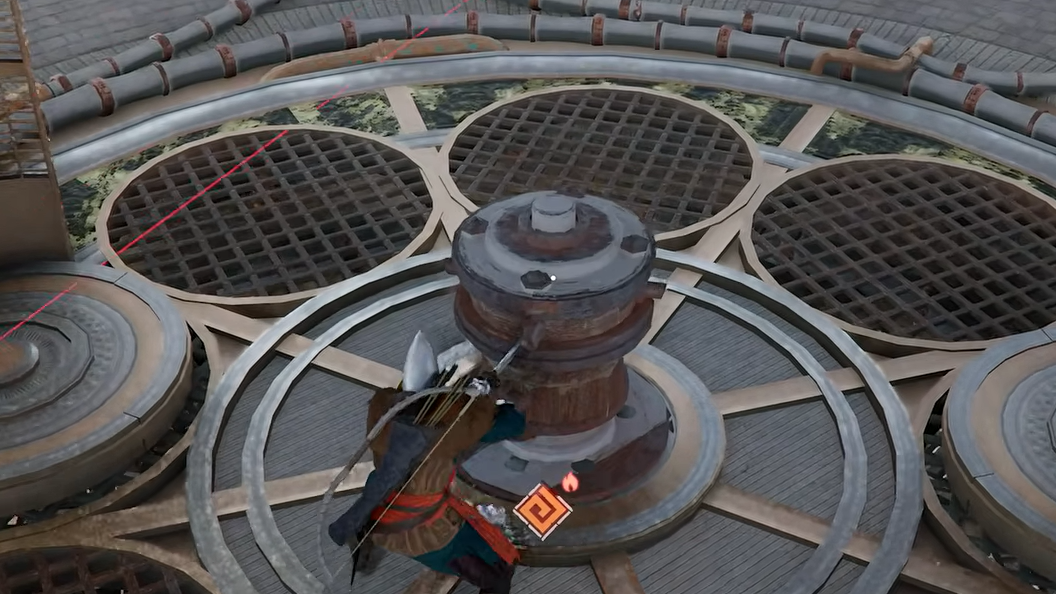
Find a way inside (central pillar puzzle)
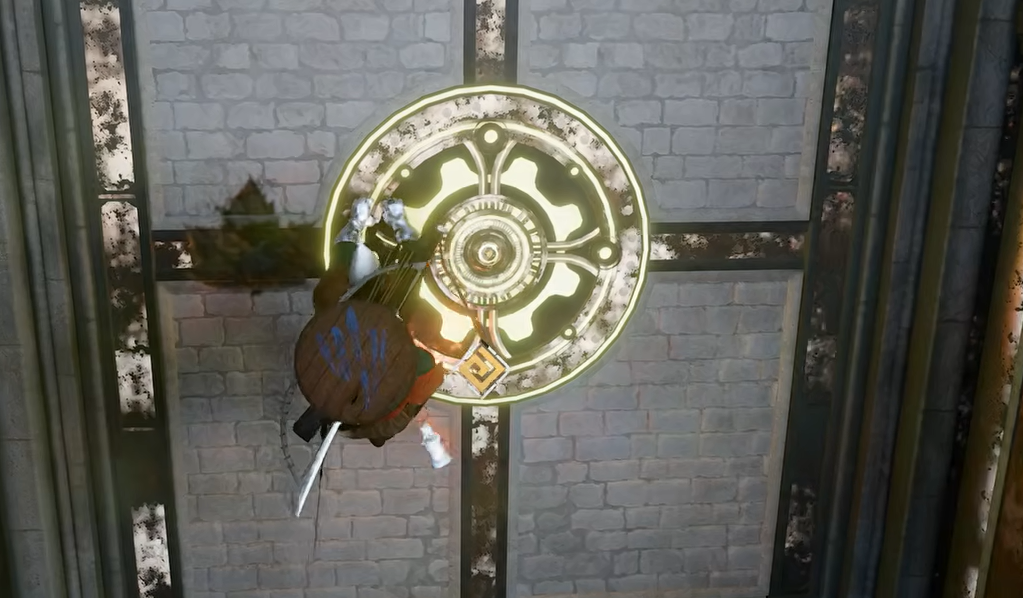
You land next to a wooden central pillar ringed by metal grates. None of the grates has a visible opening at first. The solution uses the Stab skill, executed with Sprint + Heavy Attack.
Pull the sword out when the opening aligns, then climb up through the gap into the next chamber. If the break animation doesn’t land, you pulled out too early — re-stab and hold for about two seconds.
Pull the sword out when the opening aligns, then climb up through the gap into the next chamber | Image credit: Pearl Abyss (via YouTube/@TroubleChute Basics)
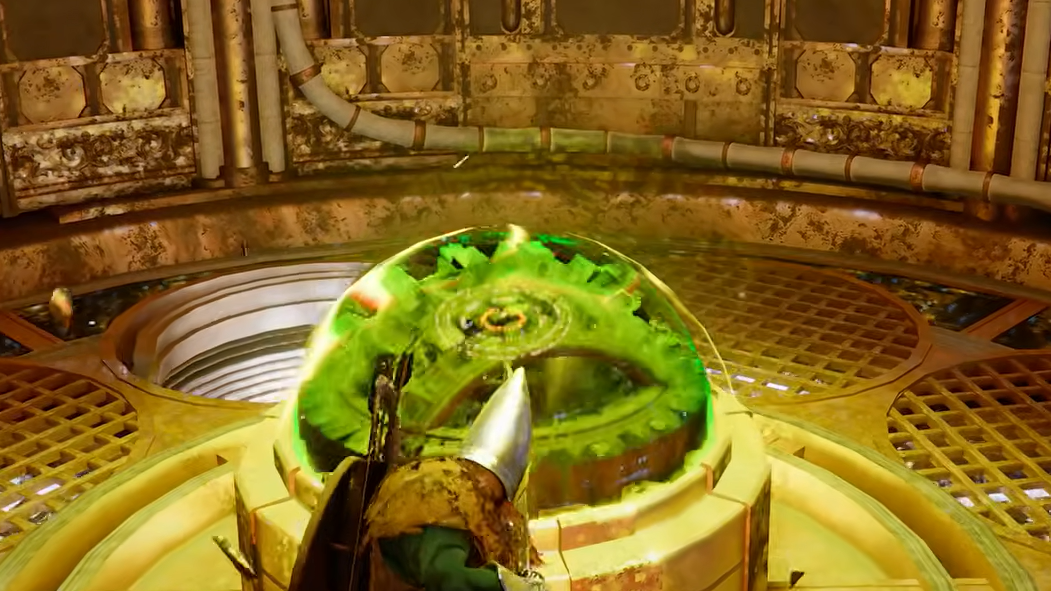
Destroy the first glass dome and climb to the roof
The interior chamber contains a green glass dome device and spawns melee enemies plus small floating turrets. Deal with the adds first so you can work the puzzle uninterrupted. Charged bow shots (hold light + heavy with the bow out) cleanly one-shot the floating turrets when their targeting laser flashes on you.
Stab the cog device at the base of the dome, then press Pierce to shatter the glass. Holding for a beat before pulling out prevents the bug where the break doesn’t register.
Stab the cog device at the base of the dome, then press Pierce to shatter the glass | Image credit: Pearl Abyss (via YouTube/@TroubleChute Basics)
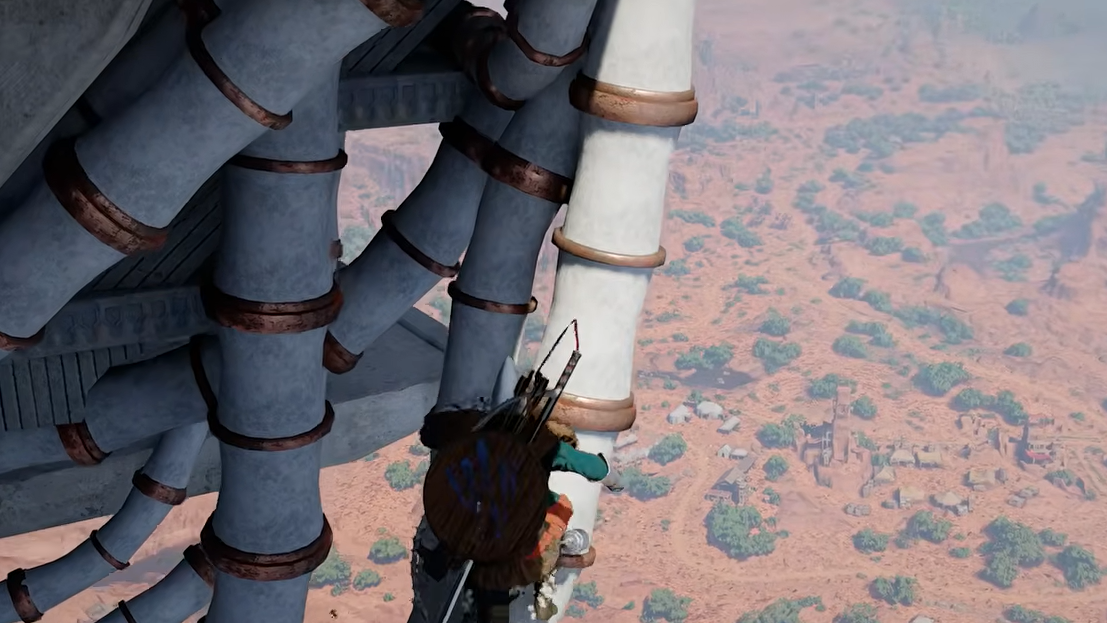
Jump off the edge and use triple Force Palm to gain height, then glide and climb the exterior cables all the way up to the upper deck.
Climb the exterior cables all the way up to the upper deck | Image credit: Pearl Abyss (via YouTube/@TroubleChute Basics)
💡
If your stamina is short, invest points into it before this mission or rely on the triple Force Palm jump pattern — the wire climb is otherwise hard to finish in one run.
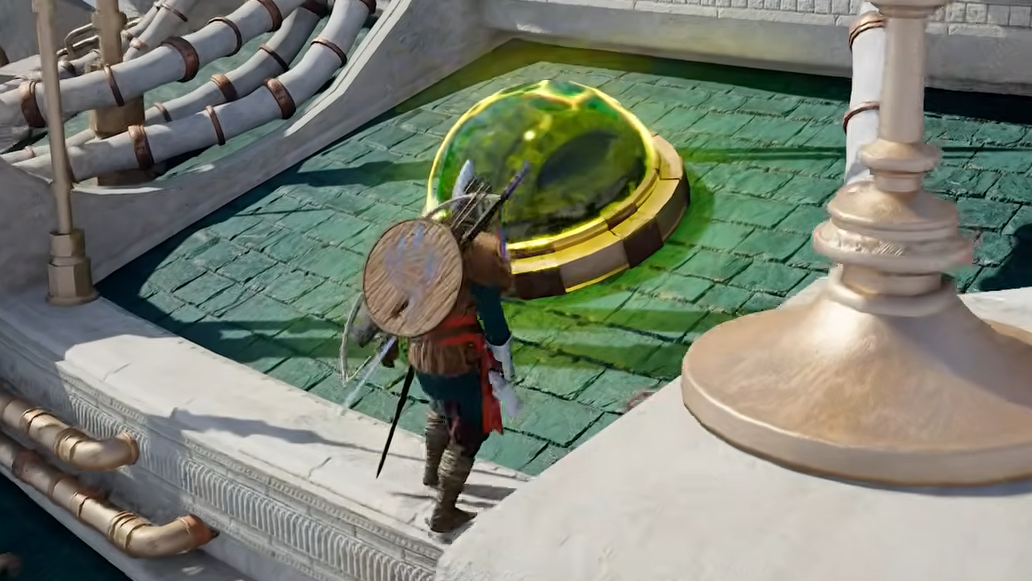
Break every glass bulb on the roof
The roof holds five or six green glass bulbs spread around the outer ring, plus a central console. They are all marked on the minimap. Sky turrets will fire at you continuously during this phase; they are a damage nuisance but not lethal at high HP.
A cutscene plays, and a wall panel opens on the south side of the fortress. You’ll know it worked when the side tower’s platform becomes accessible from a higher ledge than where you started.
A cutscene plays, and a wall panel opens on the south side of the fortress | Image credit: Pearl Abyss (via YouTube/@TroubleChute Basics)
Enter the H.A.L.L. room (rotating door)
Drop onto the newly opened south platform and head inside. Follow the circular corridor to a wall panel marked with a crest. The panel has rotating segments and won’t hold still for a normal interaction.
If the door spins past you, mantle the edge as it rotates. You are in position once Kliff is deposited inside the boss arena, and the health bar for H.A.L.L. appears.
You are in position once Kliff is deposited inside the boss arena | Image credit: Pearl Abyss (via YouTube/@TroubleChute Basics)
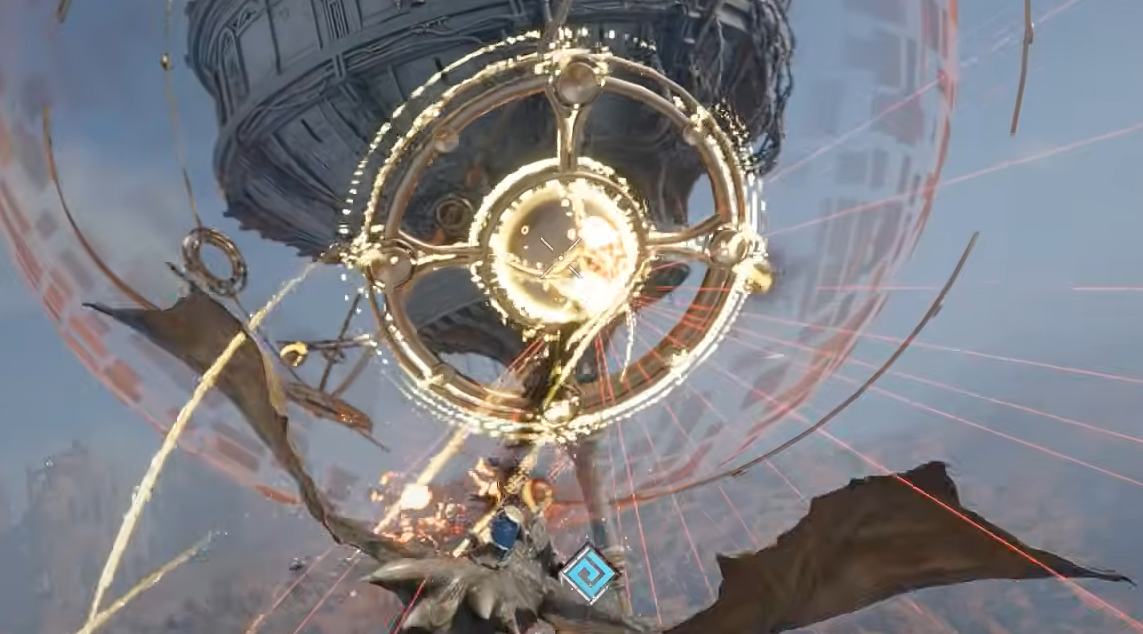
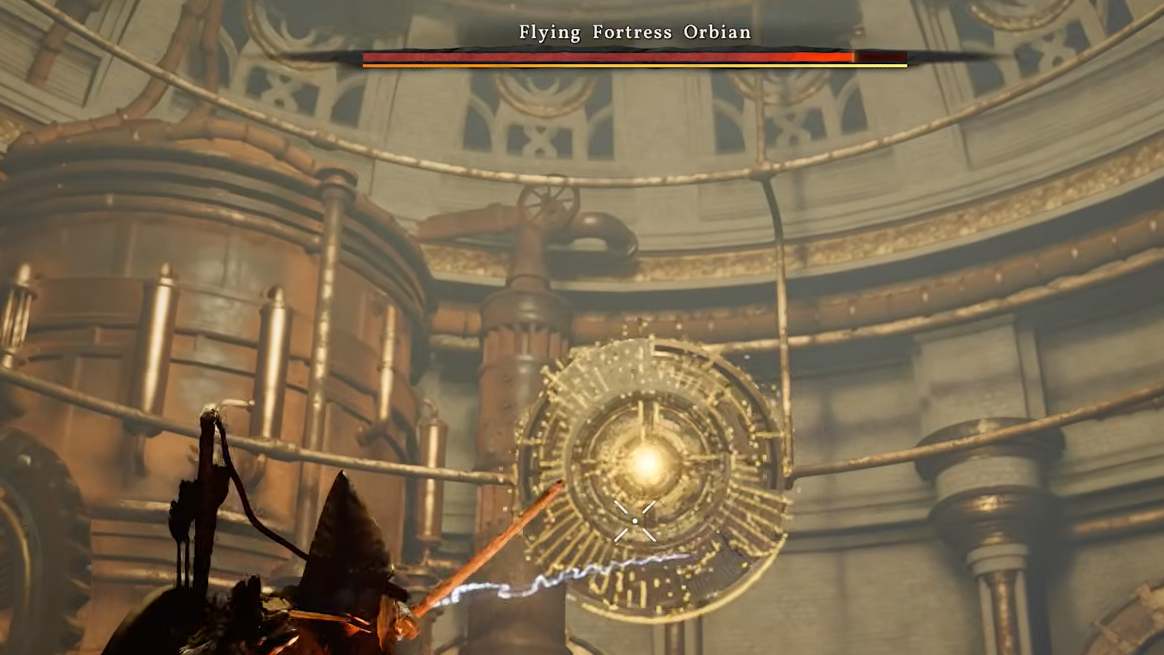
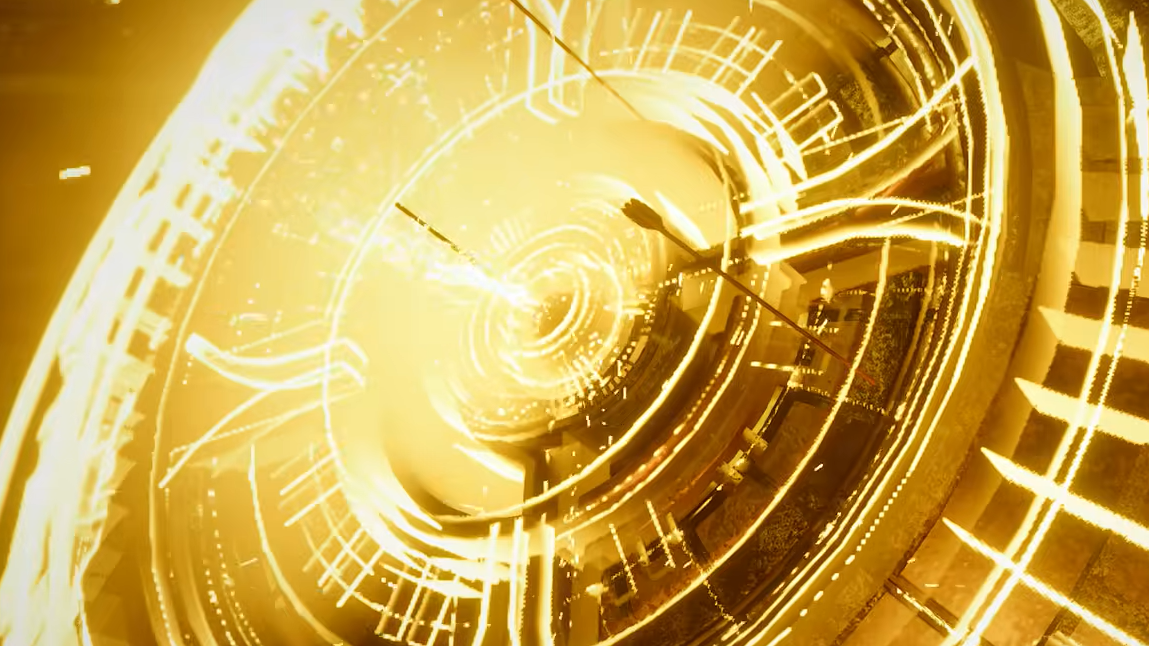
Beat Flying Fortress Orbian (H.A.L.L. boss fight)
The boss is a spinning disc of light with a central eye, supported by small drones that fire tracking projectiles and red laser beams. Its stagger bar is extremely low, so almost any solid hit interrupts it — but it resists damage unless you either keep it staggered or shut down its projectile phase.
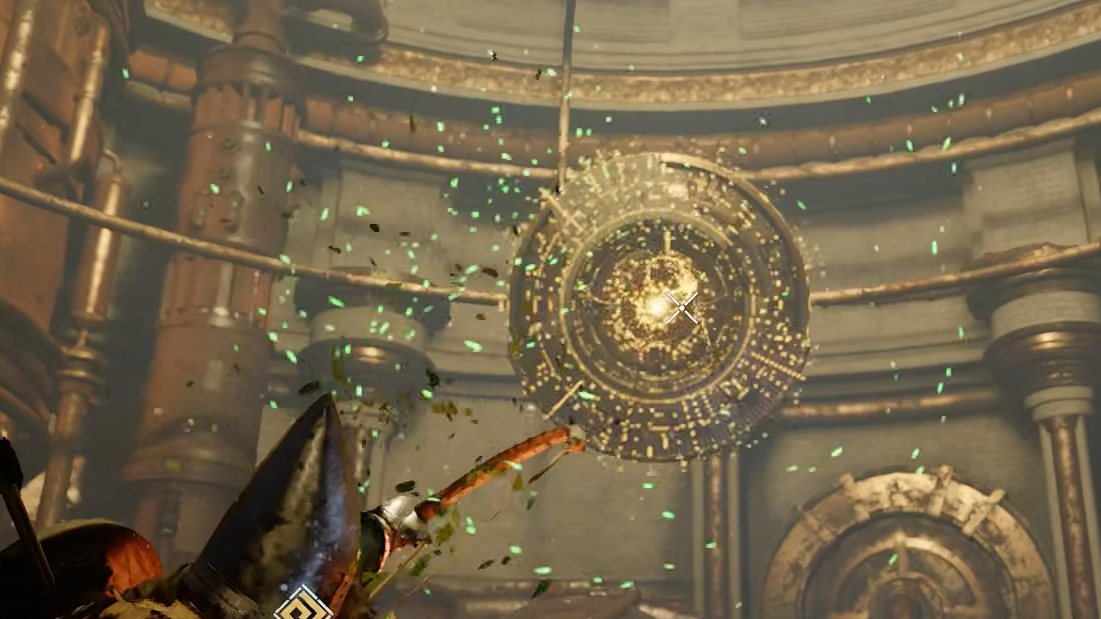
Main method: Focused Shot burst
This is the fastest kill, and what the fight is balanced around.
Release L2 to fire the full volley. Each full mark-and-release cycle chunks a large portion of the health bar; repeat two or three times to finish the fight before the laser phases become a threat.
Image credit: Pearl Abyss (via YouTube/@TroubleChute Basics)
⚠️
If you enter this room with no arrows, the Focused Shot plan is off the table and melee grind is not viable. You will need to exit, restock, and redo the pillar, dome, roof, and rotating-door puzzles to get back in.
Backup method: Nature’s Retribution reflect (no arrows)
If you’re stuck without arrows and don’t want to reset, Nature’s Retribution from the Nature Scale / Nature Snare skill line can carry the fight. It catches the boss’s own projectiles — including the large missile — and returns them for heavy damage.
Use Focus (slow-time) between catches to regenerate spirit. The red-beam windup is long enough that Focus almost always refills before the next reflect.
If spirit bottoms out, dodge through a few attacks to recover, then resume reflecting. The boss staggers on reflected hits, which lets you chain damage without ever taking a laser cleanly.
Image credit: Pearl Abyss (via YouTube/@TroubleChute Basics)
How to know the mission is done
H.A.L.L.’s health bar empties after a short sequence of successful Focused Shot volleys or reflected projectiles, triggering the end-of-fortress cutscene. The quest updates to close out the Chapter 11 main quest line, and the game transitions into Chapter 12. No manual confirmation is needed — if the cutscene plays and you regain control in the next chapter, the fortress is down for good.