
Switching between accent colors in Windows 11 leaves a visible history of your recent choices, which appears whenever you personalize your system’s appearance. This record can clutter your customization options or reveal your preferences to others who use your device. Removing this history streamlines your color selection and helps maintain privacy. Several approaches are available, ranging from direct registry edits to resetting your personalization settings.
Clear Recent Colors History Using Registry Editor
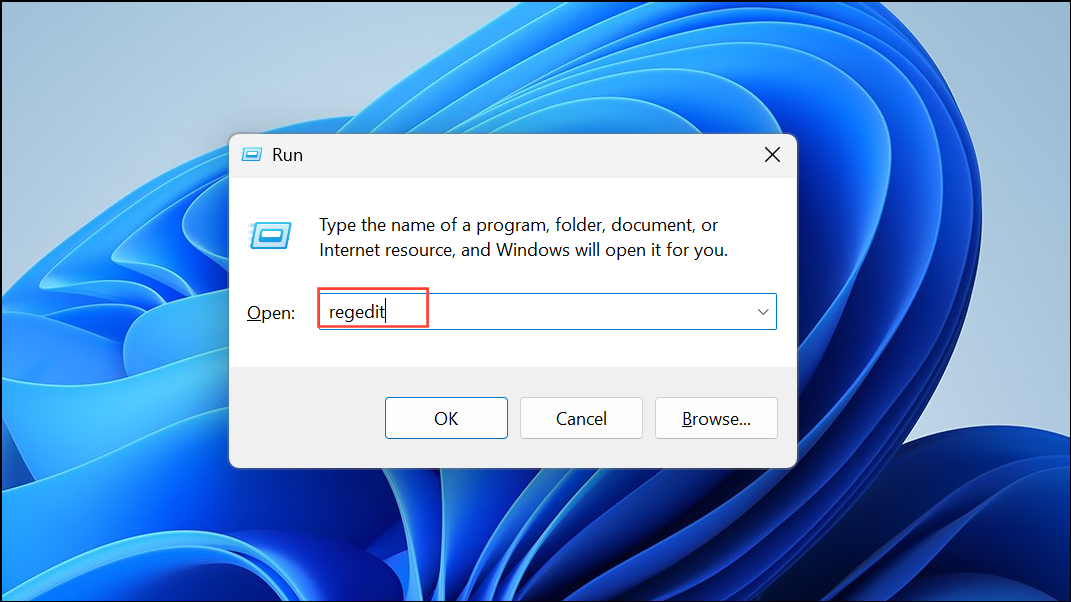
Step 1: Open the Registry Editor by pressing Win + R to bring up the Run dialog, type regedit and hit Enter. If prompted by User Account Control, select Yes to allow changes.
Step 2: In the Registry Editor window, navigate to the following path by expanding the folders in the left pane:
HKEY_CURRENT_USER\Software\Microsoft\Windows\CurrentVersion\Themes\History\Colors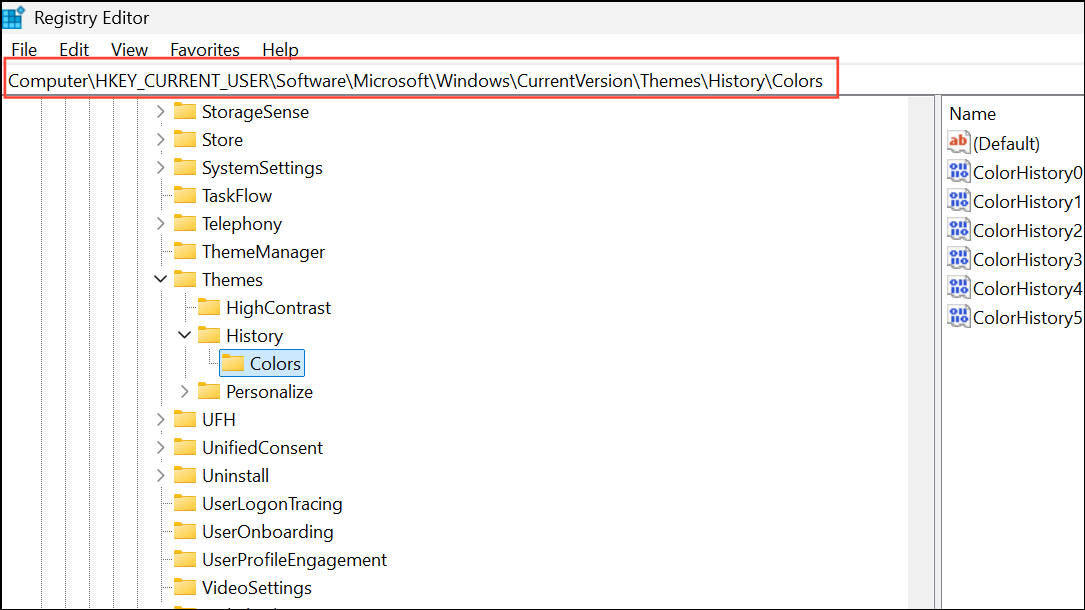
This location contains entries for each of your recent accent colors.
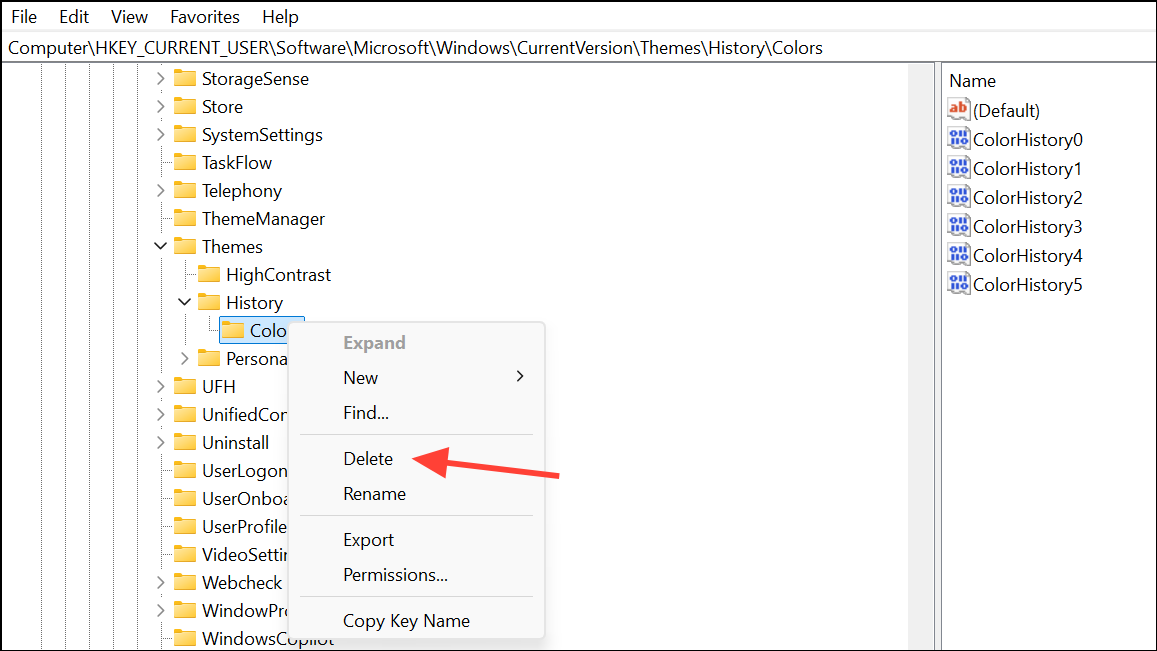
Step 3: To remove all recent colors, right-click the Colors folder and select Delete. Confirm the deletion when prompted. If you only want to remove specific colors, expand the Colors key and delete individual entries representing the colors you wish to clear.
Step 4: Close Registry Editor. Changes will take effect immediately, but restarting your computer is recommended to ensure the color history is fully cleared from the personalization menu.
Remove Recent Colors History with Windows PowerShell
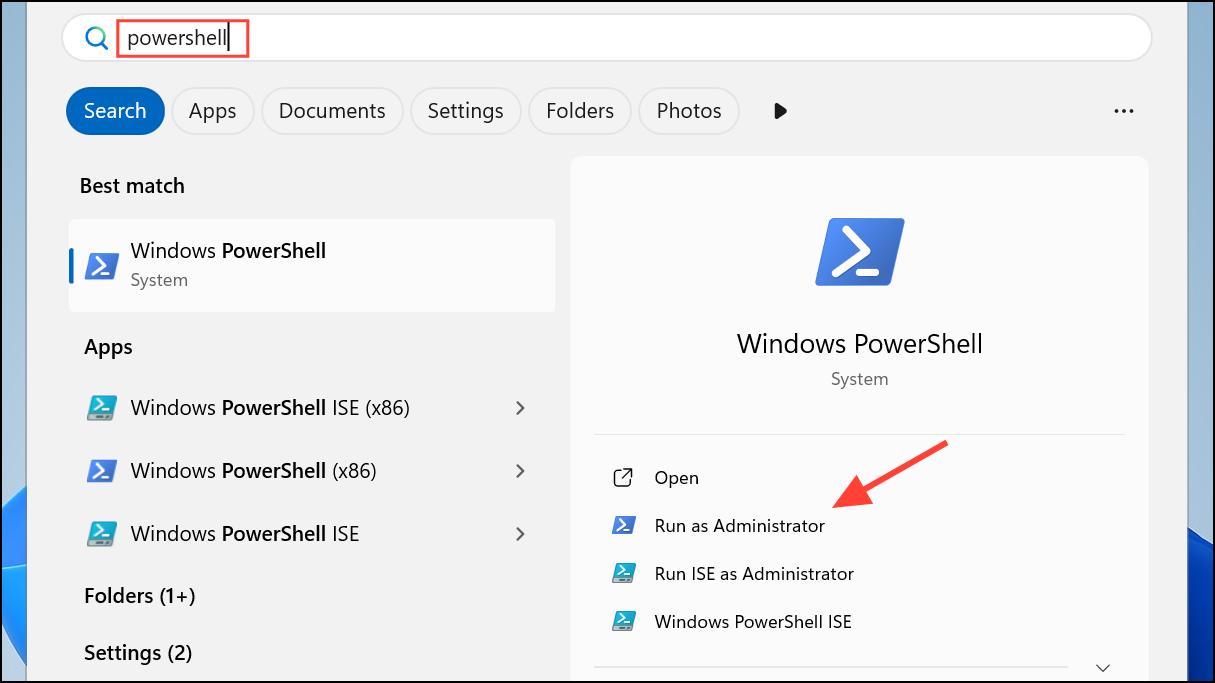
Step 1: Open Windows PowerShell as an administrator. Click the Start menu, type PowerShell, right-click the result, and choose Run as administrator. Approve the User Account Control prompt.
Step 2: In the PowerShell window, enter the following command to delete all entries from the recent colors history:
Remove-ItemProperty -Path "HKCU:\Software\Microsoft\Windows\CurrentVersion\Themes\History\Colors" -Name *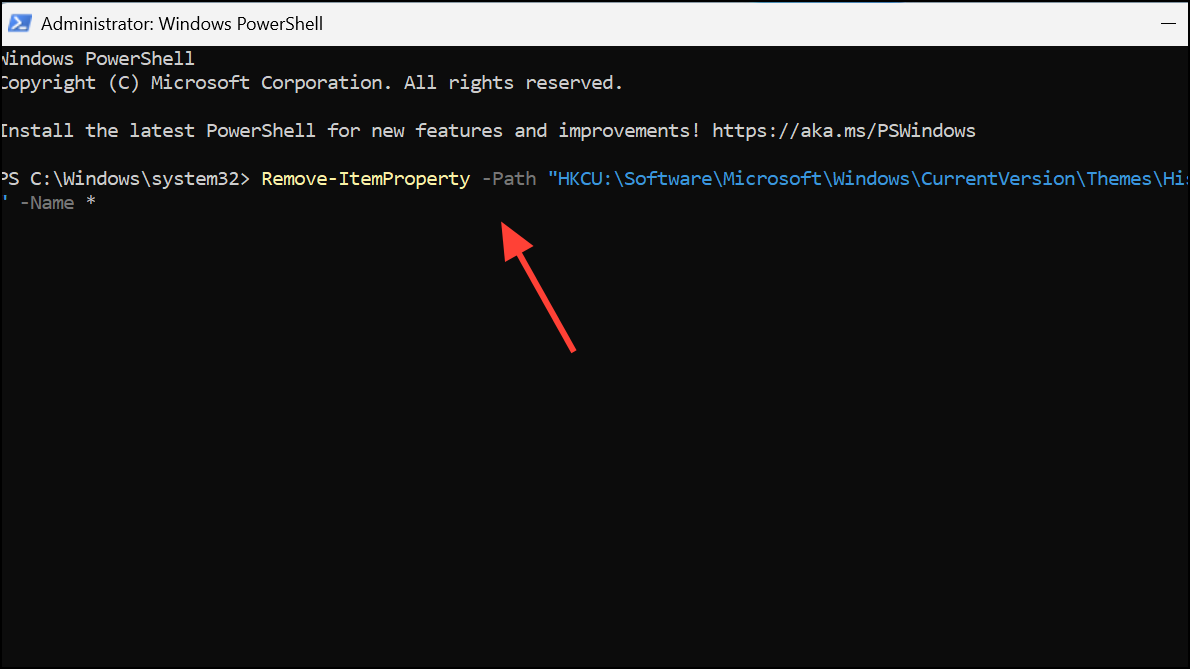
This command removes all property values (recent colors) under the specified registry key. Press Enter to execute.
Step 3: Once the command completes, open the Settings app and navigate to Personalization > Colors to confirm the recent colors list is empty. A system restart may be required for changes to fully appear.
Reset Recent Colors by Changing Personalization Settings
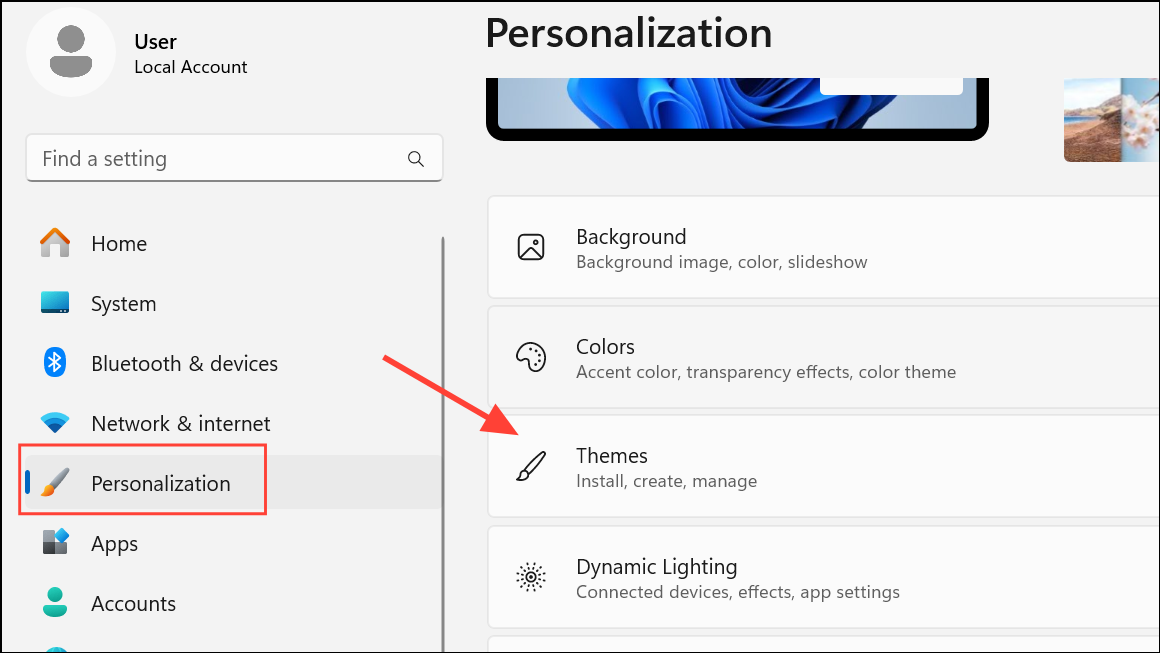
Step 1: Open the Settings app by pressing Win + I. Go to Personalization and select Themes from the sidebar.
Step 2: Under Themes, apply one of the default Windows themes. This action resets many personalization options, including recent colors history.
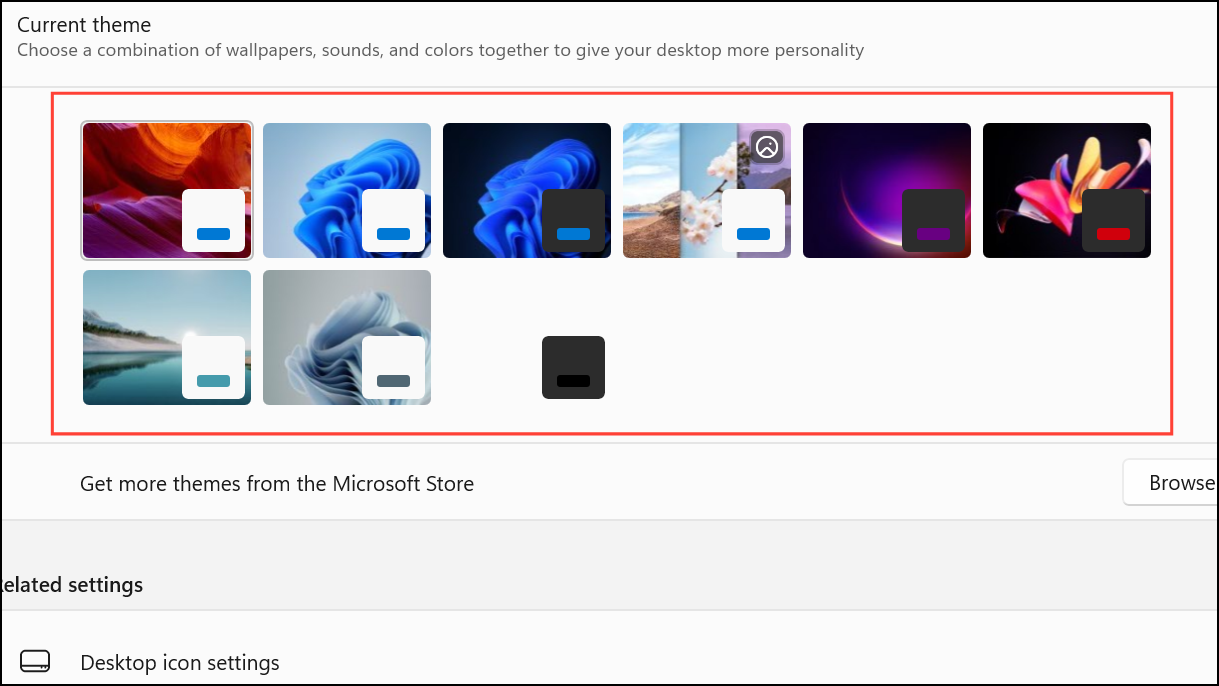
Step 3: Return to the Colors section to verify that the recent colors history has been cleared. If you had other customizations, you may need to reapply them after resetting the theme.
This method is less direct, as it resets other visual customizations along with color history, but it avoids direct registry edits.
Additional Notes and Tips
- Clearing recent colors does not alter your current accent color setting; it only removes the list of previously used colors.
- For users who frequently switch colors, repeating these steps keeps your recent colors list uncluttered.
- Always back up your registry or create a system restore point before making manual changes to the Windows registry.
- Third-party utilities and downloadable registry files can automate this process, but only use trusted sources to avoid security risks.
Removing your recent colors history in Windows 11 is straightforward with these methods, giving you a cleaner personalization menu and greater control over your system’s appearance.