
Location tracking in Windows 11 enables apps and system services to determine your device’s geographic position using GPS, Wi-Fi, cellular data, and IP address. While this supports features like weather updates, maps, and device recovery, it also means your location data may be collected, stored, and in some cases shared with Microsoft or third parties. Disabling location tracking strengthens privacy and limits unnecessary data sharing, though it may impact location-dependent features.
Disable Location Tracking for All Users
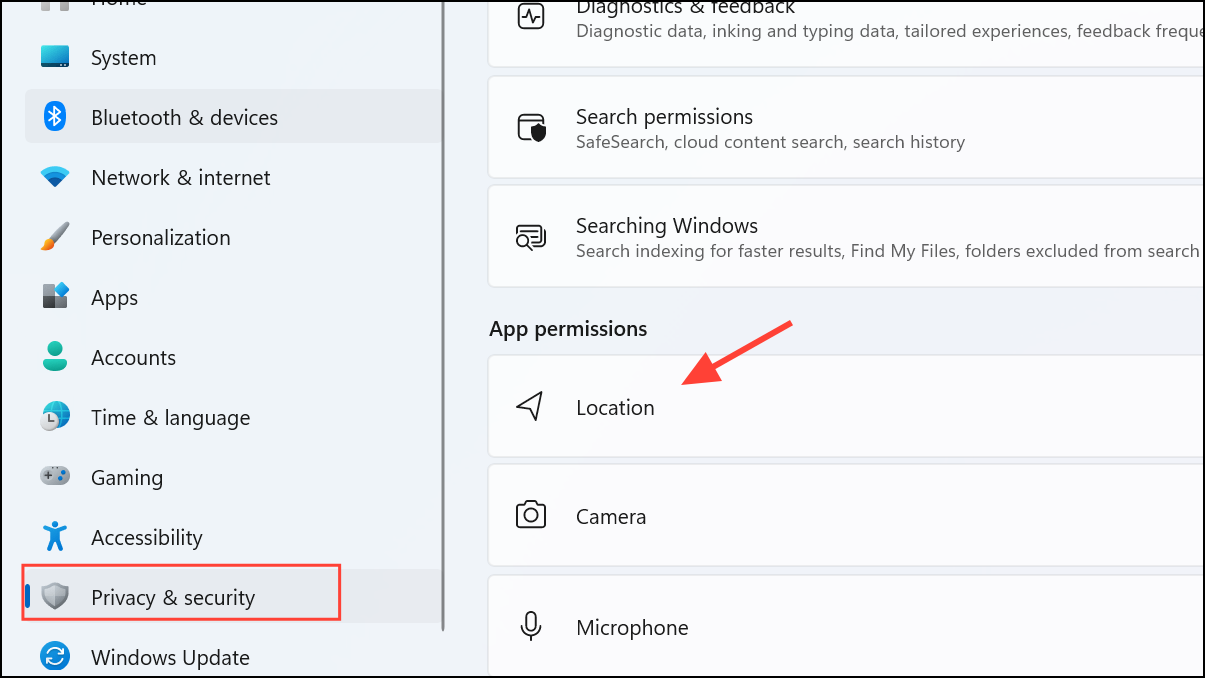
Step 1: Press Windows+i to open the Settings app.
Step 2: In the sidebar, select Privacy & security, then click Location in the right pane.
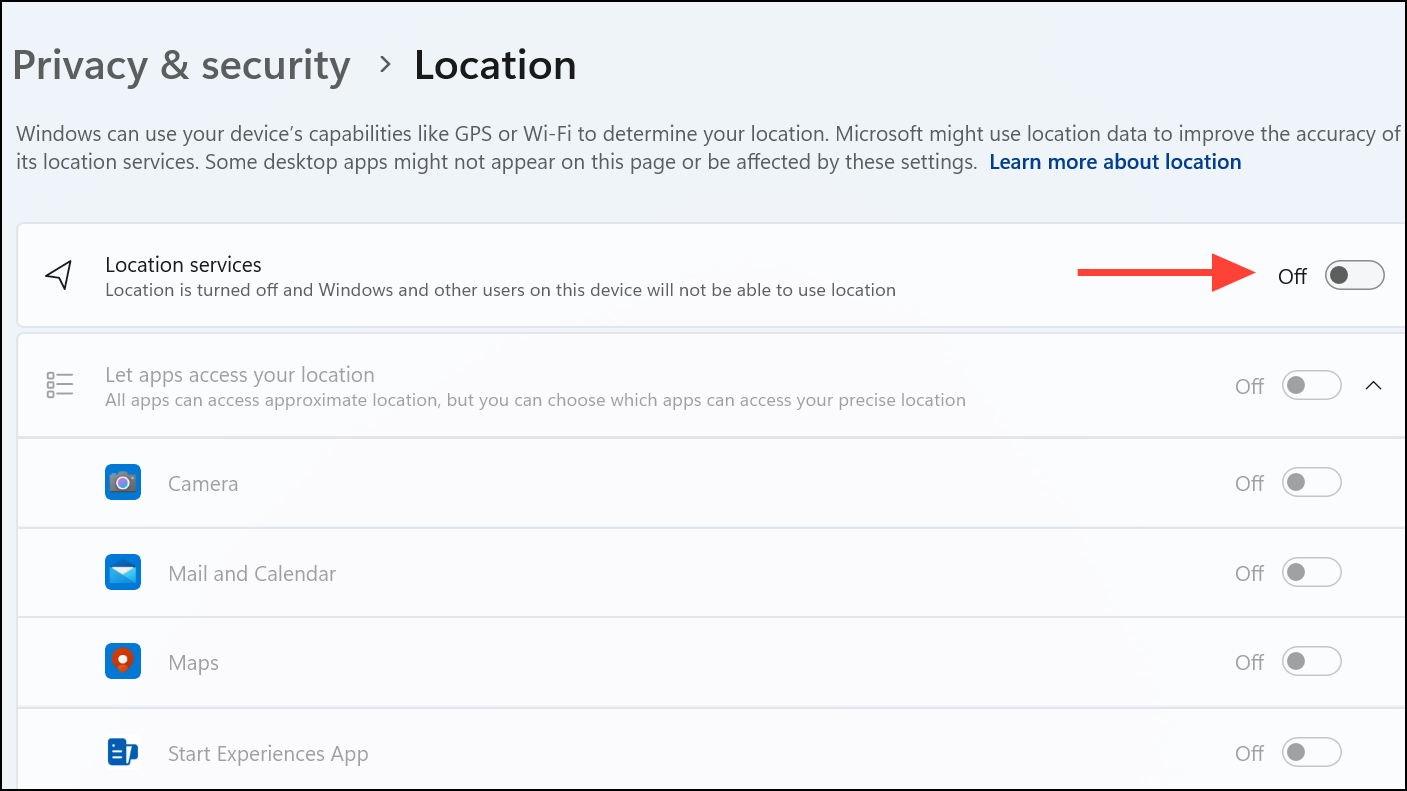
Step 3: At the top of the Location page, locate the Location services toggle. Switch it to Off. This disables all location tracking for every user on the device. All related options will become grayed out, preventing apps and Windows features from accessing or storing your location.
Turning off location services at the device level immediately stops apps and most system features from accessing your position. However, certain features like emergency calling may still attempt to determine your location in urgent situations.
Disable Location Tracking for Individual Apps
Some users prefer to allow location access for specific trusted apps while blocking others. Windows 11 offers granular controls for Microsoft Store apps, though desktop applications may not always appear in this list.
Step 1: Open Settings with Windows+i.
Step 2: Go to Privacy & security > Location.
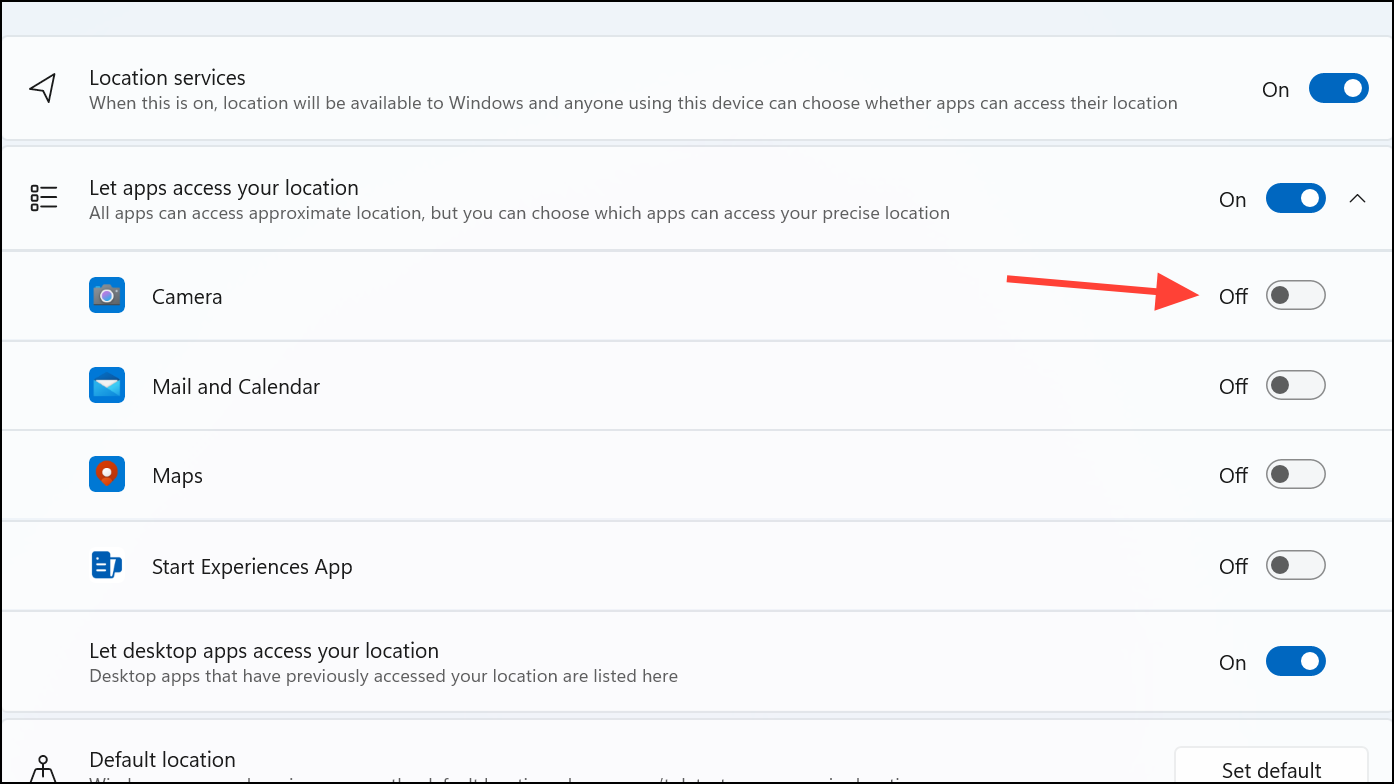
Step 3: Under Let apps access your location, toggle the setting to On if it’s not already enabled. Below, you’ll see a list of apps with individual toggles. Switch Off any app that you do not want to have access to your location.
Clear Location History from Your Device
Even after disabling location tracking, previously collected data may remain stored on your device or in the cloud. Clearing this history removes local records of your location.
Step 1: Open Settings using Windows+i.
Step 2: Navigate to Privacy & security > Location.
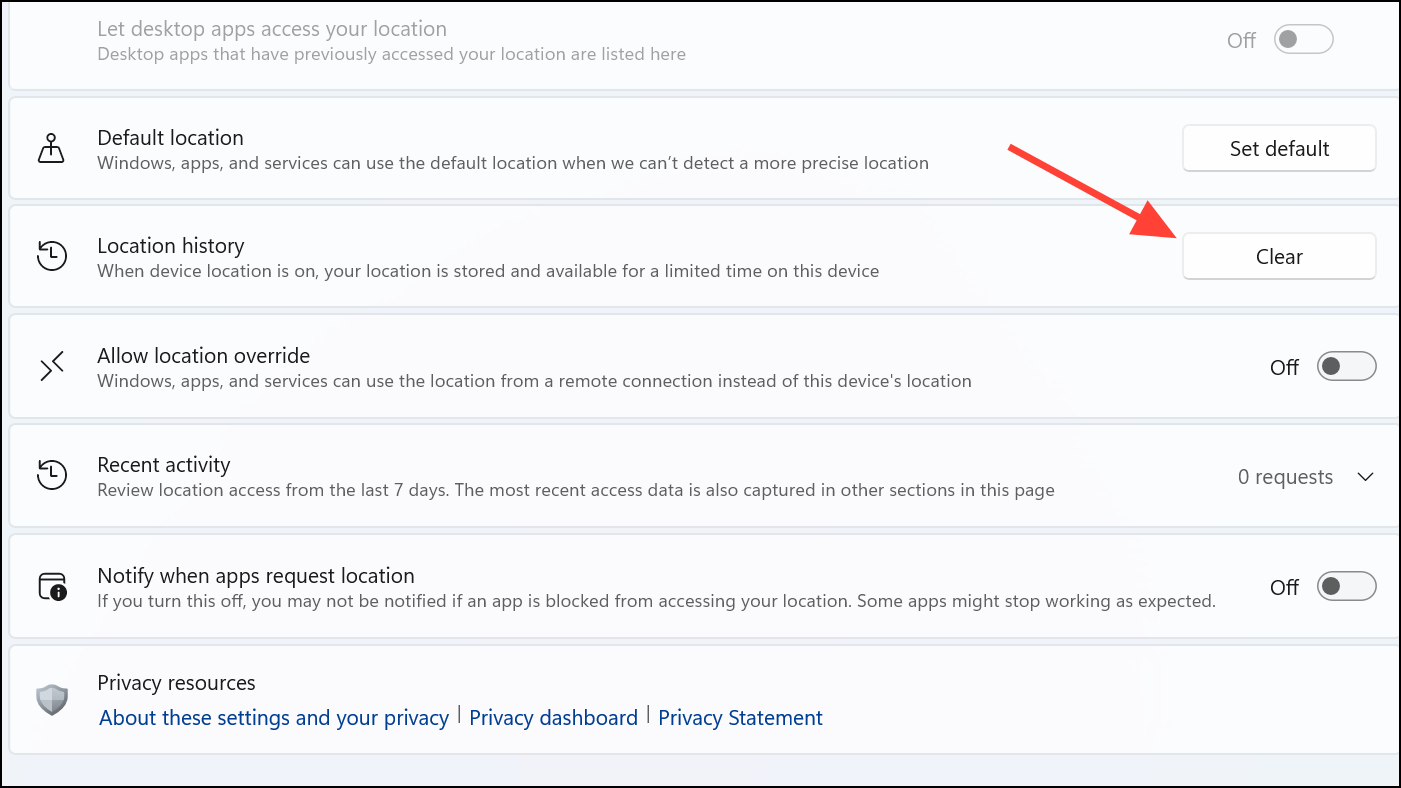
Step 3: Scroll to the Location history section and click Clear. A checkmark will confirm successful deletion.
To clear location history stored in your Microsoft account cloud data, visit account.microsoft.com/privacy/location, sign in, and use the Clear location activity option.
Block Website Location Requests in Browsers
Web browsers can request your location independently of Windows location services. Adjust browser settings to block site-based location tracking.
Microsoft Edge
Step 1: Open Edge and click the three-dot menu. Choose Settings.
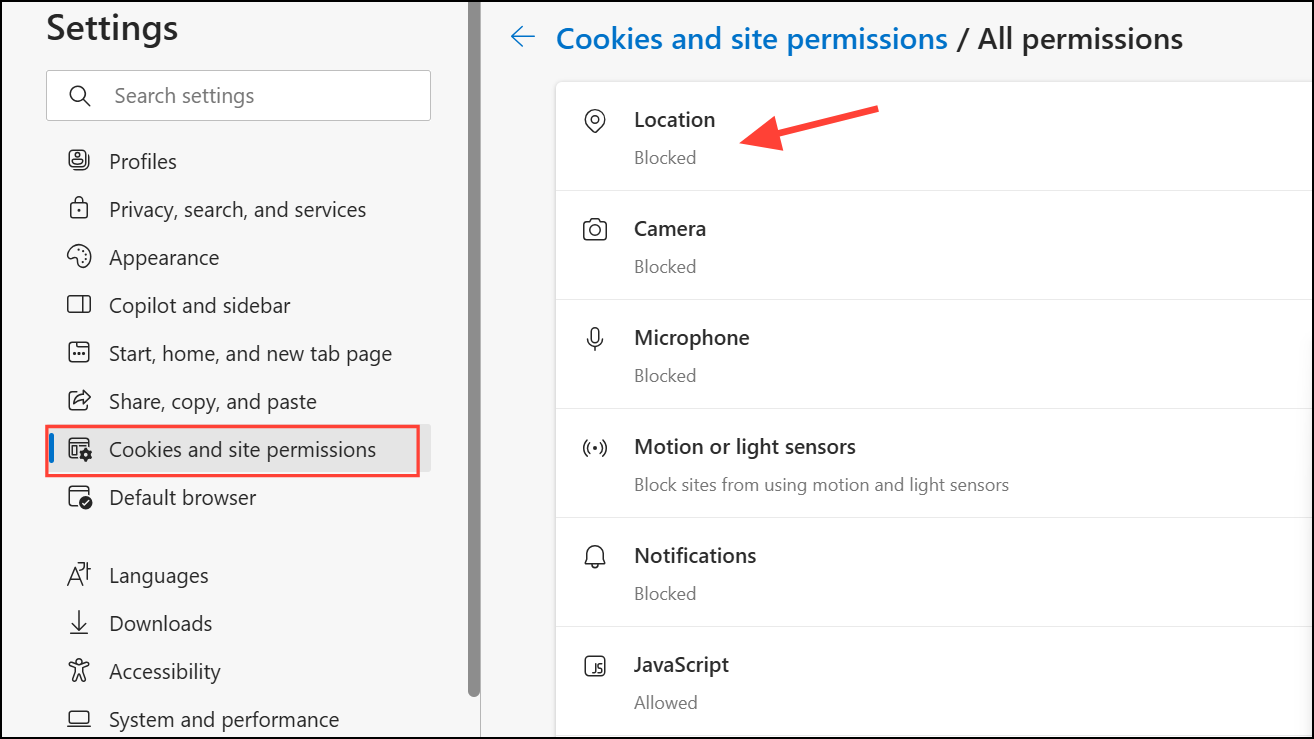
Step 2: Go to Cookies and site permissions > All permissions > Location.
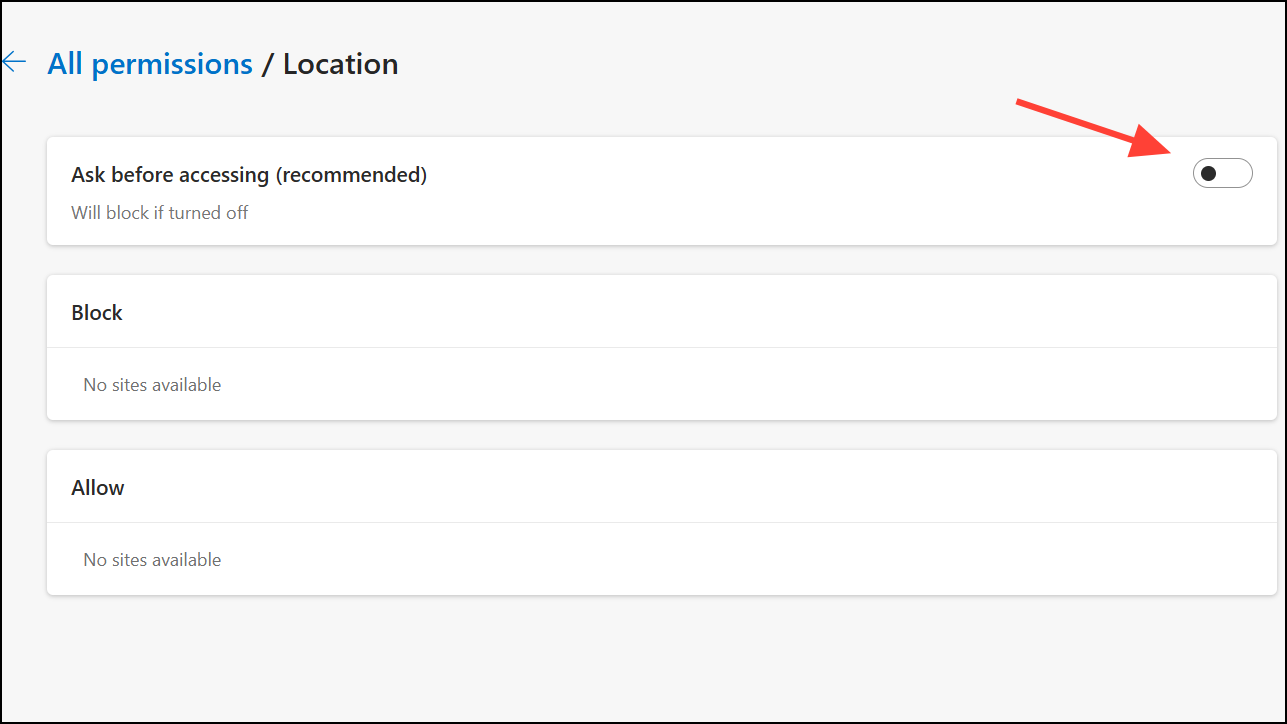
Step 3: Disable Ask before accessing (Recommended) to block all sites from requesting your location.
Google Chrome
Step 1: In Chrome, click the three-dot menu and select Settings.
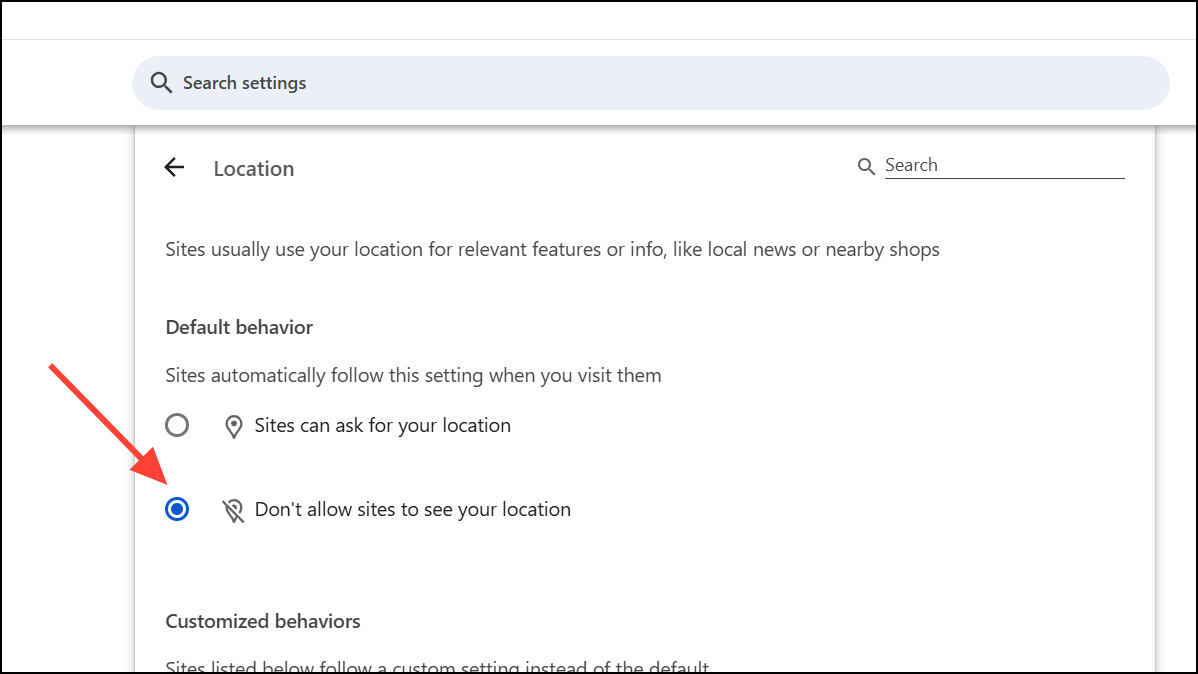
Step 2: Go to Privacy and security > Site Settings > Location.
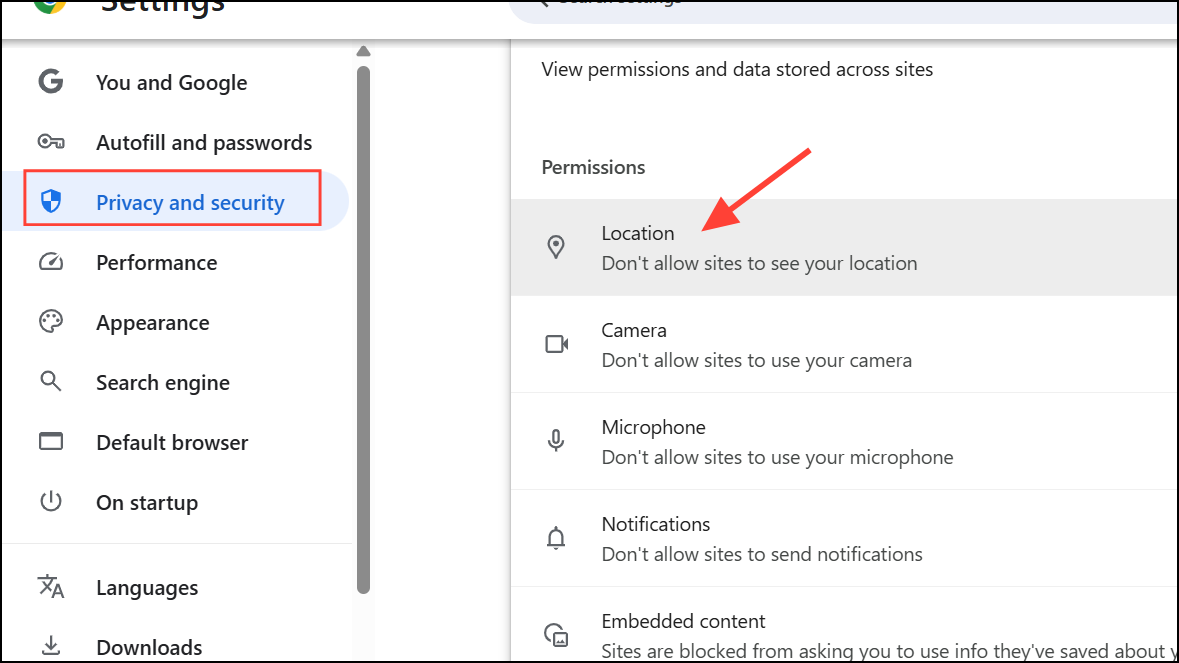
Step 3: Select Don’t allow sites to see your location.
Mozilla Firefox
Step 1: Open Firefox and click the menu button. Choose Settings.

Step 2: Go to Privacy & Security, then scroll to Permissions > Location and click Settings.
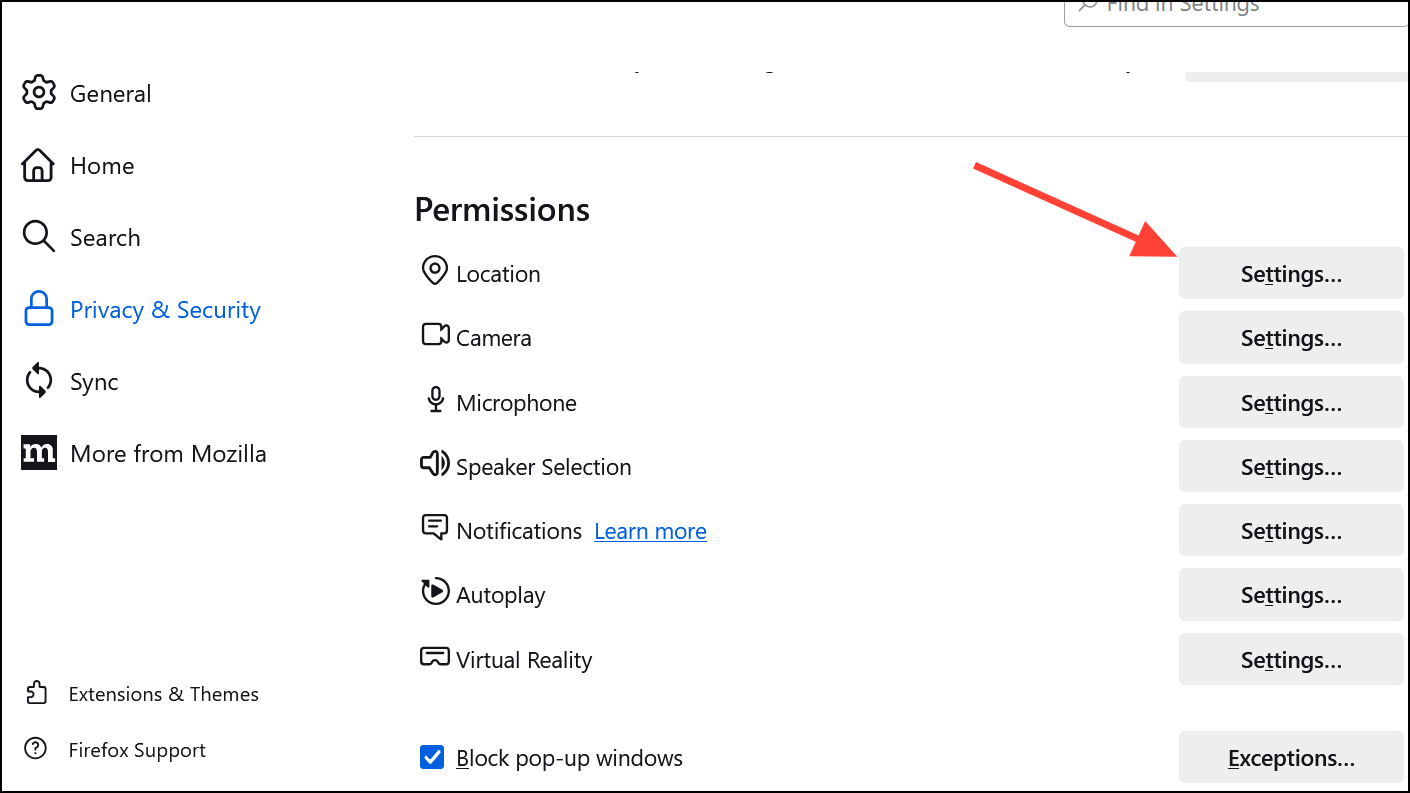
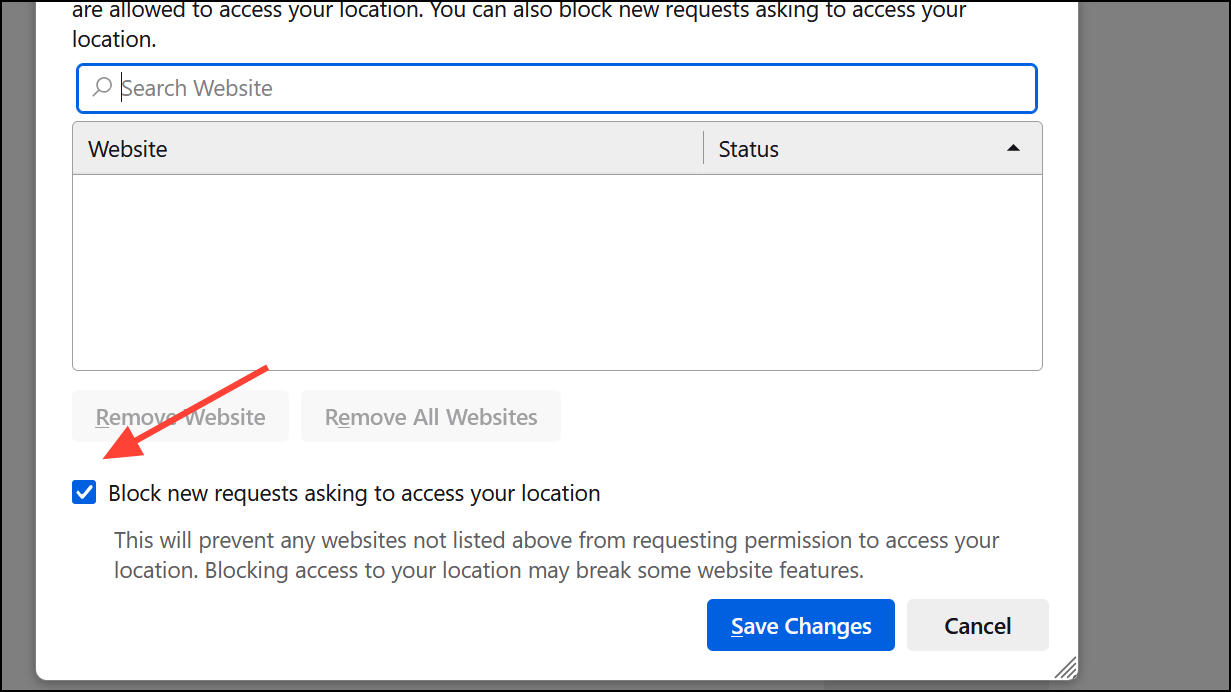
Step 3: Enable Block new requests asking to access your location and click Save Changes.
Temporarily Disable Location Services Using Airplane Mode
Airplane mode quickly disables all wireless communications, including Wi-Fi, Bluetooth, and location services. This is useful for temporarily blocking all location access without changing individual settings.
Step 1: Press Windows+A to open the Action Center.
Step 2: Click the Airplane mode tile to enable it. This will shut off all wireless signals, effectively blocking location detection methods tied to network connectivity.
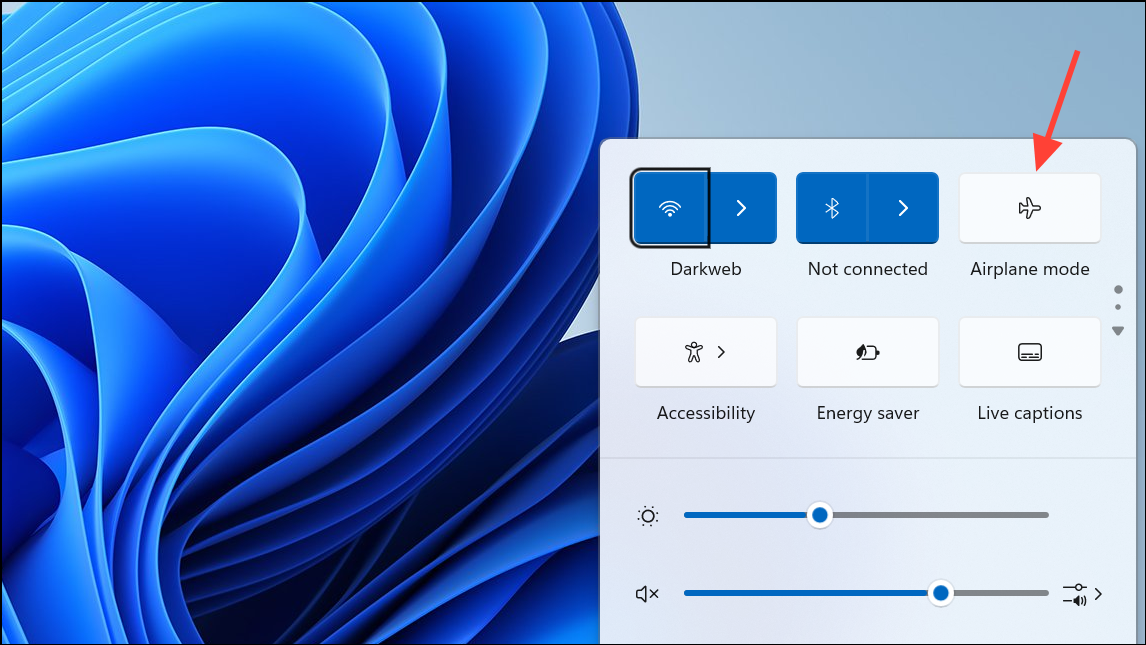
To resume normal operation, click the Airplane mode tile again to turn it off.
Advanced Methods: Group Policy and Registry Edits
For system administrators or users needing to enforce location settings across multiple accounts, Windows 11 supports disabling location services via Group Policy or the Registry.
Using Local Group Policy Editor (Pro, Enterprise, Education editions only)
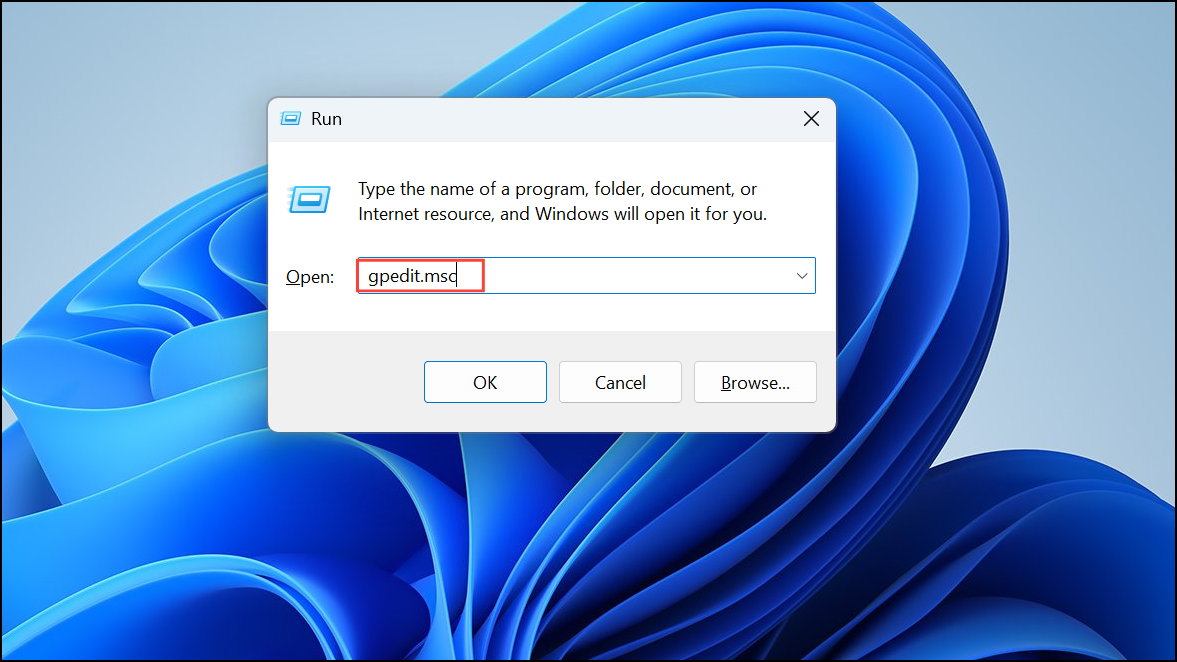
Step 1: Press Windows+R, type gpedit.msc, and press Enter.
Step 2: Navigate to Computer Configuration > Administrative Templates > Windows Components > Location and Sensors.
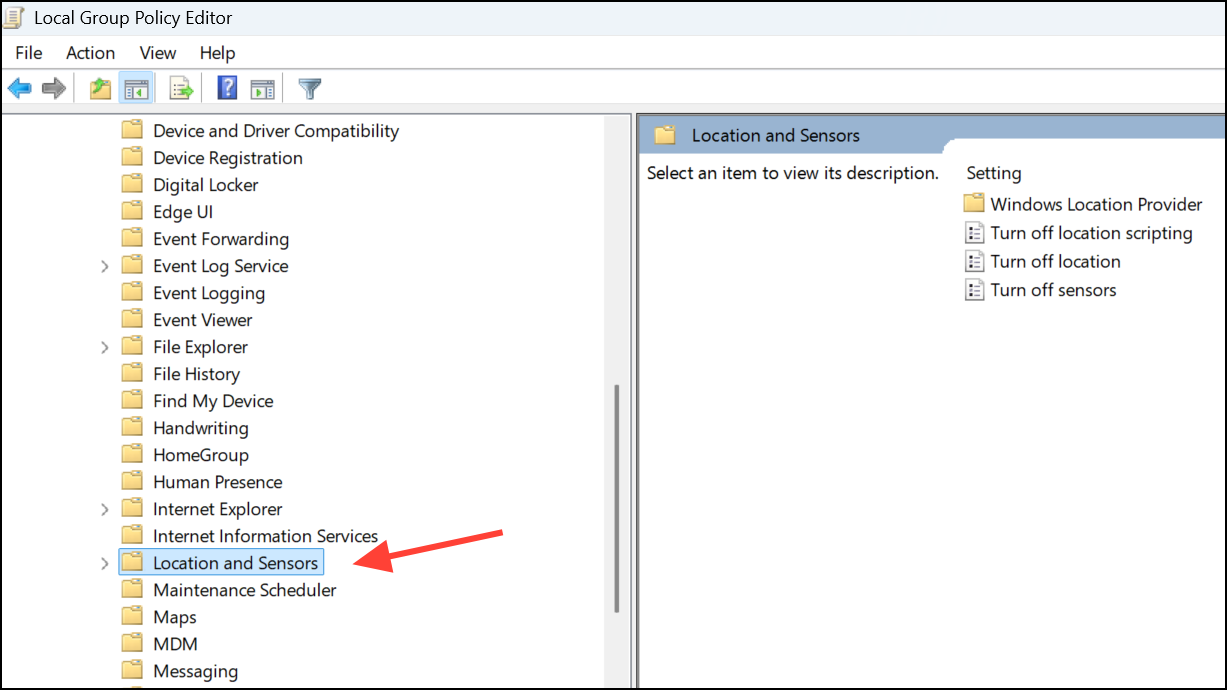
Step 3: Double-click Turn off location and set it to Enabled. Click OK to apply.
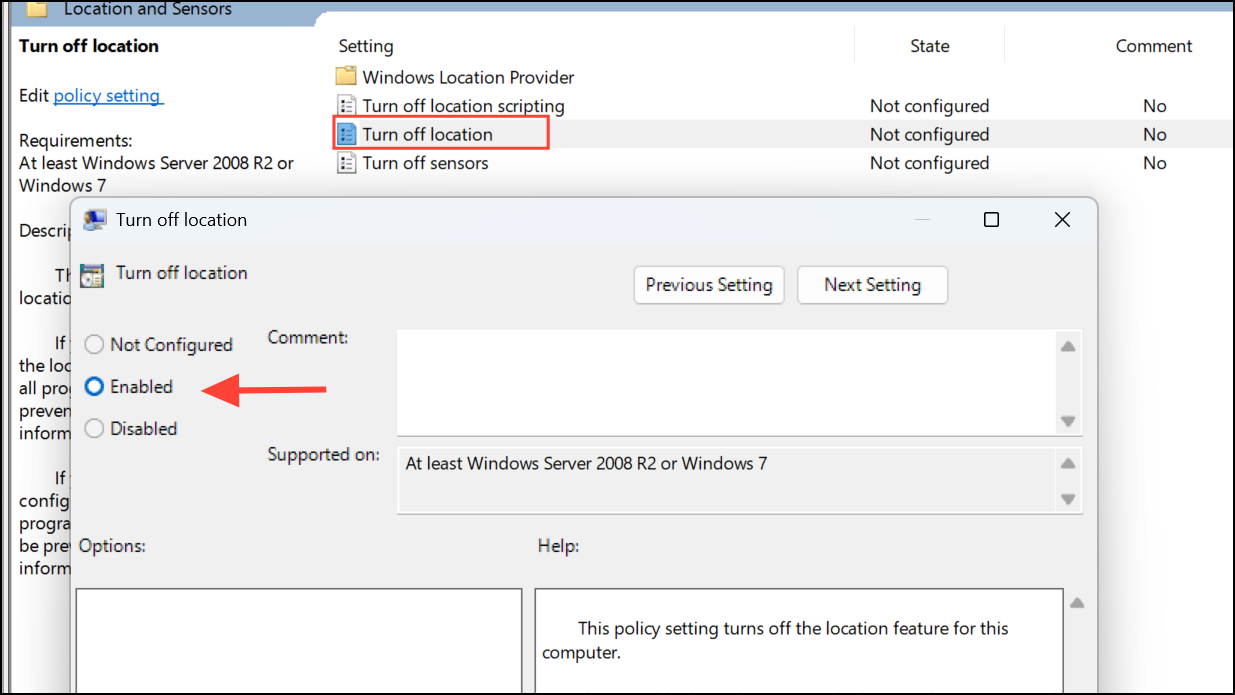
This disables location services for all users on the device.
Using Registry Editor
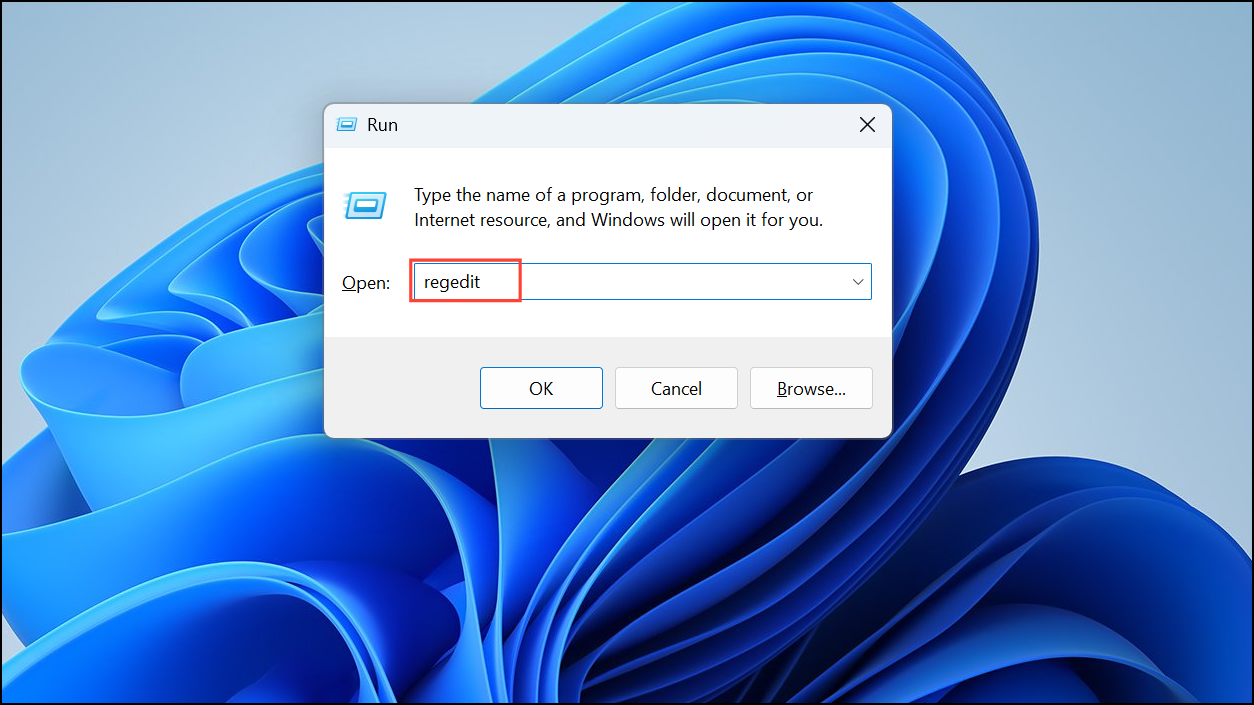
Step 1: Press Windows+R, type regedit, and press Enter.
Step 2: Navigate to HKEY_LOCAL_MACHINE\SOFTWARE\Policies\Microsoft\Windows\LocationAndSensors.
Step 3: Add or edit the DisableLocation DWORD value. Set it to 1 to disable location services.
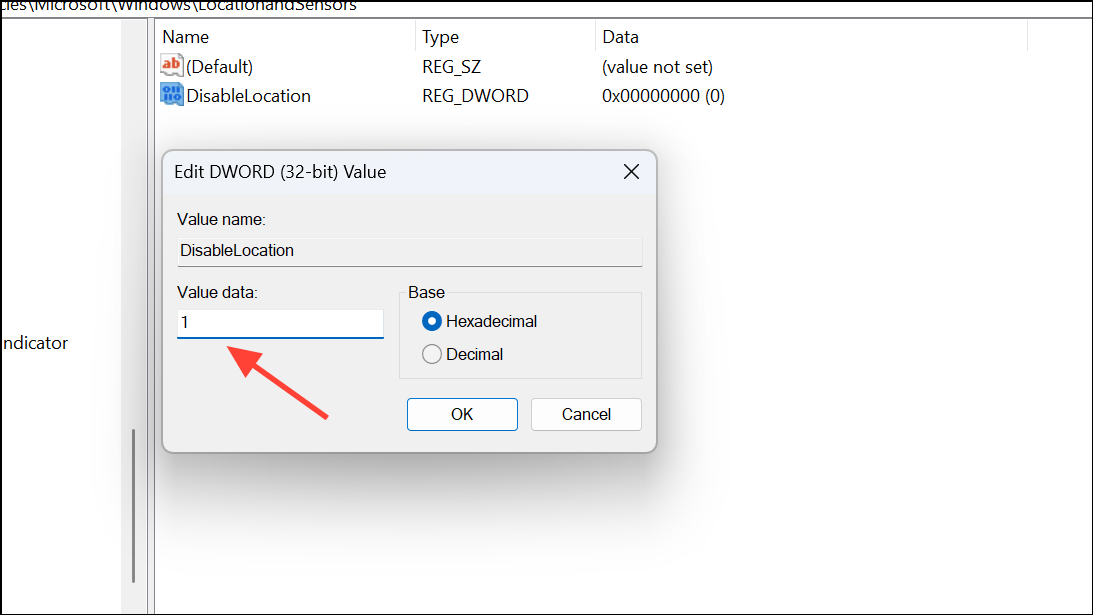
Restart your computer for changes to take effect. Always back up your registry before making manual edits.
Additional Tips and Considerations
- Some desktop apps may access location data without appearing in app permission lists. Disabling device-wide location services is the most reliable way to prevent this.
- Disabling Wi-Fi, Bluetooth, and cellular radios further reduces the risk of location detection, but may disrupt connectivity and device functionality.
- Emergency services may still access your location when placing emergency calls, regardless of your settings.
- Review privacy settings for individual apps and services to understand their use of location data.
- For quick toggling, consider third-party utilities or context menu scripts to automate enabling/disabling location services, though these may require administrative privileges.
Disabling location tracking on Windows 11 gives you greater control over your device’s privacy. Regularly review your settings and clear location history to keep your data private and limit unnecessary sharing.