
Persistent Windows Hello prompts can disrupt workflow, especially in environments where PINs, biometrics, or other Hello methods are unnecessary or unwanted. Windows 11 frequently nudges users to set up Windows Hello for improved security, but not every organization or user needs this feature. Disabling these prompts requires changes at the system or policy level to prevent Windows from requesting Hello setup during logon or when registering security apps like Okta Verify.
Disable Windows Hello Prompt Using Group Policy
Group Policy provides a centralized way to manage authentication settings on Windows 11 Pro, Enterprise, and Education editions. Adjusting these policies can disable PIN sign-in and other Hello options for all users on a device.
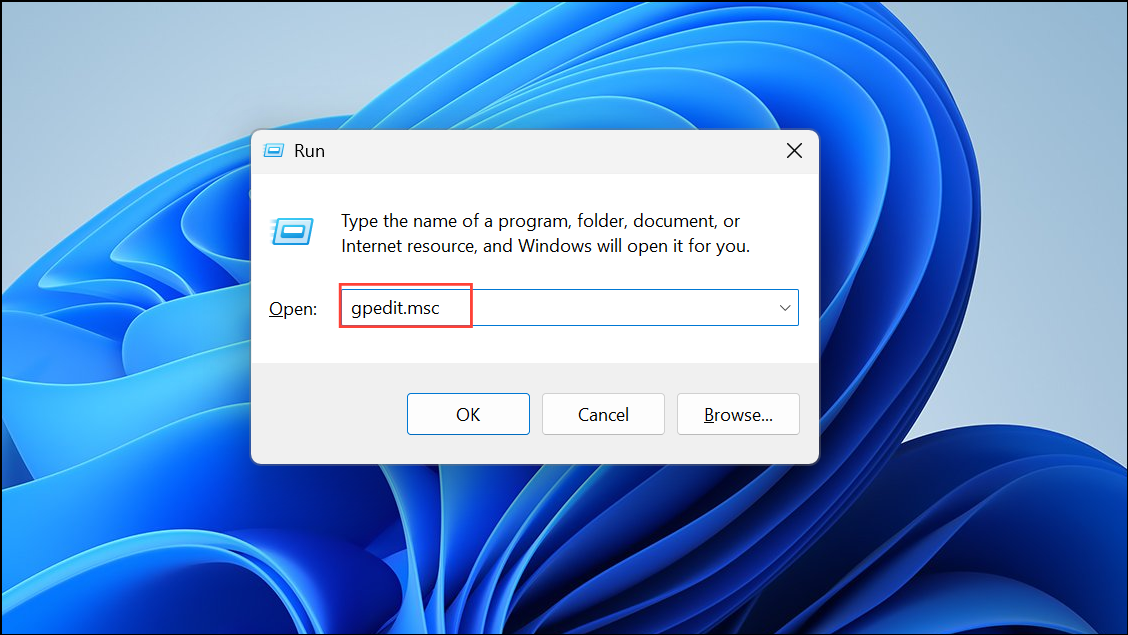
Step 1: Open the Group Policy Editor by pressing Windows + R to launch the Run dialog, typing gpedit.msc, and pressing Enter. This opens the Local Group Policy Editor.
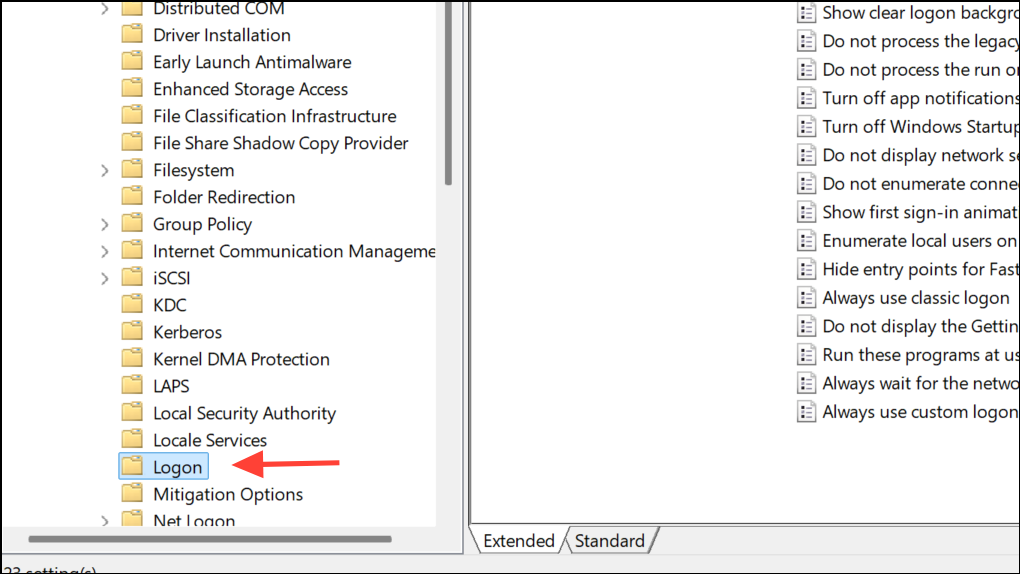
Step 2: Navigate to Computer Configuration > Administrative Templates > System > Logon.
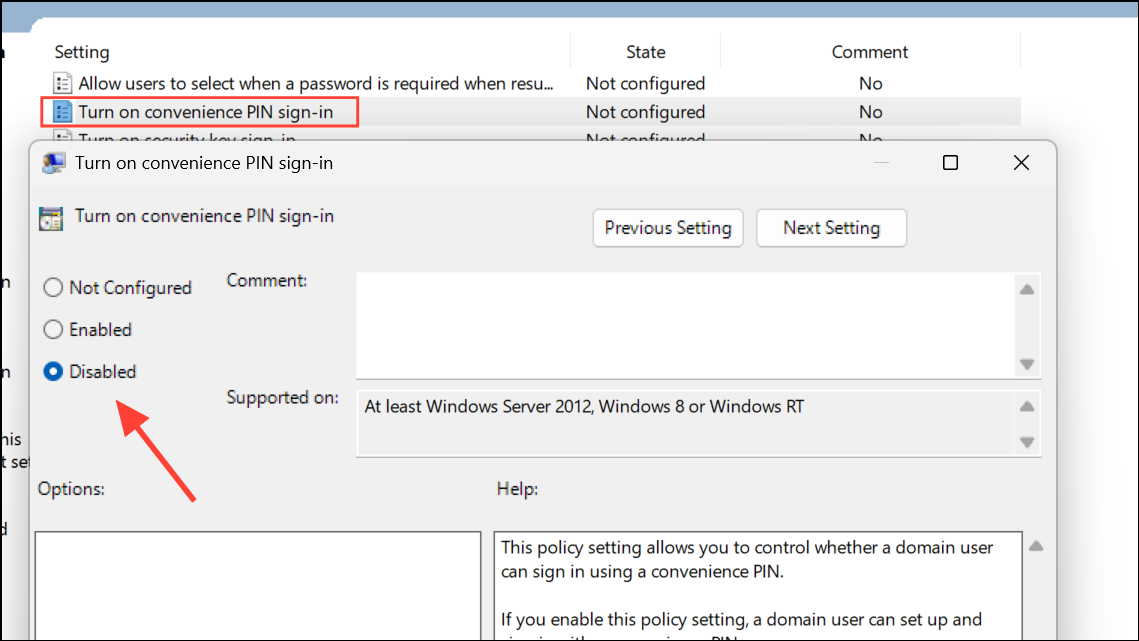
Step 3: In the right pane, double-click Turn on convenience PIN sign-in (or Turn on PIN sign-in depending on your Windows version) and set it to Disabled. This prevents users from adding or using a PIN for sign-in.
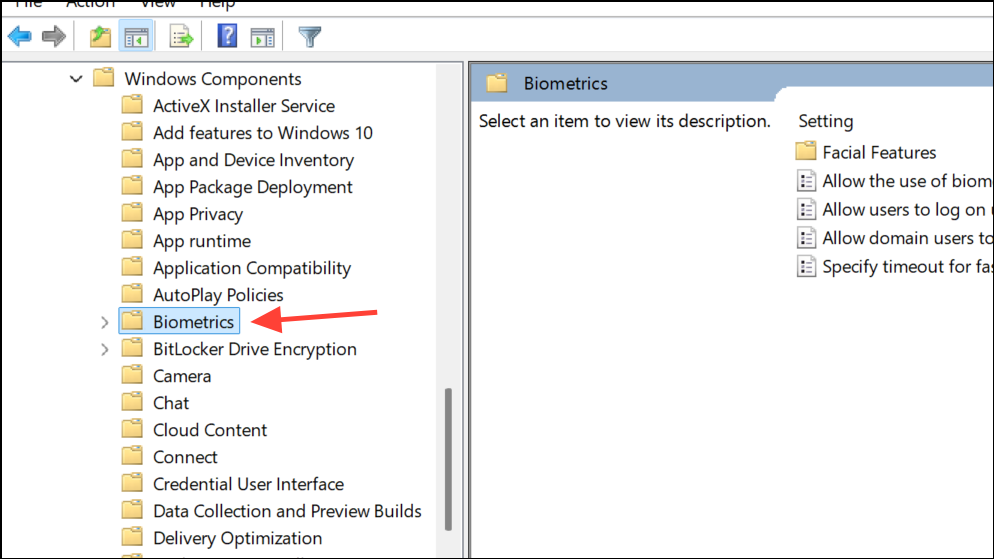
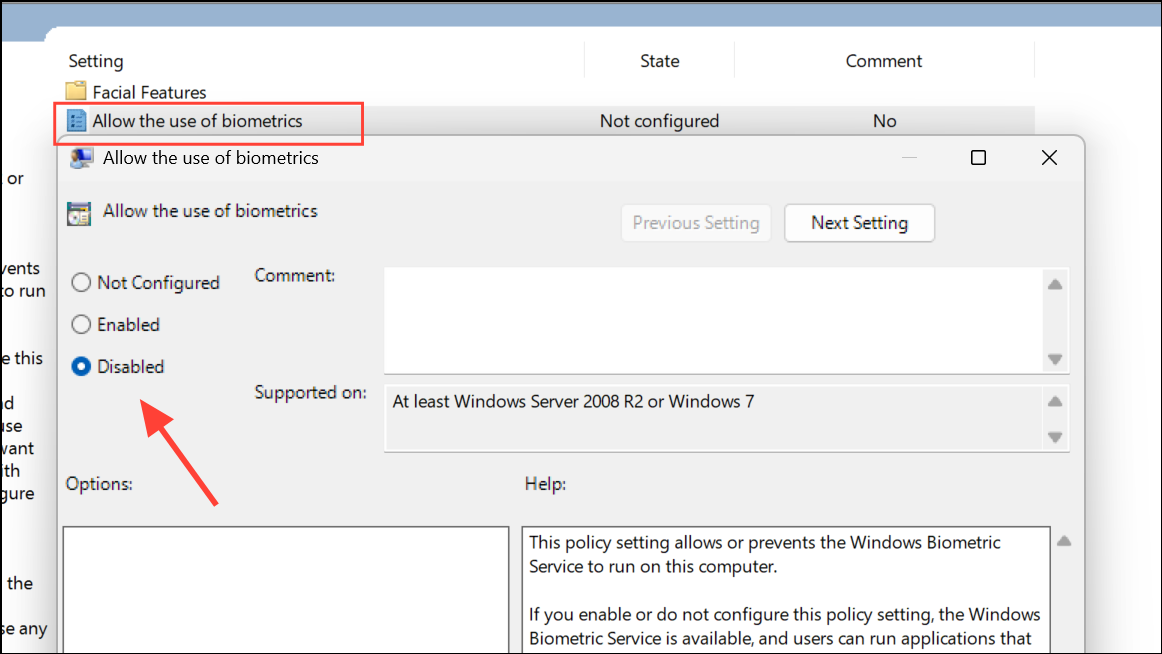
Step 4: To block biometric authentication, go to Computer Configuration > Administrative Templates > Windows Components > Biometrics.
Step 5: Double-click Allow the use of biometrics and set it to Disabled. This stops the system from asking users to set up fingerprint or facial recognition.
Step 6: Review other Windows Hello options in the same sections and disable them as needed. After making changes, close the Group Policy Editor and restart the computer to apply the new settings.
Disable Windows Hello Prompt via Registry Editor
For devices where Group Policy Editor is unavailable (such as Windows 11 Home), Registry edits can achieve similar results. Modifying registry keys can disable Windows Hello sign-in options system-wide. Editing the registry carries risk—incorrect changes can cause system instability. Always back up the registry before proceeding.
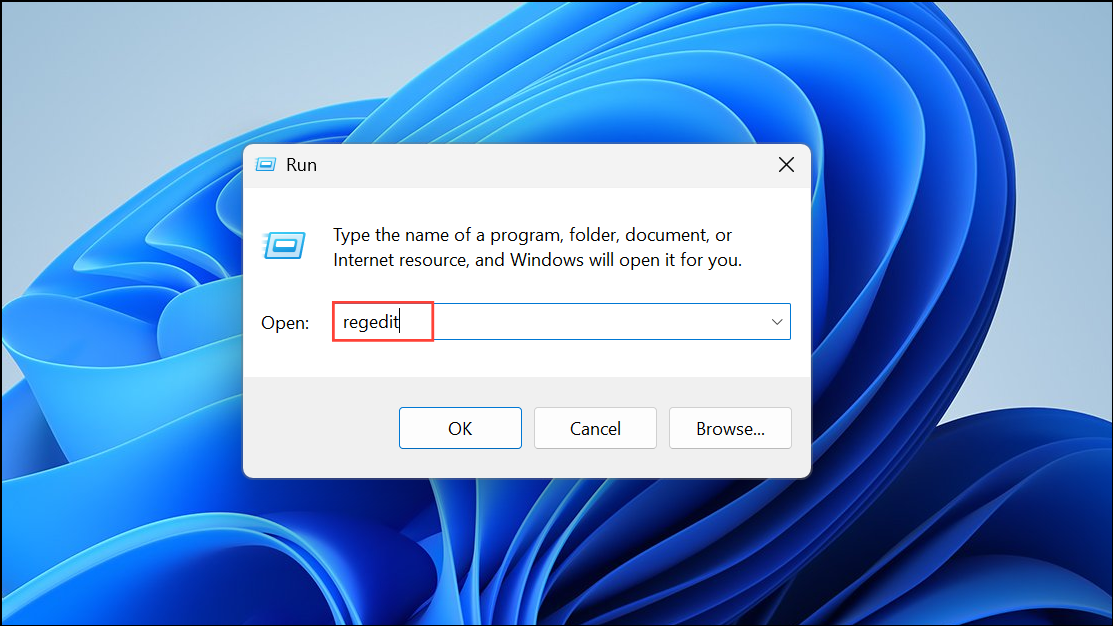
Step 1: Open the Run dialog with Windows + R, type regedit, and press Enter. If prompted by User Account Control, allow the Registry Editor to launch.
Step 2: Navigate to the following key:
HKEY_LOCAL_MACHINE\SOFTWARE\Microsoft\PolicyManager\default\Settings\AllowSignInOptions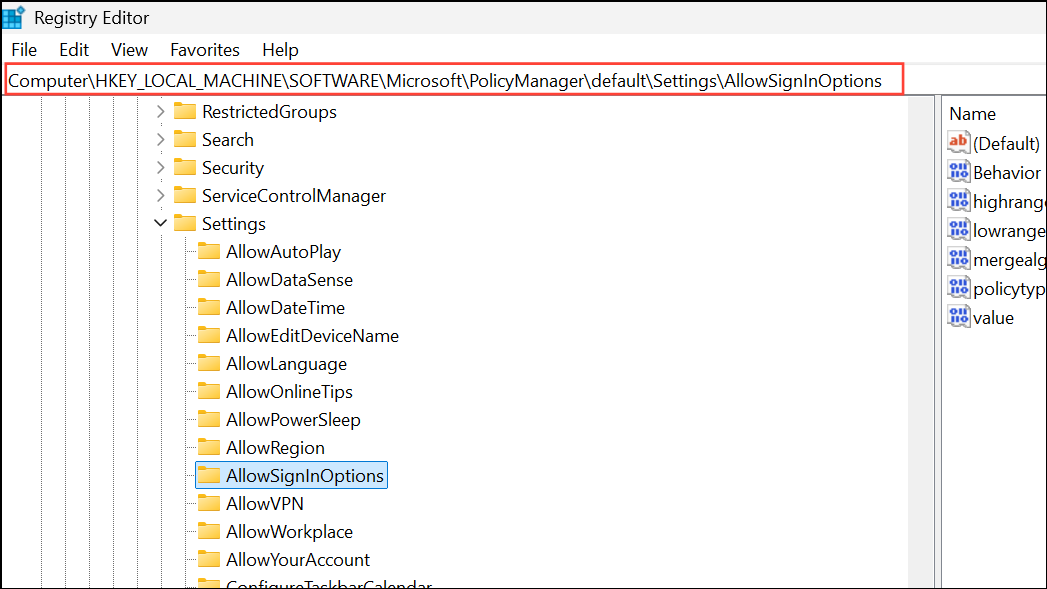
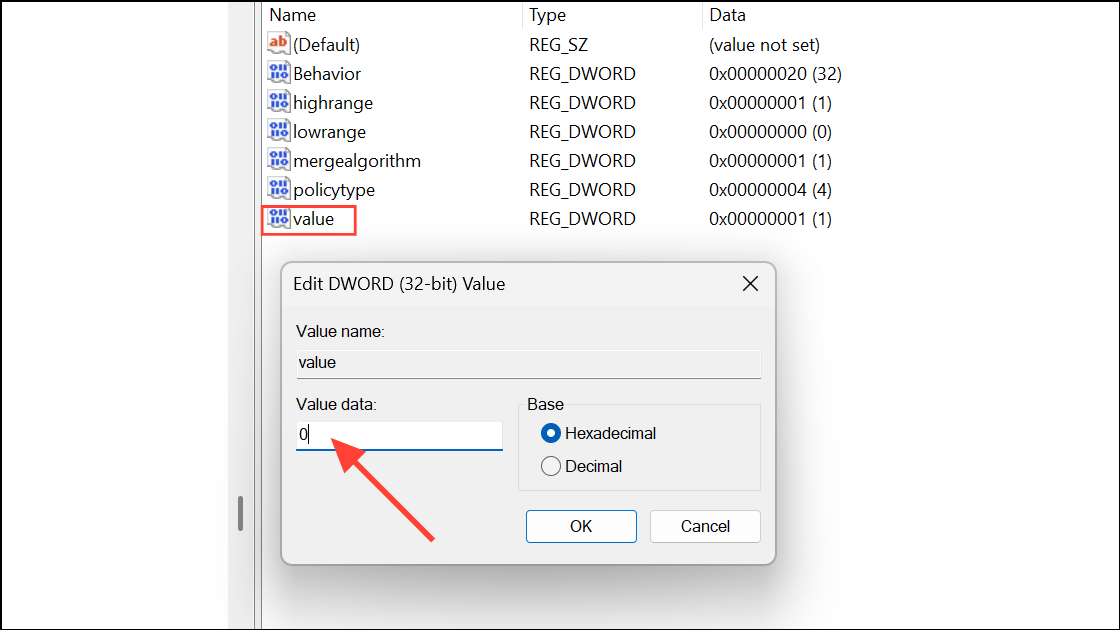
Step 3: In the right pane, locate the DWORD entry named value. Double-click it and set its data to 0. This disables Windows Hello sign-in options for all accounts on the device. To re-enable, set the value back to 1.
Step 4: Close the Registry Editor and restart the computer for the changes to take effect. If you do not see the AllowSignInOptions key, you may need to create it or use your device management tool to push the change.
Remove Windows Hello PIN and Disable Prompts via Account Settings
Windows 11 includes settings to remove the PIN and stop Hello sign-in prompts for individual users. This approach is suitable for personal devices or when only a few users need to opt out of Hello features.
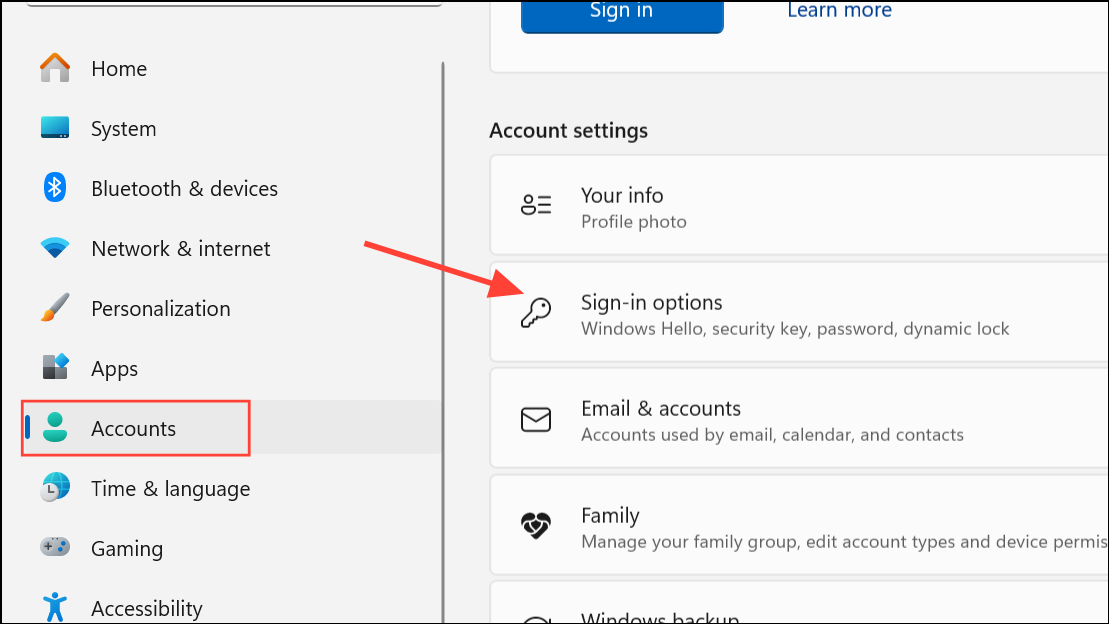
Step 1: Open Settings by right-clicking the Start menu and selecting Settings. Go to the Accounts section, then choose Sign-in options.
Step 2: Find the option labeled For improved security, only allow Windows Hello sign-in for Microsoft accounts on this device (Recommended) and toggle it off. This allows traditional password sign-in and disables mandatory Hello setup prompts.
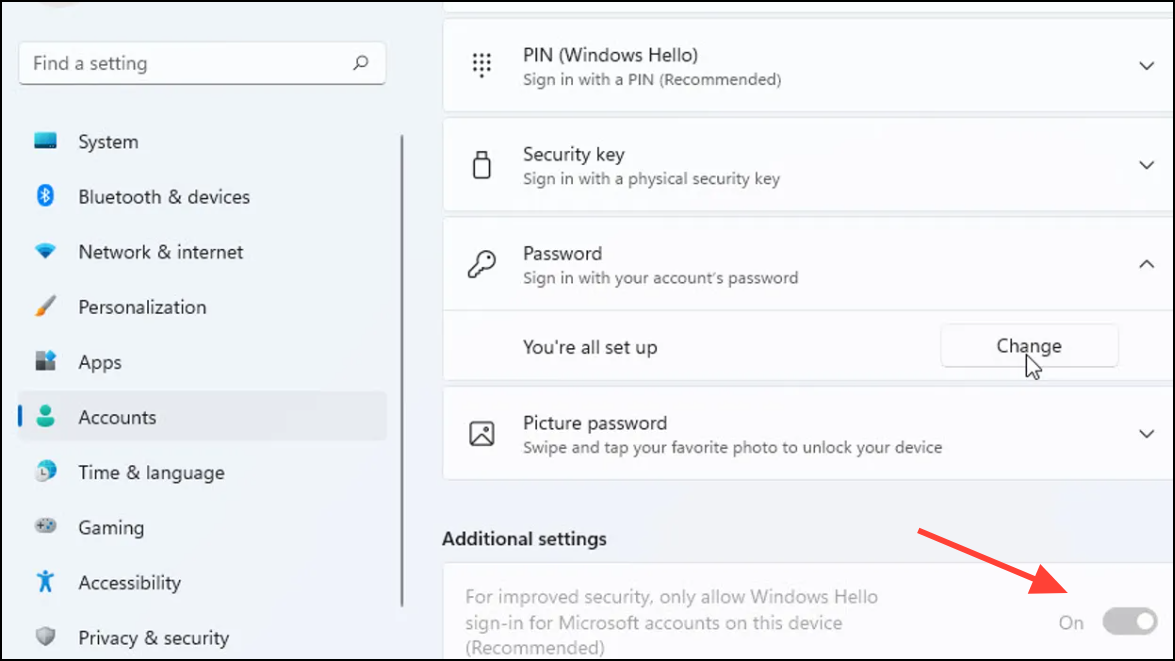
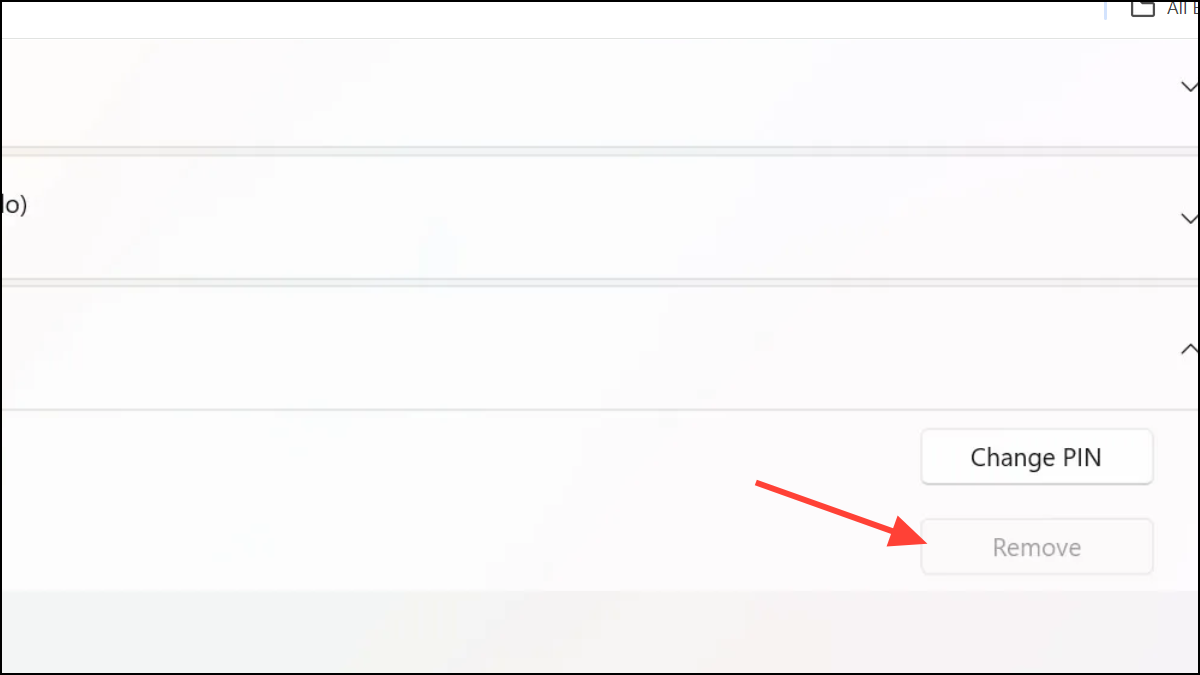
Step 3: To remove an existing PIN, expand the PIN (Windows Hello) section and click Remove. Confirm your account password to finalize removal. If you see an “I forgot my PIN” link, you can use it to reset or remove the PIN as well—follow the prompts and cancel the setup when asked to create a new PIN.
Step 4: If you use a Microsoft account with passwordless login enabled, you may need to turn off passwordless sign-in. In the Accounts settings, click Your info, then select Manage my account to open your Microsoft account in a browser. Under Security > Advanced security options, disable the Passwordless account setting.
Disable Windows Hello via PowerShell and Registry for AAD-Joined Devices
In environments where devices are Azure Active Directory (AAD) joined, disabling Windows Hello can be more complex, especially without Intune or local Active Directory. Registry settings may be overridden by tenant policies, but PowerShell can help in certain cases.
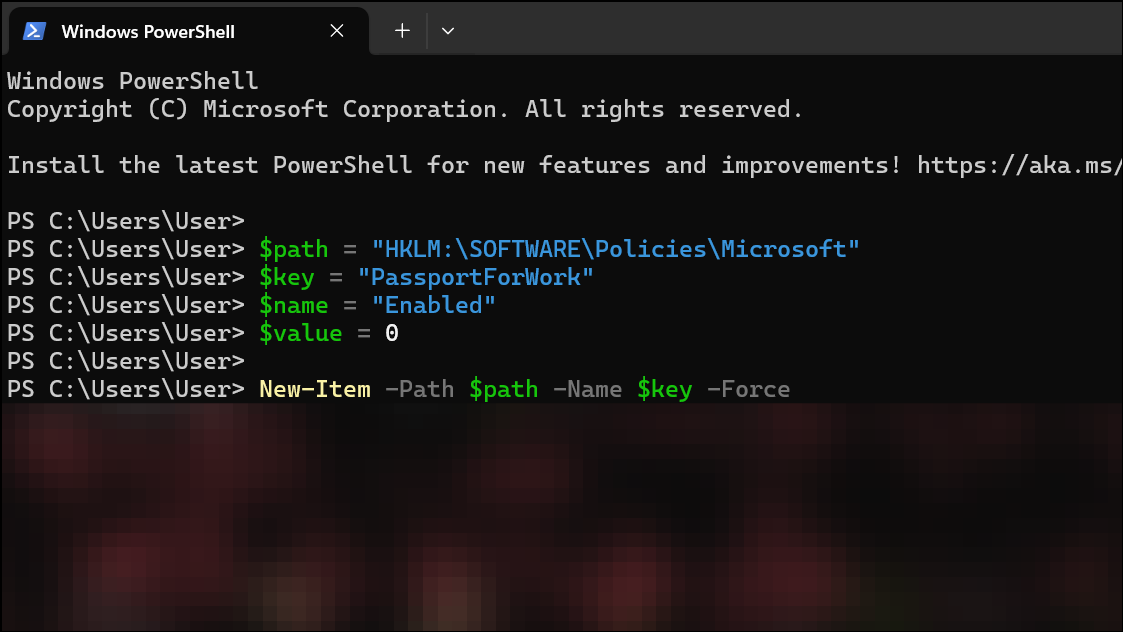
Step 1: Open PowerShell as an administrator. Use the following script to disable Windows Hello for Business:
$path = "HKLM:\SOFTWARE\Policies\Microsoft"
$key = "PassportForWork"
$name = "Enabled"
$value = 0

New-Item -Path $path -Name $key -Force
New-ItemProperty -Path "$path\$key" -Name $name -Value $value -PropertyType DWORD -Force
This creates or updates the required policy key to disable Hello for Business on the local machine.
Step 2: To remove existing PINs, delete the NGC folder containing PIN data:
$passportFolder = "C:\Windows\ServiceProfiles\LocalService\AppData\Local\Microsoft\Ngc"
if (Test-Path -Path $passportFolder) {
    Takeown /f $passportFolder /r /d "Y"
    ICACLS $passportFolder /reset /T /C /L /Q
    Remove-Item -path $passportFolder -recurse -force
}
Disabling Windows Hello prompts on Windows 11 streamlines the sign-in process and avoids unnecessary setup requests. Choose the method that fits your environment—Group Policy for managed networks, registry tweaks for individual machines, or account settings for personal devices. Always test changes on a non-production system before rolling out organization-wide.