The new features in iOS 13 are tempting, and we wouldn’t be surprised if you (a casual user) took the pains to install the iOS 13 Beta on your iPhone or iPad. But of course, the teeny tiny bugs present in beta builds can be annoying and wanting to downgrade back to iOS 12 seems like a relief.
So here’s a step-by-step guide to downgrade from iOS 13 to iOS 12. You can’t do this without a computer and iTunes, so make sure you have access to a computer for downgrading your iPhone.
Note: You cannot restore an iCloud or iTunes backup from iOS 13 on an iOS 12 running device. If you downgrade to iOS 12, you’ll either have to use a previous backup that you took on iOS 12 before upgrading to iOS 13 or set up your iPhone as new.
Follow the instructions below to downgrade your iPhone from iOS 13 to iOS 12. You must have a computer with the latest version of iTunes installed on it.
- Open iTunes on your computer
Launch iTunes on your computer. If you don’t have it installed, head over to iTunes Download page to download/install it.

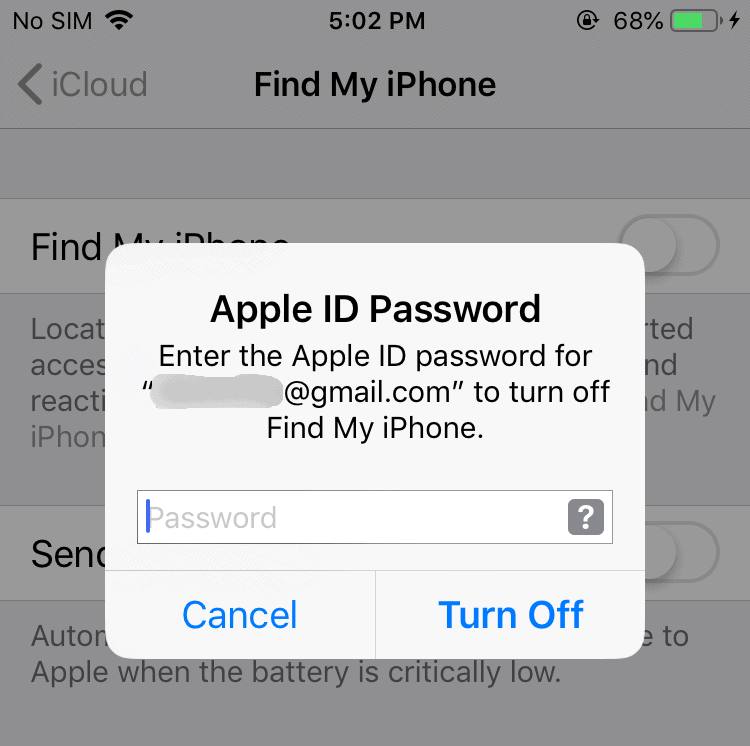
- Turn off ‘Find My iPhone’
Go to Settings » tap your Name (Apple ID) » select iCloud » scroll down a little and select Find My iPhone, then turn off the toggle switch for the service on the screen. You may get a prompt to insert your Apple ID Password, do it and hit the Turn Off button.
- Connect your iPhone to the computer
Get the USB to Lightning cable that came with your iPhone, and use it to connect your device to the computer.
- Allow your computer to access files on your iPhone
If a “Trust This Computer” pop-up shows on your device’ screen, select “Trust”.
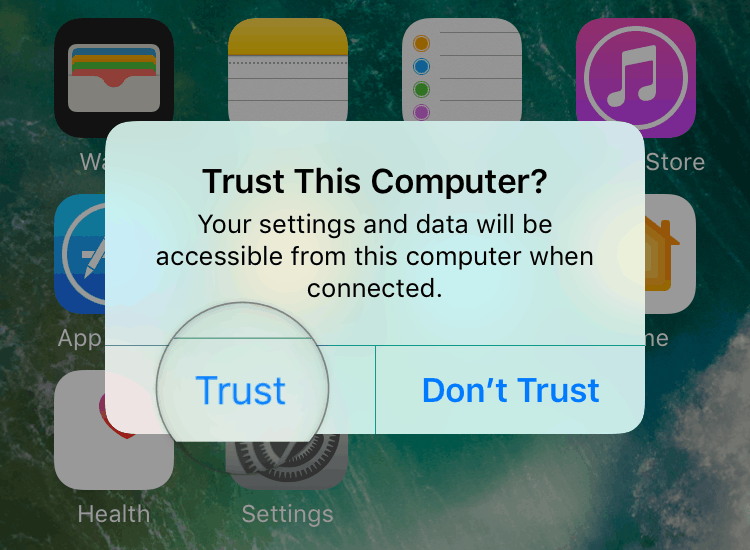
You may also get a “Do you want to allow this computer…” pop-up from iTunes, select Continue to let your computer read/write files to your iOS device.
└ If you’re connecting your iPhone to iTunes for the first time. You may get the “Welcome to Your New iPhone” screen, select “Set up as new iPhone” and click on the “Continue” button. - Click ‘Restore iPhone’ button
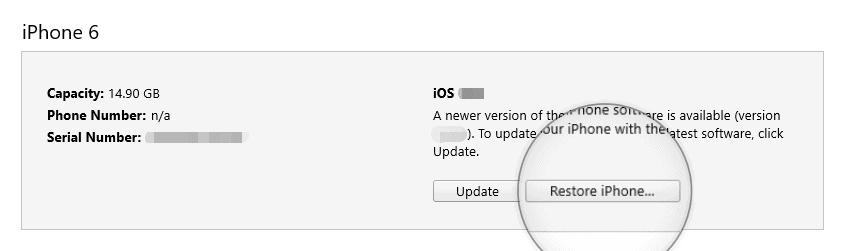
Once your device appears on the iTunes screen, click the Restore iPhone button placed right below the section where it mentions your iOS version.
- Backup your iPhone
You’ll be prompted to create a backup of your iPhone before performing a restore. Click Back Up if wish to take a back up, or click Don’t Back Up is want to proceed without a backup since (obviously) you won’t be able to restore after downgrading to iOS 12.
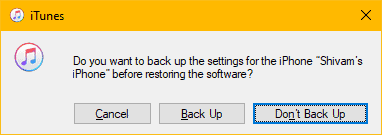
Also, if you have a previous backup from iOS 12 on your computer, make sure you archive it because taking an iOS 13 backup will overwrite it. - Confirm Restoring your iPhone
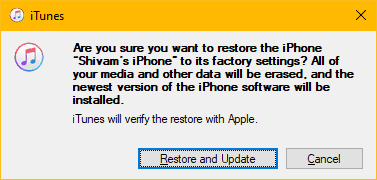
iTunes will give you a confirmation dialogue for restoring your iPhone. Make sure you click Restore and update or the Restore button, whichever is shown.
- Keep your iPhone connected to the computer
iTunes will now download and install the latest iOS 12 restore image for your iPhone. Keep it connected to the computer until the restore process is finished.
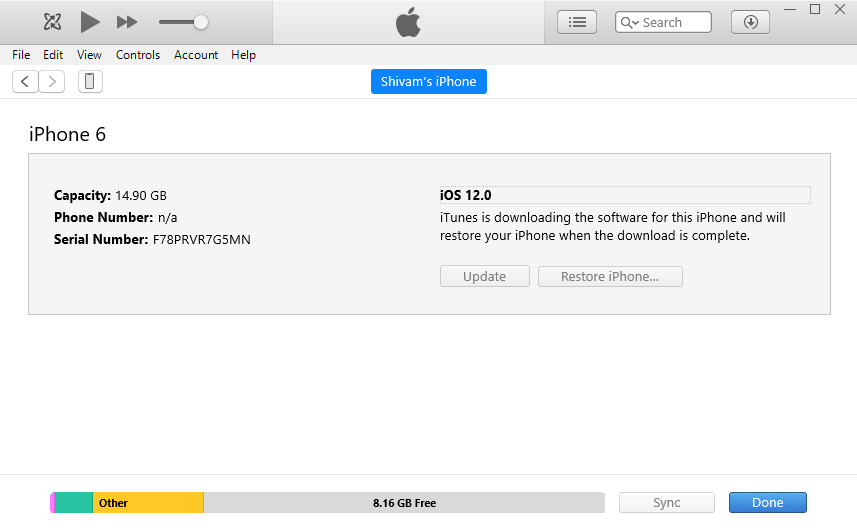
If you’ve got a passcode on your iPhone, you may get a prompt on the device to enter the passcode at the time of installing iOS 12 restore image. Keep an eye on it.
That’s all. Have fun with your iPhone running on a stable iOS 12 build now.


