
Microsoft Defender SmartScreen protects Windows 11 systems by checking apps, files, and websites against a cloud-based threat database. This security feature blocks suspicious downloads and warns about potentially harmful content, but it can also flag trusted files or interfere with certain workflows. Adjusting SmartScreen settings gives you more control over how Windows 11 manages these security checks.
Enable or Disable SmartScreen Using Windows Security
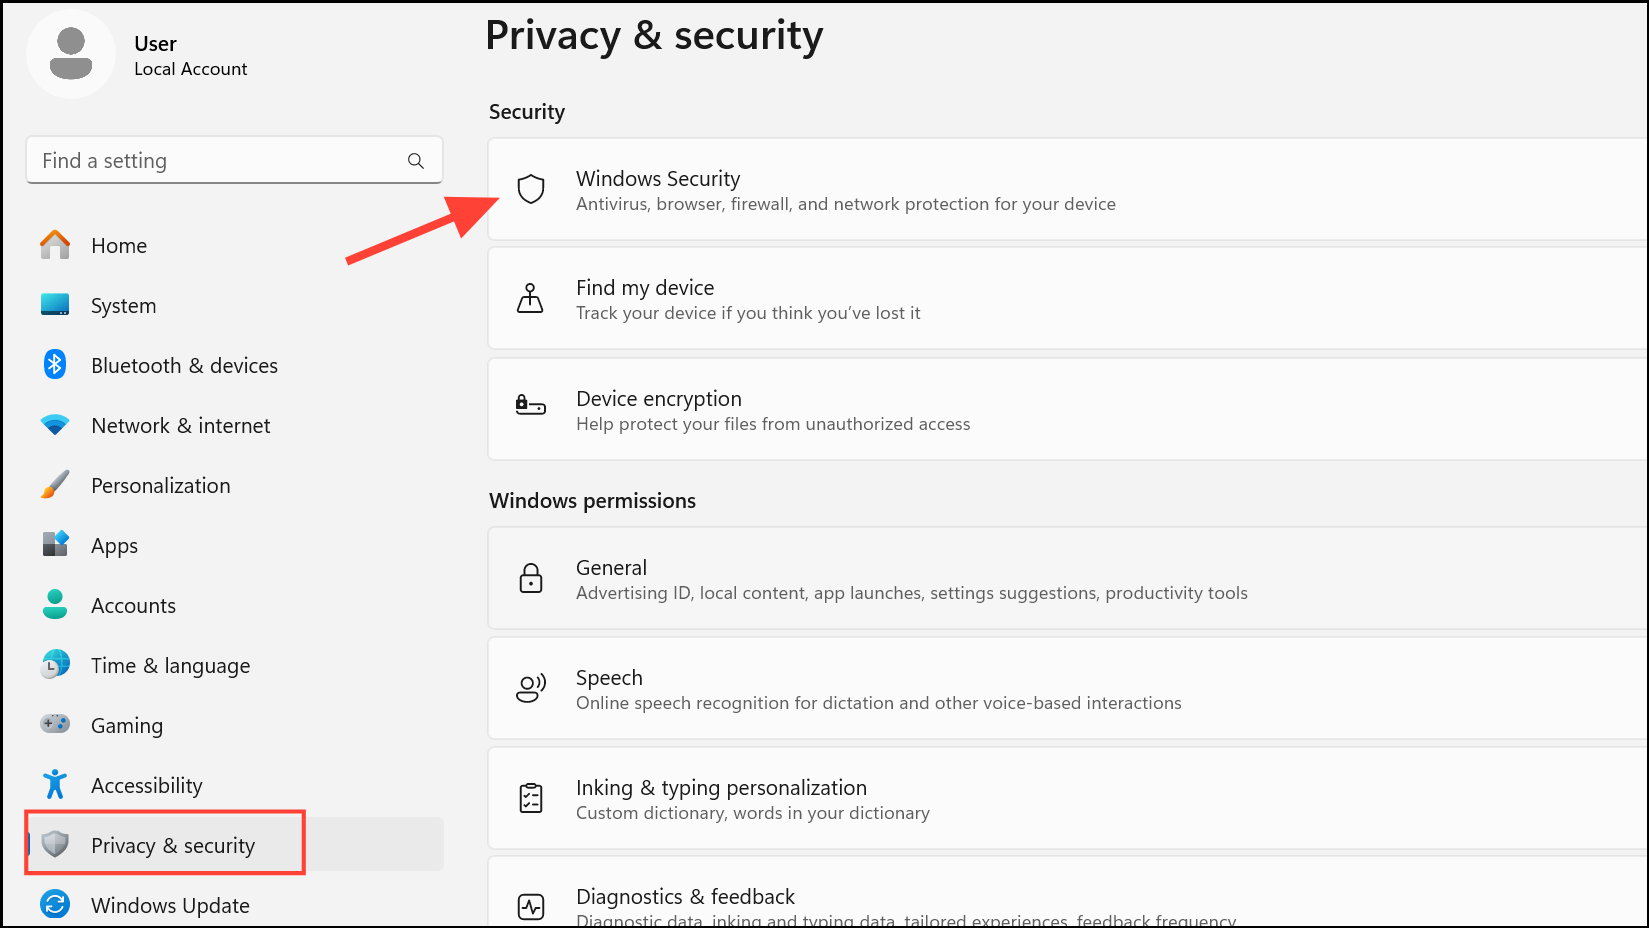
Step 1: Open the Windows Security dashboard by pressing Windows + I to launch Settings. Navigate to Privacy & security, then select Windows Security.
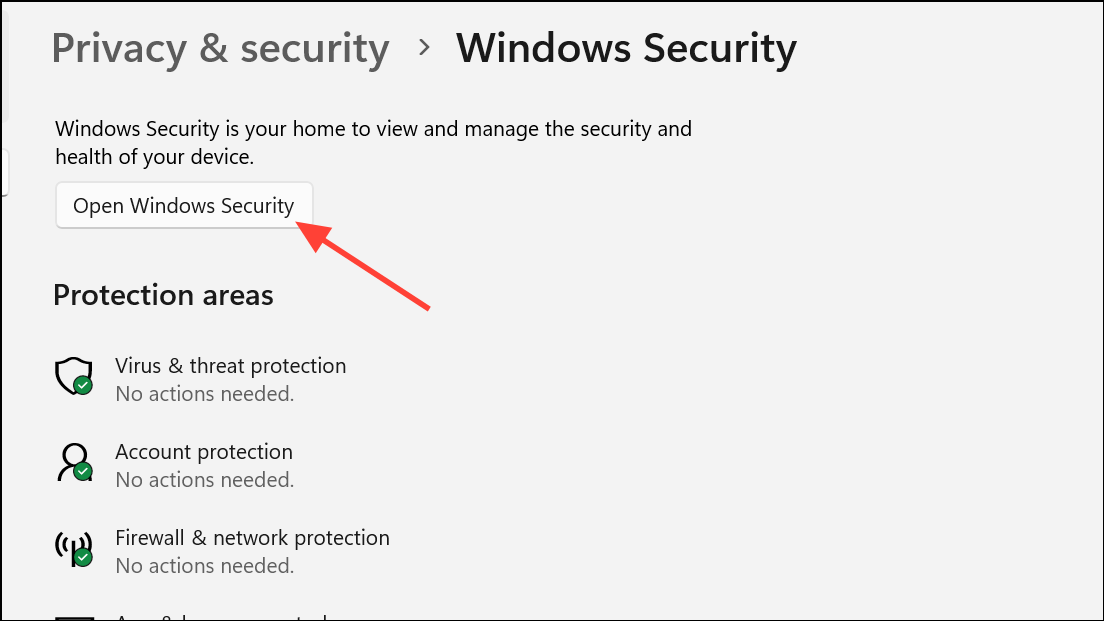
Step 2: Click Open Windows Security at the top of the page.
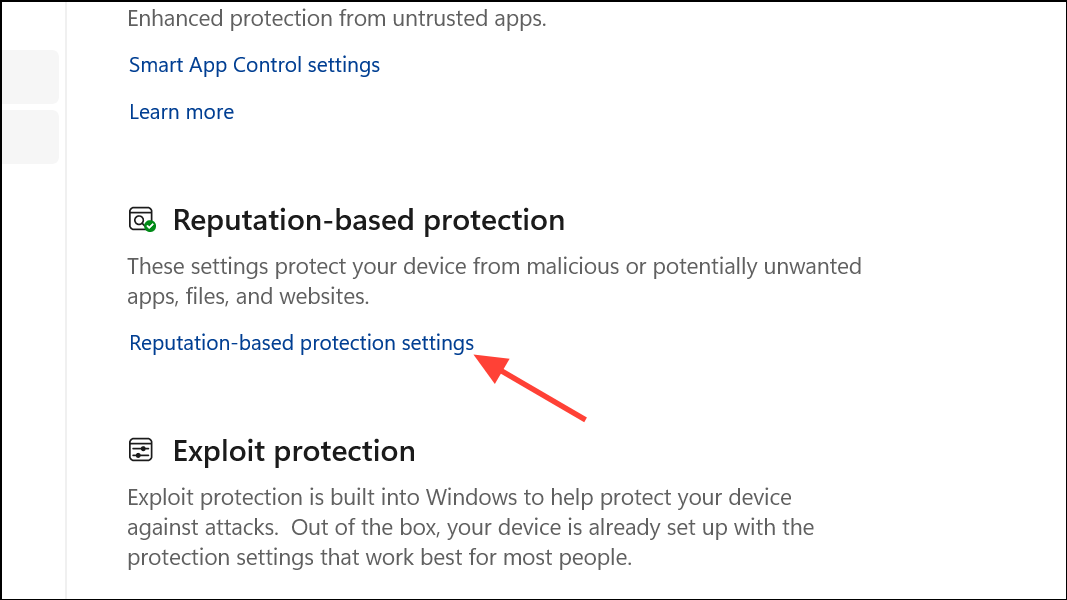
Step 3: In the Windows Security window, click App & browser control in the left-hand menu. Under the Reputation-based protection section, select Reputation-based protection settings.
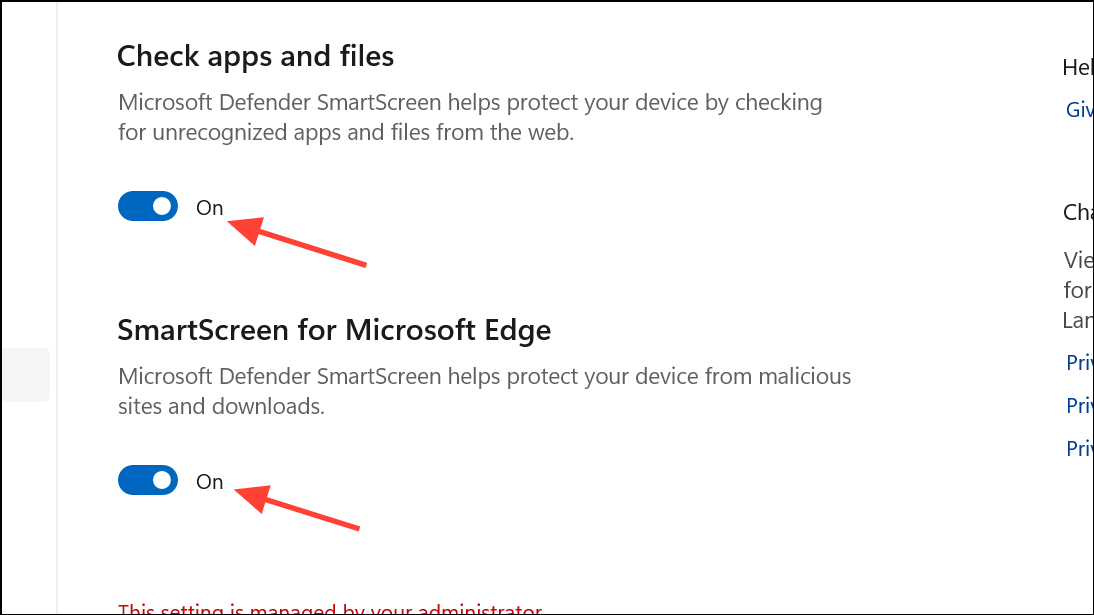
Step 4: You will see several SmartScreen options, each controlling a different aspect of protection:
- Check apps and files: Screens files and apps downloaded from the web or external sources.
- SmartScreen for Microsoft Edge: Monitors websites and downloads within the Edge browser.
- Potentially unwanted app blocking: Blocks software known to cause unwanted behavior.
- SmartScreen for Microsoft Store apps: Checks apps downloaded from the Microsoft Store.
Toggle each filter on or off according to your preference. Disabling these settings removes the corresponding checks, which can speed up downloads or installations but reduces protection against threats.
Enable or Disable SmartScreen Using Group Policy Editor
Group Policy Editor allows advanced users or system administrators to centrally manage SmartScreen settings, which is especially useful for multiple devices or organizational environments. This tool is available only on Windows 11 Pro, Enterprise, and Education editions.
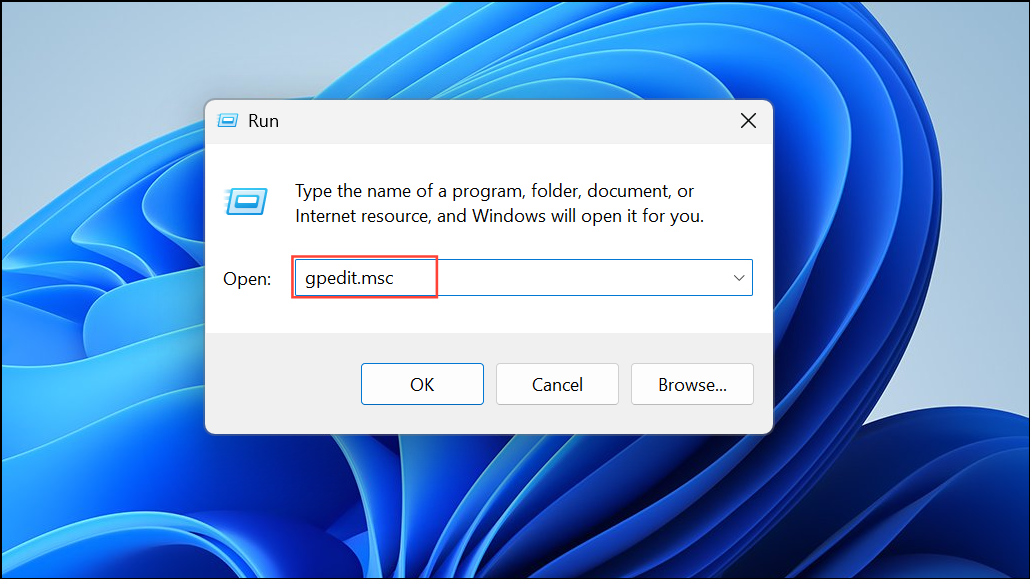
Step 1: Press Windows + R to open the Run dialog, then type gpedit.msc and press Enter to launch the Group Policy Editor.
Step 2: In the navigation pane, expand the following path:
Computer Configuration > Administrative Templates > Windows Components > File Explorer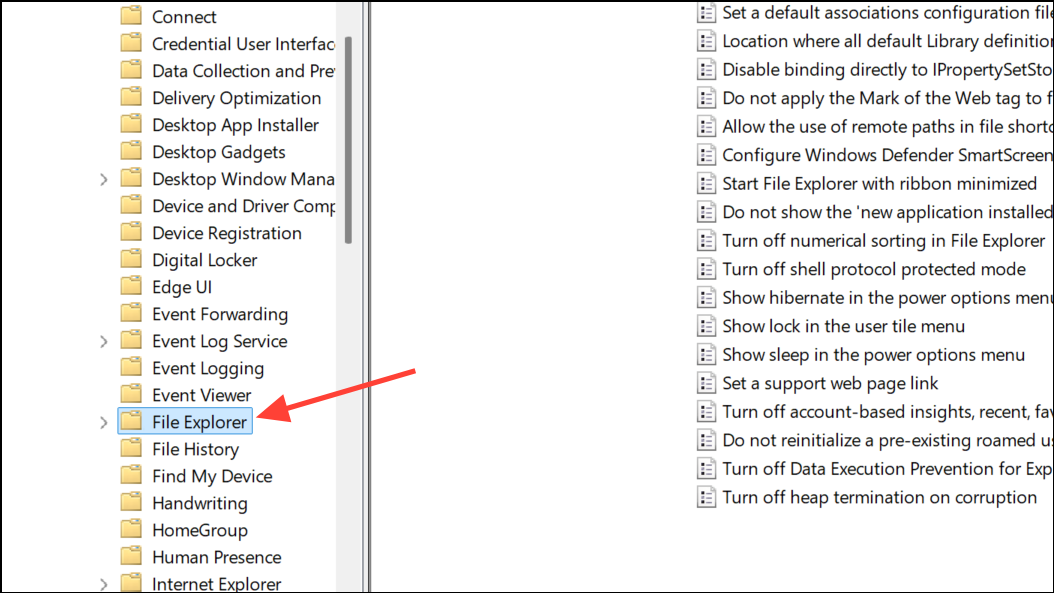
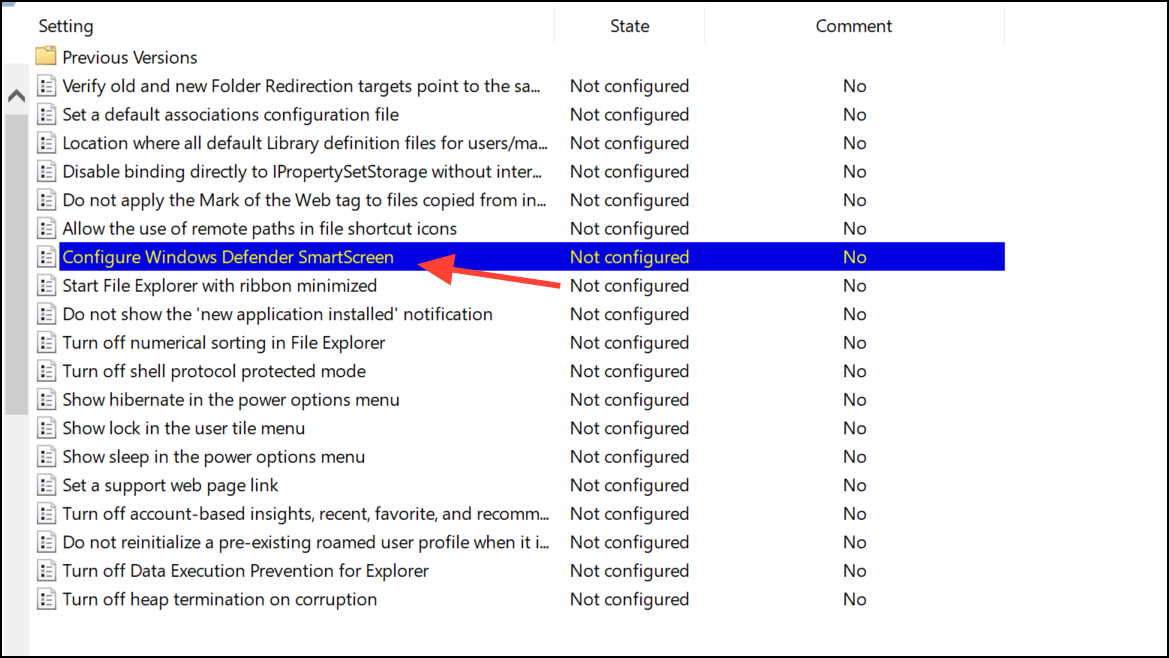
Step 3: Locate and double-click Configure Windows Defender SmartScreen in the right pane.
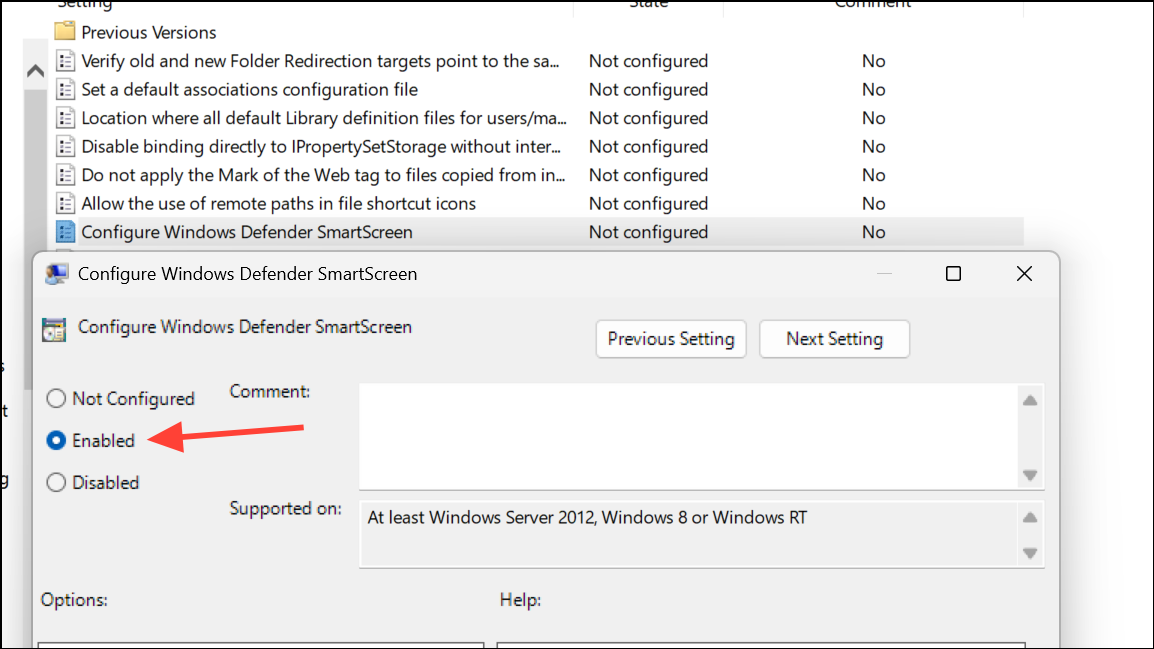
Step 4: In the policy window, select Enabled to turn SmartScreen on, Disabled to turn it off, or Not Configured to leave it at the system default. Click Apply and then OK to save your changes. Restart your computer for the new policy to take effect.
For organizations, this approach standardizes security settings across all managed PCs and prevents users from changing them individually.
Enable or Disable SmartScreen Using Registry Editor
Registry Editor offers granular control over SmartScreen settings, especially when other tools are unavailable. Modifying the registry can impact system stability, so create a restore point and back up your registry before making changes.
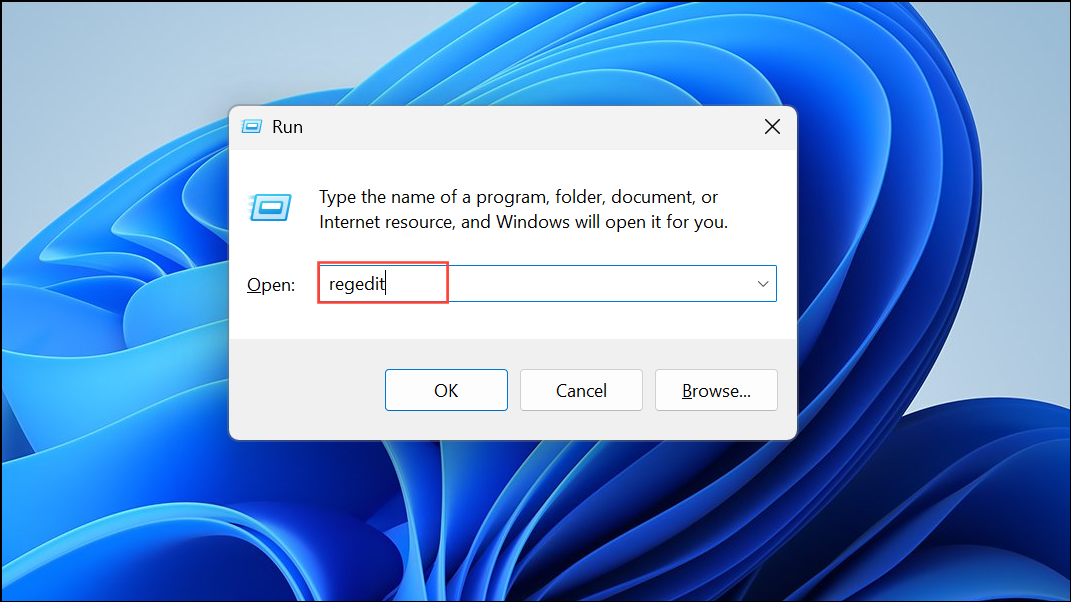
Step 1: Press Windows + R, type regedit, and press Enter. Approve the User Account Control prompt to open Registry Editor.
Step 2: In the Registry Editor, navigate to:
HKEY_LOCAL_MACHINE\SOFTWARE\Policies\Microsoft\Windows\System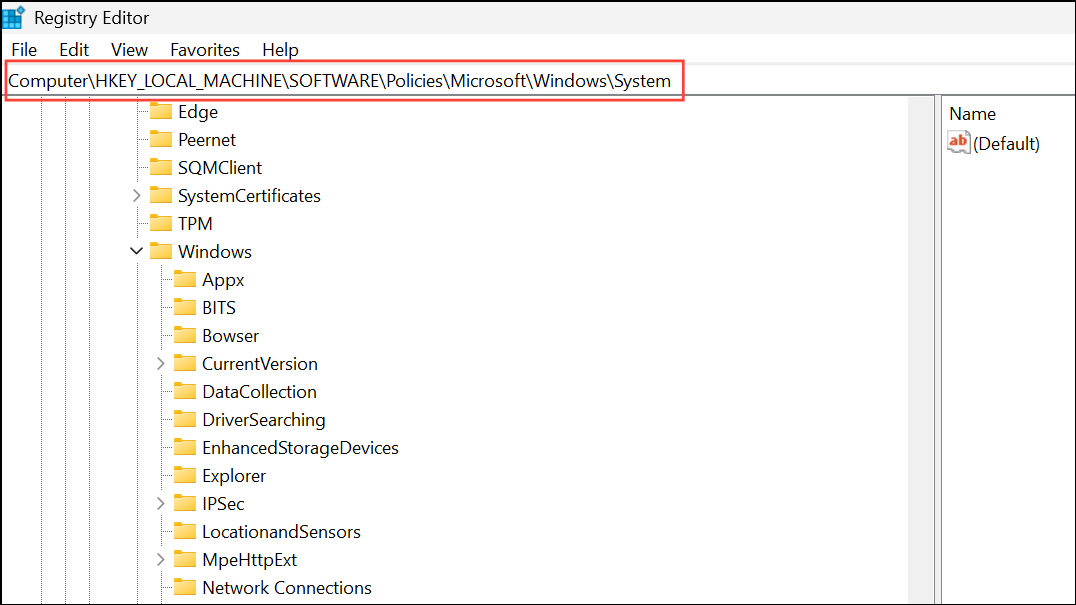
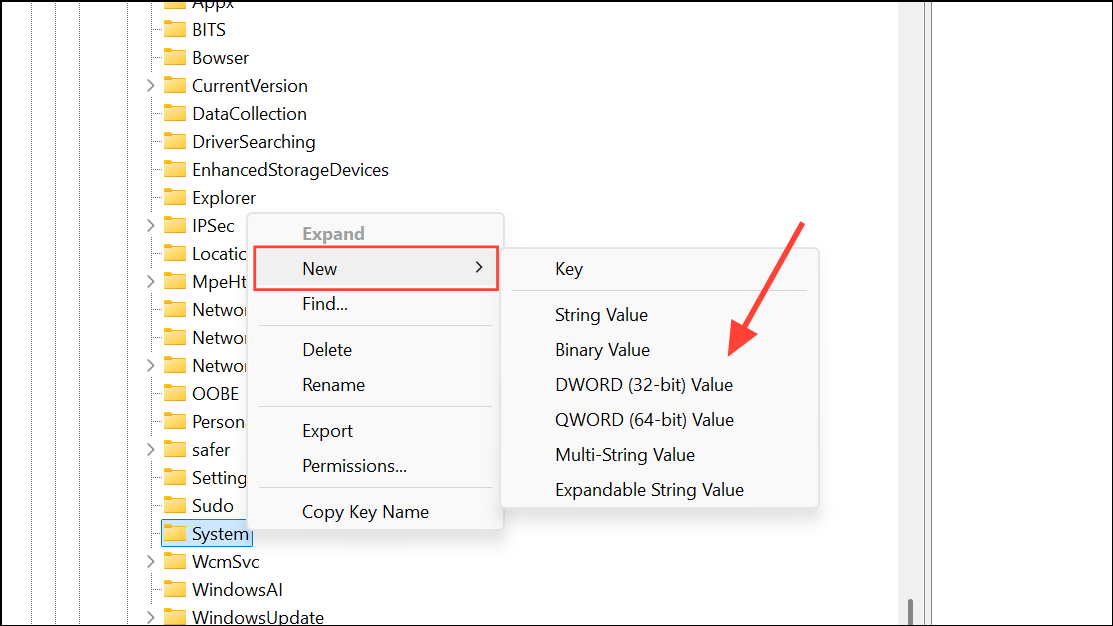
Step 3: Right-click the System key in the left pane, select New > DWORD (32-bit) Value, and name the new value EnableSmartScreen.
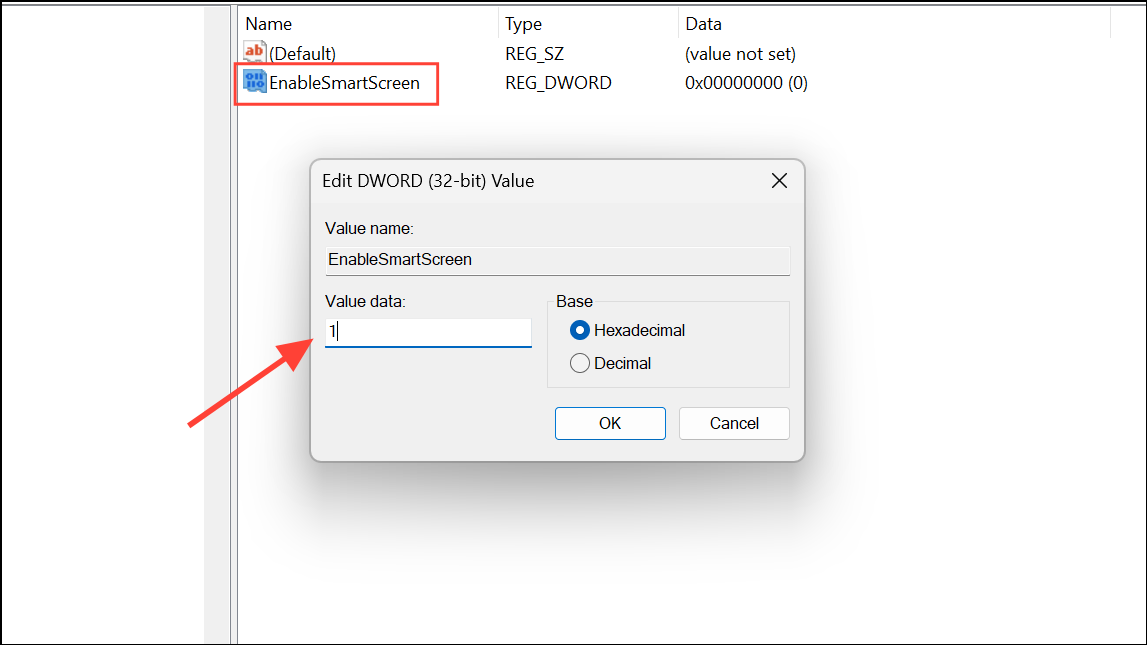
Step 4: Double-click EnableSmartScreen. Set the value data to 1 to enable SmartScreen or 0 to disable it. Click OK to save.
Step 5: Close Registry Editor and restart your computer for the changes to take effect.
To revert or remove this setting, delete the EnableSmartScreen value from the same registry location and restart your PC.
Adjusting SmartScreen in Microsoft Edge
SmartScreen is also integrated with Microsoft Edge. To change its settings specifically for Edge:
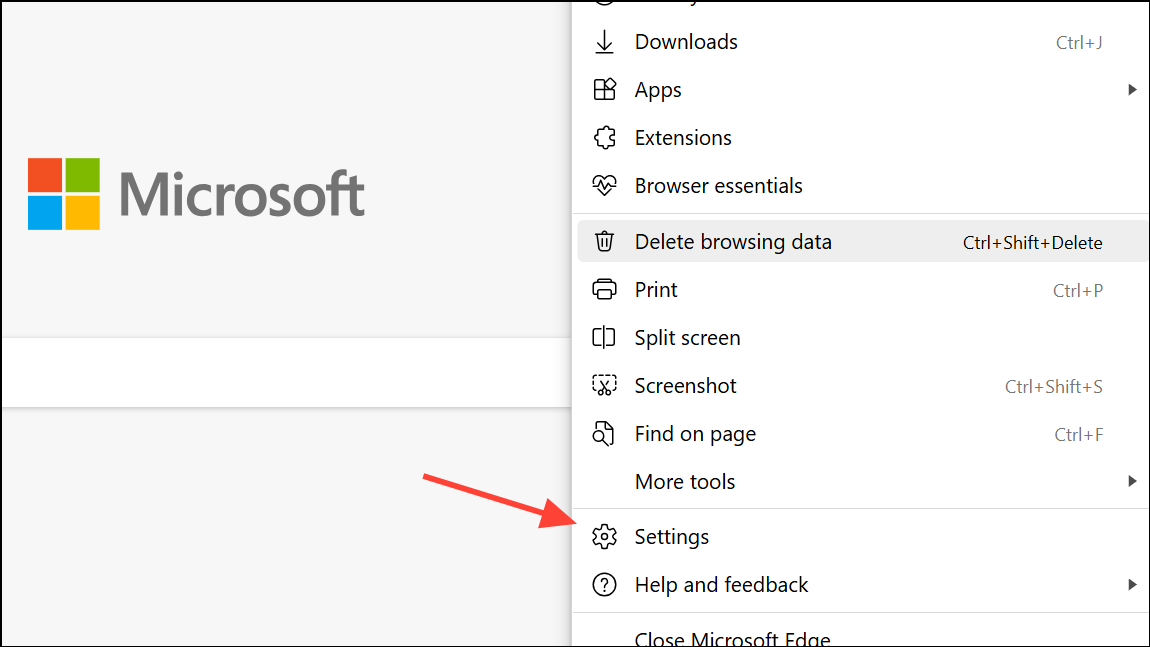
Step 1: Open Microsoft Edge and click the three-dot menu in the upper right corner. Select Settings.
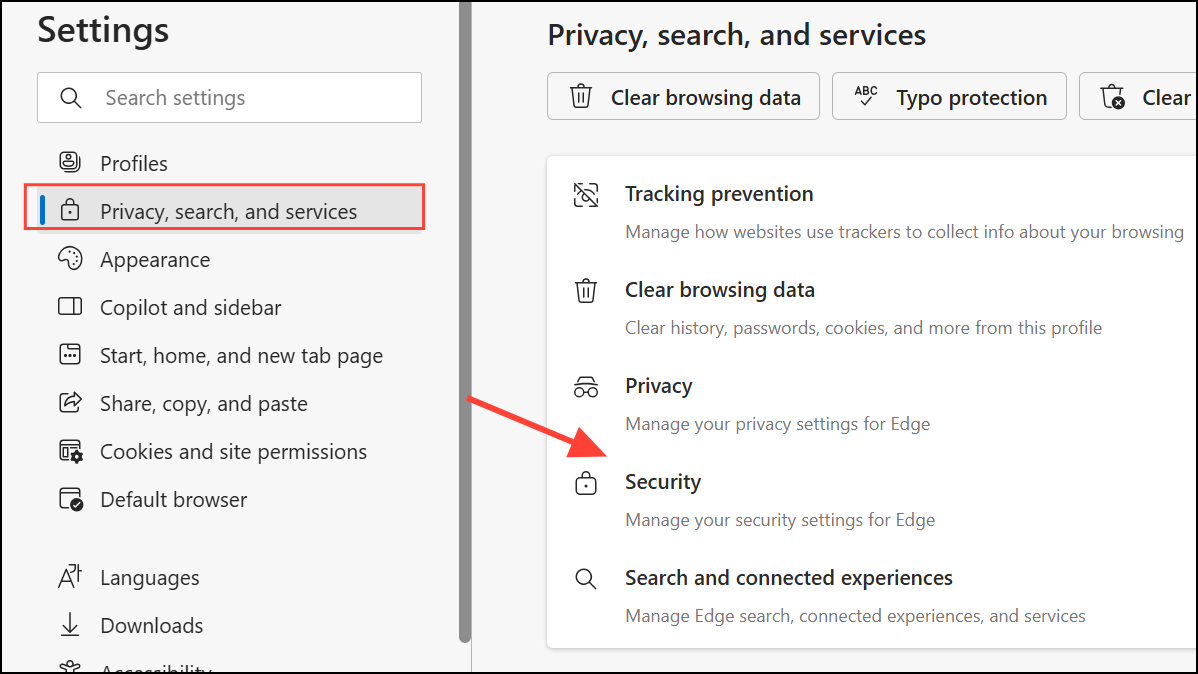
Step 2: In the left-hand menu, click Privacy, search, and services. Scroll down to the Security section.
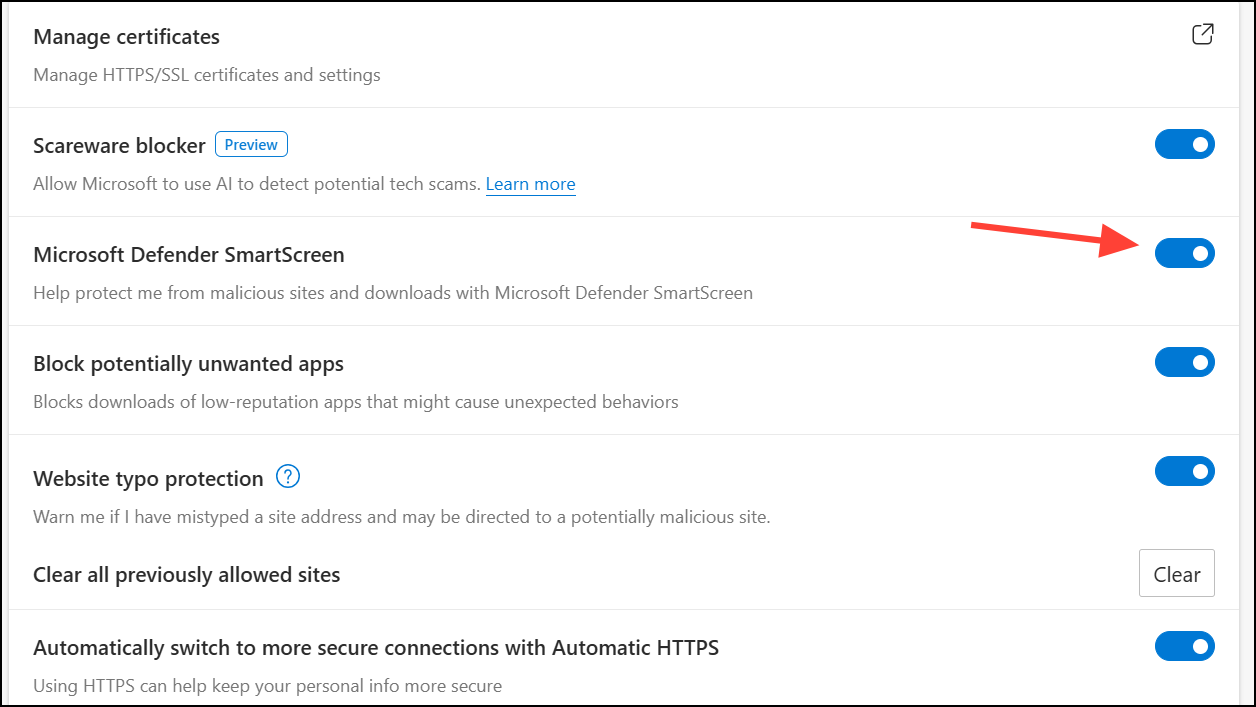
Step 3: Toggle Microsoft Defender SmartScreen on or off. If you disable it, the browser will no longer block suspicious websites or downloads, but you may need to manually re-enable the Block potentially unwanted apps feature if you turn SmartScreen back on.
Turning SmartScreen off can speed up installations or resolve issues with trusted files being blocked, but it also increases exposure to malware and phishing attacks. Always re-enable SmartScreen after completing sensitive tasks, and keep your system updated for maximum security.