
Startup applications can delay boot times and consume system resources, directly affecting how quickly your device is ready for use. Disabling unnecessary apps at startup improves boot speed and frees up memory, while enabling essential ones ensures your workflow is uninterrupted. Identifying which apps to enable or disable is the key to extracting maximum performance from your system.
Identify Startup Apps Impacting Performance
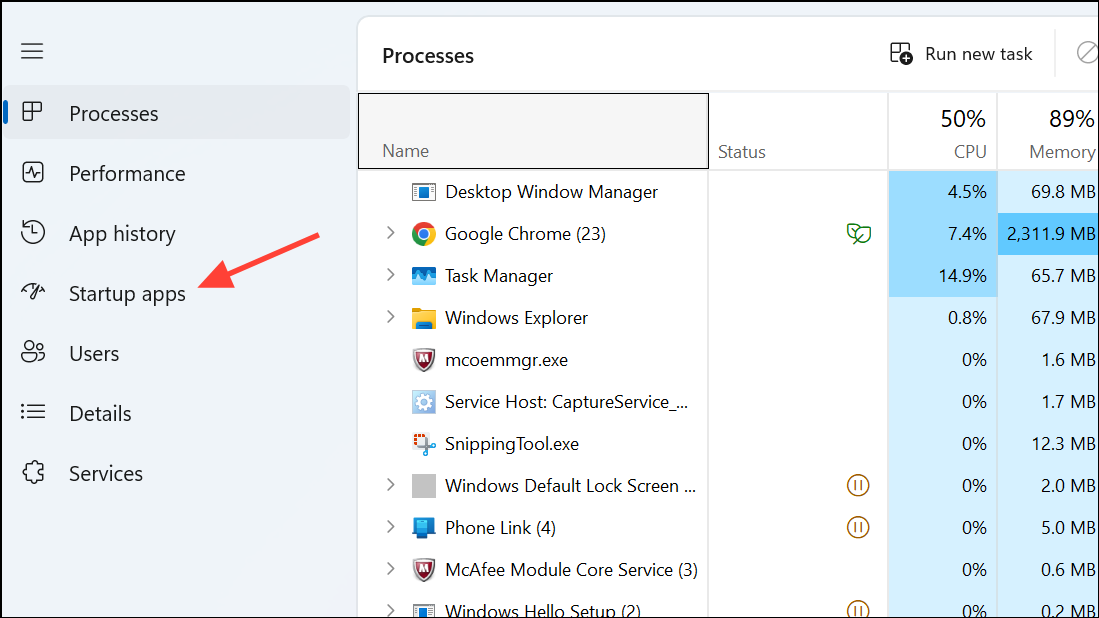
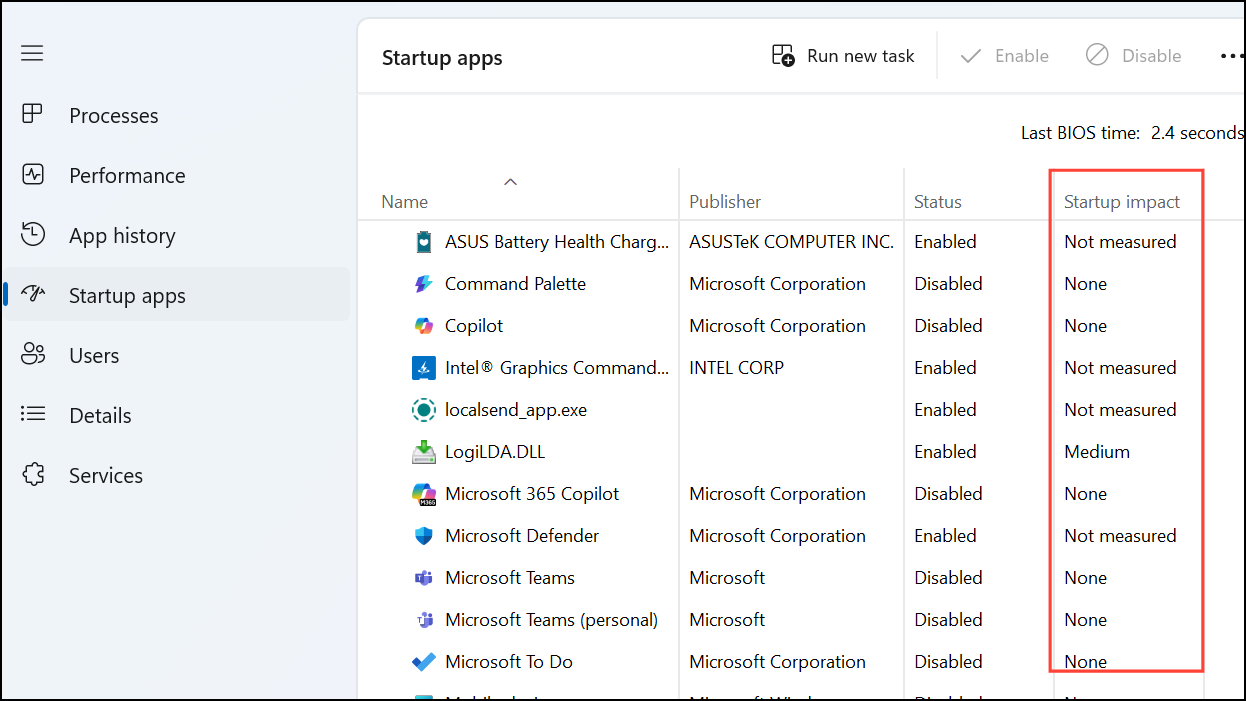
Step 1: Open the Task Manager by pressing Ctrl + Shift + Esc. In the Task Manager window, click the Startup apps tab. This tab displays all apps configured to run when your system boots, along with their startup impact ratings, measured as low, medium, or high. Apps with a high impact typically slow down boot times the most.
Step 2: Review the list of startup apps. Pay special attention to those with a high impact rating, as disabling these will usually yield the most noticeable speed improvements. Consider which apps you actively use and which ones are non-essential. For example, cloud sync tools, update notifiers, and chat clients often run at startup but may not be necessary for every user session.
Disable Non-Essential Startup Apps
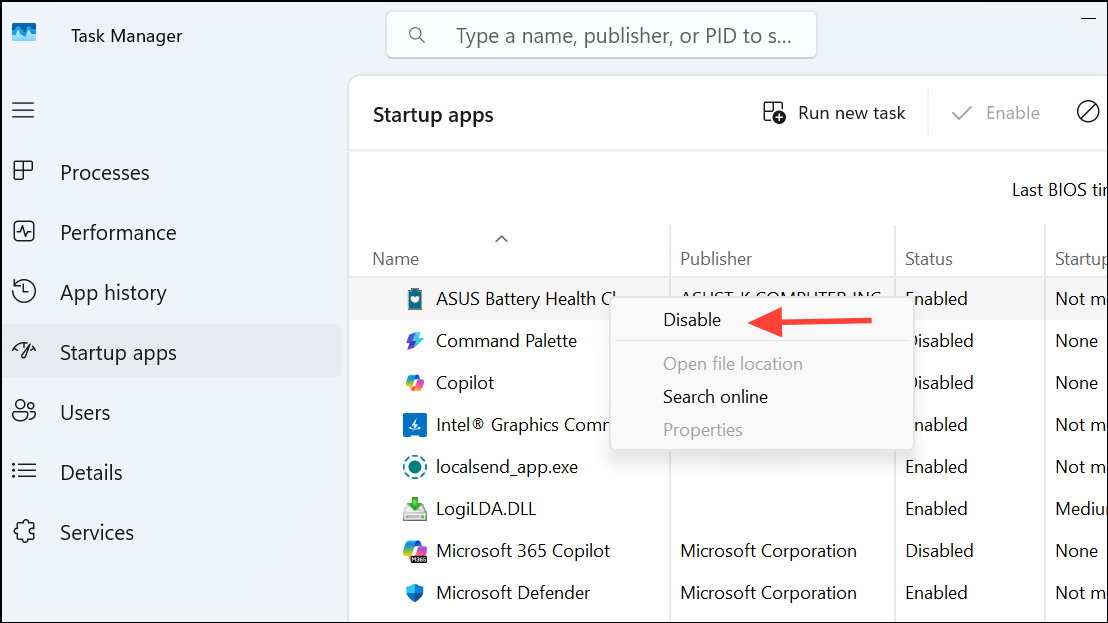
Step 1: In the Task Manager’s Startup tab, right-click an app you want to disable and select Disable. This prevents the app from launching automatically the next time you start your computer. Disabling non-essential apps reduces memory and CPU usage during boot, resulting in a faster and more responsive system.
Step 2: Repeat this process for each app you want to prevent from starting automatically. Common candidates for disabling include:
- Third-party update managers (Adobe, Java, etc.).
- Cloud storage clients, if you don’t need files synced immediately at boot.
- Gaming launchers (Steam, Epic Games), if you don’t plan to play games right away.
- Printer software utilities.
- Unused chat or video conferencing apps.
Always research any unfamiliar app before disabling it, as some may be critical for system operation or security, such as antivirus software or drivers.
Enable Critical Startup Apps
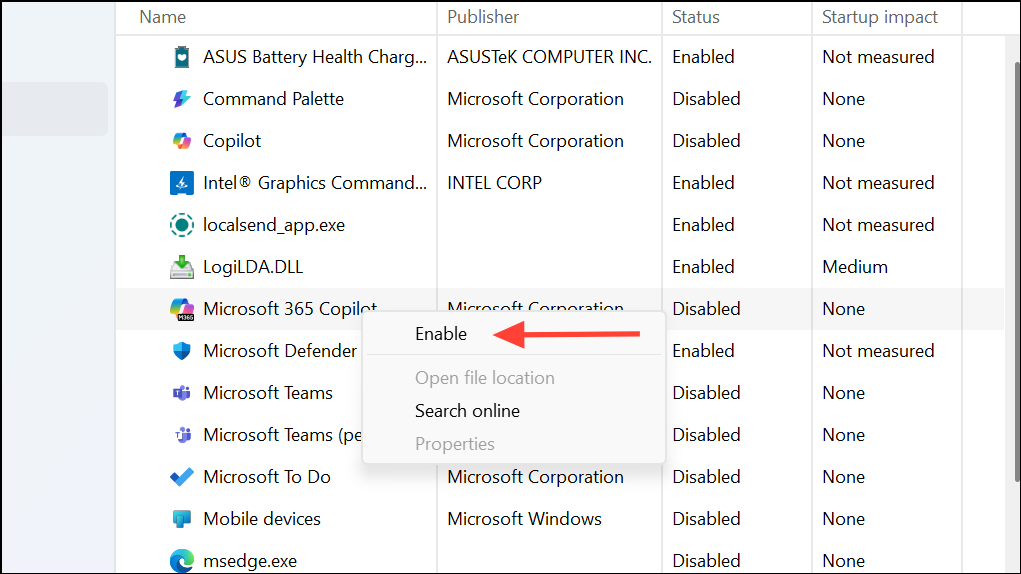
Step 1: In the same Startup tab, identify apps that are important for your workflow or system security. Right-click any essential app that’s currently disabled and select Enable. Examples of critical startup apps include:
- Antivirus or endpoint protection tools.
- System utilities required for hardware (touchpad, display, or audio drivers).
- Cloud storage clients, if you rely on immediate file syncing.
- Accessibility tools (screen readers, magnifiers).
Step 2: Only enable apps that you use frequently or that serve a security or hardware function. Keeping startup apps to a minimum streamlines boot time and reduces background processes, but disabling required apps can cause loss of functionality or expose your system to risks.
Alternative Methods for Managing Startup Apps
System Settings (Windows 10/11)
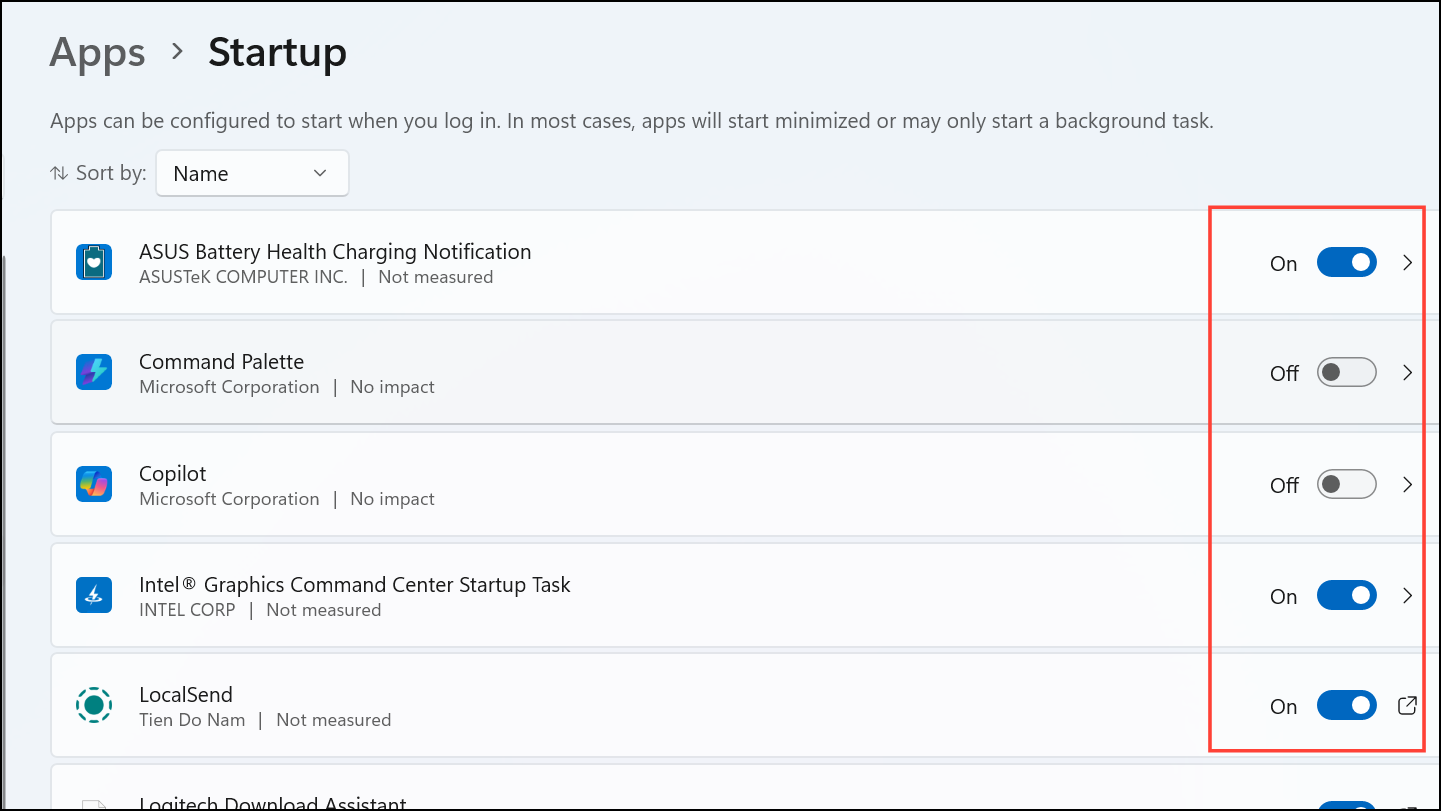
Step 1: Go to Settings > Apps > Startup.
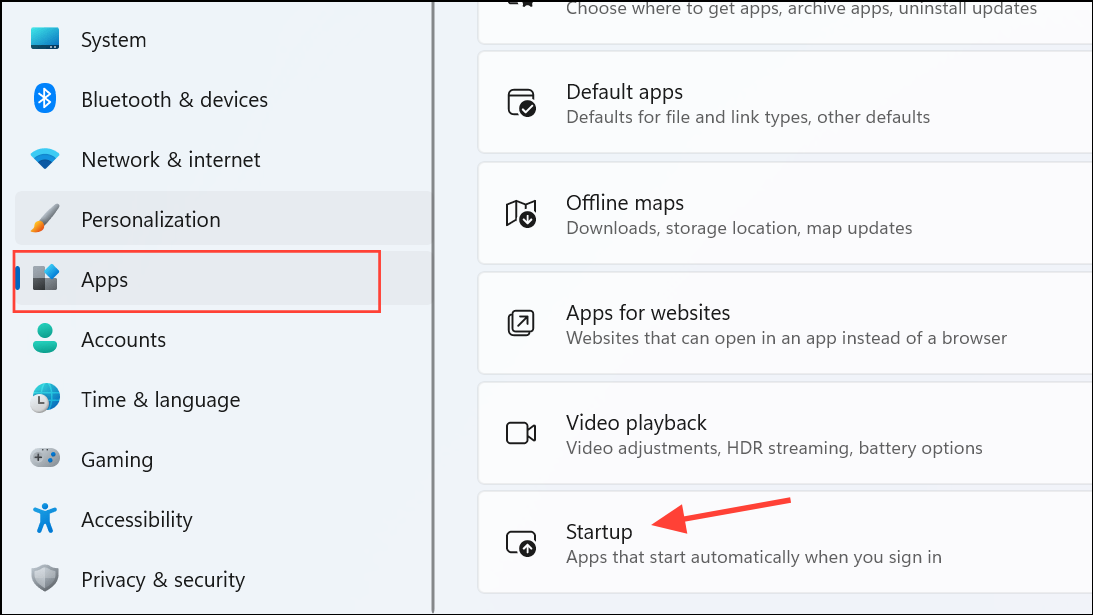
Step 2: Here, you’ll see a similar list of startup apps with toggle switches to enable or disable each one. This interface is user-friendly and provides brief descriptions for most apps.
Step 3: Use the toggles to turn off apps you don’t want to run at startup. Changes will take effect after your next reboot.
Using Third-Party Tools
Some advanced users prefer third-party utilities like Autoruns or CCleaner for more granular control. These tools can reveal hidden or system-level startup entries not visible in Task Manager or Settings, but they should be used with caution.
Step 1: Download and install a reputable tool such as Autoruns. Run the program as an administrator to see all startup entries.
Step 2: Carefully review each entry and uncheck those you recognize as unnecessary. Avoid disabling entries unless you’re certain about their function, as improper changes can cause system instability.
Regularly reviewing your startup apps helps keep your system running smoothly and quickly. Make it a habit to check for new additions after installing software, and only allow apps you truly need to run at startup.