
Receiving the "Windows can't stop your device because a program is still using it" message when trying to eject a USB or external drive in Windows 11 interrupts file transfers and puts your data at risk. This persistent error can occur even when no open files or obvious applications are using the drive, and in some cases, the Safely Remove option is missing entirely. Addressing this issue requires identifying hidden processes, disabling certain Windows features, and updating system settings to ensure safe removal without data loss or drive corruption.
Identify and Terminate Processes Using the Drive
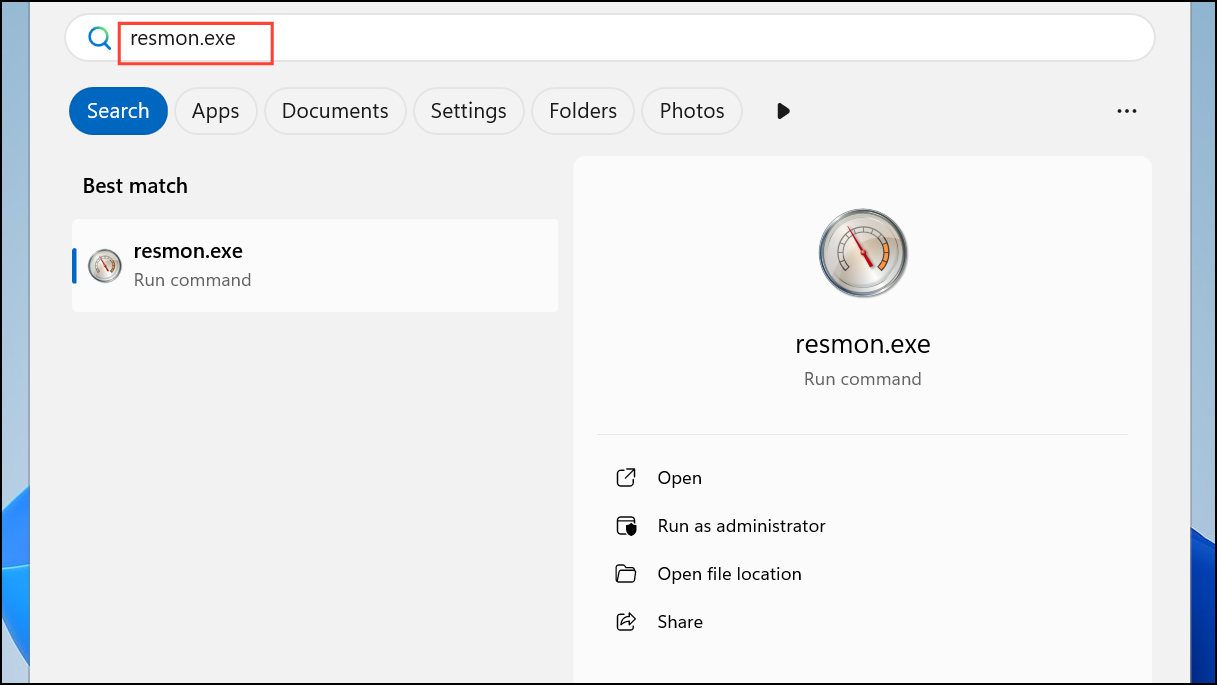
Step 1: Open Resource Monitor by pressing the Windows key, typing resmon.exe, and pressing Enter. This tool displays real-time system resource usage, including which processes have file handles open on your USB or external drive.
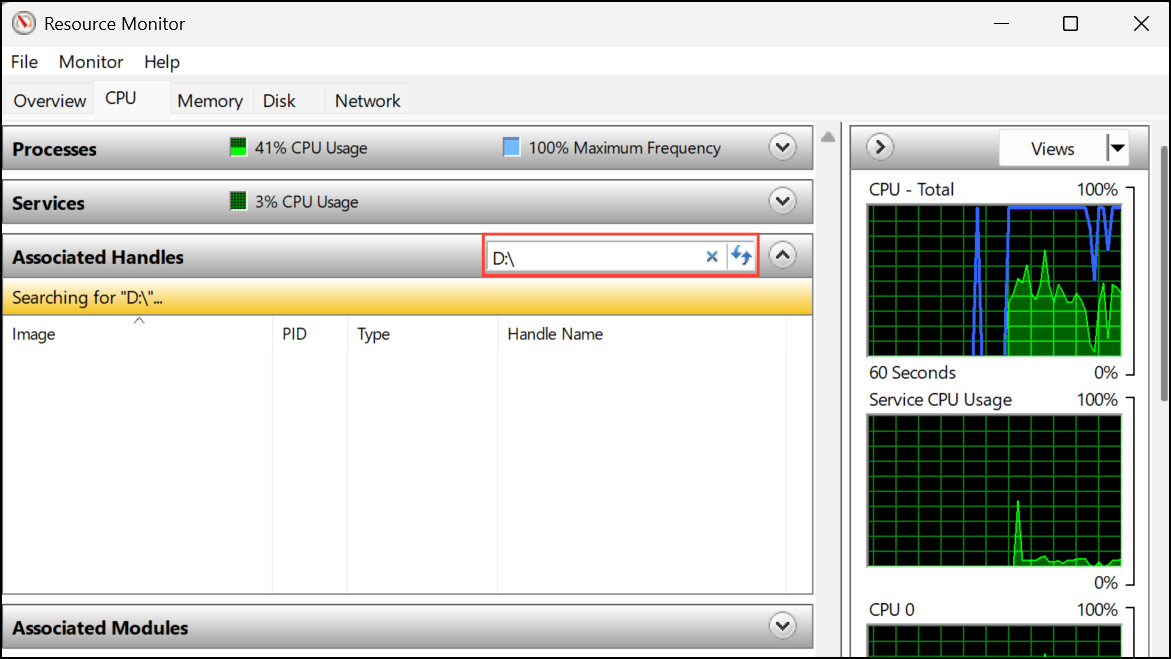
Step 2: Go to the CPU tab, collapse the Processes and Services sections, and in the 'Associated Handles' search box, type the drive letter of your USB device (for example, D:\). Resource Monitor will list any processes currently accessing files or folders on the drive.
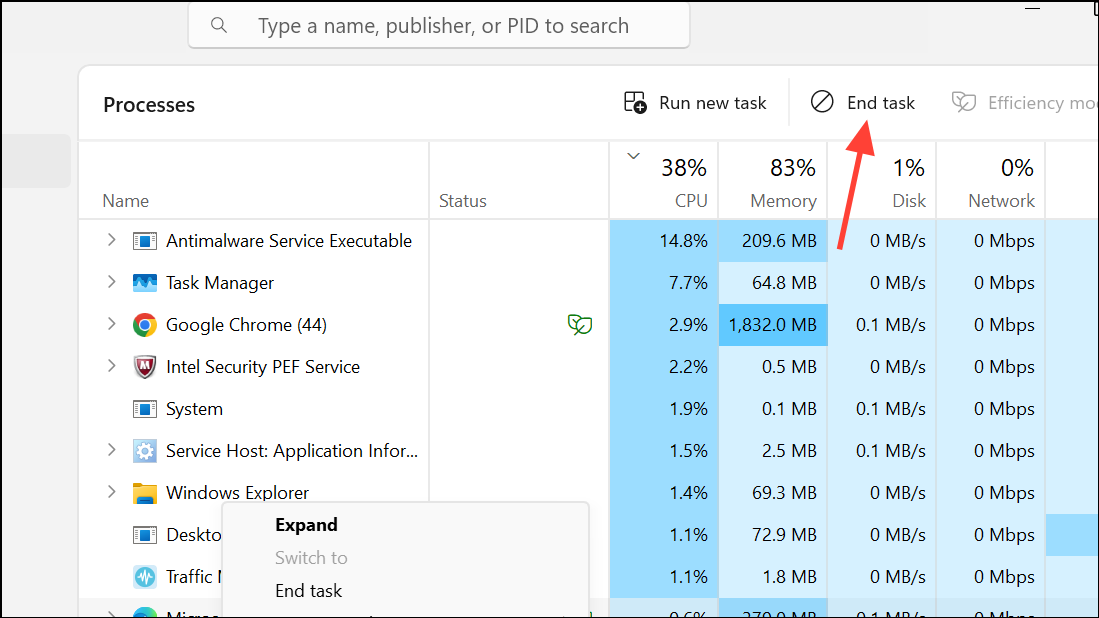
Step 3: In Task Manager (Ctrl + Shift + Esc), locate the identified processes, right-click, and select 'End Task' to close them. This action releases the drive so it can be safely ejected.
Use PowerToys File Locksmith or Sysinternals Utilities
For a more user-friendly approach, Microsoft PowerToys includes File Locksmith, which identifies and terminates processes locking files or drives.
Step 1: Download and install PowerToys from the official Microsoft site. Open PowerToys and enable the File Locksmith utility.
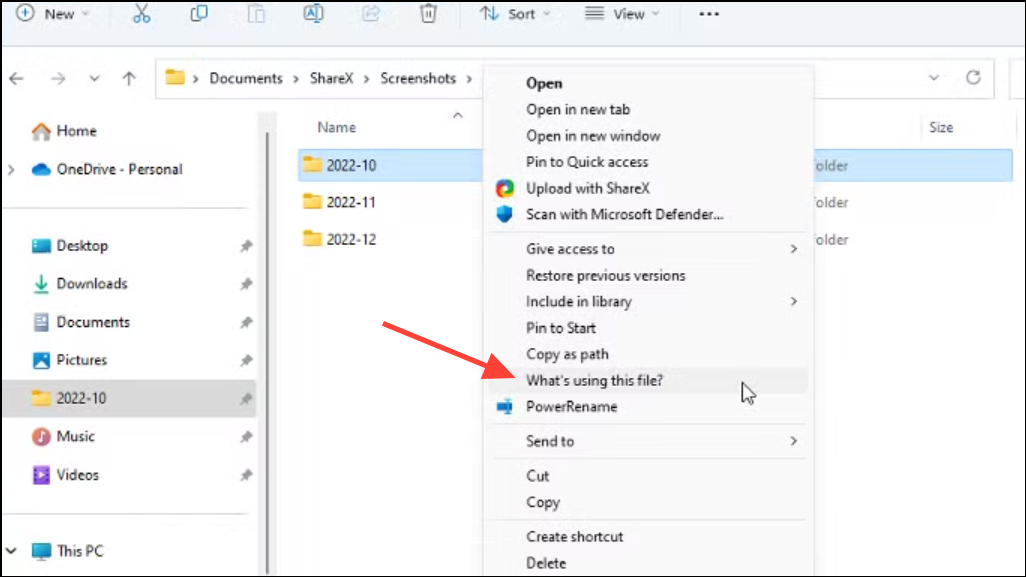
Step 2: In File Explorer, right-click your external drive, select 'Show more options,' and choose 'What's using this file?' via File Locksmith. The utility will display all processes accessing the drive.
Step 3: Select the processes and terminate them as prompted. Once all handles are released, try ejecting the drive again.
Alternatively, you can use Sysinternals Process Explorer. Launch the tool, press Ctrl + F, enter the drive letter or path, and close any listed handles.
Disable Windows Search Indexing and Recycle Bin on the Drive
Windows Search Indexer and the Recycle Bin can keep external drives locked, especially after major updates or when drives are used for backup or media libraries.
Step 1: In File Explorer, right-click the external drive, select 'Properties,' and uncheck 'Allow files on this drive to have contents indexed.' Click OK to apply the change. This prevents Windows Search from constantly accessing the drive.
Step 2: To disable the Recycle Bin for the drive, right-click the Recycle Bin icon, select 'Properties,' choose the external drive, and set it to 'Don't move files to the Recycle Bin. Remove files immediately when deleted.' This avoids lingering file handles after deletions.
Update USB and Chipset Drivers
Outdated or incompatible USB drivers can prevent safe device removal, especially after Windows updates.
Step 1: Open Device Manager by pressing Windows + X and choosing 'Device Manager.' Expand 'Disk drives' and 'Universal Serial Bus controllers.'

Step 2: Right-click your external drive and each USB controller, select 'Update driver,' and allow Windows to search automatically for updated drivers. For best results, also check your motherboard or laptop manufacturer's website for the latest chipset and USB drivers.
Set Drive Policy to Quick Removal
Windows 11 supports 'Quick Removal' mode, which minimizes the risk of data loss when unplugging USB devices without ejecting. This policy is usually enabled by default, but it's worth confirming.
Step 1: In Device Manager, right-click your external drive, select 'Properties,' and go to the 'Policies' tab.
Step 2: Ensure 'Quick removal (default)' is selected. This disables write caching, so you can unplug without using the 'Safely Remove' tool, provided no files are actively being transferred.
Take the Drive Offline in Disk Management
When standard ejection fails, Disk Management can be used to safely take the drive offline, disconnecting it from Windows without risking corruption.
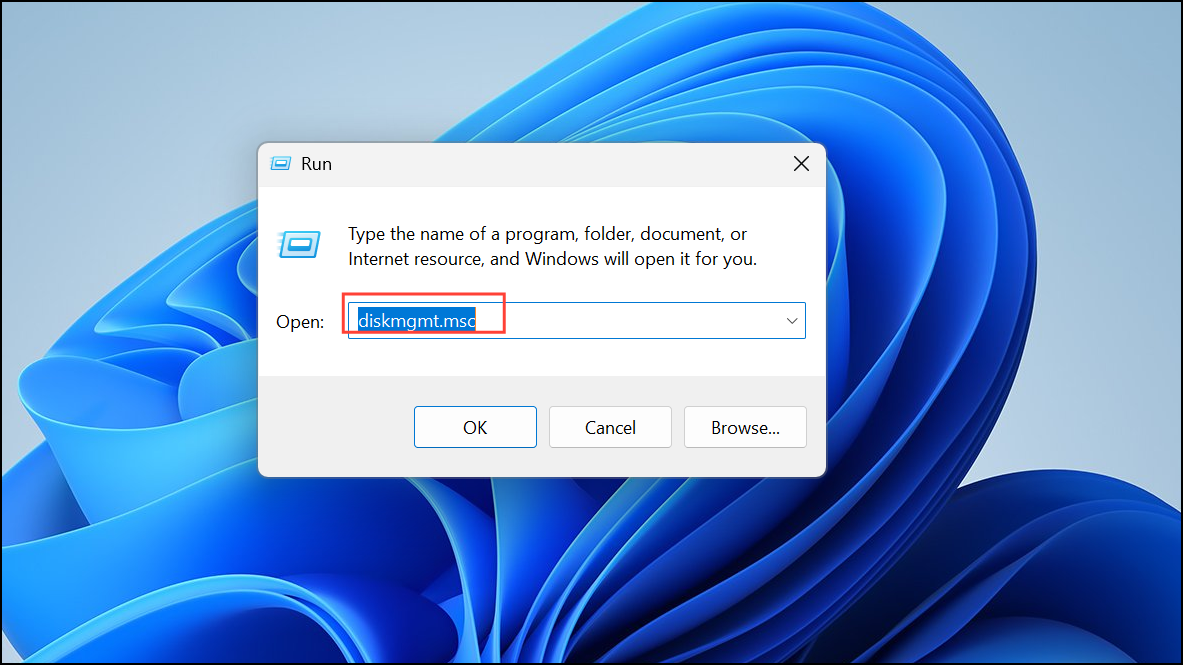
Step 1: Press Windows + R, type diskmgmt.msc, and press Enter to open Disk Management.
Step 2: Locate your external drive in the list, right-click it, and select 'Offline.' Once offline, you can safely disconnect the device.
Temporarily Disable Antivirus or Backup Software
Antivirus programs and backup utilities often scan or monitor external drives, preventing ejection. Temporarily disable real-time protection or scheduled scans for your external drive in your antivirus settings, or close any backup software that might be running in the background.
Restart Windows or Shut Down as a Last Resort
If all else fails, restarting or shutting down your PC will close all processes and release the drive. After shutdown, you can safely unplug the device. While not ideal for frequent use, this method avoids data corruption when standard ejection fails.
Resolving the "can't eject USB or external drive" error on Windows 11 involves a mix of process management, system setting adjustments, and driver updates. Applying these targeted steps restores safe removal and protects your data from accidental loss or corruption.