
The CRITICAL_PROCESS_DIED error triggers a Blue Screen of Death (BSOD) that abruptly halts Windows 11 operations, particularly affecting systems after the April 2025 cumulative update. This error indicates that a vital system process has unexpectedly stopped, leading to system instability and boot failures. Addressing this issue requires careful troubleshooting and, in some cases, system recovery steps to restore normal operation.
Install the Latest Windows Updates and Patches
Step 1: Connect your PC to the internet and open Settings by pressing Windows + I.
Step 2: Navigate to Windows Update and click Check for updates. Installing the latest patches often contains fixes for known bugs, including those causing the CRITICAL_PROCESS_DIED error after the April 2025 update.
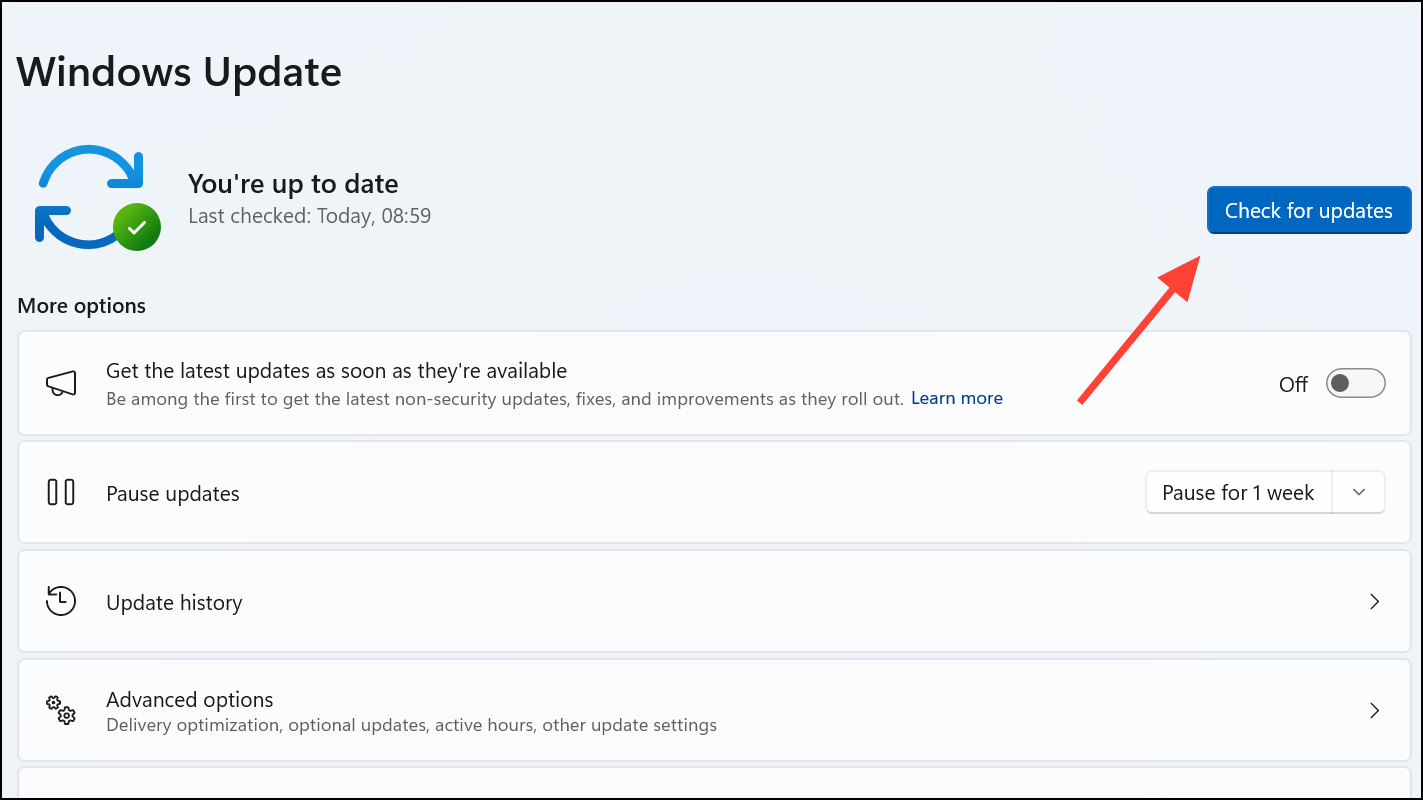
Step 3: Allow the system to download and install all available updates. After installation, reboot your PC to apply changes and verify if the issue persists.
Microsoft released a server-side fix addressing the BSOD caused by the April 8, 2025 update, particularly affecting devices running preview or release builds. Staying current with updates ensures you receive these critical fixes.
Uninstall Problematic Updates via Recovery Mode
If your PC cannot boot normally due to the BSOD, use Windows Recovery Environment (WinRE) to remove the faulty update.
Step 1: Power on your PC and interrupt the boot process three times consecutively by pressing the power button during startup to force Windows into recovery mode.
Step 2: In the recovery menu, select Troubleshoot, then Advanced options, and choose Uninstall Updates.
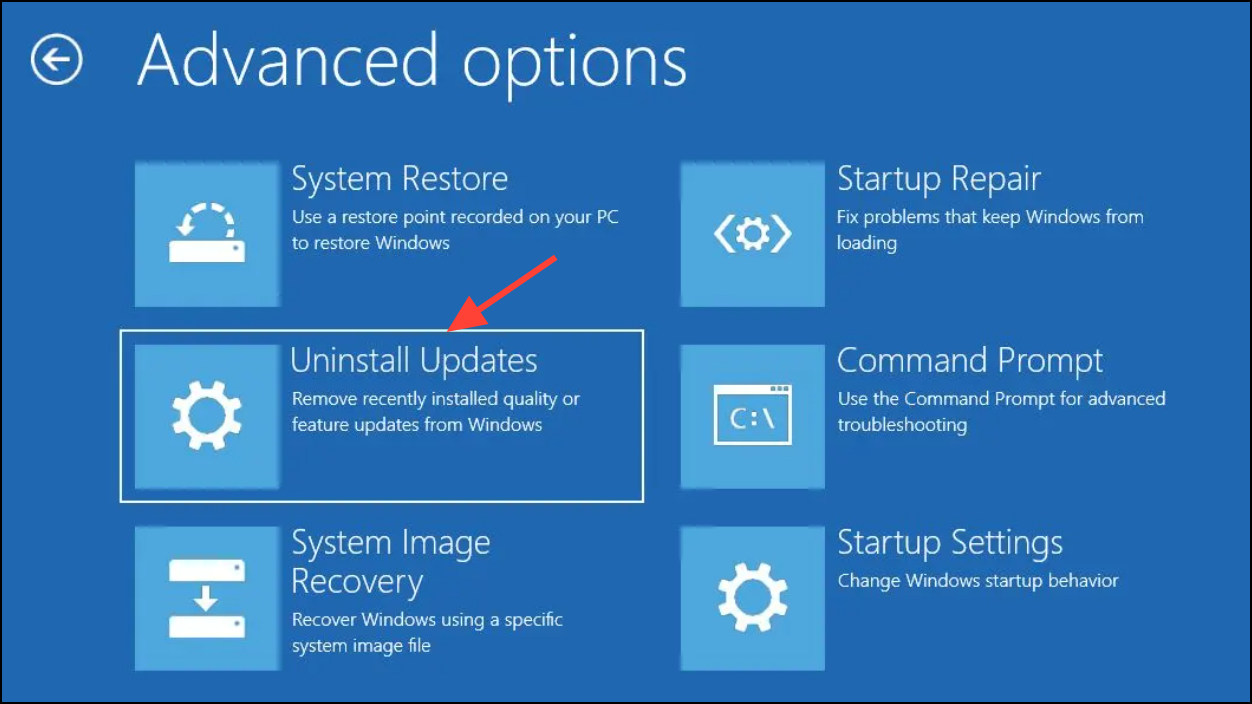
Step 3: Select Uninstall latest quality update to remove the most recent cumulative update that may be causing the error.
Step 4: After uninstalling, restart your PC and check if it boots without the CRITICAL_PROCESS_DIED error.
Uninstalling the problematic update can restore system stability, especially when the update introduced incompatibilities or corrupted system files.
Perform a Clean Installation of Windows 11
If recovery options fail, a clean installation resets your system to a fresh state, eliminating corrupted files or conflicting drivers causing the error.
Step 1: Prepare a Windows 11 installation USB drive using the Microsoft Media Creation Tool. Ensure you back up important data before proceeding.
Step 2: Boot your PC from the USB drive by adjusting the boot order in BIOS or UEFI settings.
Step 3: Follow the on-screen prompts to perform a clean installation, selecting the option to delete existing partitions if necessary to remove corrupted system files.
Step 4: After installation, disable automatic Windows updates temporarily to prevent immediate reinstallation of problematic updates until a stable patch is confirmed.
A clean install removes all software conflicts and corrupted files, providing a stable baseline for your system.
Use System File Checker and DISM to Repair Corrupted Files
Corrupted system files often cause critical process failures. The System File Checker (SFC) and Deployment Image Servicing and Management (DISM) tools help repair these issues.
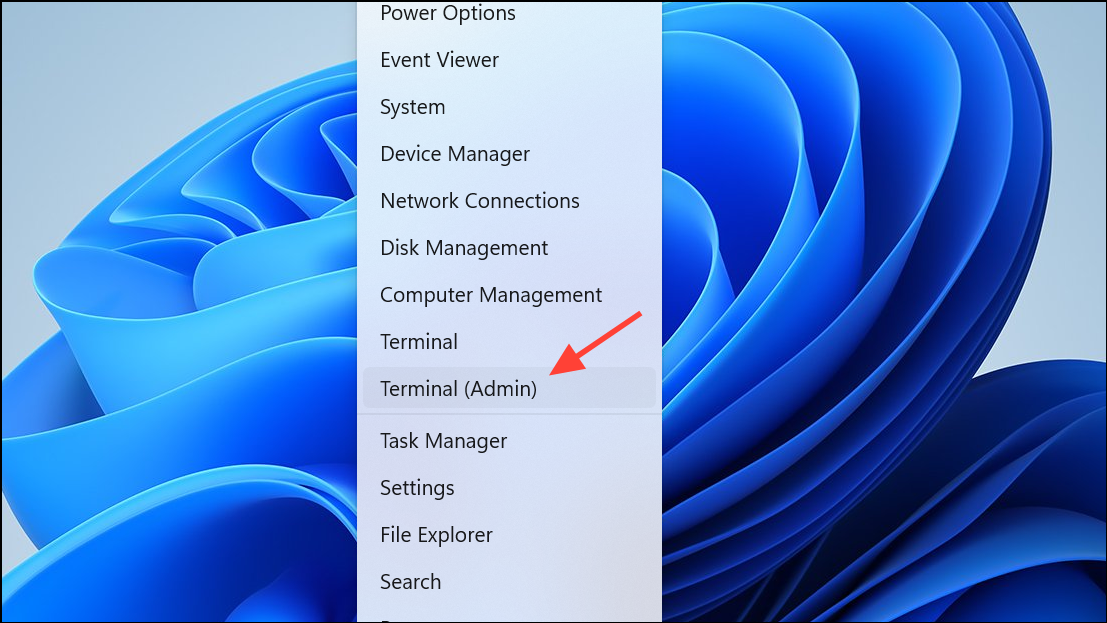
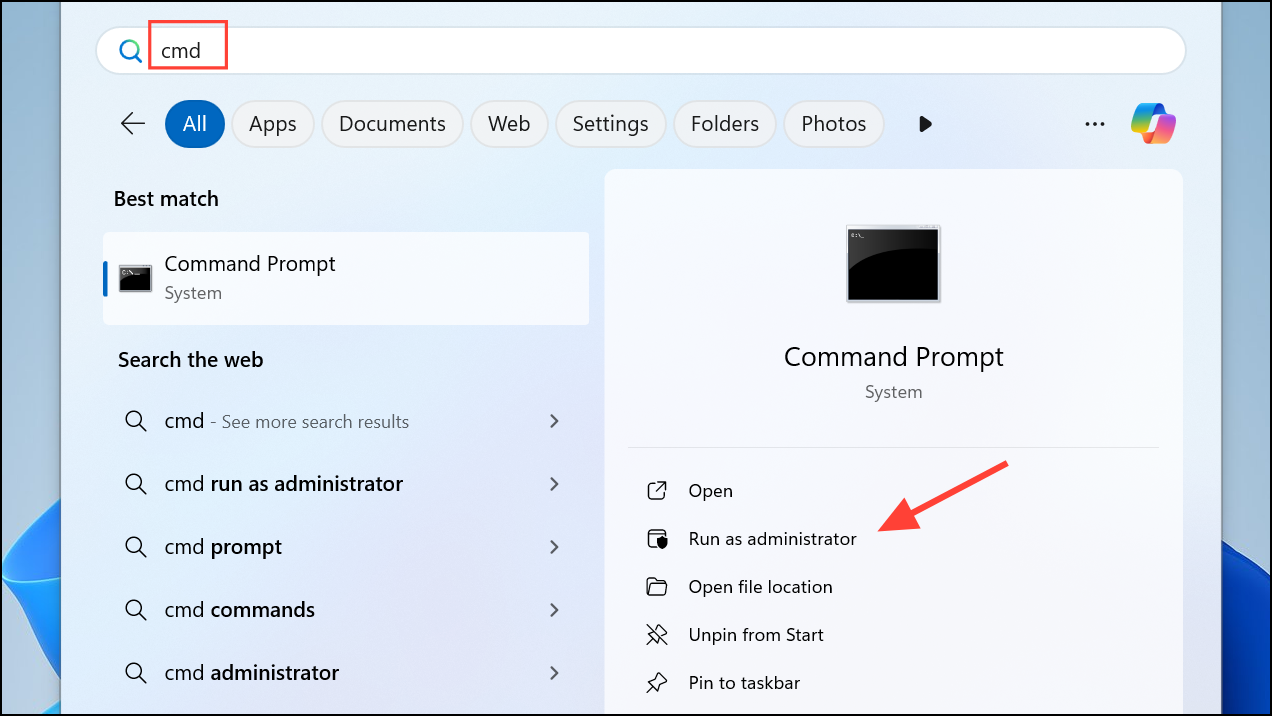
Step 1: Open Command Prompt as an administrator by right-clicking the Start button and selecting Windows Terminal (Admin) or Command Prompt (Admin).
Step 2: Run the DISM health check command:
DISM /Online /Cleanup-Image /CheckHealth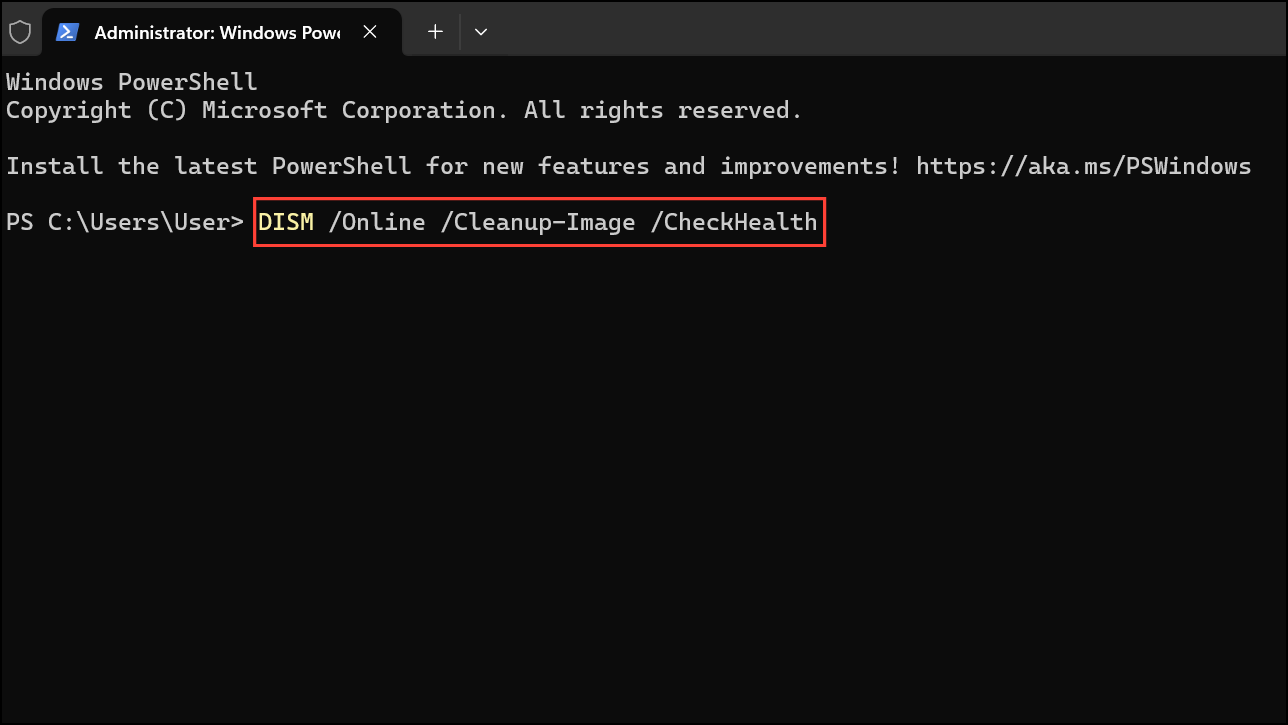
Step 3: If issues are detected, execute the restore health command:
DISM /Online /Cleanup-Image /RestoreHealth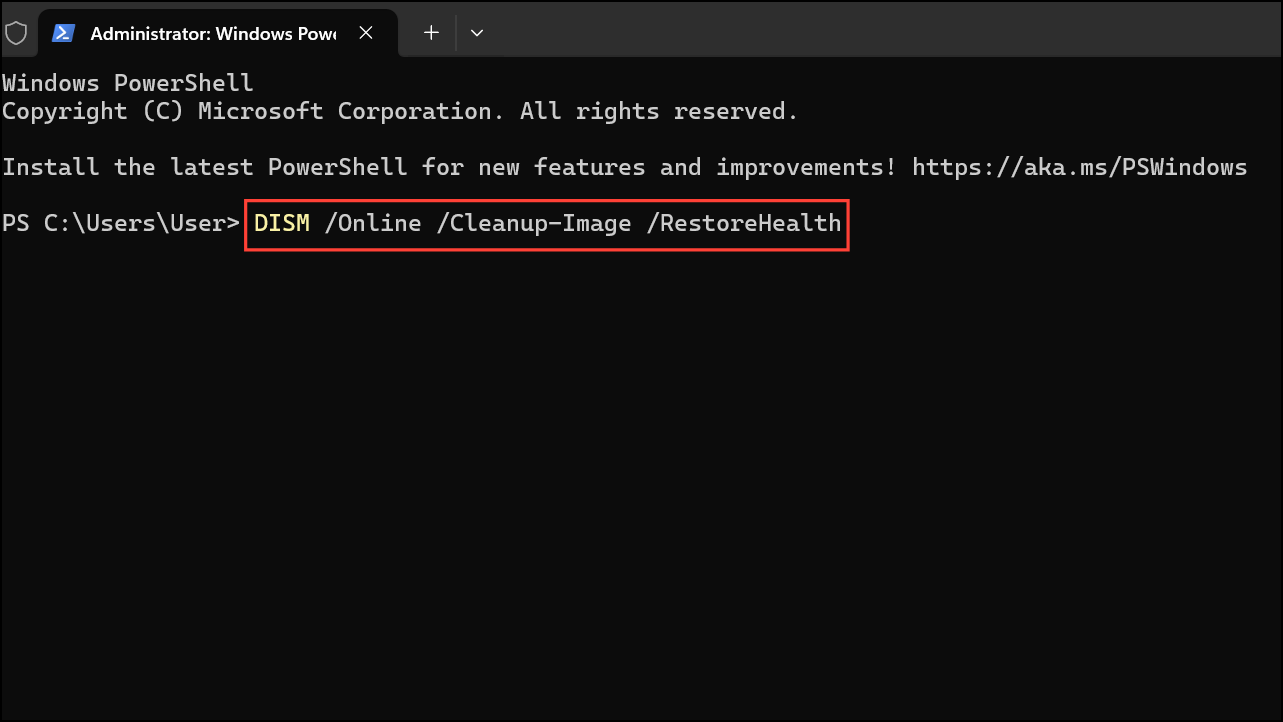
Step 4: After DISM completes, run the System File Checker to scan and repair system files:
SFC /SCANNOW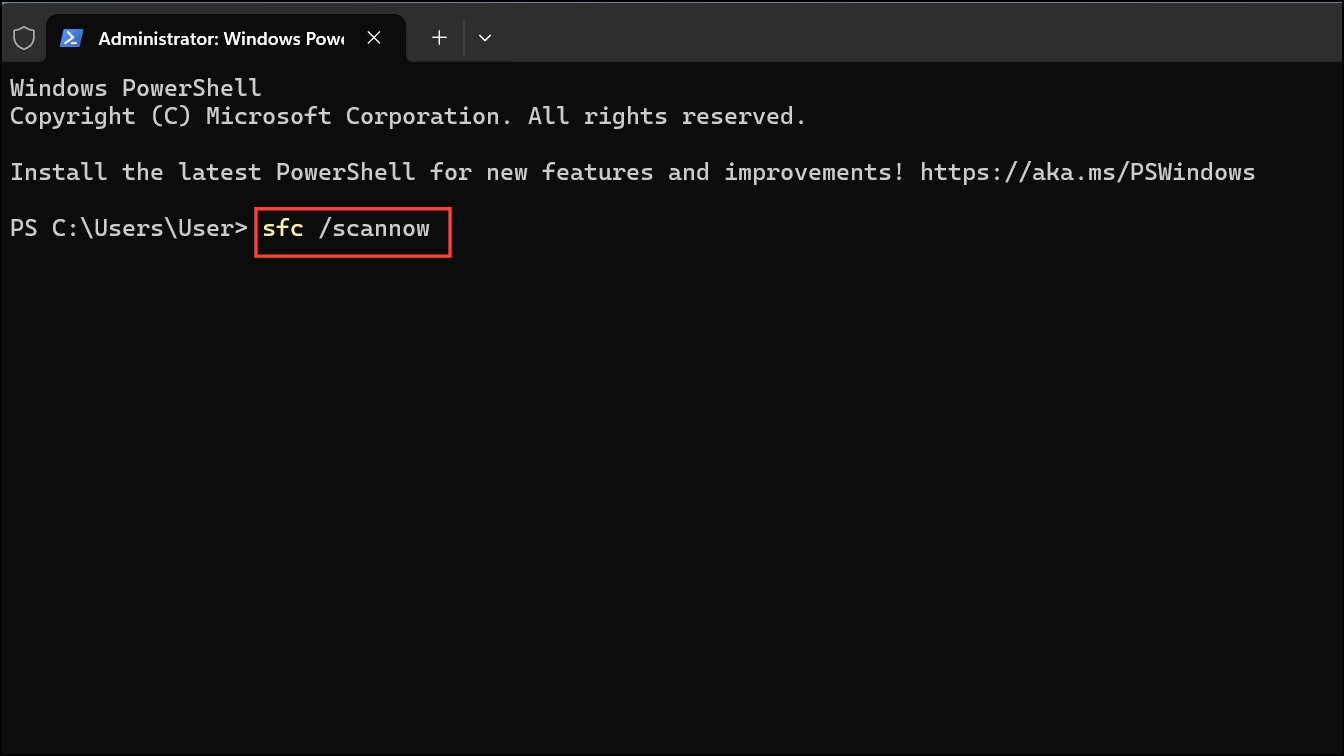
Step 5: Repeat the SFC command until it reports no errors or repairs.
These commands repair corrupted or missing system files that could cause the CRITICAL_PROCESS_DIED error, improving system stability without requiring a full reinstall.
Boot into Safe Mode and Perform a Clean Boot
Booting into Safe Mode limits Windows to essential drivers and services, which can help isolate problematic software or drivers causing the error.
Step 1: Access the recovery environment by interrupting startup three times or holding Shift while clicking Restart from the login screen.
Step 2: Navigate to Troubleshoot > Advanced options > Startup Settings and click Restart.
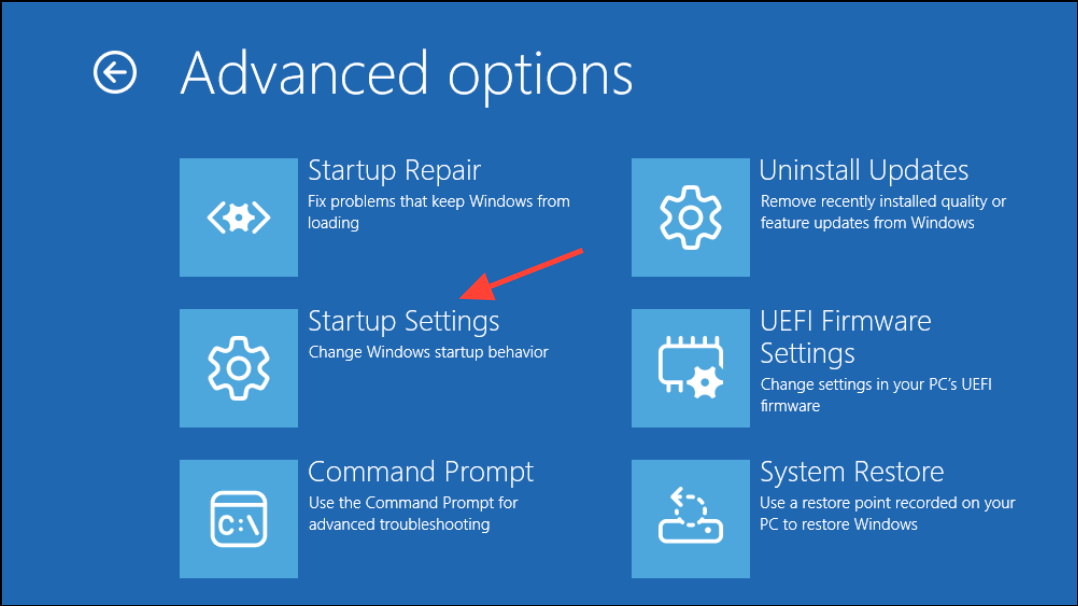
Step 3: After reboot, press 4 or F4 to enter Safe Mode.
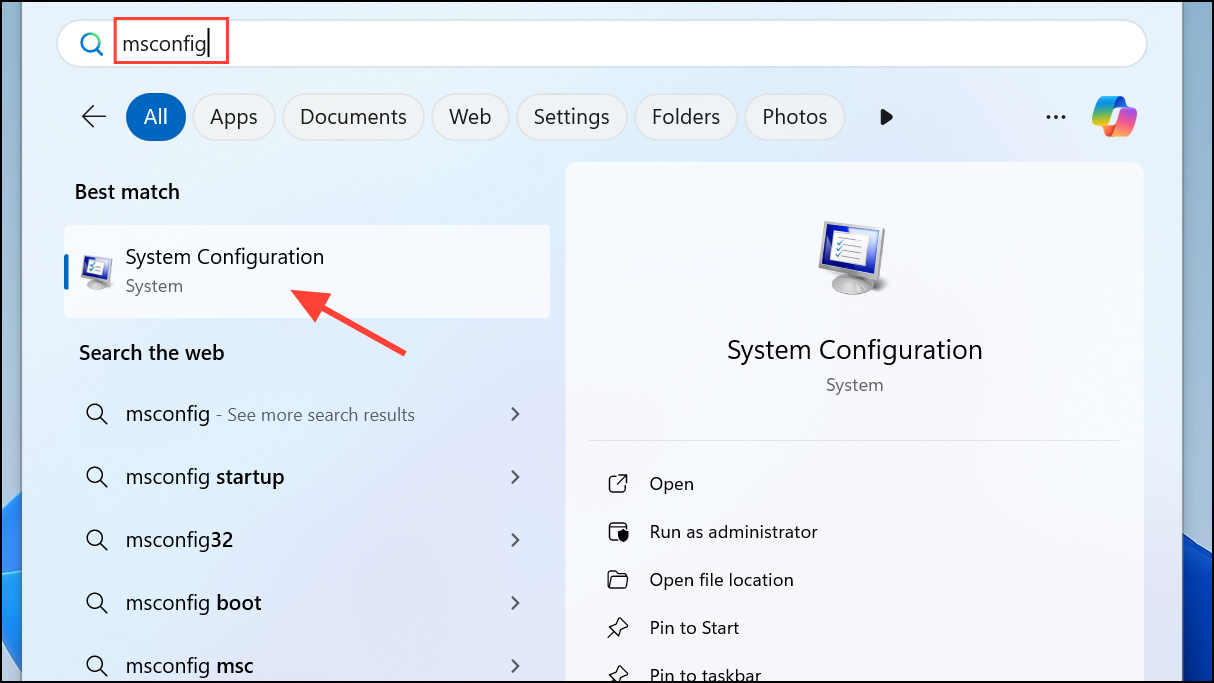
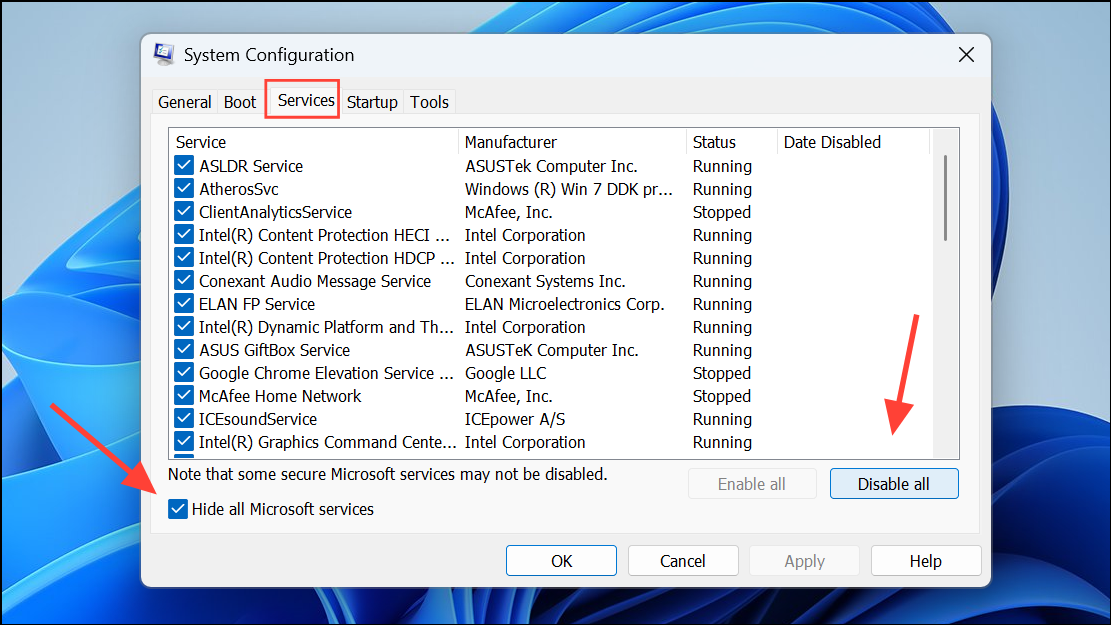
Step 4: Once in Safe Mode, open System Configuration by typing msconfig in the Start menu and pressing Enter.
Step 5: Under the Services tab, check Hide all Microsoft services and then click Disable all. Next, go to the Startup tab and open Task Manager to disable all startup items.
Step 6: Restart your PC normally. This clean boot disables third-party software that might interfere with system processes, helping to identify if a background program causes the BSOD.
Check and Roll Back Device Drivers
Incompatible or faulty device drivers can abruptly stop critical processes. Rolling back or updating drivers can resolve these conflicts.
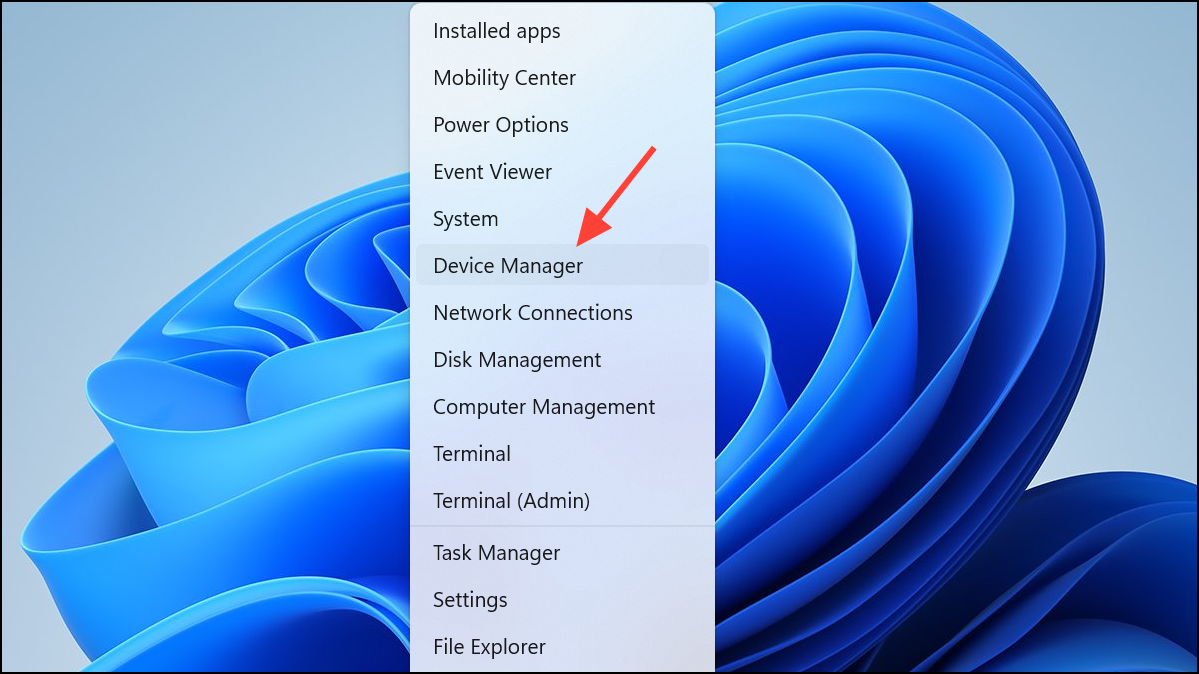
Step 1: Open Device Manager by right-clicking the Start button and selecting it from the menu.
Step 2: Expand categories and locate devices with a yellow warning icon, indicating driver issues.
Step 3: Right-click the device and select Properties. Navigate to the Driver tab and click Roll Back Driver if available to revert to a previous version.
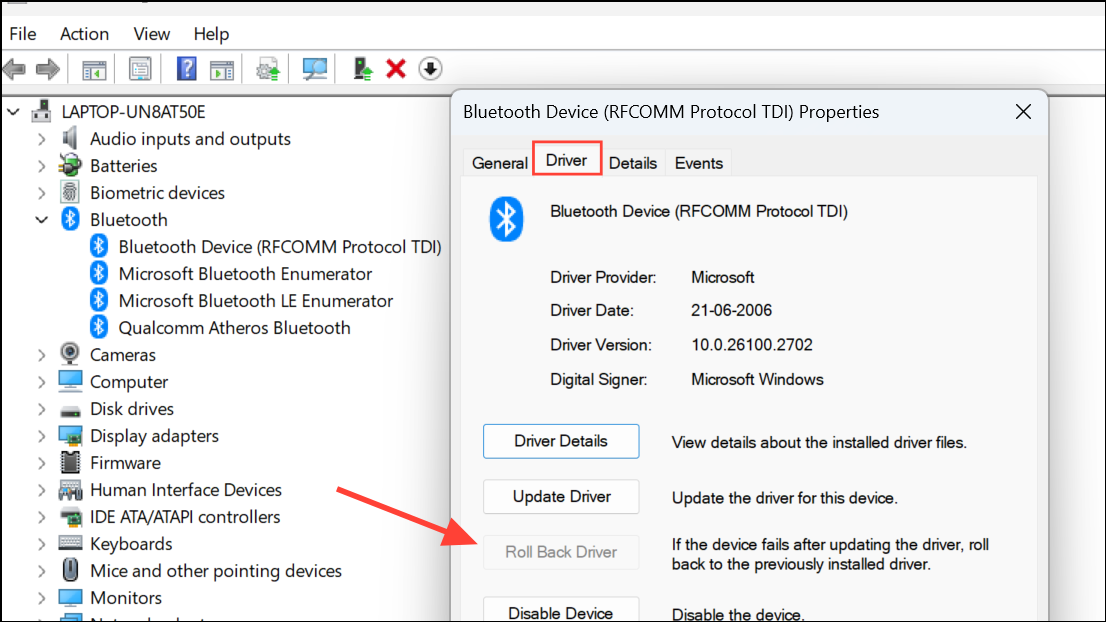
Step 4: If rollback is unavailable, visit the device manufacturer’s website to download and install the latest compatible driver.
Driver conflicts often trigger CRITICAL_PROCESS_DIED errors; managing drivers ensures hardware functions correctly without interrupting system processes.
Run Disk Check to Repair Hard Drive Errors
Hard drive issues can cause system processes to fail unexpectedly. Running a disk check scans and repairs file system errors.
Step 1: Open Command Prompt as an administrator.
Step 2: Enter the following command to check and fix drive errors:
chkdsk /f /r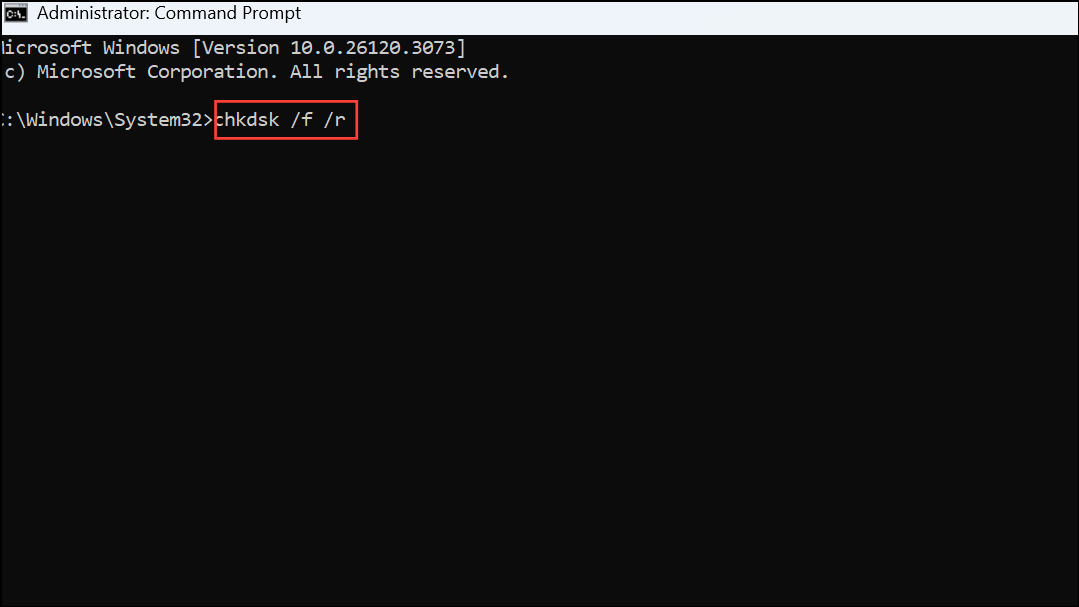
Step 3: If prompted to schedule the scan on the next restart, type Y and press Enter.
Step 4: Restart your PC to allow chkdsk to scan and repair the disk.
Repairing disk errors can prevent critical system processes from failing due to corrupted files or bad sectors.
Applying these methods systematically will help restore Windows 11 stability after the April 2025 update triggered the CRITICAL_PROCESS_DIED error. Always ensure your data is backed up before performing advanced recovery actions or clean installations to avoid data loss.