
Printer connections on Windows 11 systems running version 22H2 and later frequently fail with the error message: Operation could not be completed (error 0x00000bc4). No printers were found. This issue typically arises after upgrading Windows 11, causing network printers to disappear and preventing new connections. The root cause is a change in the default Remote Procedure Call (RPC) protocol used for printer communication, which restricts network printer discovery. Adjusting system policies or registry settings corrects this behavior and restores access to shared printers.
Change Group Policy to Allow Network Printer Discovery
Step 1: Open the Local Group Policy Editor by pressing Windows + R, typing gpedit.msc, and pressing Enter. This tool is available in Windows 11 Pro, Enterprise, and Education editions.

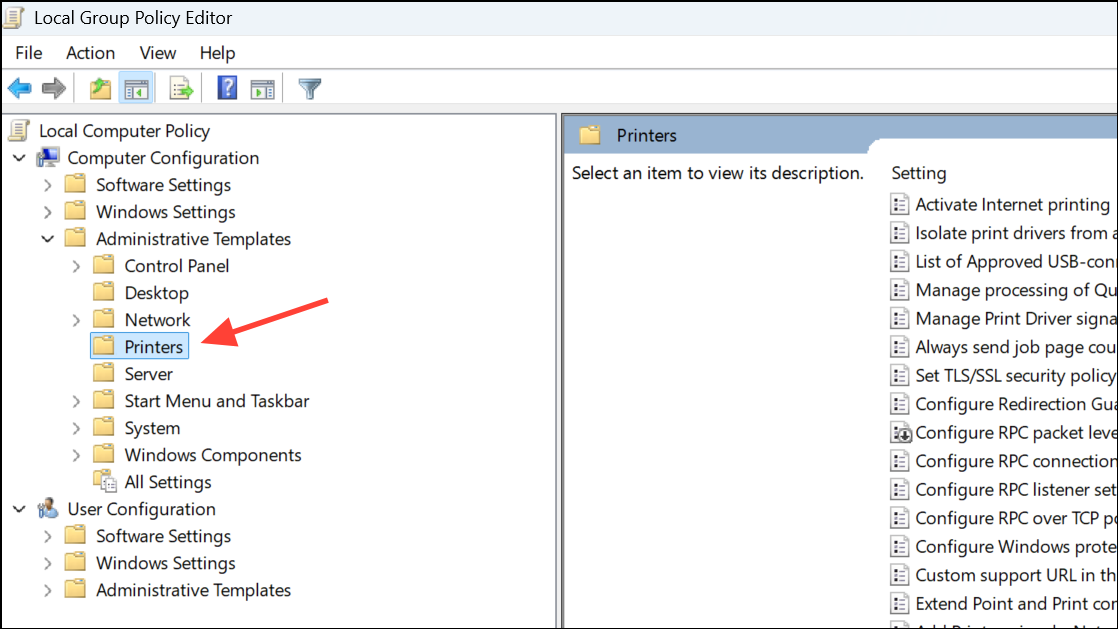
Step 2: In the Group Policy Editor, use the left sidebar to navigate to:Computer Configuration > Administrative Templates > Printers
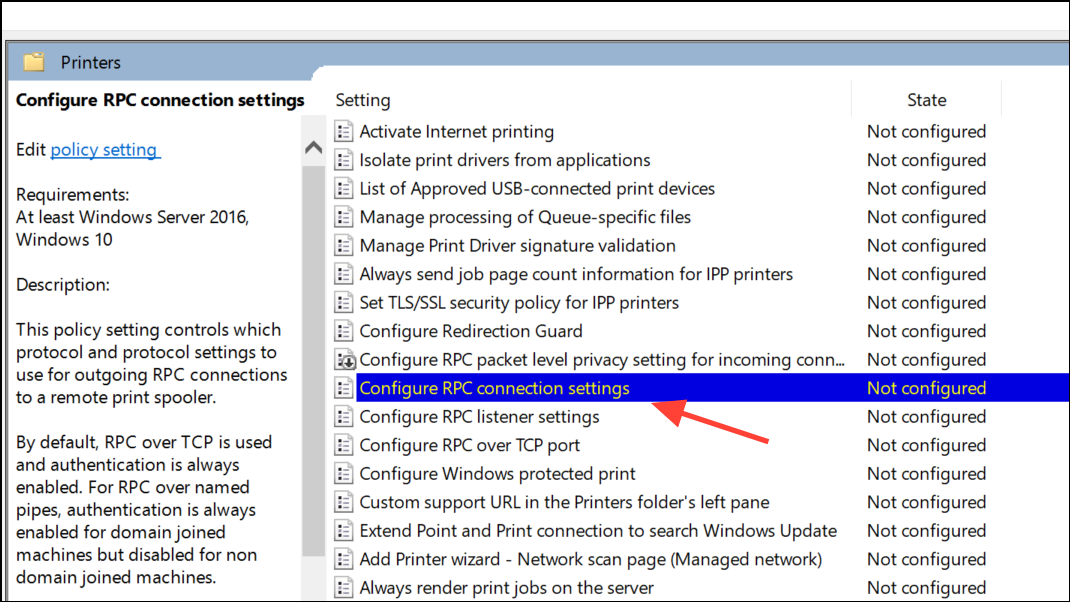
Step 3: Double-click Configure RPC connection settings in the right pane. This setting determines which protocol Windows uses to communicate with network printers.
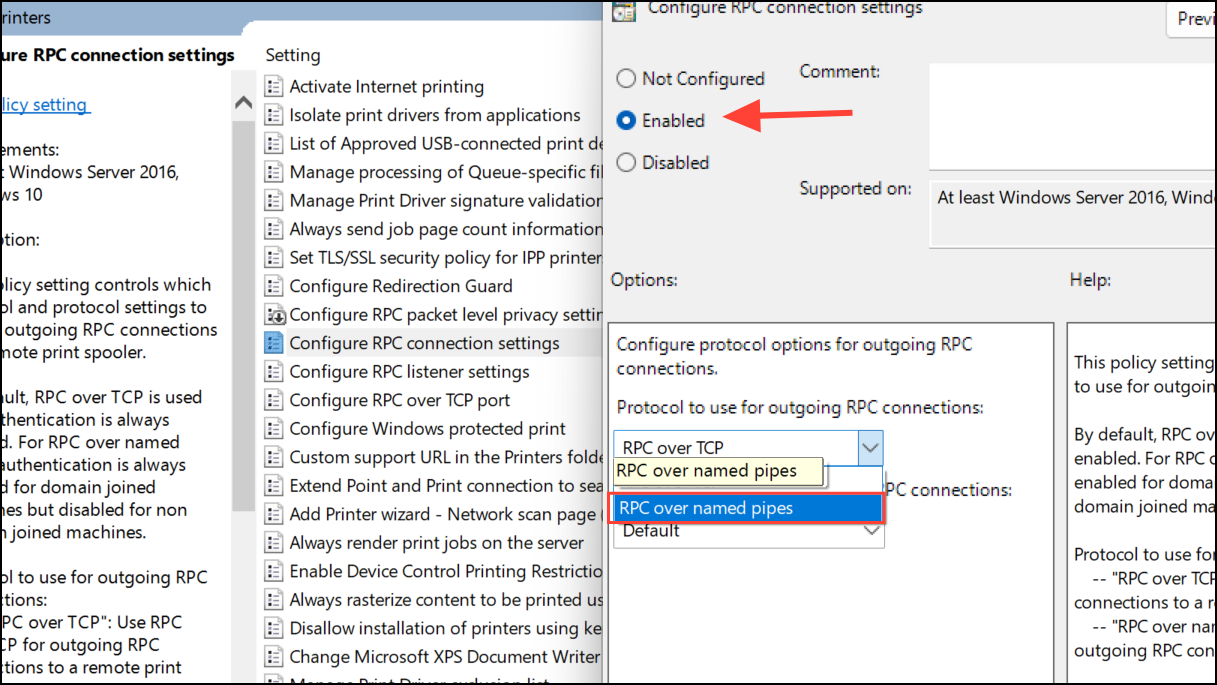
Step 4: Set the policy to Enabled. In the options below, select RPC over named pipes from the dropdown menu. Leave authentication settings at their defaults unless your environment requires specific adjustments.
Step 5: Click Apply, then OK. Close the Group Policy Editor and restart your computer to apply the changes. After rebooting, retry adding or using your network printer. The system should now detect available printers on the network.
Modify Registry Settings for Windows 11 Home or Missing Group Policy Editor
Windows 11 Home edition does not include the Group Policy Editor. Instead, update the registry to set the correct RPC protocol for network printers. This method achieves the same result as the group policy change above.
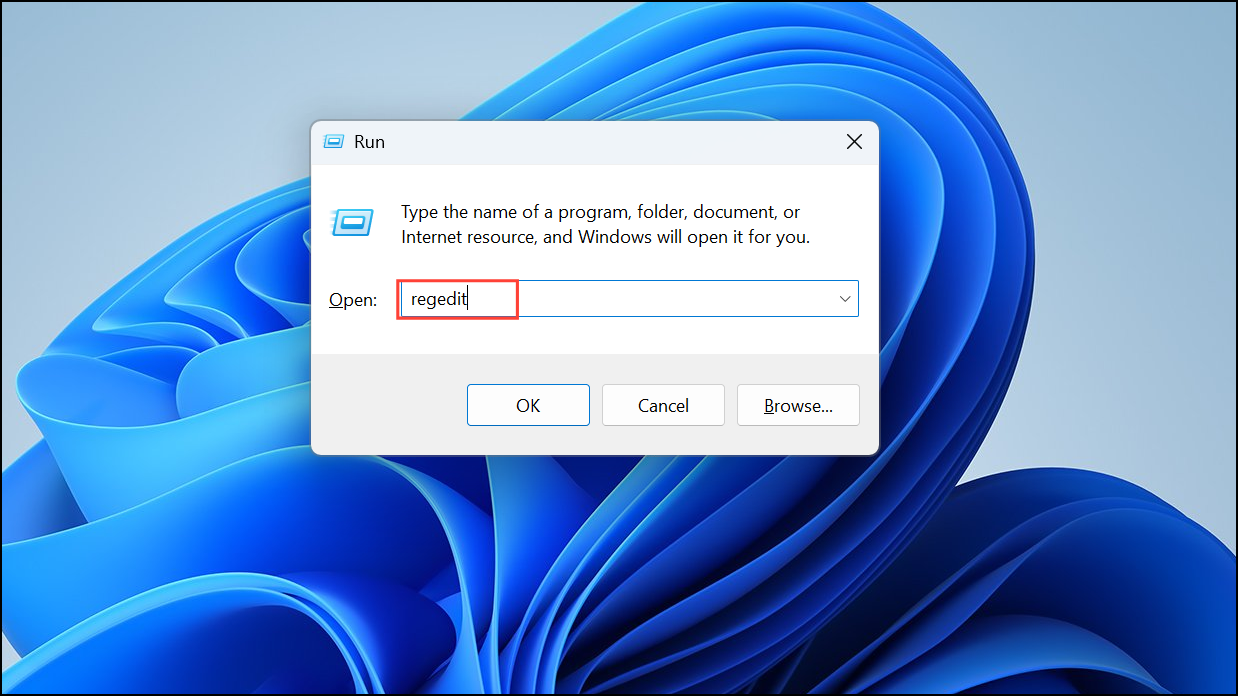
Step 1: Press Windows + R, type regedit, and press Enter to open the Registry Editor. When prompted by User Account Control, confirm to proceed.
Step 2: In the Registry Editor, navigate to the following path:
HKEY_LOCAL_MACHINE\SOFTWARE\Policies\Microsoft\Windows NT\Printers\RPCIf the Printers or RPC keys do not exist, right-click to create them as new keys under Windows NT and Printers respectively.
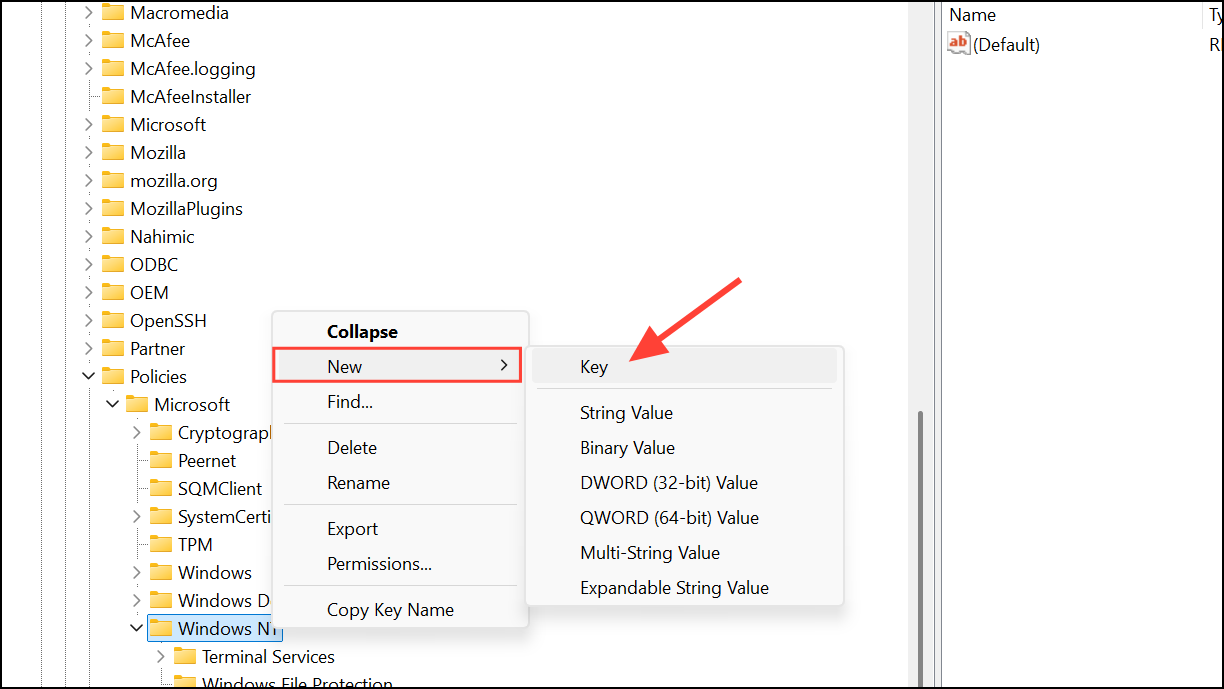
Step 3: Inside the RPC key, right-click the right pane and select New > DWORD (32-bit) Value. Name the new value RpcUseNamedPipeProtocol.
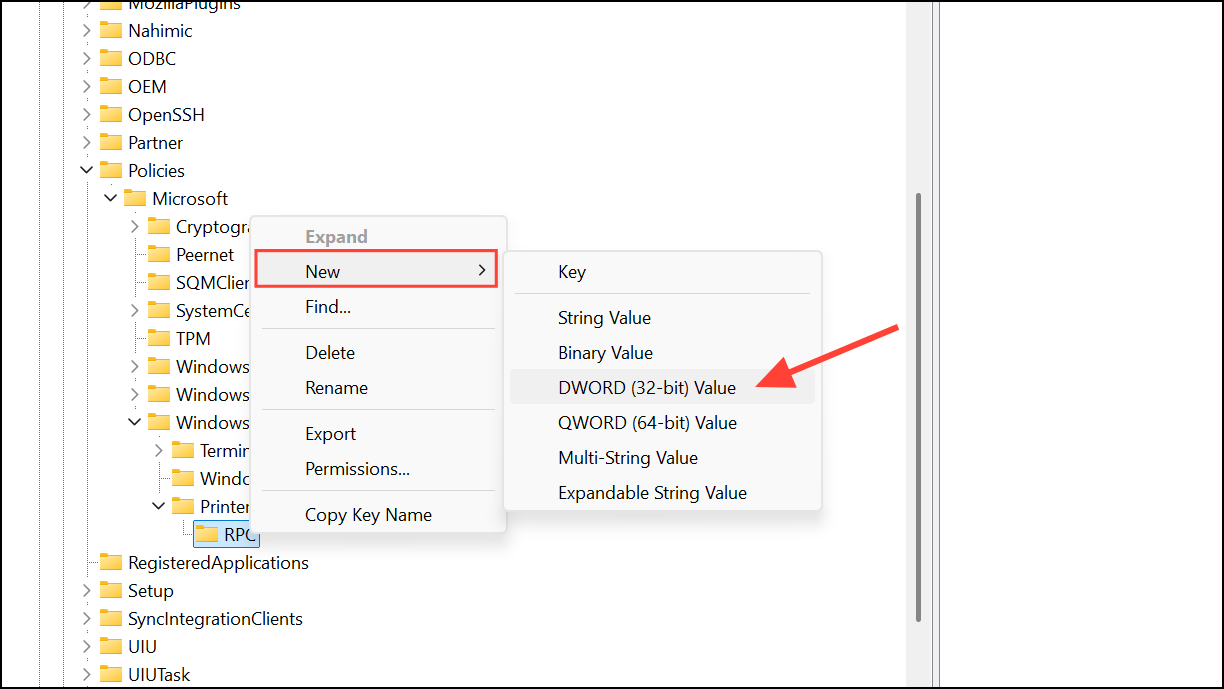
Step 4: Double-click RpcUseNamedPipeProtocol and set its value data to 1. Click OK to save.

Step 5: Close the Registry Editor and restart your computer. Upon reboot, Windows should now successfully detect and connect to network printers.
Clear and Reset the Printer Spooler
Print spooler issues or stuck print jobs can also interfere with printer detection. Resetting the spooler clears pending jobs and refreshes printer services.
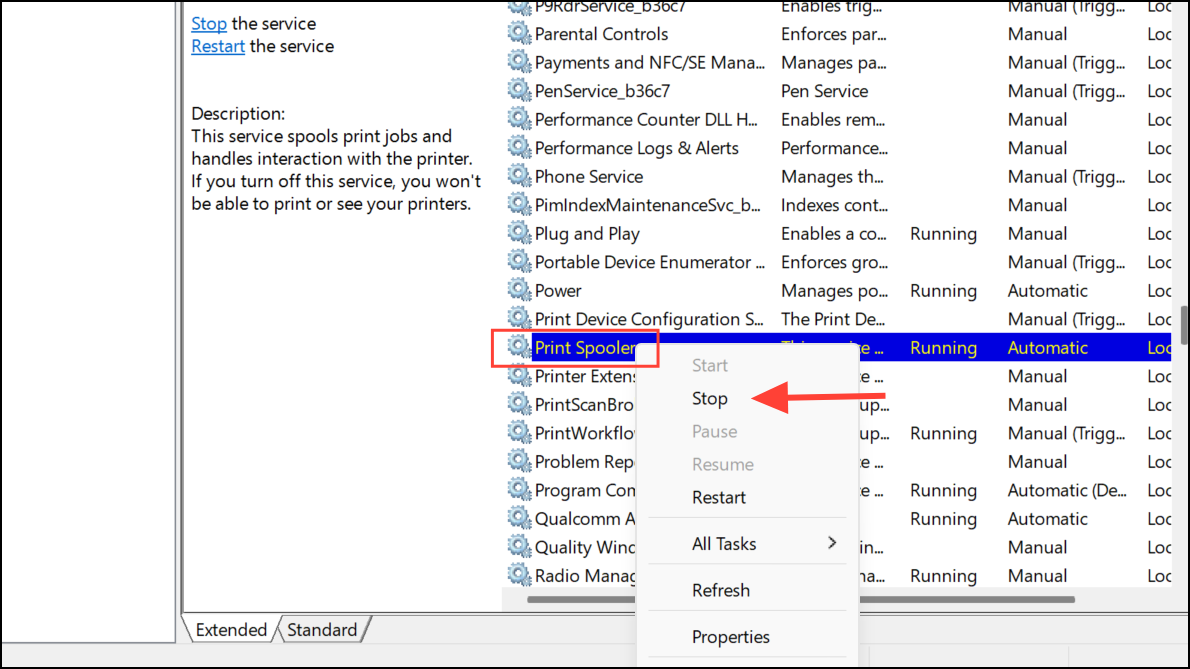
Step 1: Press Windows + R, type services.msc, and press Enter to open the Services manager.

Step 2: Scroll down and locate Print Spooler in the list. Right-click it and choose Stop to halt the service.
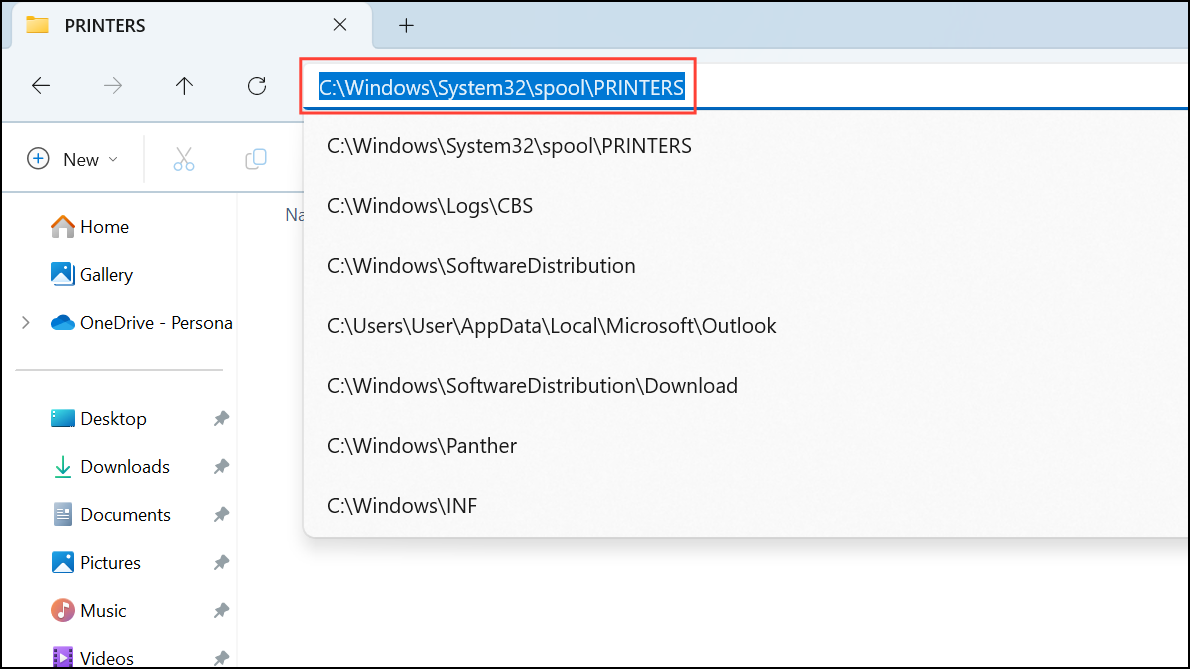
Step 3: Open File Explorer and go to:
C:\Windows\System32\spool\PRINTERSDelete all files inside the PRINTERS folder, but do not delete the folder itself. This step removes any stuck print jobs.
Step 4: Return to the Services manager, right-click Print Spooler again, and select Start to restart the service.
Step 5: Try printing or adding the printer again. If the error was related to the spooler, this process resolves it.
Run the Printer Troubleshooter
Windows includes a built-in printer troubleshooter that diagnoses and repairs common printer issues automatically.
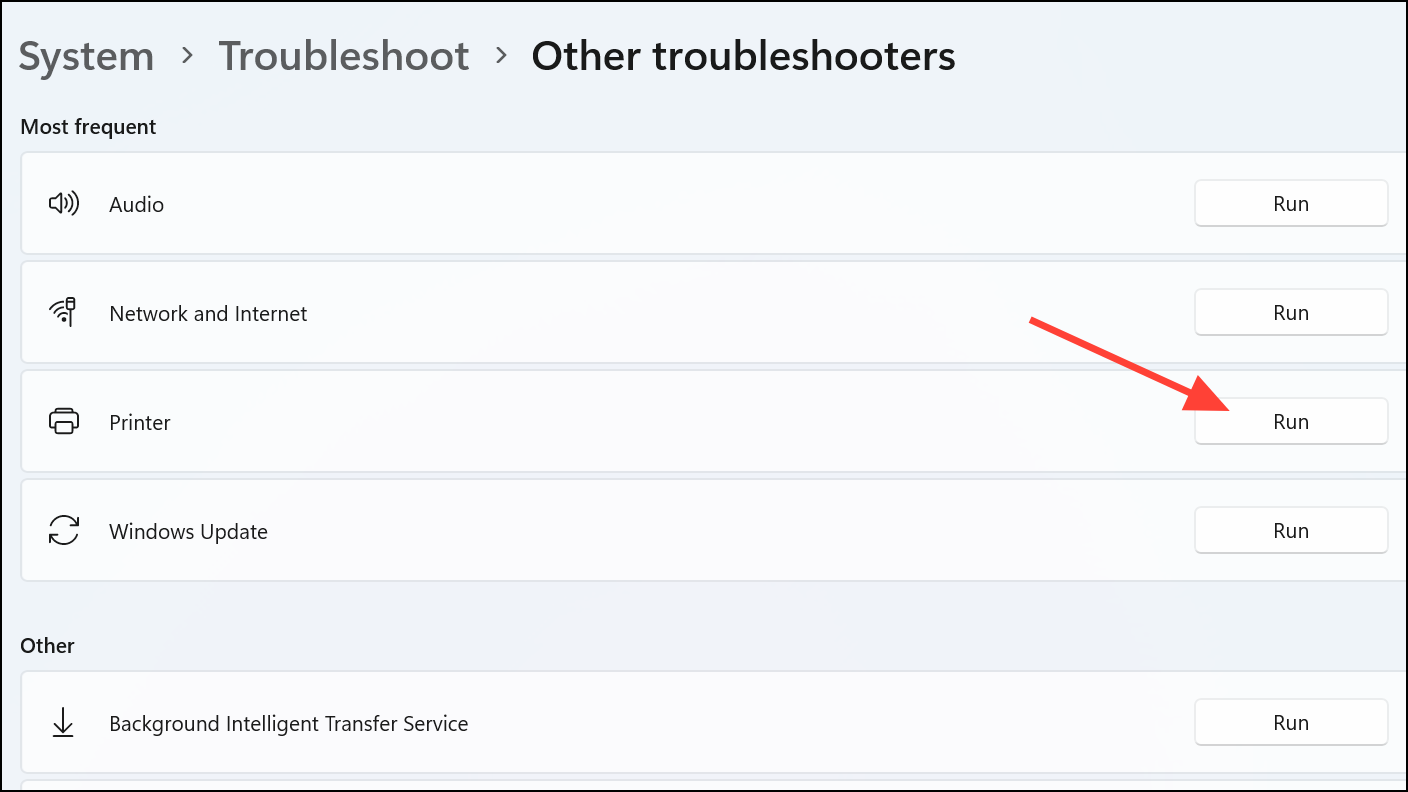
Step 1: Press Windows + I to open Settings. Navigate to System > Troubleshoot > Other troubleshooters.
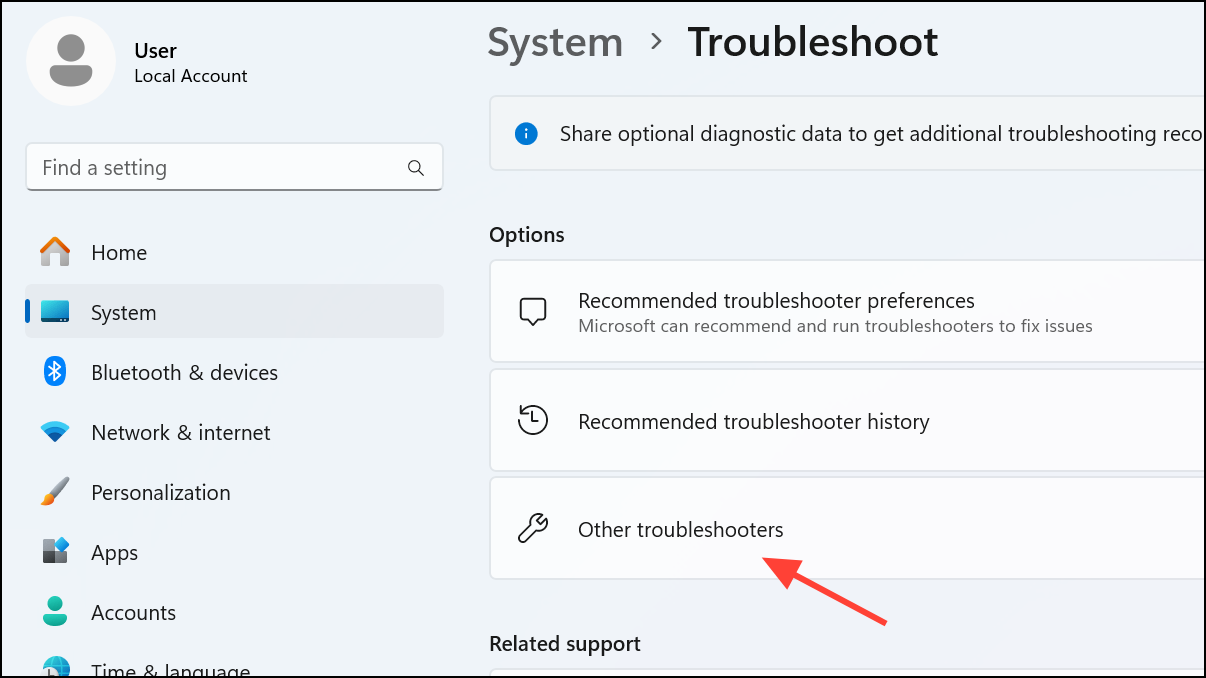
Step 2: Find Printer in the list and click Run next to it.
Step 3: Follow the on-screen prompts. The troubleshooter will scan for issues and suggest or apply fixes. Restart your computer after the troubleshooter completes, then check if printers are now detected.
Add the Printer Manually
If automatic detection still fails, manually adding the network printer can bypass some system restrictions.
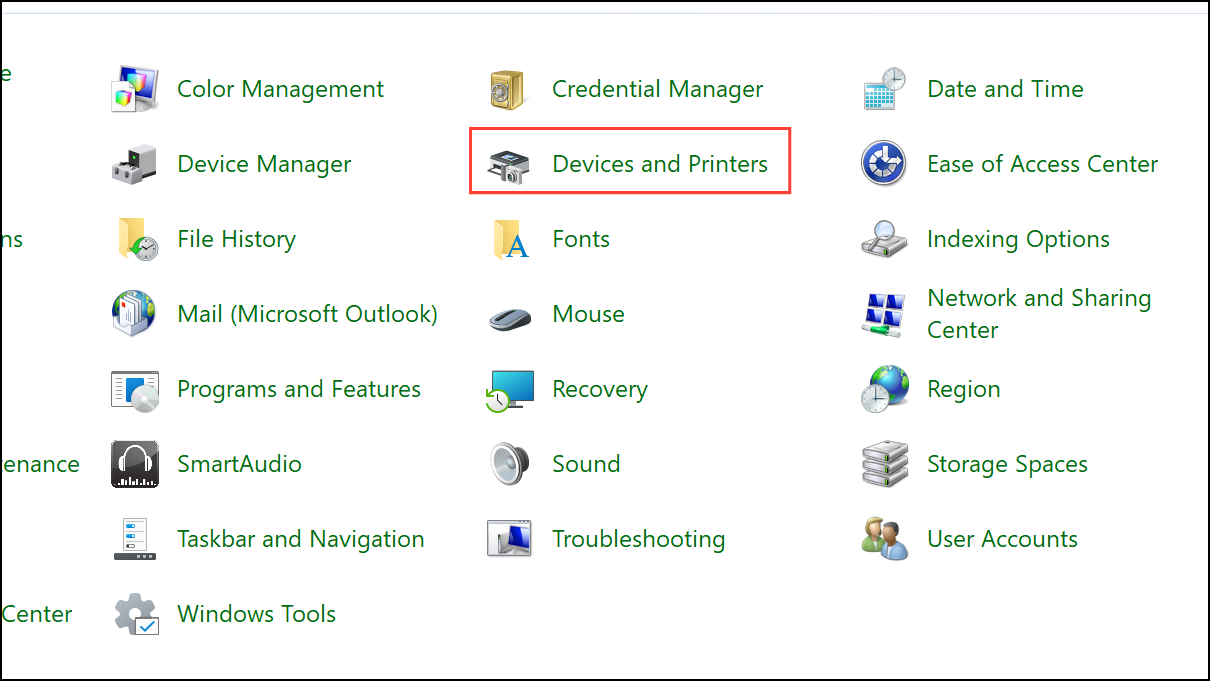
Step 1: Open the Control Panel and select Devices and Printers.
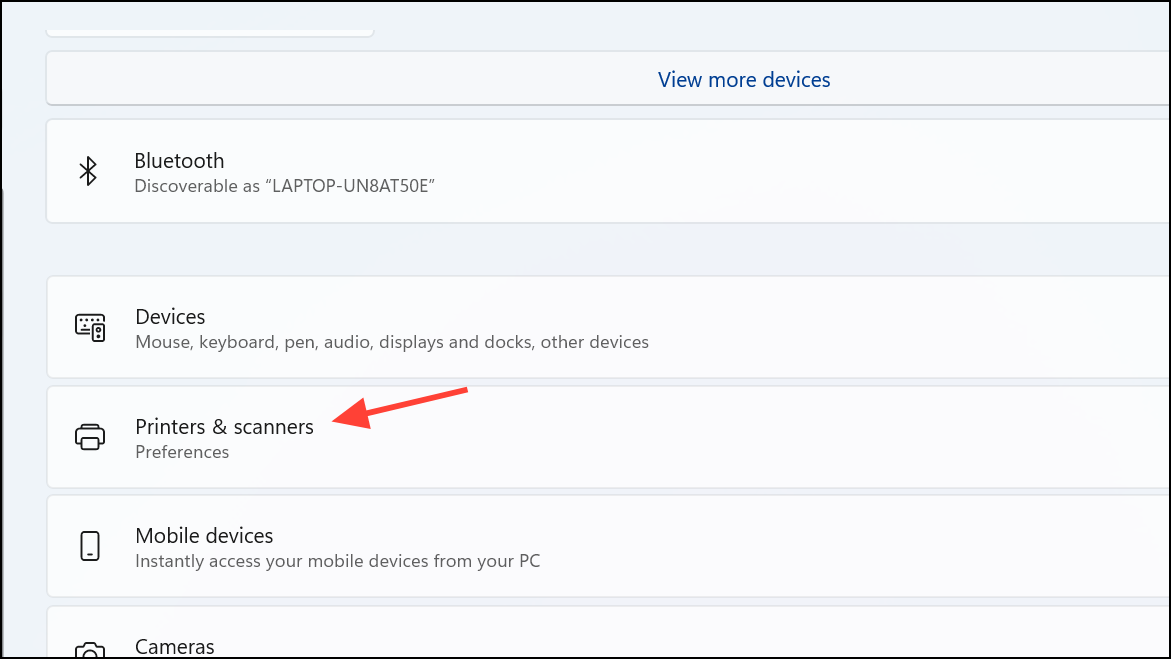
Step 2: Click Printers and scanners on the Bluetooth and Devices page.
Step 3: Click the Add device button at the top right. If your printer is not listed, click The printer that I want isn't listed.
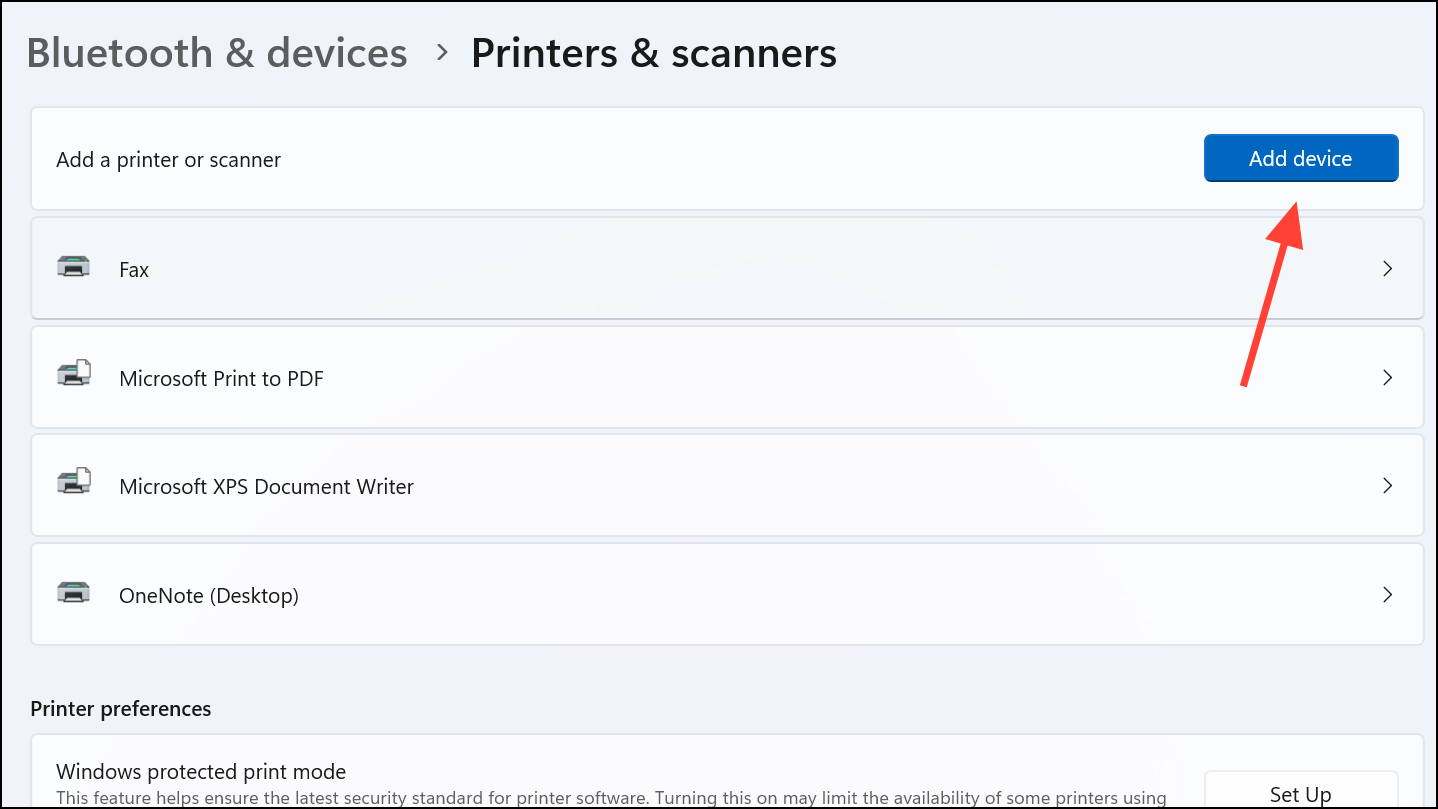
Step 4: Choose Select a shared printer by name. Enter the network path to the shared printer (e.g., \\ComputerName\PrinterName) or browse for it.

Step 5: Complete the wizard to finish adding the printer. Install any required drivers if prompted.
Update Printer Drivers
Outdated or incompatible printer drivers can also prevent successful printer connections. Installing the latest drivers ensures compatibility with Windows 11's updated protocols.
Step 1: Go to the printer manufacturer's website and download the latest driver for your printer model and Windows version.
Step 2: Install the driver according to the manufacturer's instructions. Restart your computer after installation.
Step 3: Try reconnecting to the printer. Updated drivers often resolve detection and communication failures.
Switching the RPC protocol via Group Policy or the registry reliably restores network printer functionality after upgrading to Windows 11. If issues persist, resetting the print spooler, running the troubleshooter, or updating drivers provides additional fixes.