
Windows 11 systems may display the error code 0xc0290122 during boot or after applying cumulative updates, especially when virtualization-based security (VBS) features are enabled in the BIOS or via Group Policy. This error typically appears as part of a failed virtualization-based security enablement policy check at boot phase 6, which can prevent the operating system from loading, cause repeated BitLocker recovery prompts, or trigger a Blue Screen of Death (BSOD). Addressing this issue involves a combination of BIOS configuration changes, firmware protection settings, and, when available, applying the latest Microsoft updates.
Apply the Latest Out-of-Band Update
Microsoft periodically releases out-of-band (OOB) updates to address critical issues that emerge after regular Patch Tuesday releases. For error 0xc0290122, check for and install any OOB updates, as these often resolve compatibility problems between security features and recent patches.
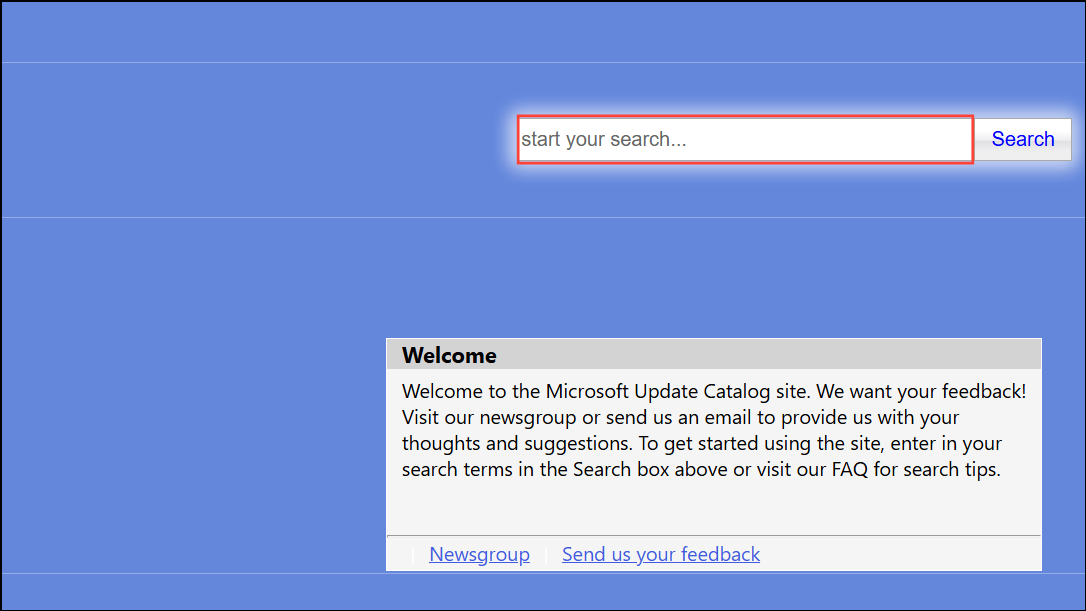
Step 1: Visit the Microsoft Update Catalog and search for the latest OOB update relevant to your Windows 11 version. Download the appropriate .msu file for your system architecture.
Step 2: Double-click the downloaded file to initiate the update installation. Follow on-screen prompts and allow the process to complete. Restart your computer when prompted.
Step 3: After rebooting, verify that the error no longer appears. If the error persists, continue with the next method.
Adjust BIOS Virtualization and Security Settings
Settings such as Intel VT-d (Virtualization Technology for Directed I/O), Intel VT-x, Intel TXT (Trusted Execution Technology), and Secure Boot can conflict with Windows virtualization-based security policies after certain updates. Modifying these BIOS settings can often restore system boot and resolve the error.
Step 1: Power off your computer and enter the BIOS or UEFI firmware setup (typically by pressing F2, Del, or Esc during startup).
Step 2: Locate the Secure Boot option and set it to Disabled. Save changes and reboot. If the system boots successfully, you may re-enable Secure Boot after the update process is complete and the error is resolved.
Step 3: If the error persists, re-enter the BIOS and disable all virtualization-related options, including Intel VT-d, Intel VT-x, and Intel TXT. Save and reboot the system.
Step 4: If disabling these features allows the system to boot, you can test re-enabling them one at a time to identify which specific setting causes the error. Some organizations require these features for security or virtualization workloads, so document any changes and consult the IT policy before making permanent adjustments.
Modify Firmware Protection and Virtualization-Based Security Policies
Group Policy or registry settings that enforce firmware protection (Microsoft Defender System Guard) or Secure Launch can trigger error 0xc0290122 if they are incompatible with your hardware or recent updates.
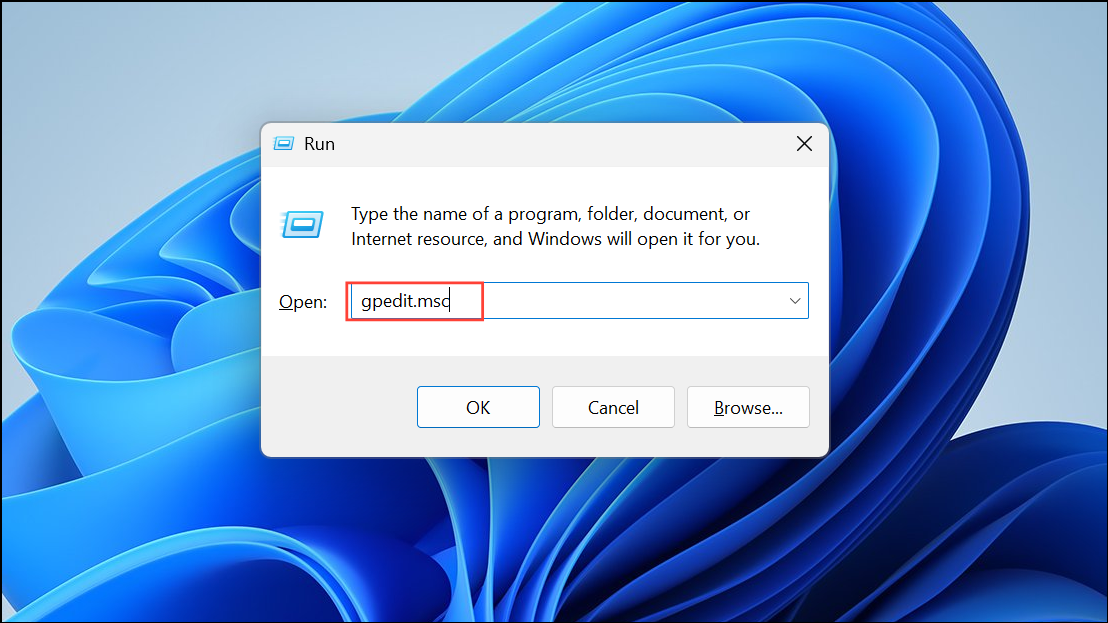
Step 1: Open the Run dialogue using the Win + R shortcut, typegpedit.msc (Group Policy Editor), and press Enter.
Step 2: Navigate to Computer Configuration > Administrative Templates > System > Device Guard > Turn On Virtualization Based Security.
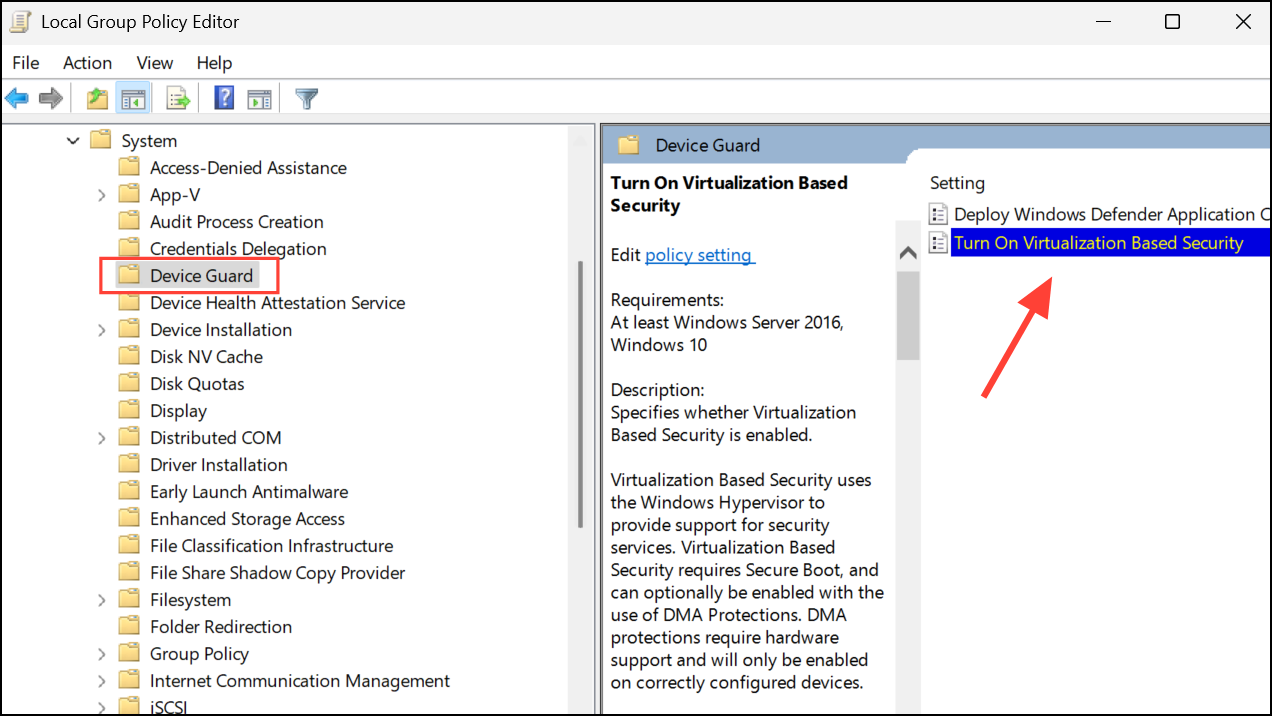
Step 3: Under the Secure Launch Configuration section, set the policy to Disabled. Apply the changes and restart your computer.

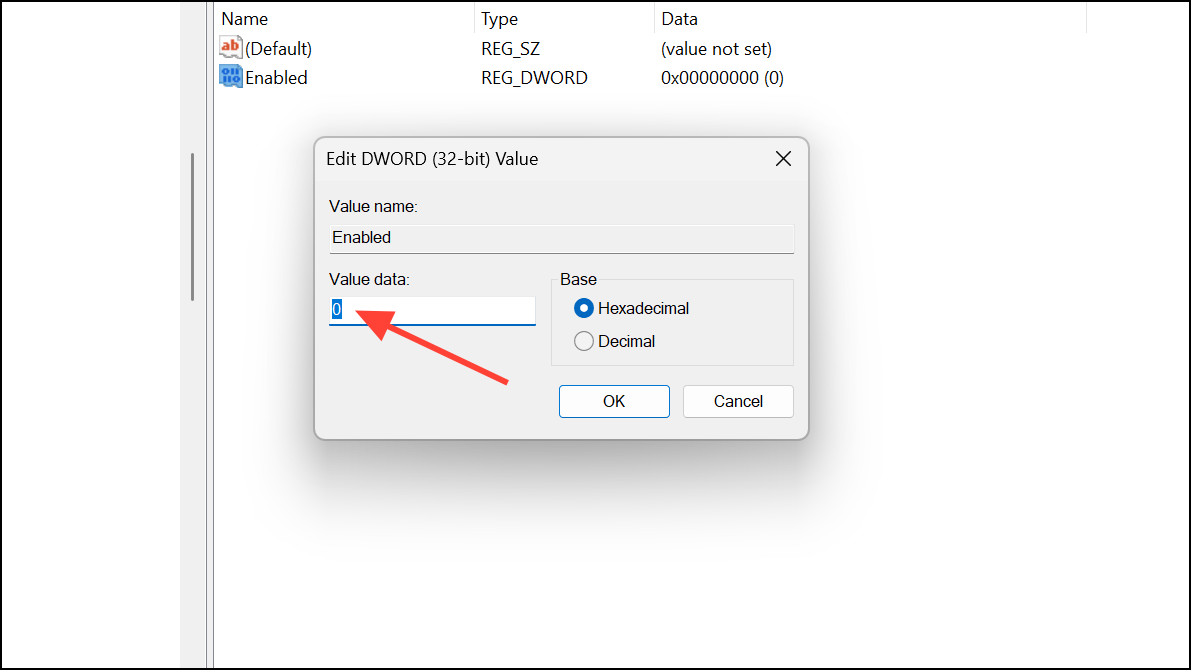
Step 4: Alternatively, open regedit (Registry Editor) and navigate to:
HKEY_LOCAL_MACHINE\SYSTEM\CurrentControlSet\Control\DeviceGuard\Scenarios\SystemGuard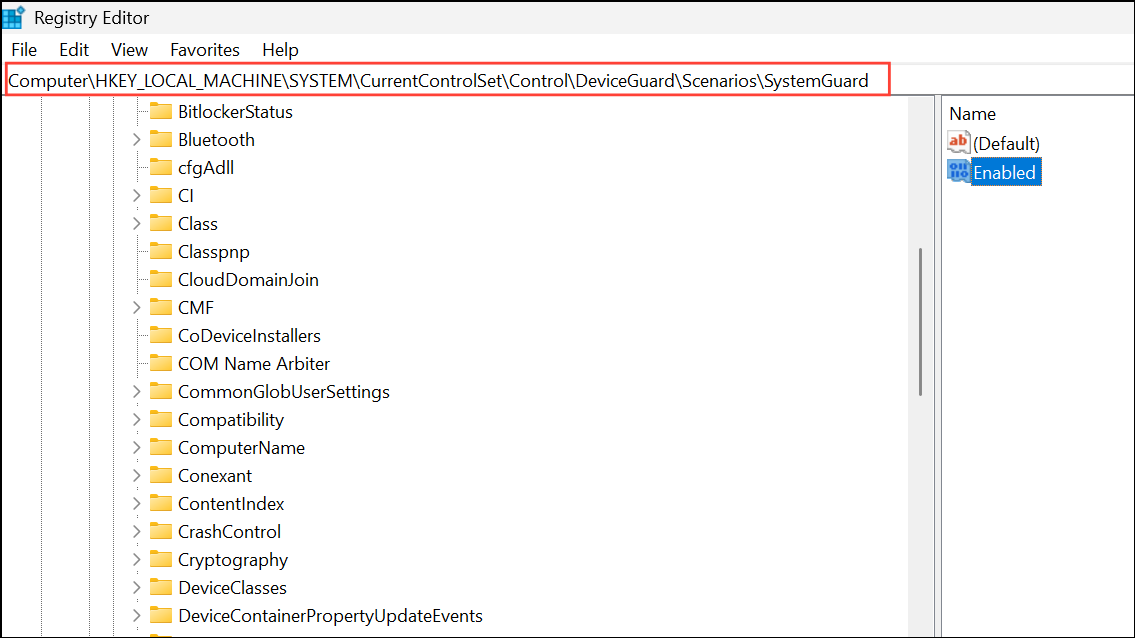
Step 5: Set the Enabled DWORD value to 0 (or create it if missing). Restart for changes to take effect.
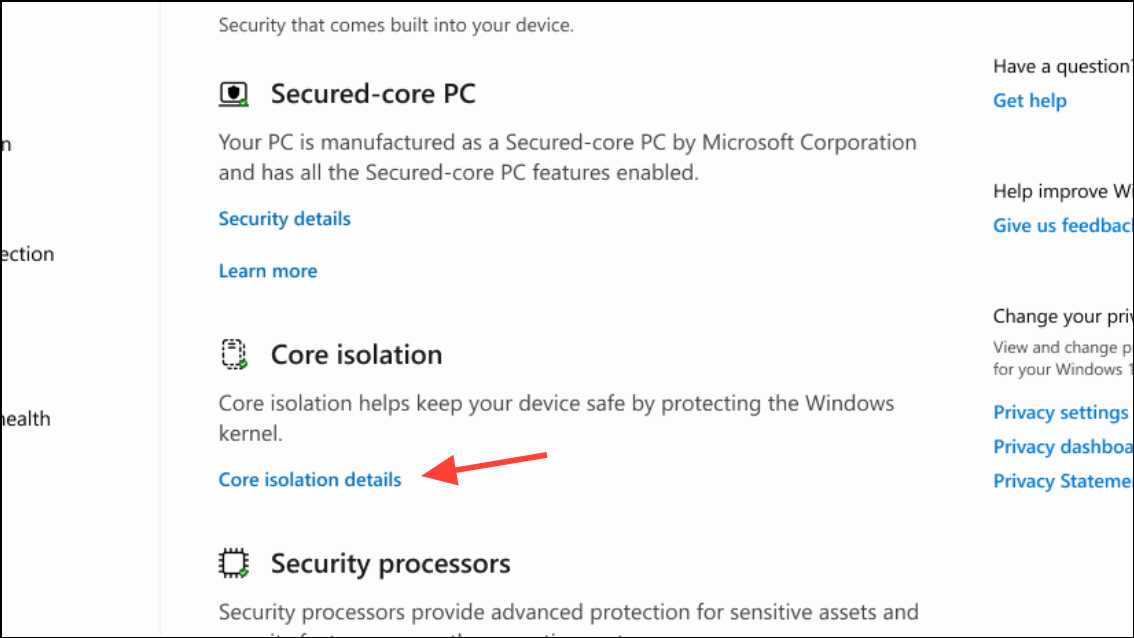
Step 6: To verify firmware protection status, check the same registry path or open Windows Security > Device Security and review the Core Isolation or Firmware Protection section.
Manual Update Installation Using Media Creation Tool
When standard update methods fail due to corruption or missing files, performing an in-place upgrade with the Media Creation Tool can fix underlying system issues without affecting personal files and installed applications.
Step 1: Download the Media Creation Tool or Installation Assistant from Microsoft’s official site.
Step 2: Run the tool and select Upgrade this PC now. When prompted, ensure the option to keep personal files and apps is checked.
Step 3: Allow the tool to download fresh system files and complete the repair process. This method replaces corrupted files and resolves update failures that standard troubleshooting cannot address.
Step 4: Restart your computer when prompted and confirm that the error no longer appears at startup or during updates.
Additional Troubleshooting Tips
- Check for updated drivers and firmware from your device manufacturer, especially for security and virtualization features.
- Monitor Microsoft’s official update channels and support pages for new patches addressing virtualization or BitLocker issues.
- If you use enterprise deployment tools (WSUS, SCCM, Intune), ensure that the latest updates and OOB patches are imported and approved for affected devices.
- Consider pausing updates on affected device models until a permanent fix is available, particularly for business-critical systems.
Resolving error 0xc0290122 on Windows 11 may require a combination of BIOS, policy, and update changes. Staying current with Microsoft’s OOB patches and carefully managing security settings will minimize downtime and restore normal system operation.