
HP printer installations on Windows 11 ARM-based laptops and tablets frequently stall with the error message: Service ‘PlugPlay’ (PlugPlay) failed to start. Verify that you have sufficient privileges to start system services. This issue blocks device recognition, prevents printers from installing, and disrupts USB and peripheral connectivity. On affected systems, the Plug and Play service may be missing from the services.msc list entirely, or present but unable to start. Addressing this error restores automatic hardware configuration and device functionality.
Install HP Printers on ARM64 Windows 11 Using Universal Print Drivers
Step 1: Download the HP Smart Universal Print Driver for ARM64 from the official HP support website. This driver is specifically designed for ARM-based Windows 11 devices and bypasses the Plug and Play service dependency that can block standard installations.
Step 2: Ensure the correct version of Windows is detected on the HP driver download page. If not, manually select your operating system as Windows 11 ARM64.
Step 3: Expand the "Driver - Smart Universal Print Driver" section and download the ARM64 version of the HP Smart Universal Printing Driver.
Step 4: Run the downloaded file. When prompted, accept the license terms and proceed through the installation wizard to unpack the driver files.
Step 5: If the installer offers to set up the printer automatically, follow the prompts. If not, or if installation fails, continue to add the printer manually.
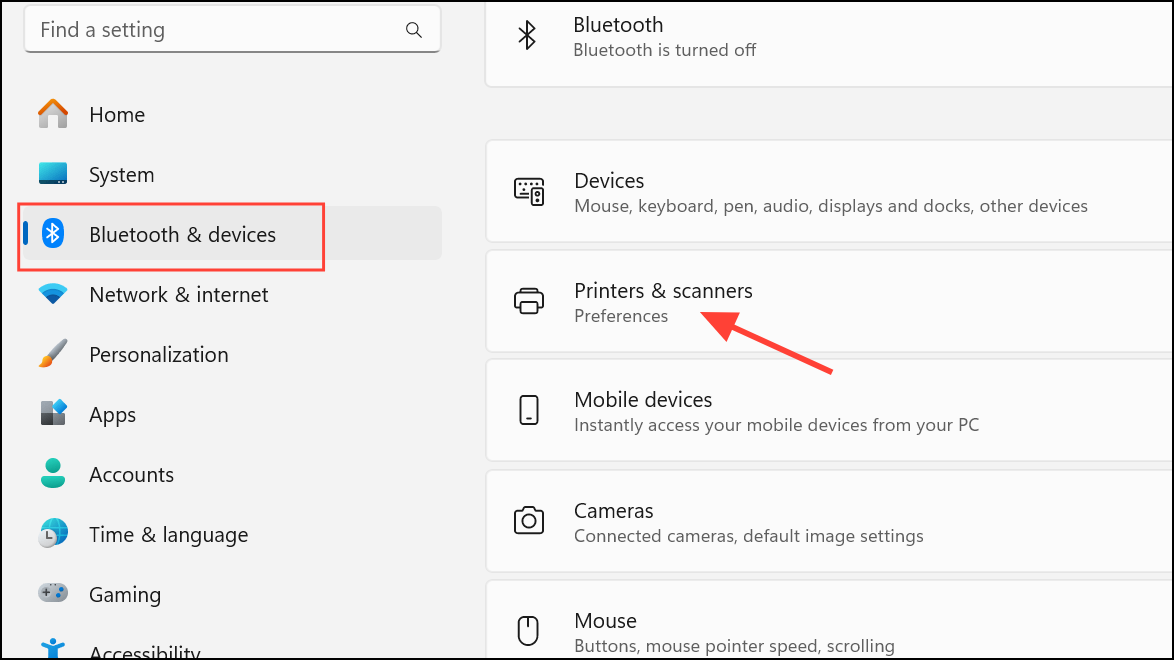
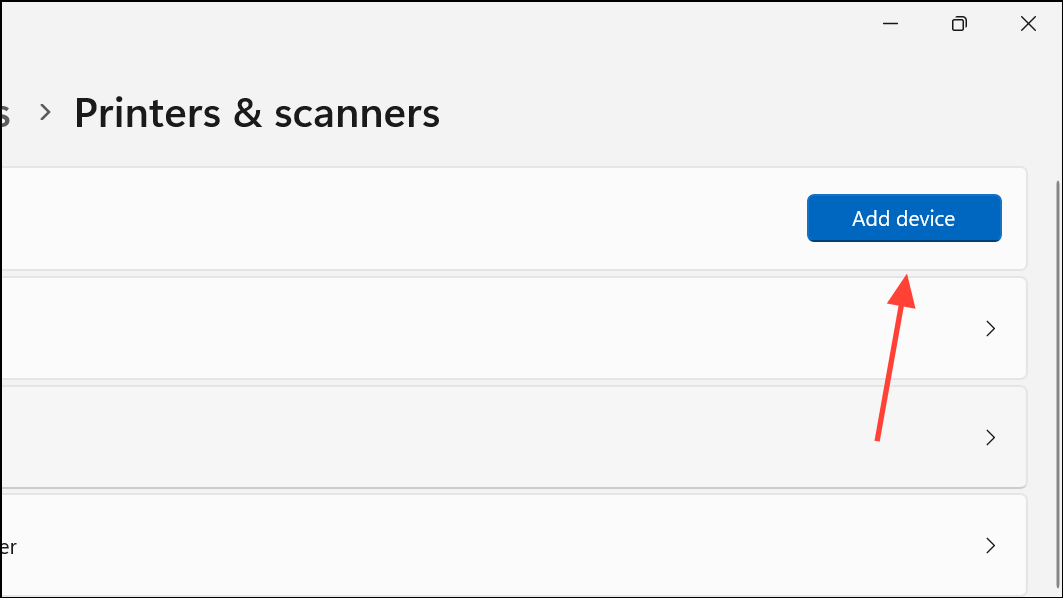
Step 6: Open Settings > Bluetooth & devices > Printers & scanners. Click Add device and wait for Windows to search for available printers. If your printer is not detected, select Add manually.
Step 7: In the Add Printer wizard, choose the appropriate connection type (USB or network/IP). If Windows fails to find a suitable driver, click Have Disk and browse to the folder where the HP Universal Print Driver was extracted. Select the appropriate INF file to install the driver manually.
Step 8: Complete the wizard to finalize the printer installation. This method restores basic printing functions even when the Plug and Play service is missing or blocked.
Restore Plug and Play Service Settings via Command Prompt
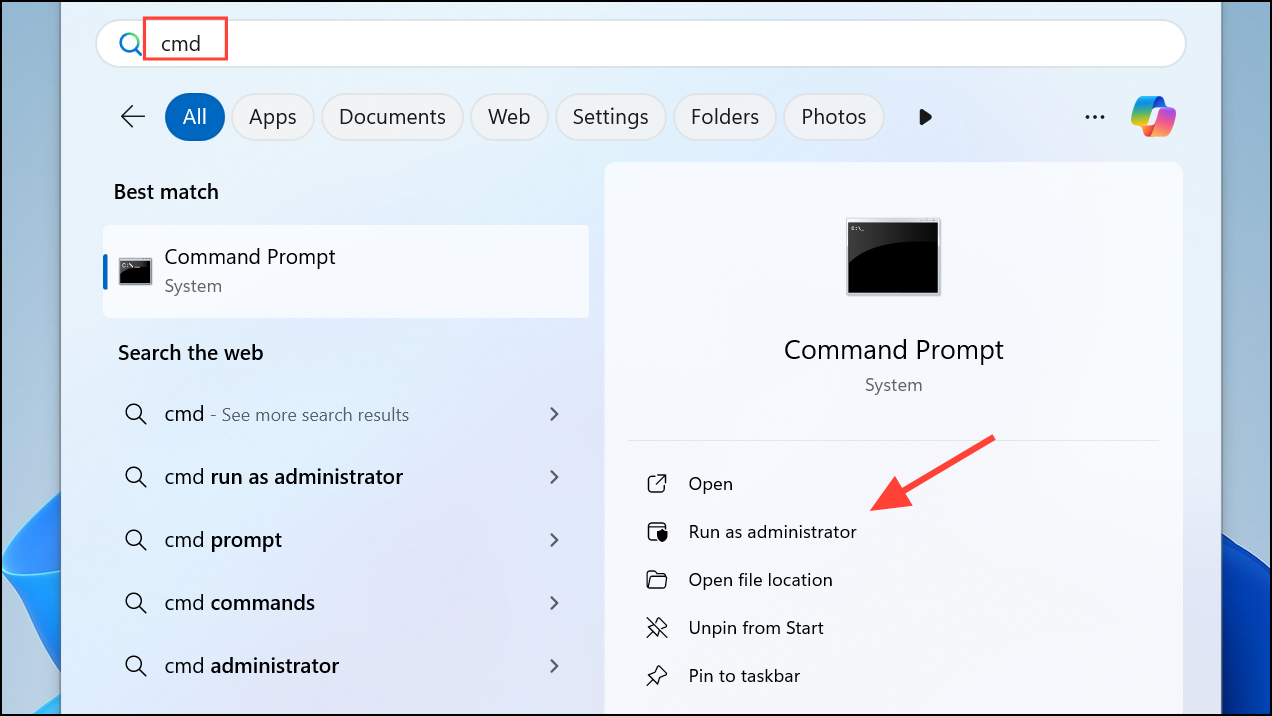
Step 1: Open Command Prompt as an administrator. Press Win + S, search for "cmd", right-click, and select Run as administrator.
Step 2: Enter the following command to reset the Plug and Play service to its default startup configuration:
sc config PlugPlay start= demand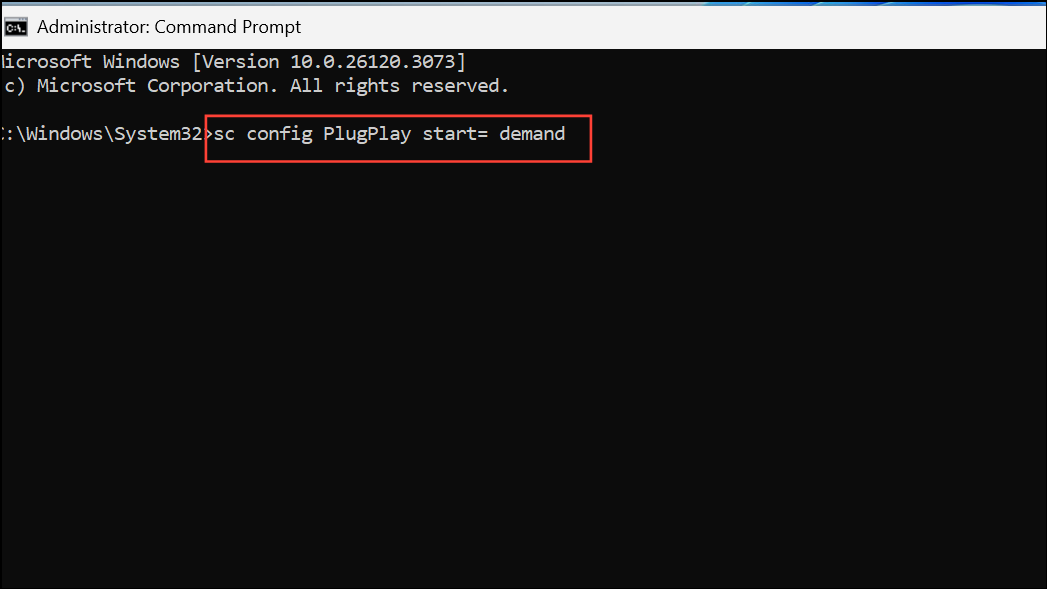
This command sets the Plug and Play service to start manually when needed.
Step 3: Start the service with:
net start PlugPlay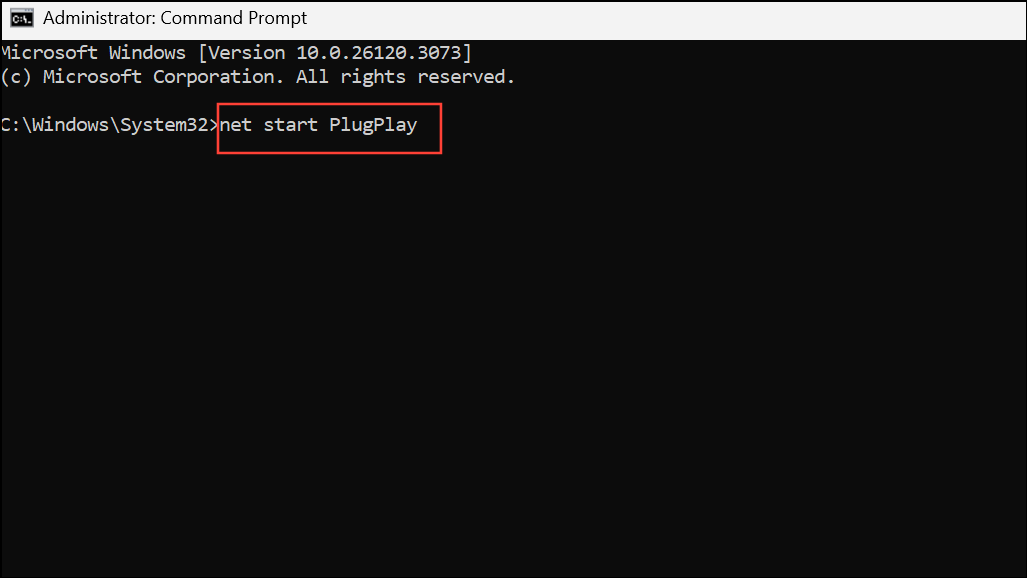
If the service is missing or these commands fail, system file corruption or a deeper OS issue may be present.
Check for Problematic or Missing Drivers
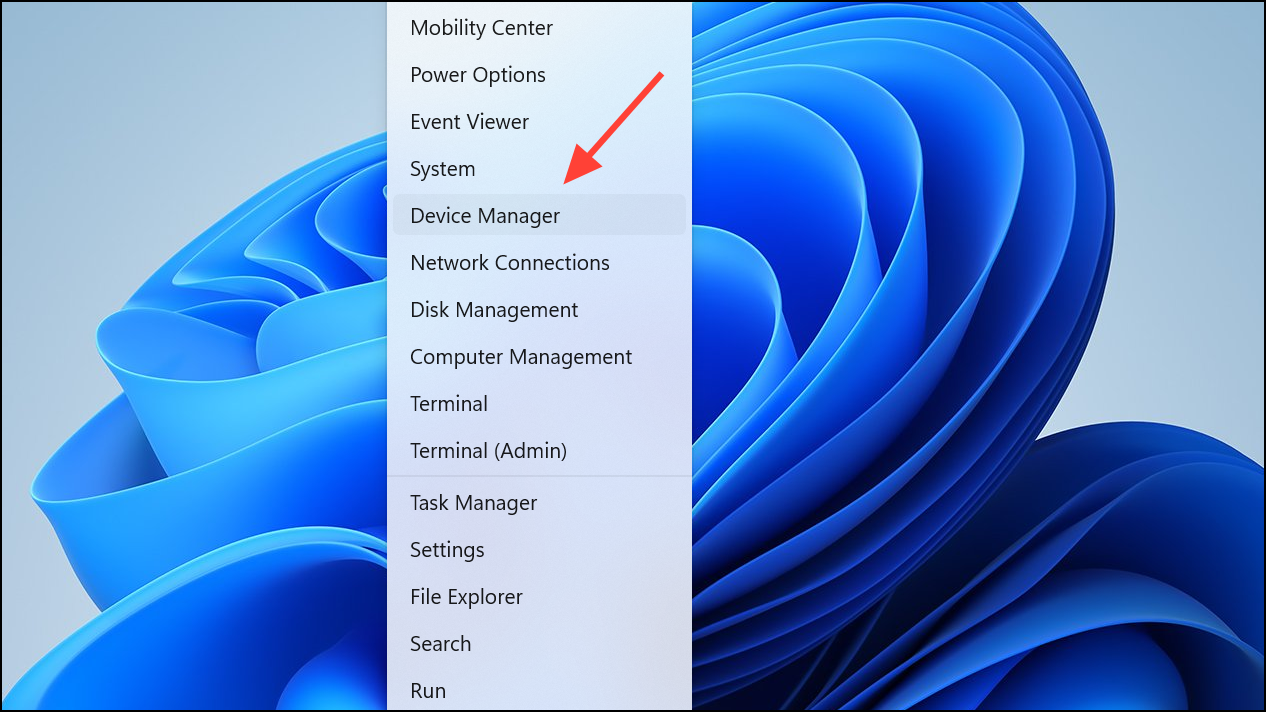
Step 1: Open Device Manager by pressing Win + X and selecting Device Manager.
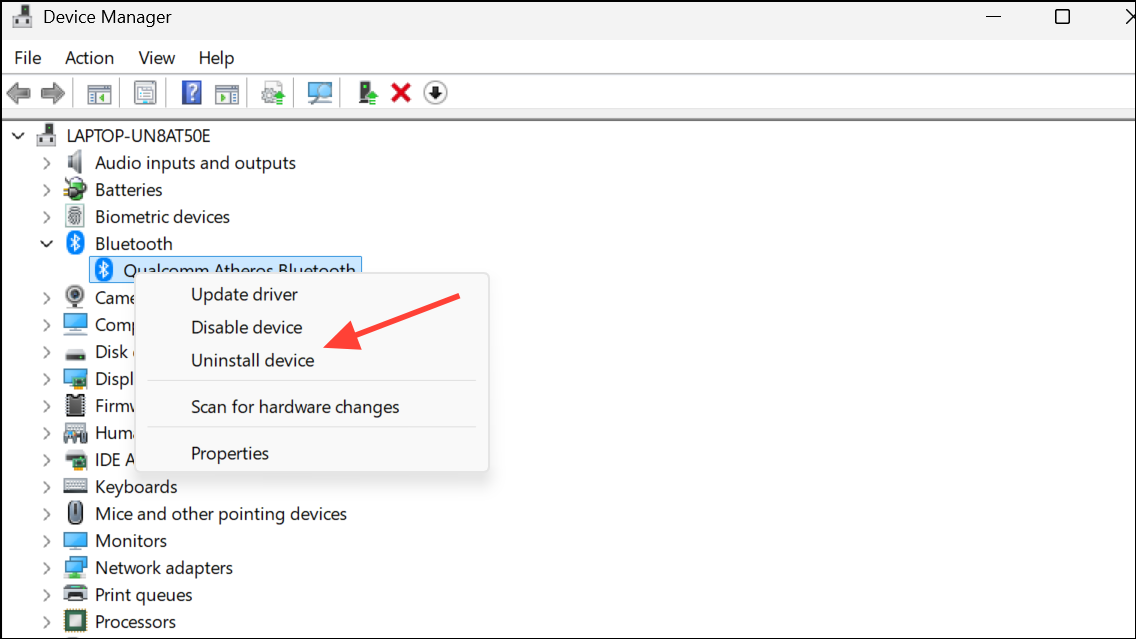
Step 2: Expand device categories and look for entries marked with a yellow exclamation mark. These indicate driver conflicts or missing drivers.
Step 3: Right-click the problematic device and choose Uninstall device.
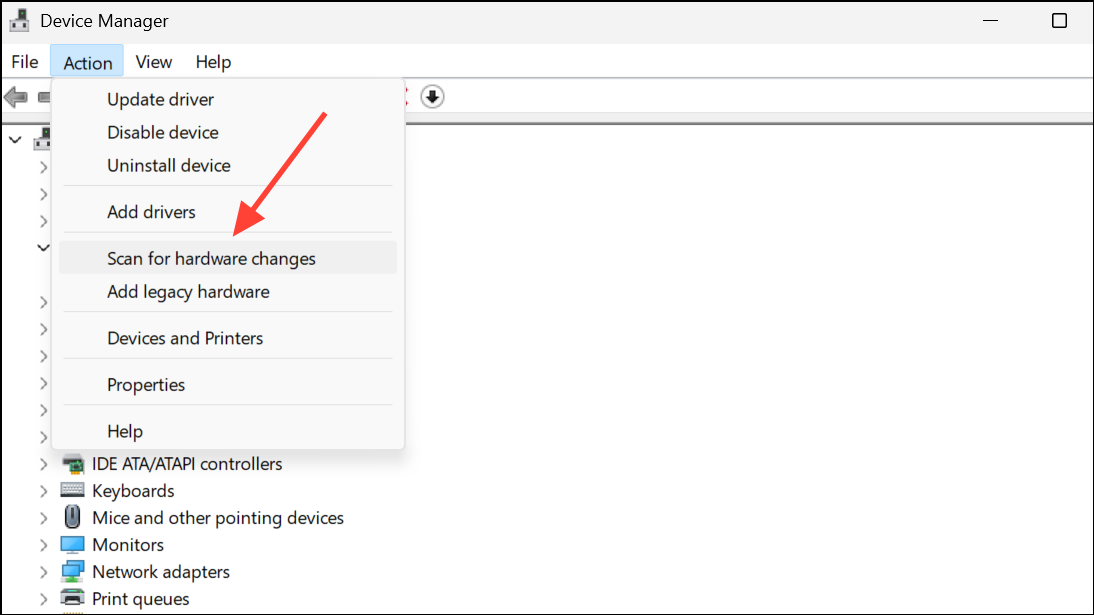
Step 4: After uninstalling, click Action > Scan for hardware changes to allow Windows to attempt reinstallation of the correct driver.
Step 5: If the device remains unrecognized, download the latest driver from the manufacturer’s official website, ensuring compatibility with ARM64 if applicable.
Use the Generic Microsoft Printer Driver
Step 1: Open Settings > Bluetooth & devices > Printers & scanners.
Step 2: Select Add device. Allow Windows to detect your printer. If it appears, select it and let Windows install the default Microsoft driver.
Step 3: If advanced features are unavailable, this method still provides basic printing capability, which can be critical when the Plug and Play service is missing or nonfunctional.
Repair System Files and Windows Image
Step 1: Open Command Prompt as an administrator.
Step 2: Run the System File Checker to scan and repair corrupted system files:
sfc /scannow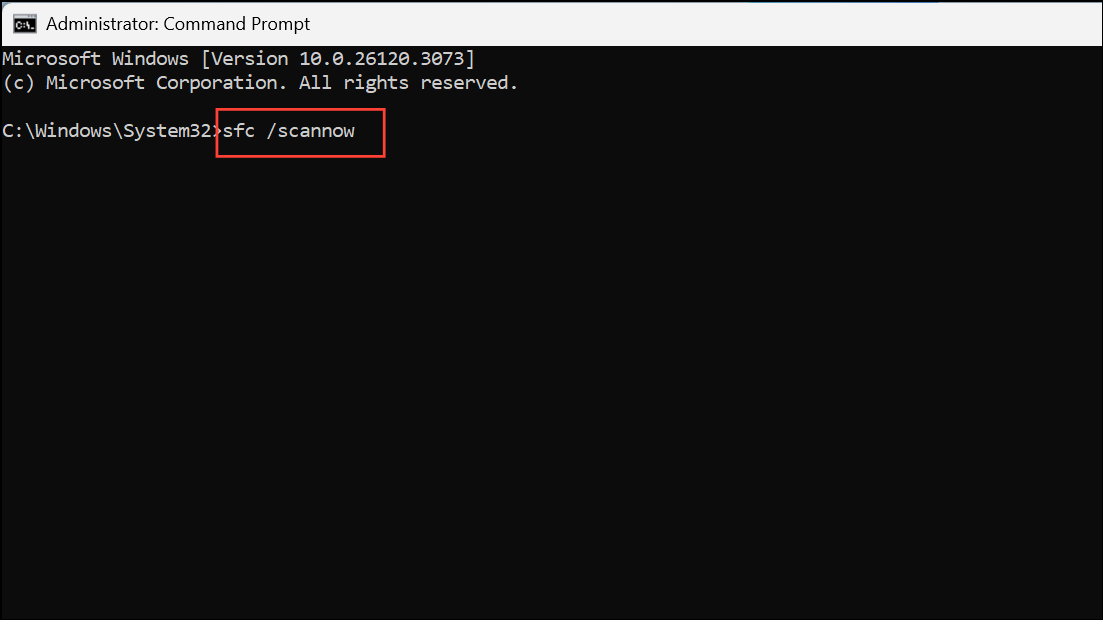
This process checks for missing or altered Windows files, restoring them from cache.
Step 3: If sfc reports unrepairable issues, use the Deployment Imaging Service and Management Tool (DISM) to restore the Windows image:
DISM.exe /Online /Cleanup-Image /RestoreHealth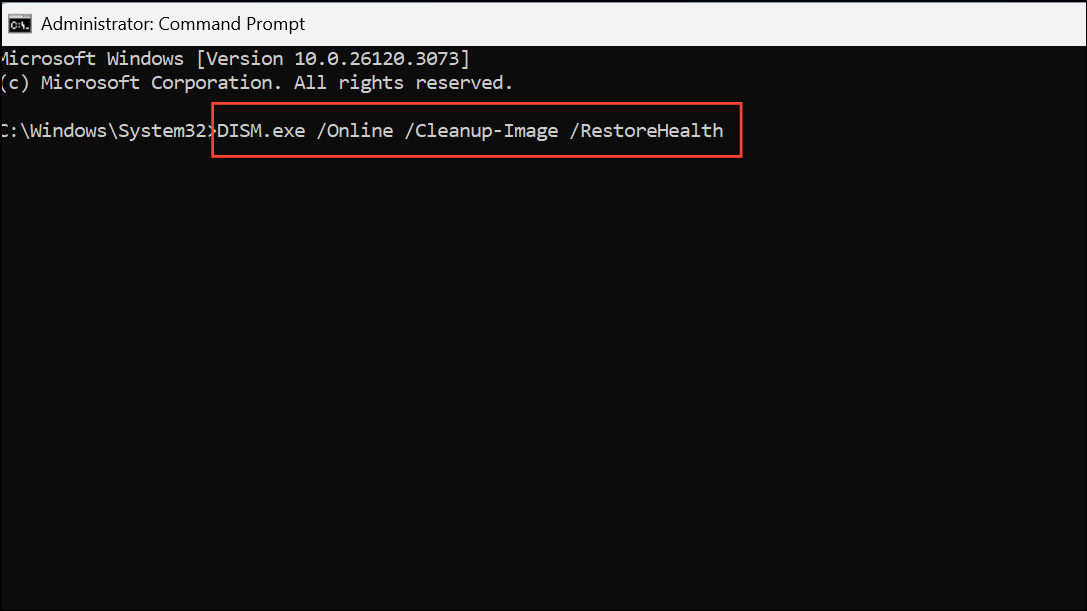
Allow the process to finish, then restart your computer. This step can resolve deeper system corruption that prevents services like Plug and Play from appearing or functioning.
Restore from a System Image or Perform a Repair Install
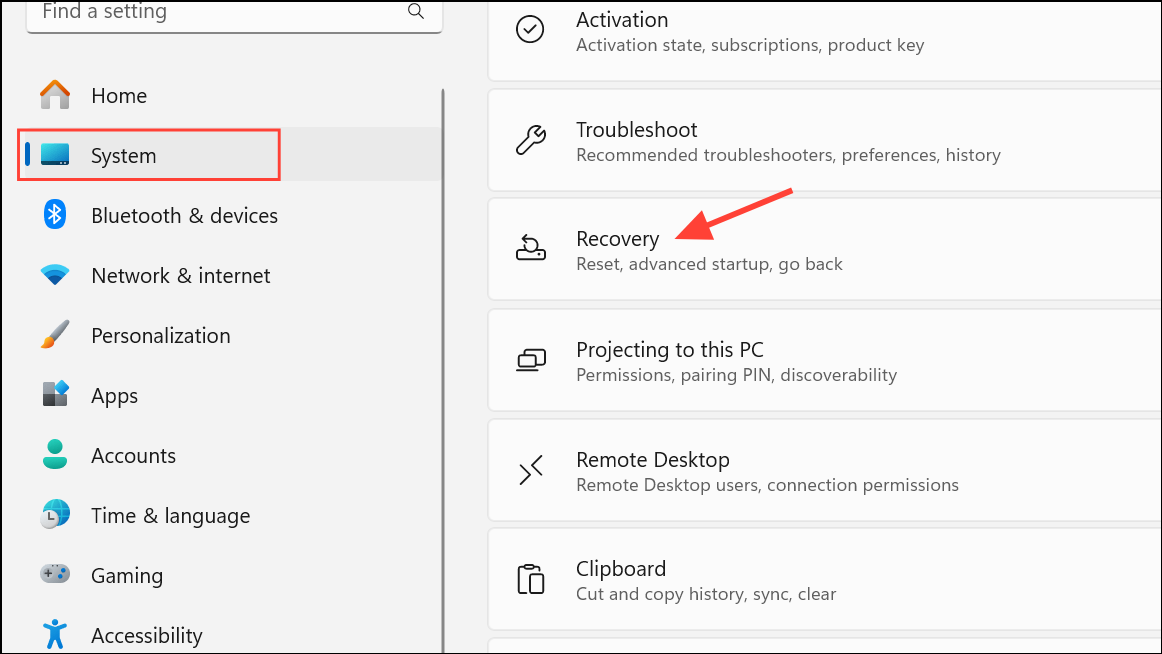
Step 1: If Plug and Play remains missing after all previous steps, consider restoring from a system image or a Windows restore point created before the issue began. Access Settings > System > Recovery and use the Go back or System Restore options.
Step 2: If no restore point exists, a repair installation of Windows 11 may be necessary. This process reinstalls core system files and services while keeping user data intact, but always back up important files before proceeding.
Additional Considerations for ARM-Based Devices
Recent reports indicate the Plug and Play service may be absent or nonfunctional on certain ARM-based Windows 11 systems, particularly after major system updates or out-of-the-box on new hardware. This issue disproportionately affects HP printer installations and other peripherals requiring PnP. If standard troubleshooting fails, check for updated firmware and drivers from both Microsoft and your device manufacturer. In some cases, only a future OS update or OEM patch will fully resolve the missing Plug and Play service on affected ARM devices.
Restoring Plug and Play service functionality in Windows 11 brings back seamless device detection and peripheral installation. For persistent issues on ARM-based systems, using universal drivers or generic Microsoft drivers can restore basic functionality until a permanent fix is available.