
Fixing Hyper-V installation problems on Windows 11 typically requires either adjusting specific virtual machine settings to meet system requirements or removing conflicting virtualization software from your host computer. When attempting to install Windows 11 inside a Hyper-V virtual machine (VM), you may see an error message stating, "This PC can't run Windows 11." This is usually because the VM has not been configured with the necessary virtual hardware. Alternatively, you might be unable to enable the Hyper-V feature on your Windows 11 host system, with the installation failing and rolling back after a restart. The following methods address both of these distinct scenarios.
Configure Virtual Machine Settings for Windows 11 Compatibility
If you are trying to install Windows 11 within a Hyper-V virtual machine and receive an error about not meeting the minimum system requirements, the cause is likely the VM's configuration. Windows 11 has stricter hardware prerequisites than its predecessors, including the need for a Trusted Platform Module (TPM), a dual-core processor, and sufficient RAM. These settings must be enabled for the virtual machine itself, not just on the host computer.
Before proceeding, ensure your virtual machine is configured as a **Generation 2** VM, as this is a prerequisite for enabling virtual TPM and Secure Boot. If your VM is Generation 1, you will need to create a new Generation 2 VM. You must also shut down the virtual machine completely before you can change its security and hardware settings.
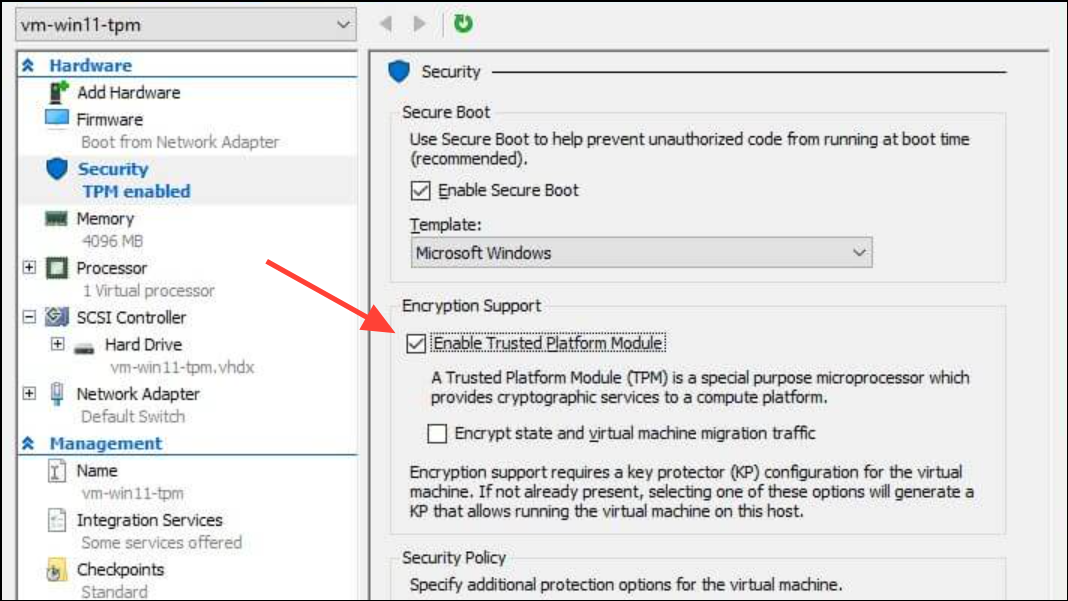
Step 1: Open the Hyper-V Manager from the Start Menu. In the list of virtual machines, right-click the one you intend to use for Windows 11 and select Settings from the context menu.
Step 2: In the VM settings window, navigate to the Security tab on the left-hand pane. In the security settings, locate the option labeled Enable Trusted Platform Module and check the box next to it. This adds a virtual TPM 2.0 device to your VM, which is a mandatory requirement for Windows 11.
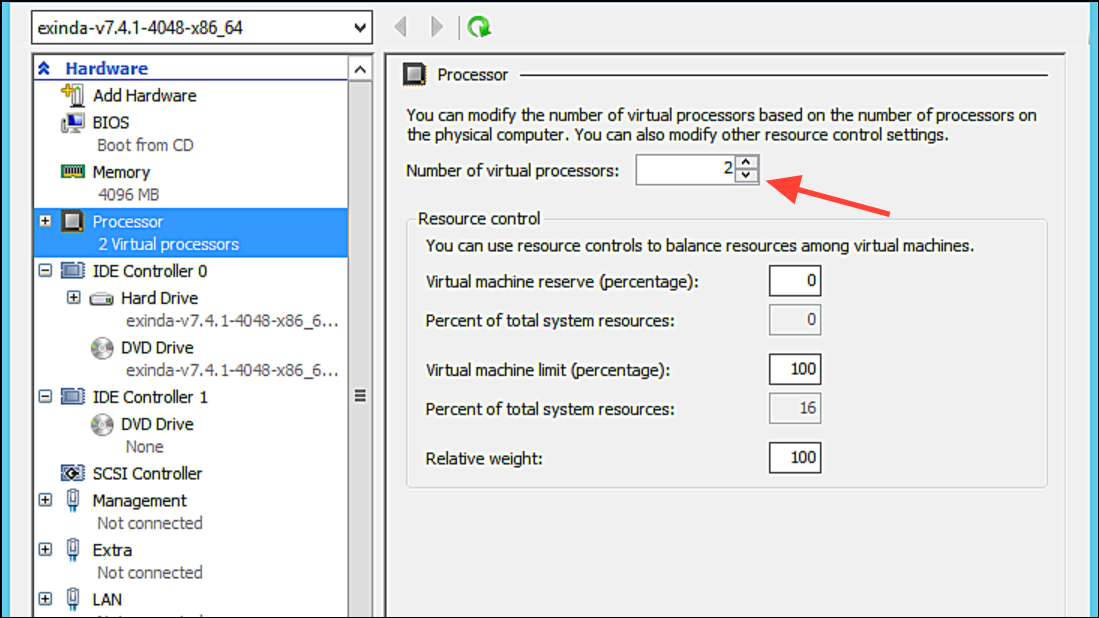
Step 3: Next, select the Processor tab from the left-hand menu. Change the value for Number of virtual processors to at least 2. Windows 11 will not install on a single-core system, so this step is crucial for meeting the minimum CPU requirements.
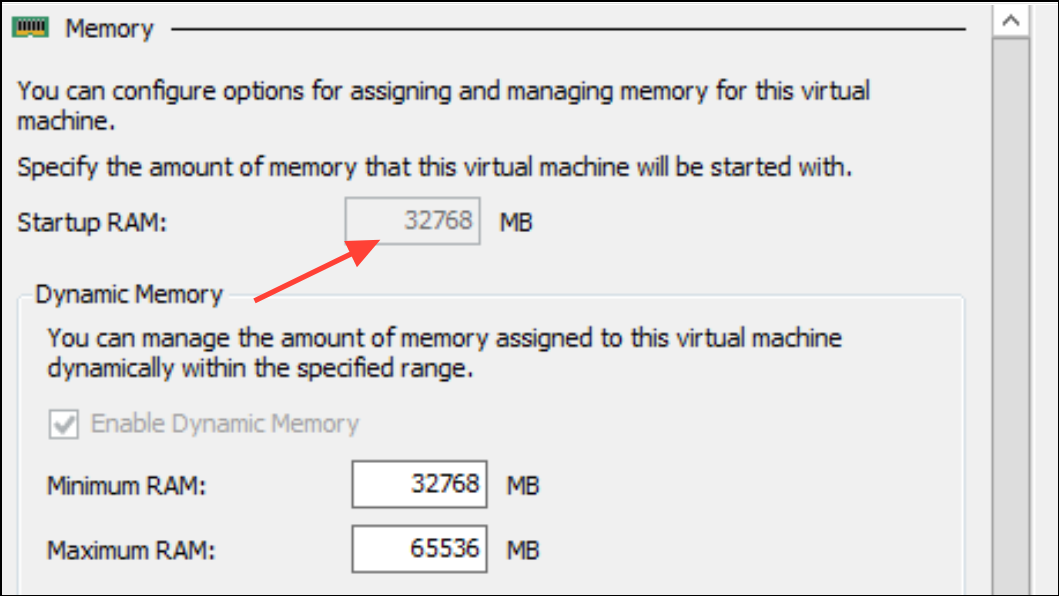
Step 4: Click on the Memory tab. In the Startup RAM field, make sure the value is set to a minimum of 4096 MB. If you are using Dynamic Memory, the minimum RAM can be lower, but the startup value must be at least 4 GB. This satisfies the system's memory requirement.
Step 5: Click Apply and then OK to save the changes. You can now start the virtual machine and attempt the Windows 11 installation again. The "system requirements not met" error should be resolved.
Troubleshoot Hyper-V Feature Installation Failures
If you are unable to enable the Hyper-V feature on your Windows 11 Pro or Enterprise machine—for instance, the process fails during the restart with a message like "We couldn't complete the features"—the problem likely lies with your host system's configuration or files.
Hyper-V is a Type 1 hypervisor, which means it runs directly on the hardware and requires exclusive access to the system's virtualization capabilities. If another virtualization application like VMware Workstation, VirtualBox, or certain Android emulators are installed, they can create conflicts that prevent Hyper-V from being enabled.
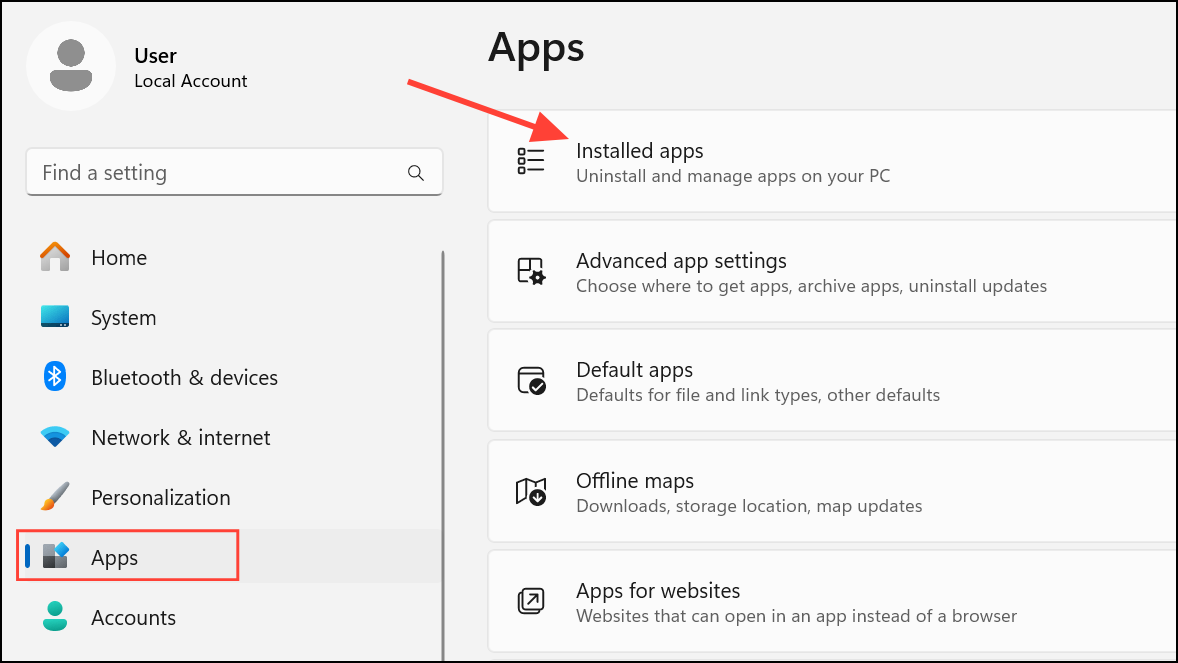
Step 1: Go to Installed apps in Windows Settings and uninstall any other virtualization software. This includes any programs you may have used for creating virtual machines or running mobile apps on your desktop.
Step 2: After uninstalling, restart your computer. Sometimes, uninstalling these programs leaves behind services or drivers that continue to cause conflicts. If the Hyper-V installation still fails, check the Windows Event Viewer for errors related to services like VMnetDHCP or VMSP, as these are clear indicators of leftover components from VMware or other applications.
Step 3: For a more thorough removal, consider using a third-party uninstaller tool that can scan for and delete residual files and registry entries. Alternatively, check the software vendor's website for a dedicated cleanup or removal utility.
Repair Corrupted System Files
If no conflicting software is present, the installation failure may be due to corrupted Windows system files. You can use built-in command-line tools to scan for and repair these files.
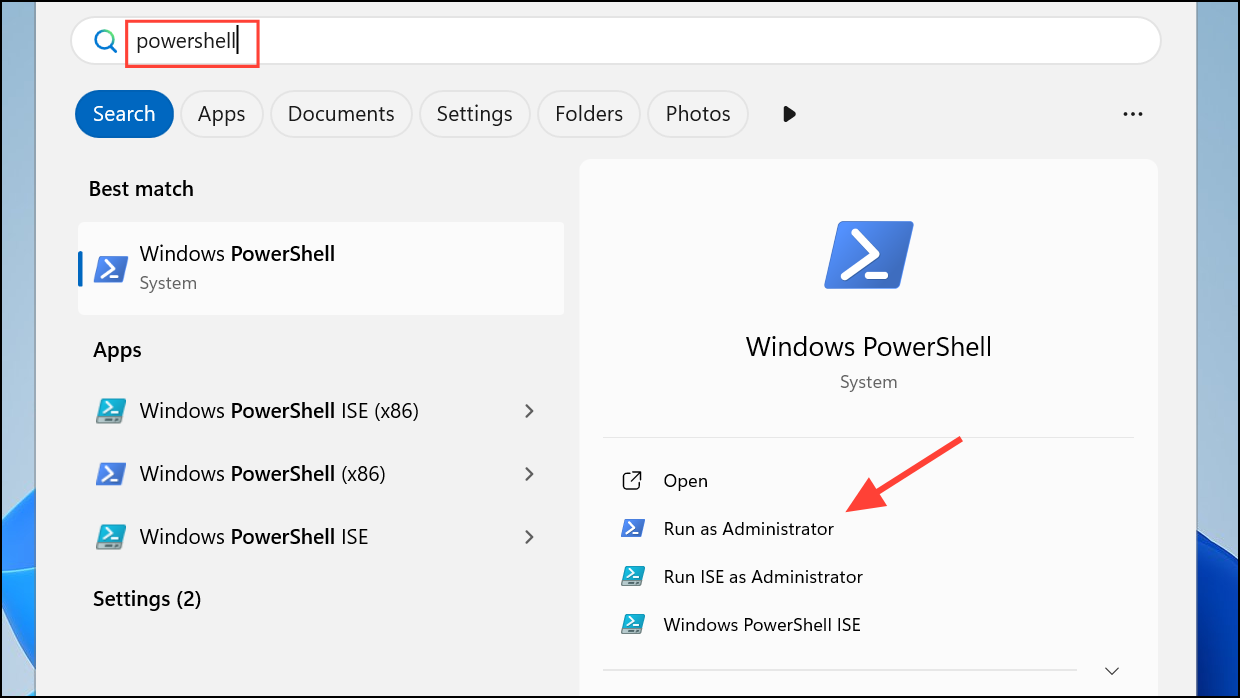
Step 1: Open the Start Menu, type PowerShell, right-click on Windows PowerShell, and select Run as administrator.
Step 2: In the administrative PowerShell window, run the Deployment Image Servicing and Management (DISM) tool to repair the Windows component store. Type the following command and press Enter:
dism /online /cleanup-image /restorehealth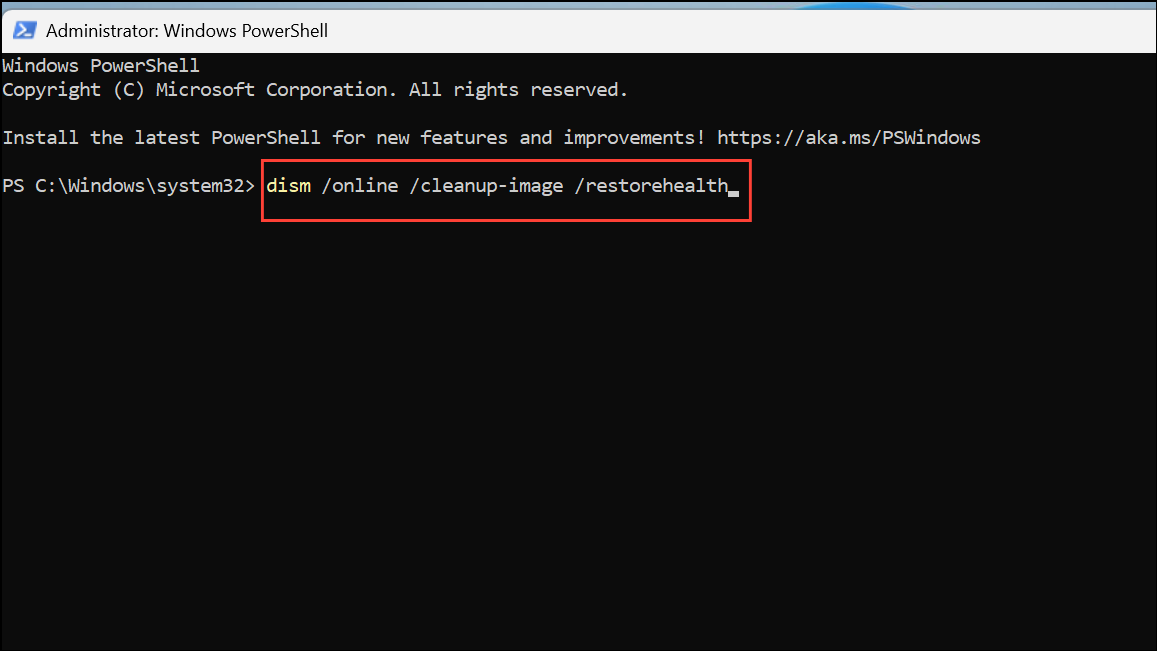
Step 3: Once the DISM scan is complete, run the System File Checker (SFC) to find and fix corrupted system files. Type the following command and press Enter:
sfc /scannow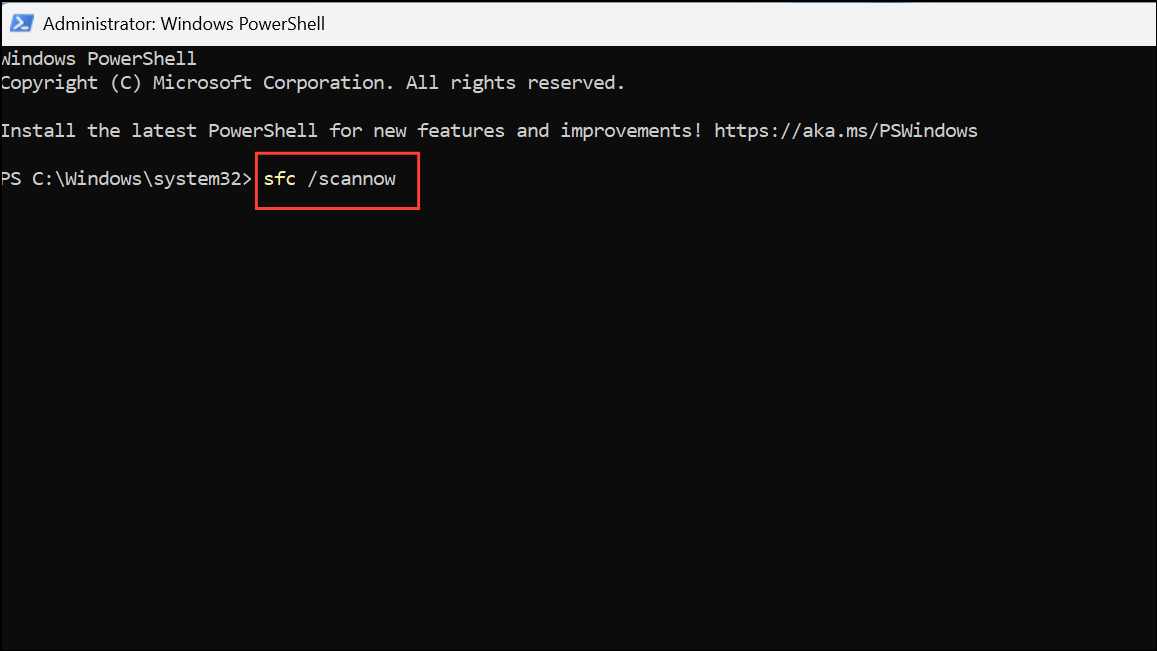
Step 4: After the SFC scan finishes, restart your computer. Once rebooted, try to enable Hyper-V again through the Turn Windows features on or off dialog.
By properly configuring your VM or resolving conflicts on your host system, you should be able to get Hyper-V up and running with Windows 11.