
Windows PowerShell is the built-in command-line tool on Windows used to run various commands on the system. You can use it to perform various functions, such as installing and removing programs, checking for updates, and even performing system scans for errors. The tool usually works fine, but it can sometimes result in a spike in CPU usage, which can adversely affect the performance of your PC. In such cases, there are a few solutions you can try to deal with this problem.
Check For Updates
One of the most common causes of high CPU usage when running Windows PowerShell is an outdated system. So, the first thing you should do to fix the problem is check for updates and install them if available.
- Open Windows Settings using the
Win + Ishortcut and click on Windows Updates on the bottom left.
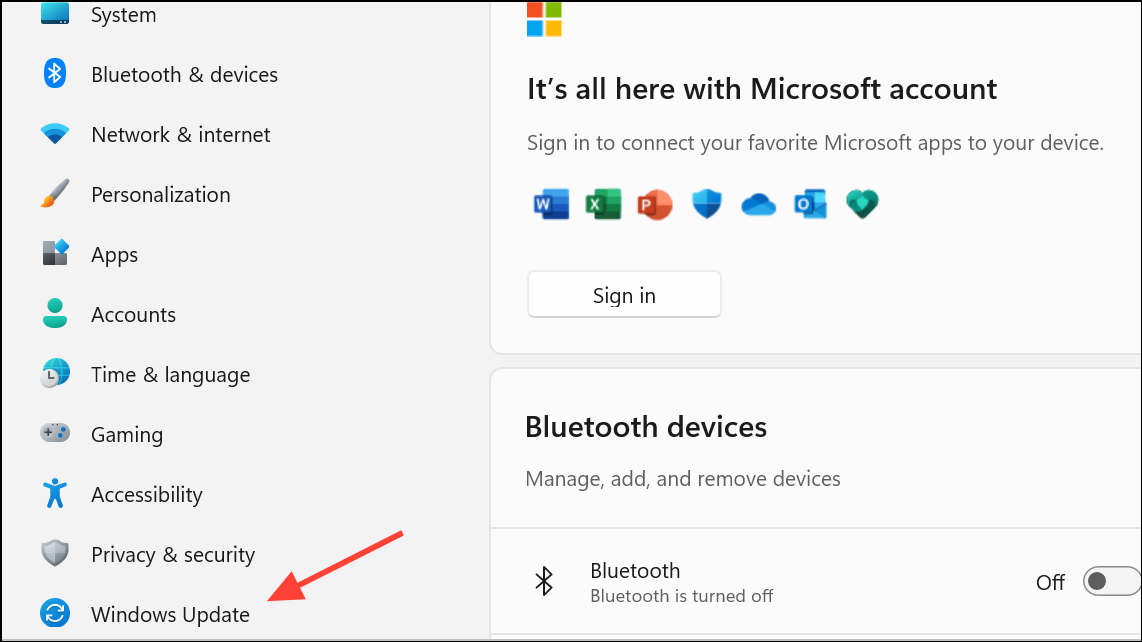
- Click the Check for Updates button on the Windows Update page. If updates are available, Windows will download and install them. You may have to reboot your PC after that. Then check whether CPU usage has returned to normal levels.

Perform A Clean Boot And Troubleshoot
If another application is interfering with PowerShell, it may result in high CPU usage. To identify that application, you should perform a clean boot, which disables all non-essential services on your system.
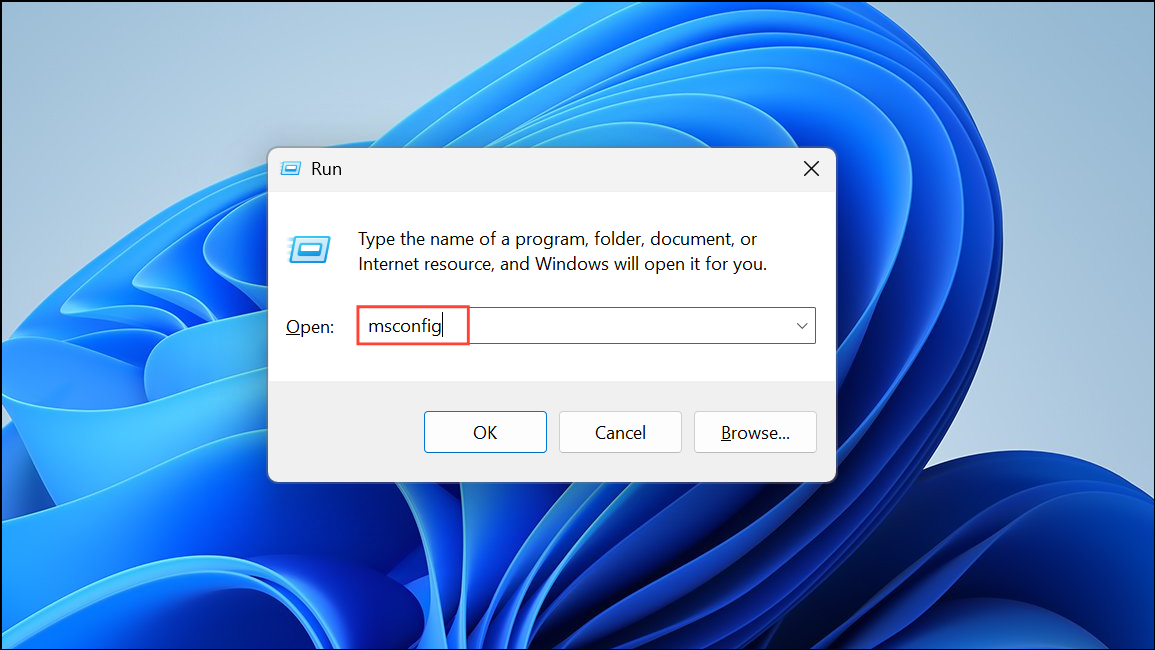
- Open Windows Search or Start Menu, type
msconfigand press Enter. You can also use the same command in the Run dialog after pressingWin + R.
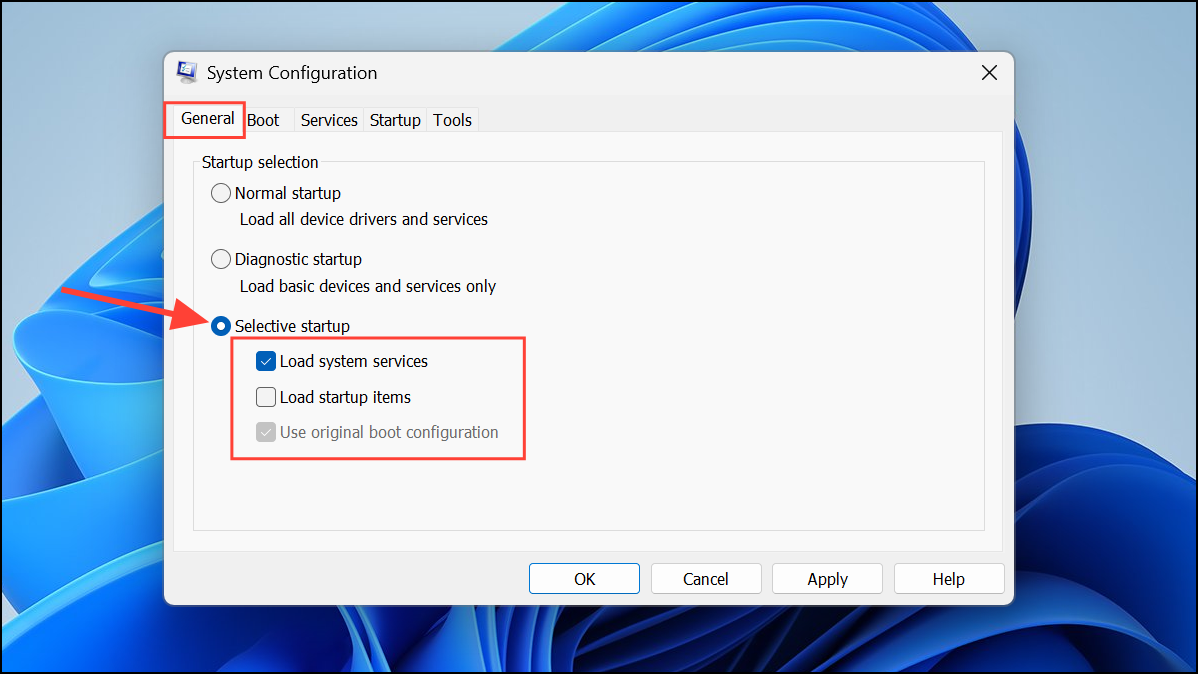
- When the System Configuration utility opens, click Selective Startup on the General tab. Make sure that Load system services and Use original boot configuration are selected, and Load startup items remains unselected.
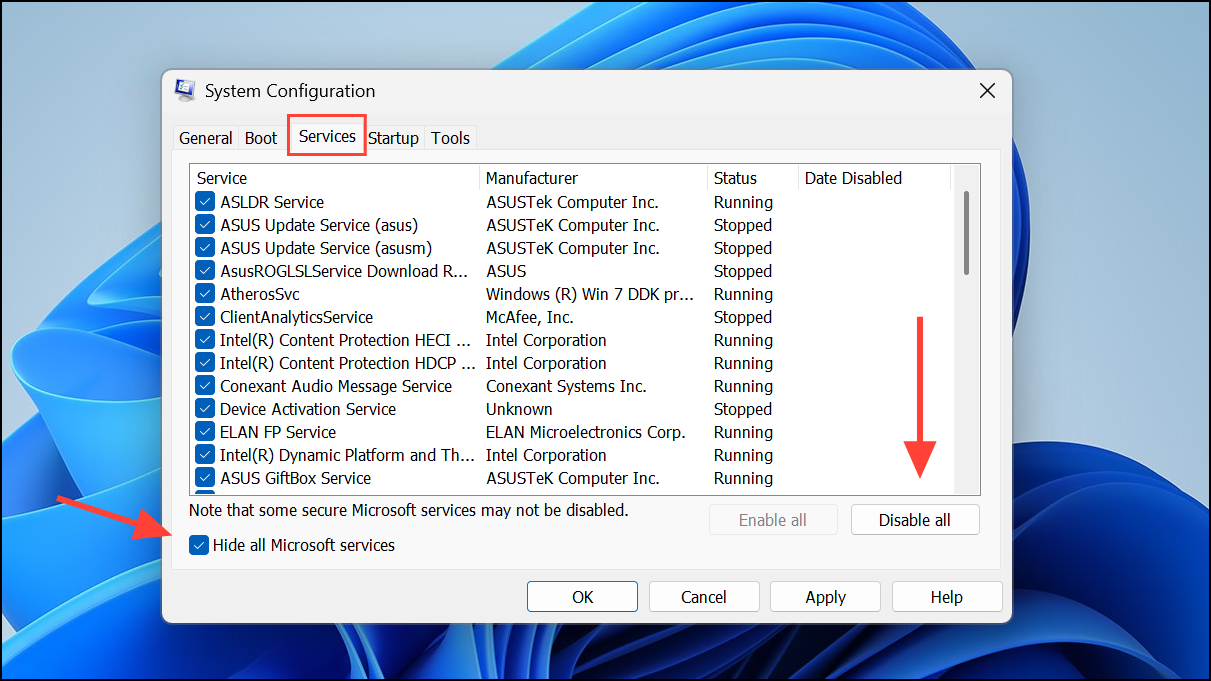
- Go to the Services tab and click Hide all Microsoft services. Then click the Disable all button on the right.
- Go to the Startup tab and click Open Task Manager.

- When the Task Manager opens, right-click all non-essential programs and disable them.
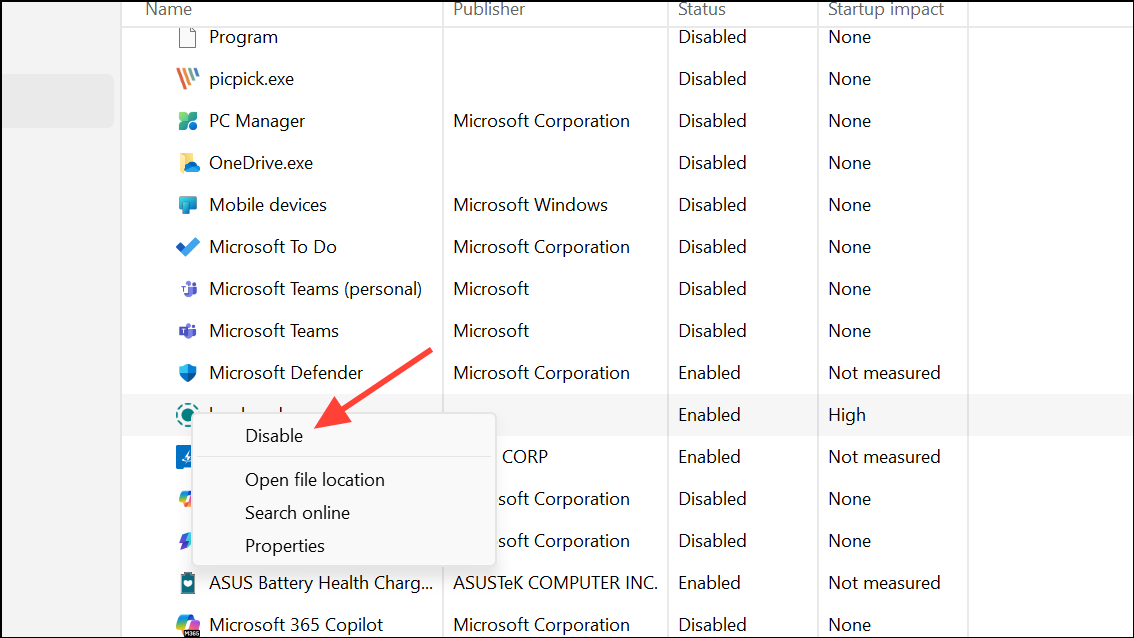
- Close the Task Manager, click Apply and OK in the System Configuration utility, and reboot your PC.
- Your computer will perform a clean boot with all third-party programs and services disabled. You can then try enabling them one by one to determine which one is responsible for the high CPU usage problem when running PowerShell.
Run SFC and DISM scans
If the problem occurs due to corrupted system files, running SFC and DISM scans might help fix it.
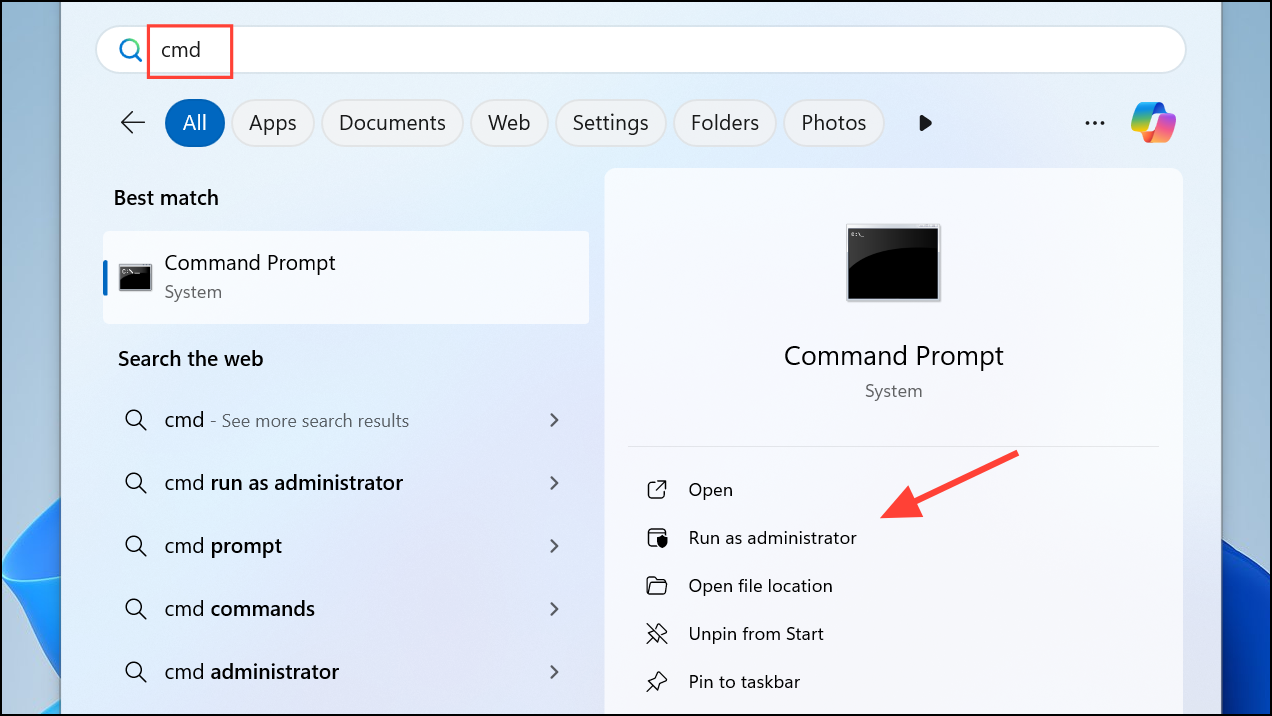
- Open Windows Search or Start menu, type
CMDand click Run as administrator.
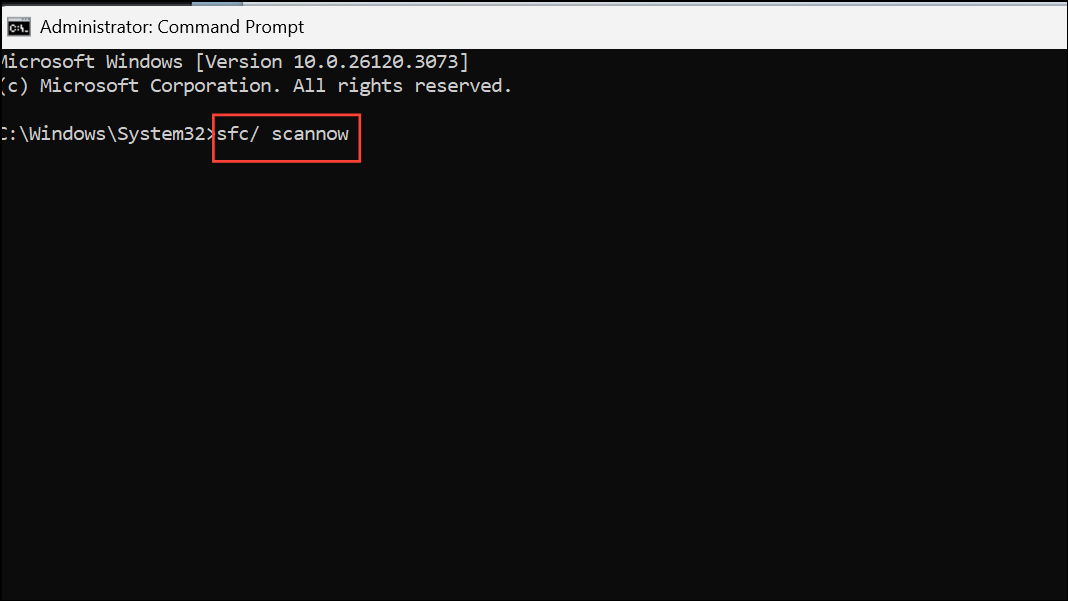
- When Command Prompt opens, type
sfc/ scannowand press Enter.
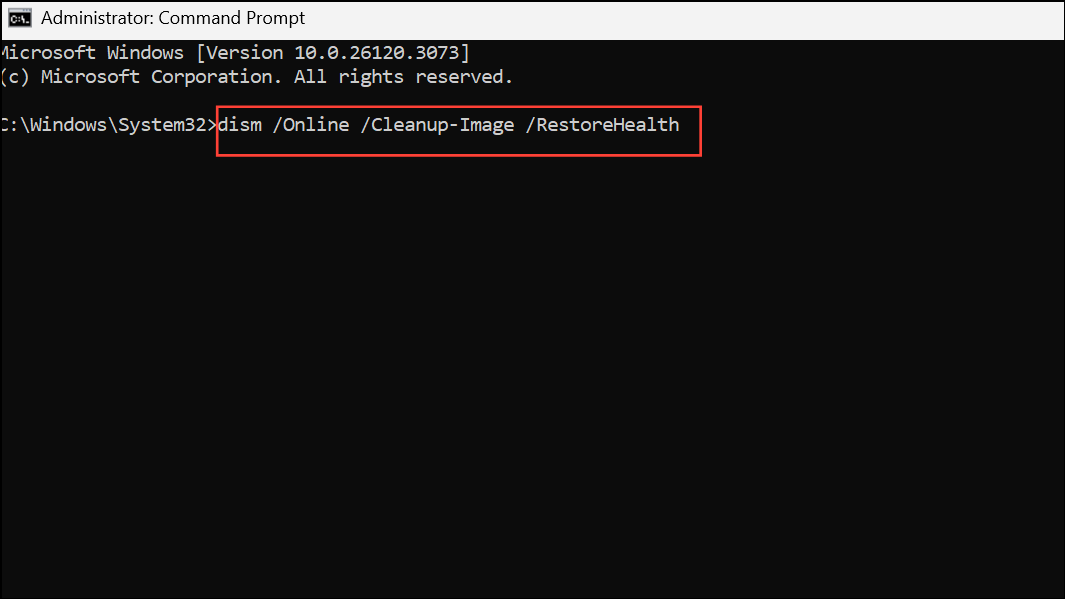
- Wait for the scan to complete. Then type
dism /online /cleanup-image /restorehealthand press Enter again.
Perform a Virus and Malware Scan
High CPU usage can also be caused if your system is infected with a virus or malware. Scanning your system for them can help you get rid of the problem.
- Open Windows Security by searching for it in the Start menu.
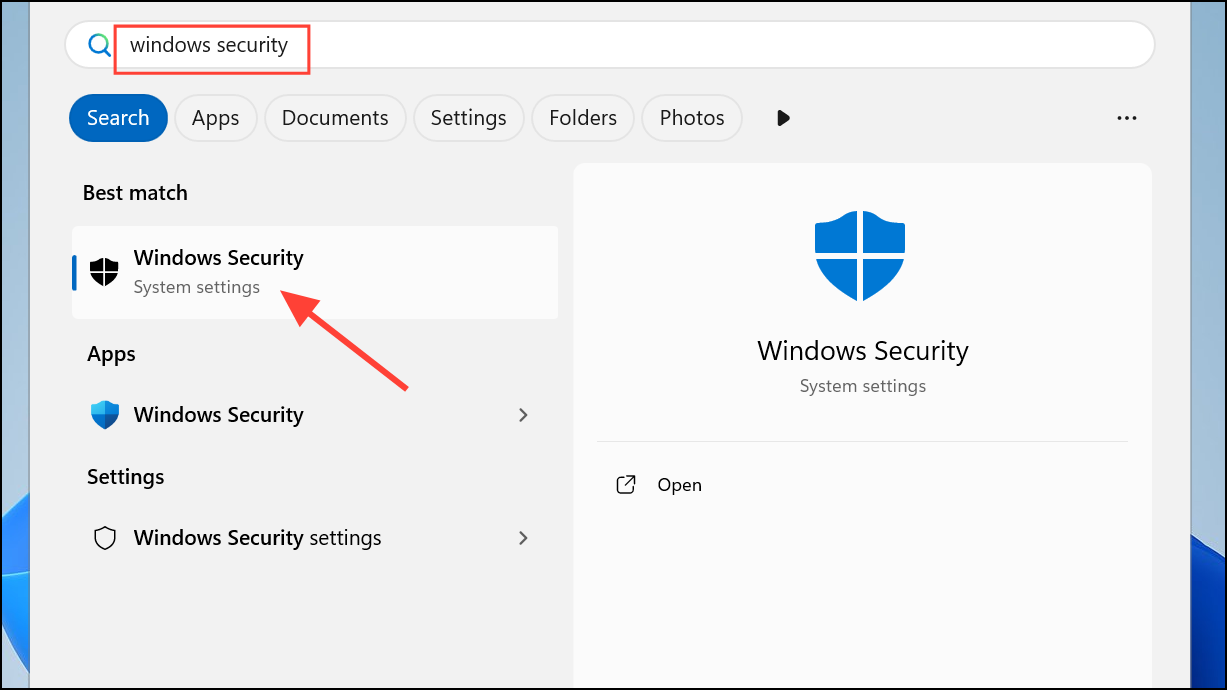
- When Windows Security opens, click Virus and Threat Protection.

- Next, click Scan Options, select Full scan, and hit the Scan now button.
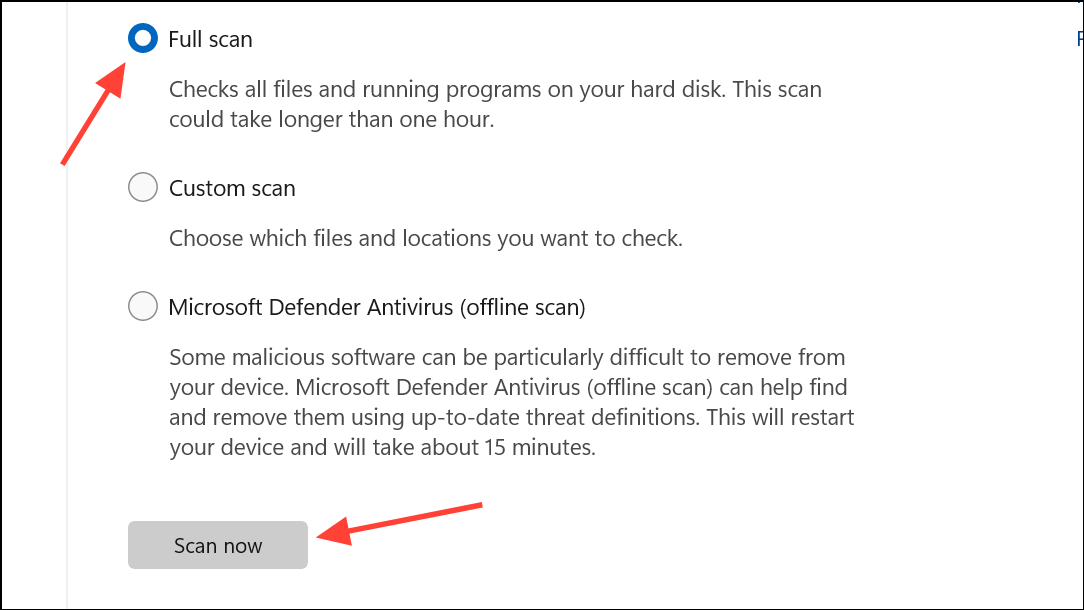
- Wait for the scan to complete and then check if the problem is resolved.
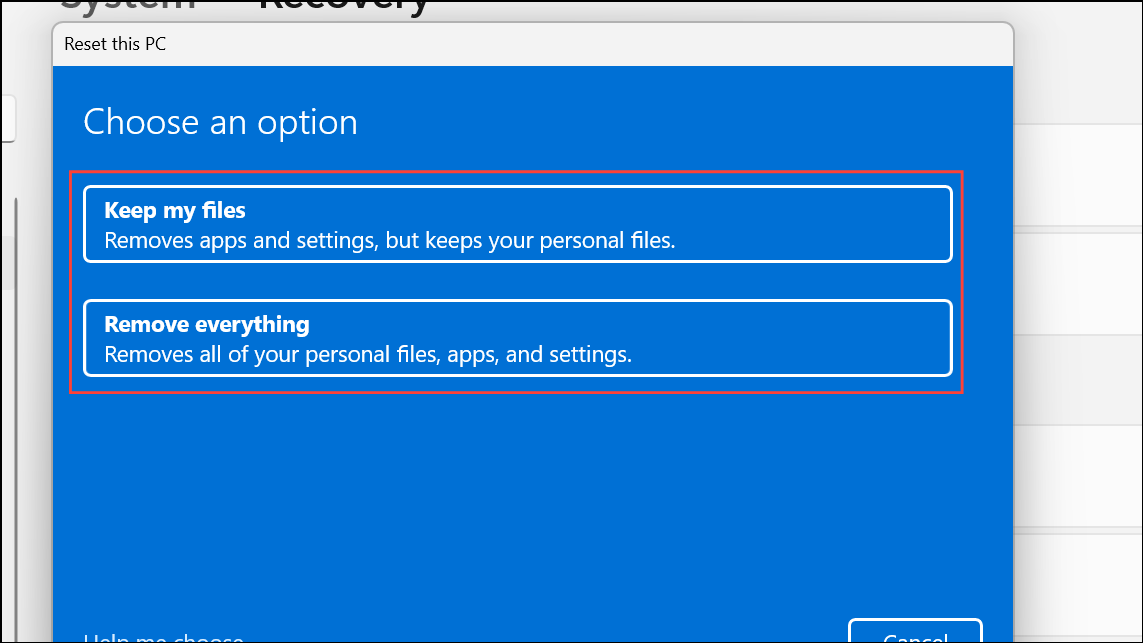
Reset Windows
Resetting your PC can help you by changing all settings and programs to their default state, just like a fresh install.
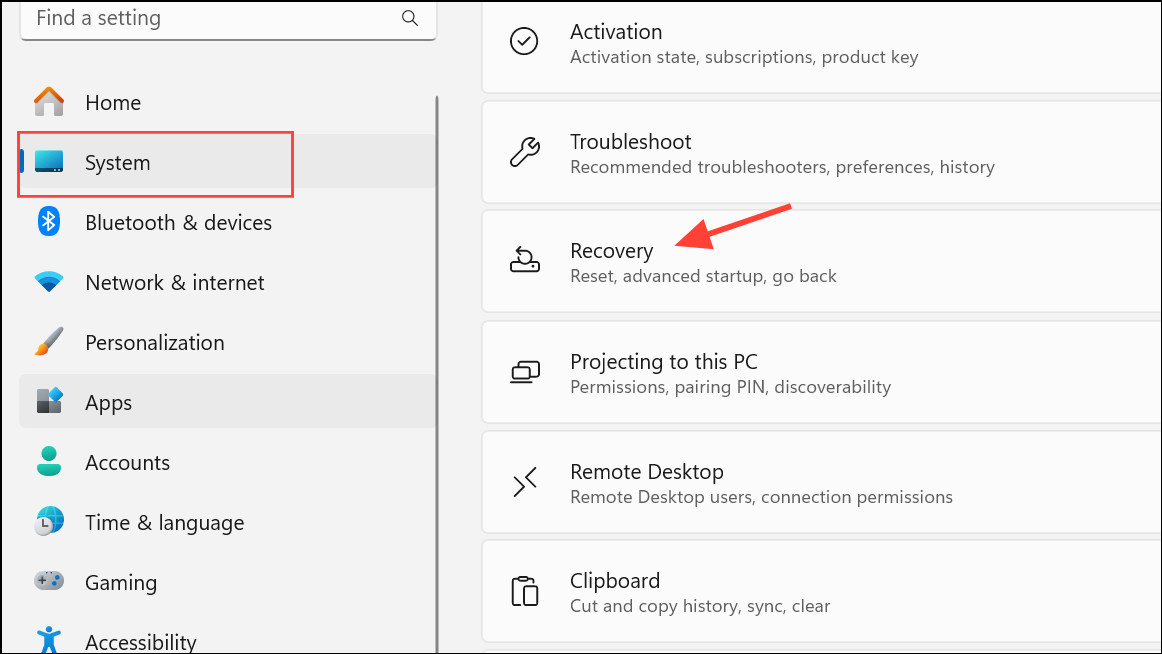
- Open Windows Settings using the
Win + Ishortcut. Then click System on the left and select Recovery from the right.
- On the Recovery page, click the Reset PC button.
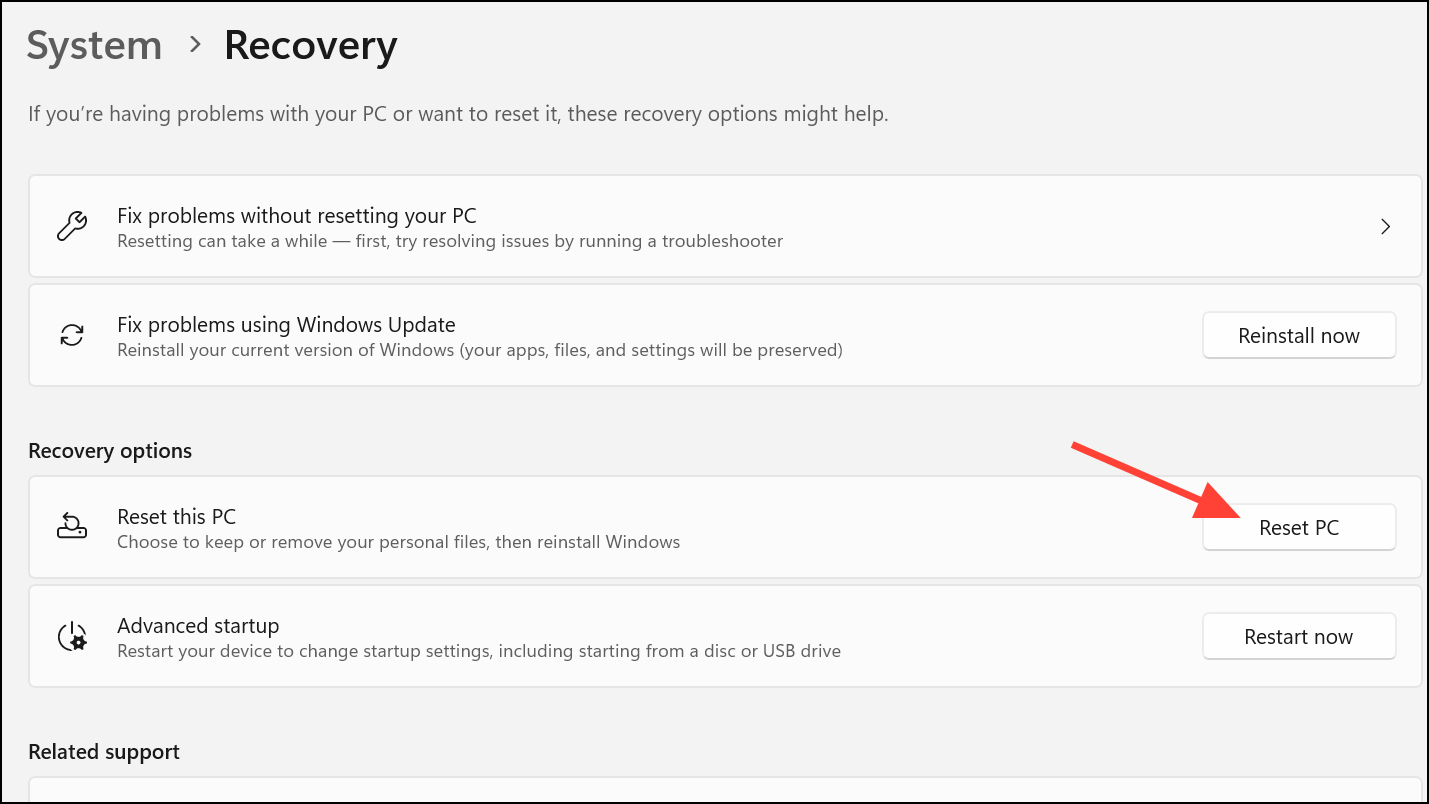
- Choose whether you want to keep your files or remove everything. Wait for the reset process to complete and then check whether PowerShell is working normally.
Repair Windows with Installation Media
Another option is to repair your Windows installation using the Windows ISO file.
- Download the Windows ISO file from the official Microsoft website.
- Prepare your installation USB using the downloaded file and boot from it.
- Select Repair your computer and follow the instructions on the screen to repair your PC. In case this solution doesn't help, consider reinstalling Windows using the installation media.
High CPU usage when running PowerShell or any other program can make your computer unusable since it can result in freezes, crashes, and other problems. The above solutions can help you identify the cause of the problem and fix it easily. If you've recently installed a program after which the issue popped up, try removing it and check whether that helps. Alternatively, consider performing a system restore if you set up a restore point when your PC was running fine.