Three roaming bosses patrol the Shattered Coast in Fortnite Chapter 7 Season 3: Runners, and each one guards a unique Mythic weapon you can only collect by defeating them. Skeletor, Voidblade, and Wolfe no longer sit at fixed landmarks. They share a pool of spawn points, so the boss you find near one zone can change from match to match.
Quick answer: Land around Calarmi Canyon and Frosted Flats, watch the minimap for a red skull icon (it only appears within 200 meters), and defeat the boss to claim a Mythic or Legendary version of their signature weapon plus a Chug Jug.
Where bosses spawn in Chapter 7 Season 3
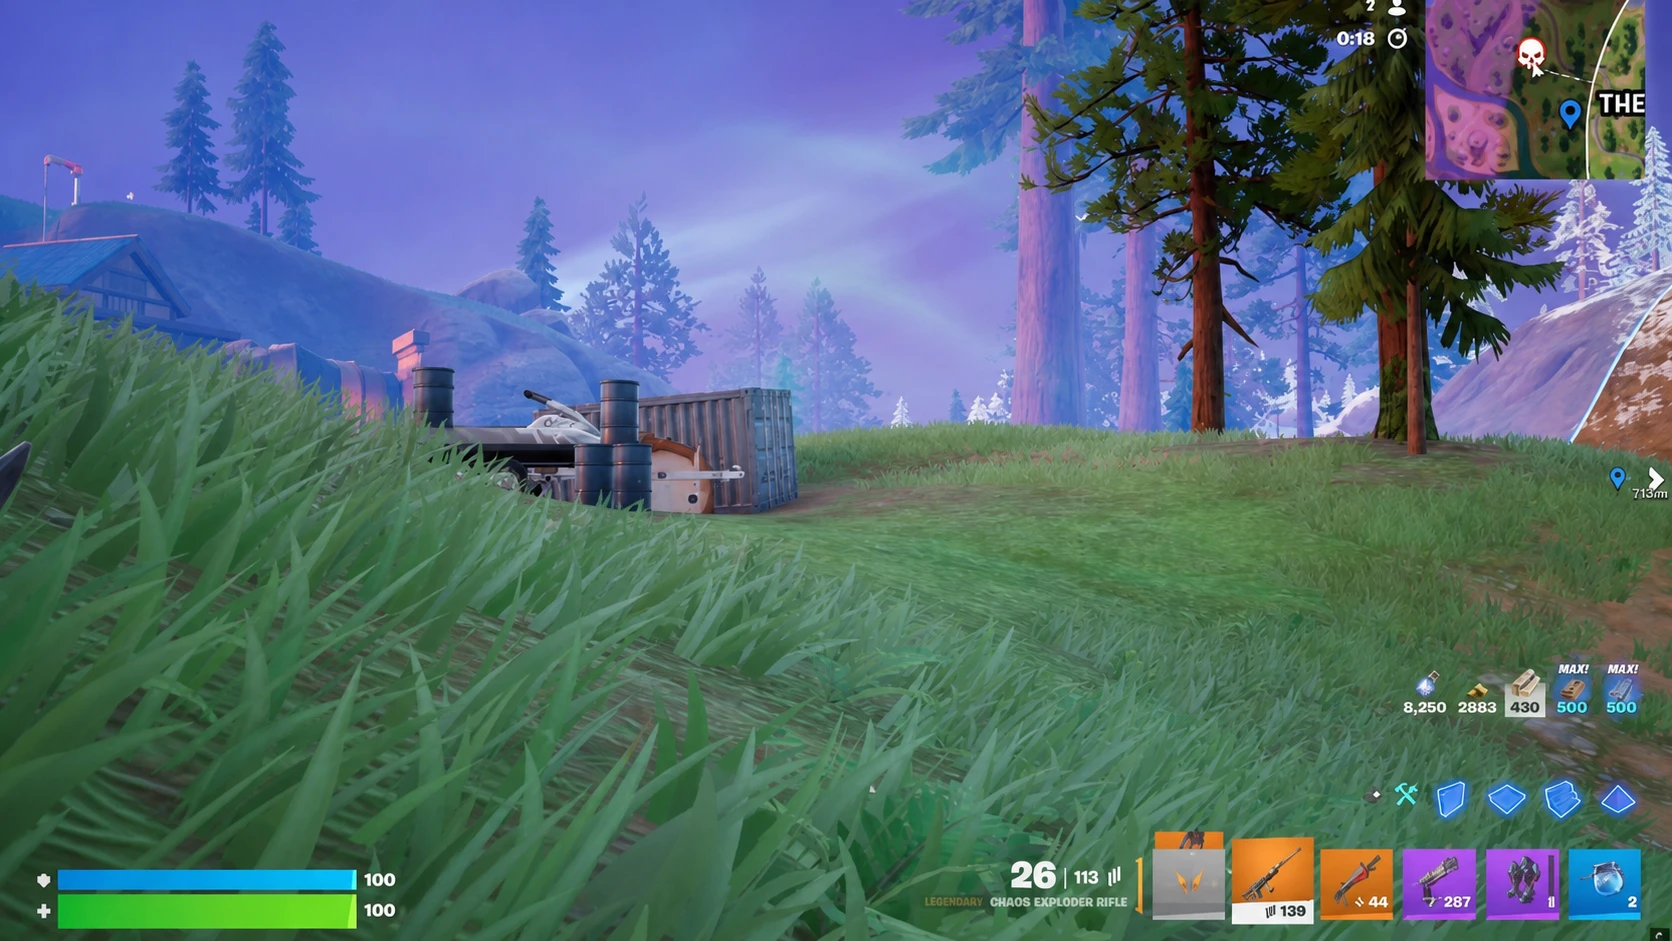
Bosses drop into a random selection of designated zones once the first storm circle closes. Any of the three can appear at any of these spots, which means you cannot memorize a single landing spot and guarantee a specific target. The activity is concentrated around Calarmi Canyon and Frosted Flats.
The minimap gives you a clear cue. A red skull flashes once you move within a 200-meter radius of a boss, and it does not appear on the full map. If you reach a zone and the skull never shows, the boss either spawned elsewhere this match or was already eliminated by another player.
Known spawn areas include the following points:
- Among the trees directly north of Calarmi Canyon
- The Collider Corridor north of Calarmi Canyon
- Near the Extractor Point northeast of Calarmi Canyon
- North of Heatwave Harbor
- The snowy stretch between The Battlewoods and Wonkeeland
- The snowy patch southwest of Latte Landing
- West of The Battlewoods, and where The Battlewoods meets the Zero Point
- The Extraction Site west of Golden Grove
Tip: Drop near The Battlewoods and grab a vehicle right away. Driving between Calarmi Canyon and Frosted Flats cuts your search time sharply compared to running on foot.
All boss rewards and weapon effects
Every boss drops a Chug Jug on death along with a signature weapon. The weapon tier depends entirely on RNG, so you may receive a Legendary variant instead of the Mythic on any given run. Defeated bosses can also leave behind a Self-Revive Device, a Big Shield Potion, and 1,000 Gold Bars.
| Boss | Mythic weapon | Weapon effect |
|---|---|---|
| Skeletor | Reacher Extending Shotgun | Improved reach and better damage at range |
| Voidblade | The Voidblade’s Burst Rifle | Increased accuracy while aiming down sights |
| Wolfe | Wolfe’s Maven Auto Shotgun | More effective when fewer pellets land |
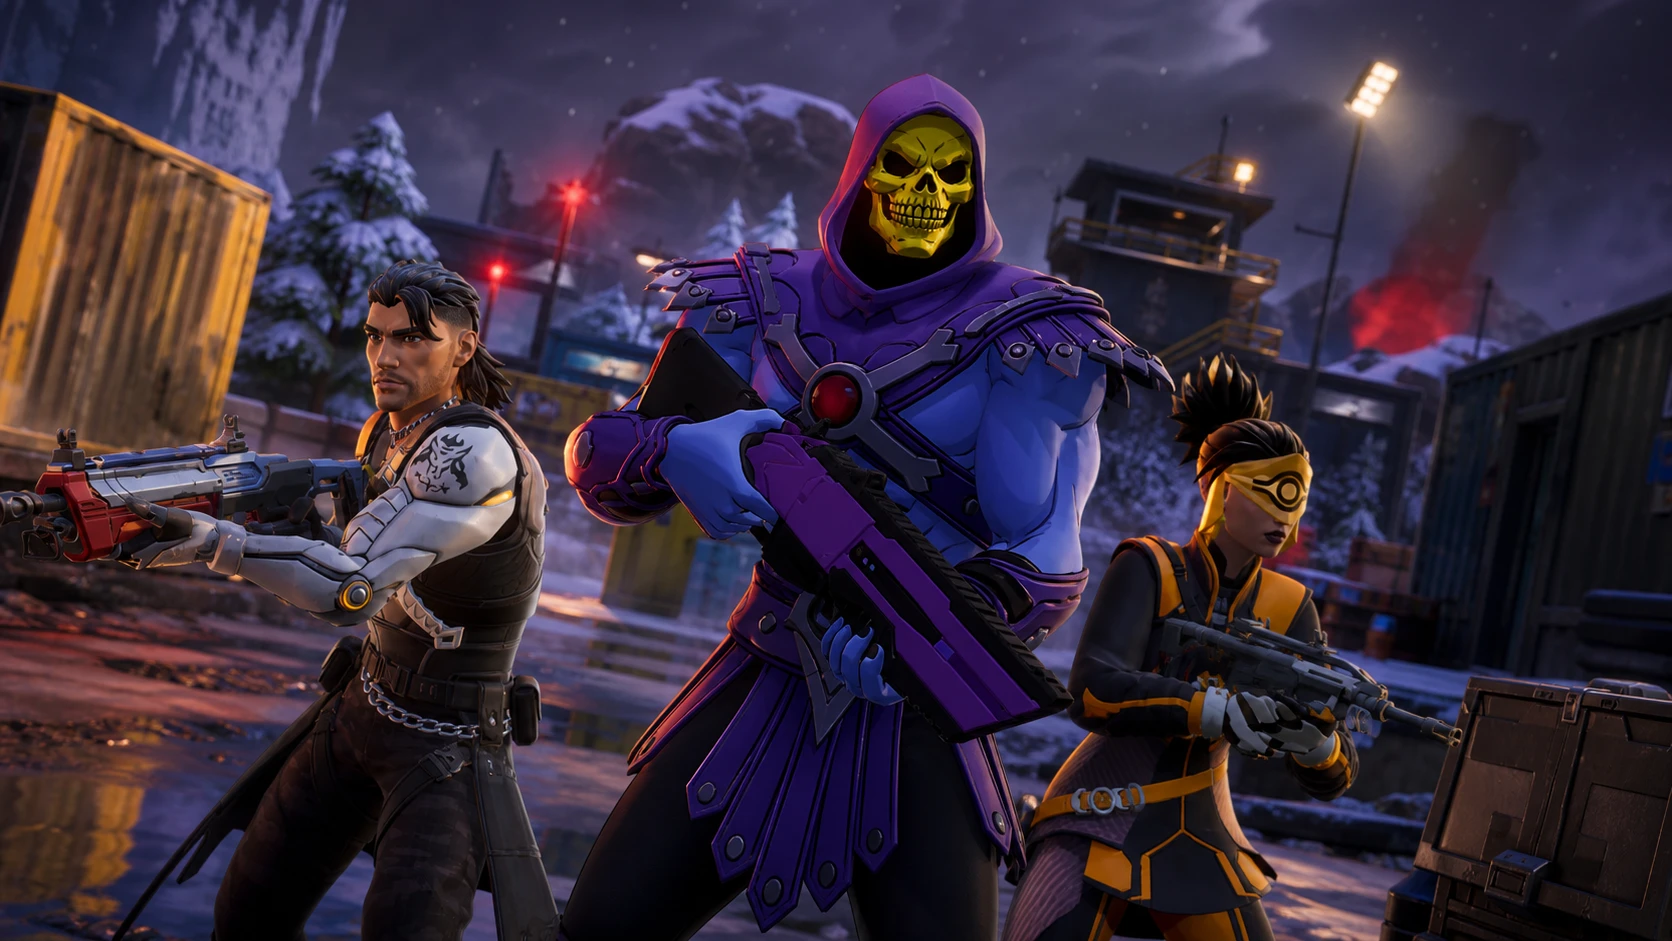
Skeletor: location, drops, and how to beat him
Skeletor fights with the Reacher Extending Shotgun, so keep your distance rather than trading blows up close. His main trick is self-sustain. He can wave his staff to restore his shields, but he cannot heal his health bar, so steady, sustained fire is the way to wear him down through each shield cycle. An Assault Rifle with a healthy magazine handles this well.
He also throws ranged purple projectiles that can knock you back, but they are telegraphed and easy to sidestep. Stay at mid-range, use natural cover while reloading, and focus on his health once the shields drop.
| Reacher Extending Shotgun stat | Value |
|---|---|
| DPS | 176.4 |
| Damage | 101 |
| Critical Hit Damage | 145 |
| Fire Rate | 1.75 |
| Magazine Size | 3 |
| Reload Time | 1.96s |
Voidblade: location, drops, and how to beat her
Voidblade is the most mobile of the three. She carries a tactical Burst Rifle, which actually makes close range the safer option since an SMG or Shotgun outperforms her weapon up close. The real threat is her vertical play. She leaps high into the air and briefly swaps to a sword on landing, which deals heavy damage to anyone standing underneath.
The counter is simple. Keep moving laterally, look up when she jumps, and step out of the landing zone right before she comes down. The strike has a small radius, so a quick dodge avoids it. High-DPS weapons such as the Chaos Exploder Rifle or a Stinger SMG end the fight before she chains multiple jumps.
Note: Voidblade can drop The Voidblade’s Burst Rifle as a Mythic or a Legendary Surgical Burst Rifle, depending on RNG.
| Voidblade’s Burst Rifle stat | Value |
|---|---|
| DPS | 165.01 |
| Damage | 29 |
| Critical Hit Damage | 43.5 |
| Fire Rate | 5.69 |
| Magazine Size | 33 |
| Reload Time | 2.38s |
Wolfe: location, drops, and how to beat him
Wolfe is the easiest boss to underestimate. He moves faster than the other two and can teleport, which makes keeping a steady bead on him difficult. He fights with the Maven Auto Shotgun and punishes players who get too comfortable at close range, so an SMG paired with your own Shotgun gives you the tools to match his pace while staying mobile.
His howl reveals your position to nearby players, but only within a small radius, so it is more of a nuisance than a fight-ender. Keep sliding and sprinting to throw off his tracking, use cover between shots, and finish him quickly before another squad pushes in.
| Wolfe’s Maven Auto Shotgun stat | Value |
|---|---|
| DPS | 146 |
| Damage | 100 |
| Critical Hit Damage | 150 |
| Fire Rate | 1.46 |
| Magazine Size | 7 |
| Reload Time | 4.42s |
How to confirm a successful boss kill
You know the fight is over when the boss collapses and drops its loot pile, which always includes a Chug Jug alongside the weapon. Skeletor even plays his runaway animation when eliminated. Walk over the drops to collect the Mythic or Legendary weapon, healing items, and Gold Bars.
If the red skull never appears in a spawn zone, the boss did not spawn there this match or another player already eliminated it. Rotate quickly to the next zone, listen for combat audio, and carry shields and a reliable mid-range weapon before engaging, since rival squads often turn these fights into early-game hotspots.
Epic plans to add more bosses as the season continues, so the current lineup of three may expand in later updates. For now, sweeping Calarmi Canyon and Frosted Flats with a vehicle and a mix of close- and mid-range weapons is the fastest route to every Mythic drop.