Not many people know that you can easily add dropdown lists to a document in Microsoft Word. This can be quite handy if you are working on a survey, quiz, interactive form, or similar document. A dropdown list puts all available options in an easily selectable menu, which helps enhance the user experience and makes your document clearer.
Step 1: Enable the Developer Menu
To add a dropdown list to a Word document, you will first need to turn on the Developer Menu.
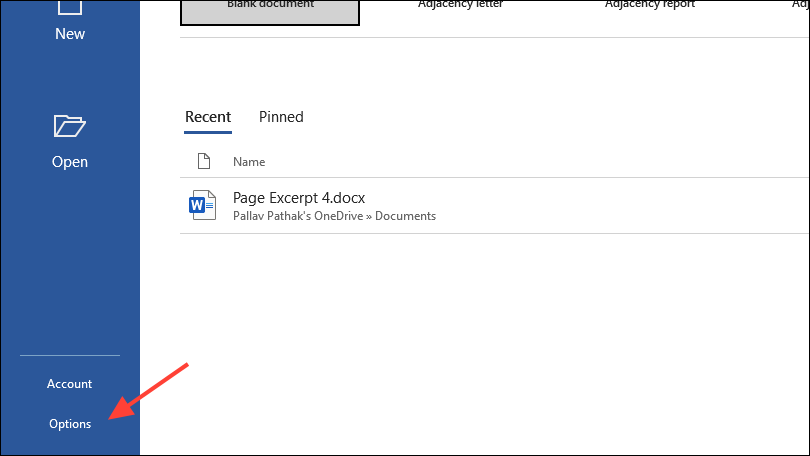
- Open Microsoft Word on your computer and click on 'Options' on the bottom left. If you have a document open, click on the 'File' button at the top left and then click on 'Options'.
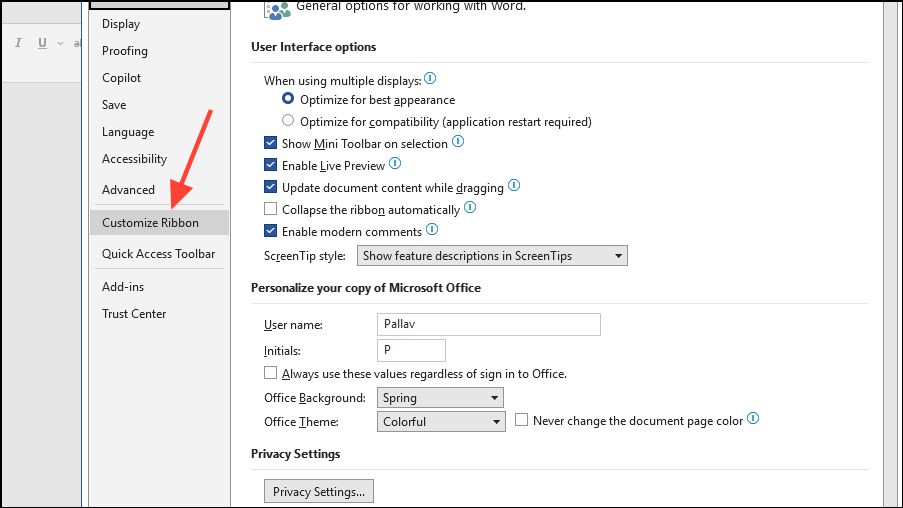
- When the Options dialog box appears, click on 'Customize Ribbon' on the left.
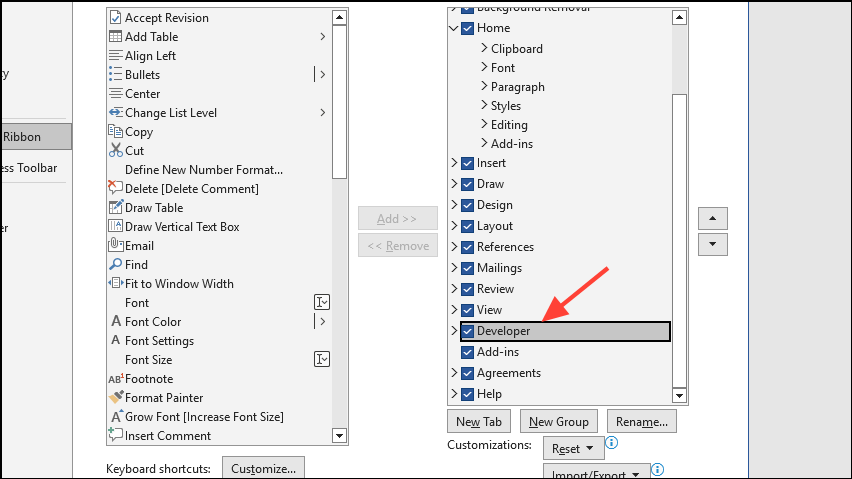
- Now scroll down the list on the right side and click on the 'Developer' checkbox to enable it before clicking on OK. If the option is already enabled, skip this step.
Step 2: Add a dropdown list
- Now create a new document or open an existing one in Microsoft Word.
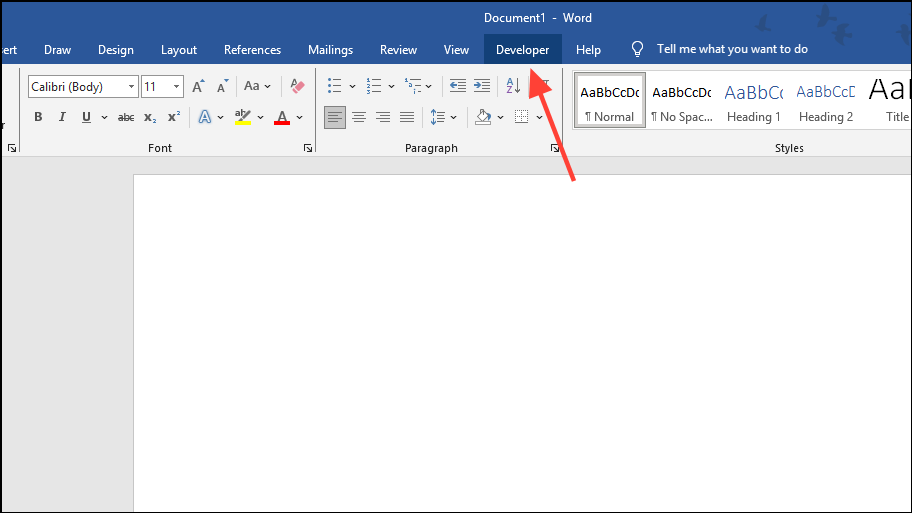
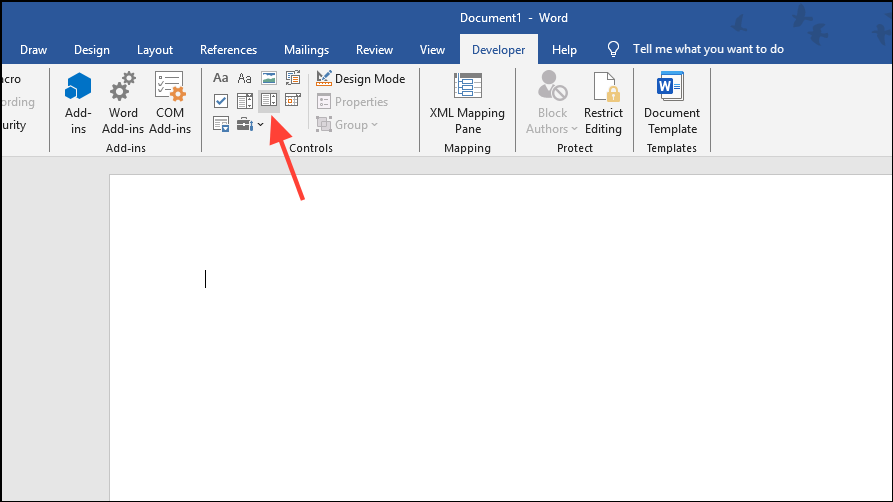
- Click on the document anywhere you want to add a dropdown list and then click on the 'Developer' menu at the top.
- Next, click on the 'Drop-Down List Content Control' icon which appears as a dropdown list in the menu.
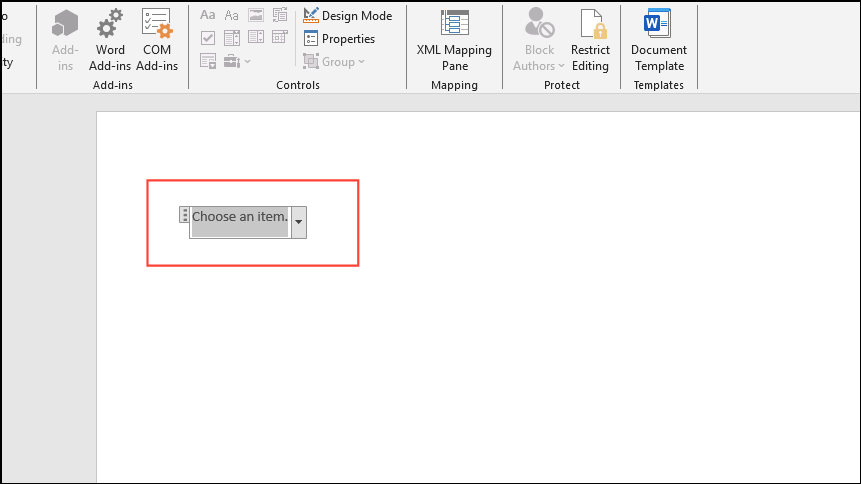
- You will see that a dropdown list has been added to your Word document.
Step 3: Customize your dropdown list
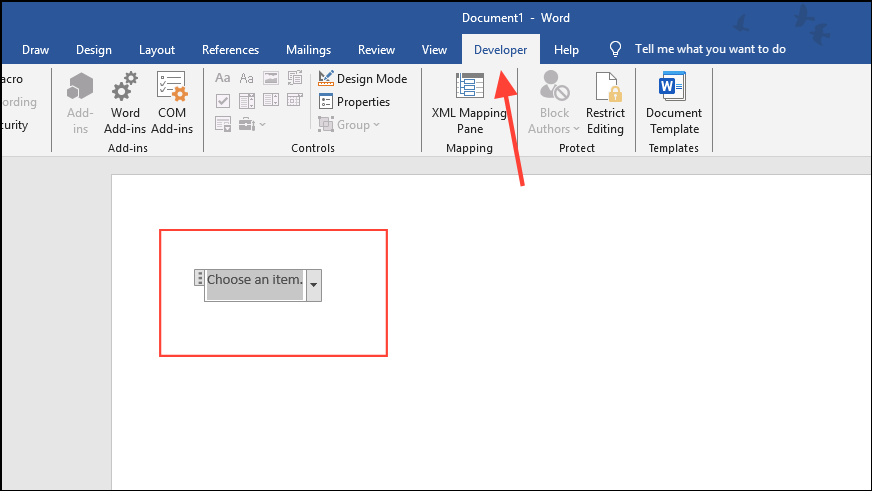
- Click on the dropdown list added to your document and then click on the 'Developer' menu again.
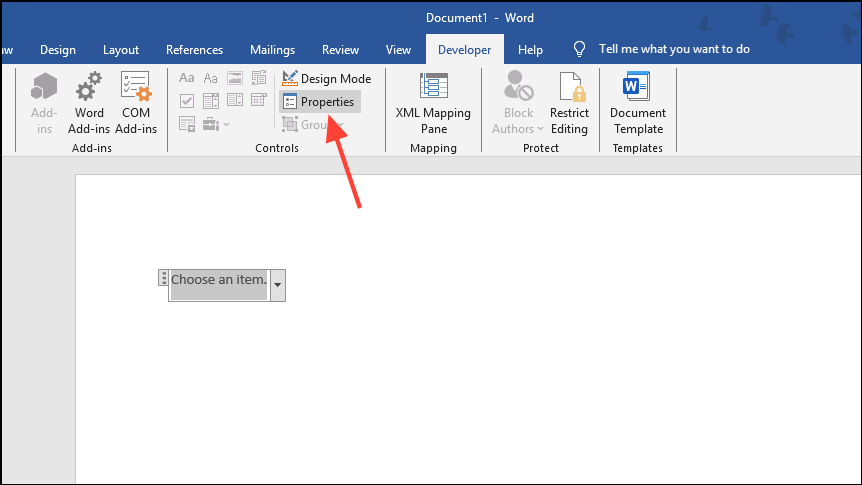
- Then click on 'Properties' in the menu.
- Add a name for your dropdown list in the 'Title' field. Keep the 'Tag' field empty as it will automatically be filled.
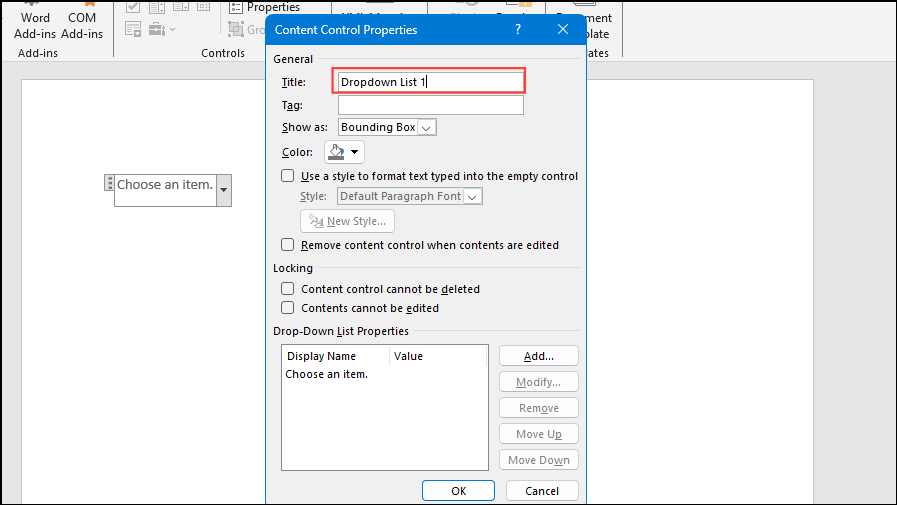
Note: The Tag field will automatically be filled when you fill in the title field. It helps other programs identify content control data in the XML structure of a document. So, you can leave it blank unless you need to specifically set it when automating your document.
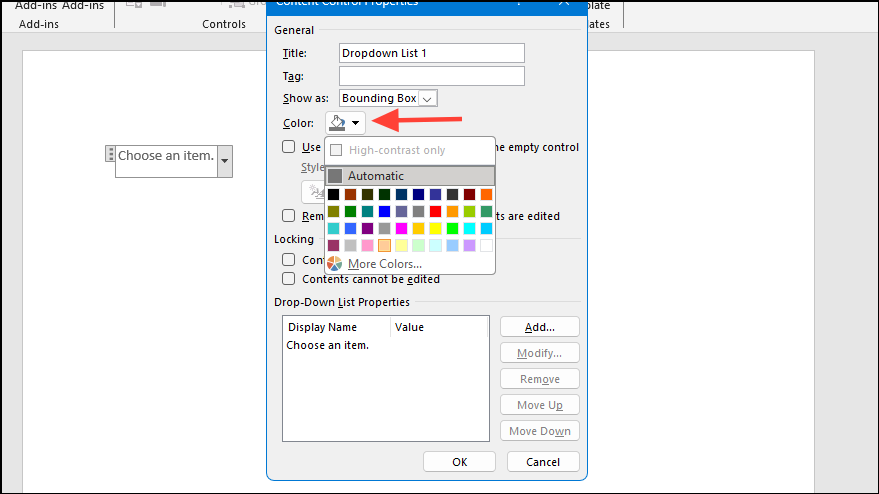
- Click on the 'Color' dropdown to select a color scheme for your dropdown list.
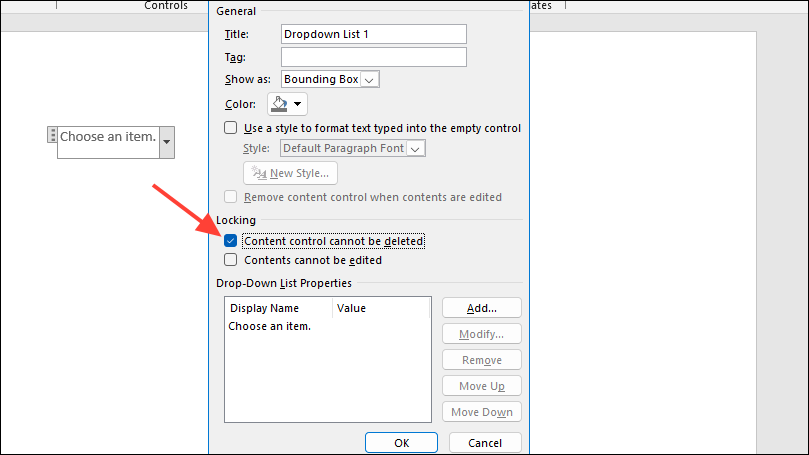
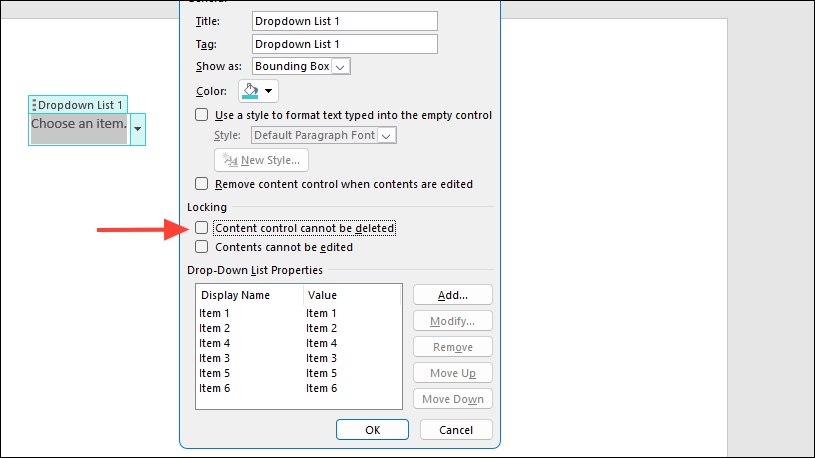
- You can also click on the 'Content control cannot be deleted' checkbox to prevent anyone from deleting your dropdown list.
Step 4: Add items to your dropdown list
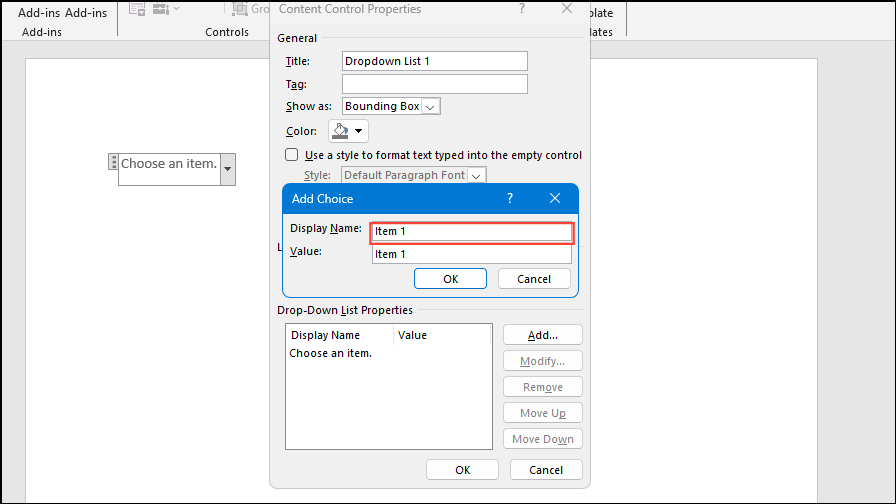
- To start adding items to your dropdown list, click on the 'Add' button next to the 'Drop-Down List Properties' box.
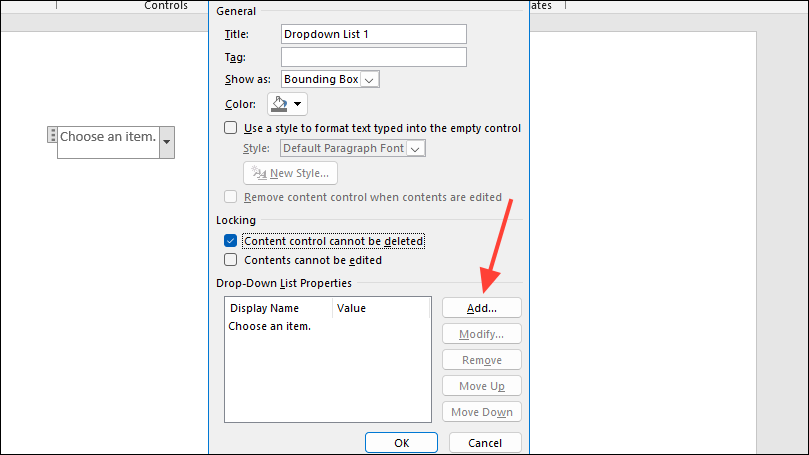
- Type in the name of the first item in the dropdown list in the 'Display Name' field and click on the 'OK' button. The 'Value' field will automatically fill in depending on the Display Name.
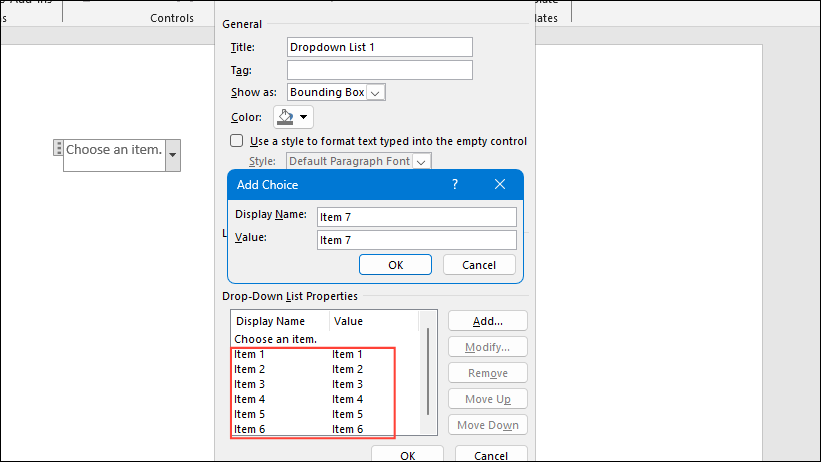
- Follow the same process to add more items to your dropdown list.
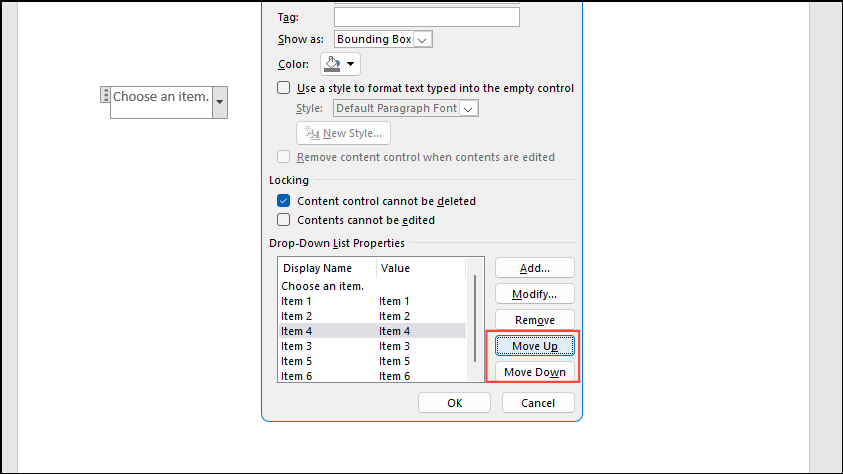
- You can move an item up or down by clicking on it and then clicking on the 'Move Up' or 'Move Down' buttons. Click on the 'OK' button when you're done.
Note: Make sure to remove the 'Choose an item' item in the dropdown list, since it will be the first item by default above the items you add. To do so, click on it to select it and then click on the 'Remove' button on the right.
- Now you should see your dropdown list in the document. Click on it to test it out.

Step 5: Delete your dropdown list
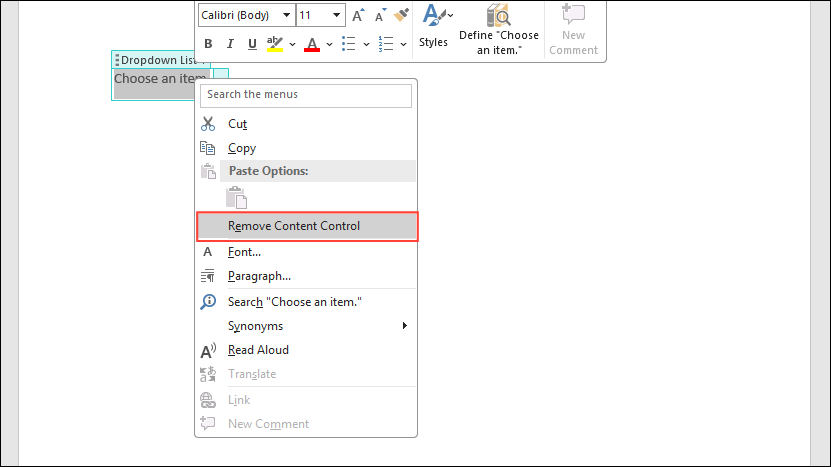
- You can delete your dropdown list by right-clicking on it and then clicking on 'Remove Content Control'. However, if you've enabled the 'Content Control cannot be deleted' option, this option will not appear.
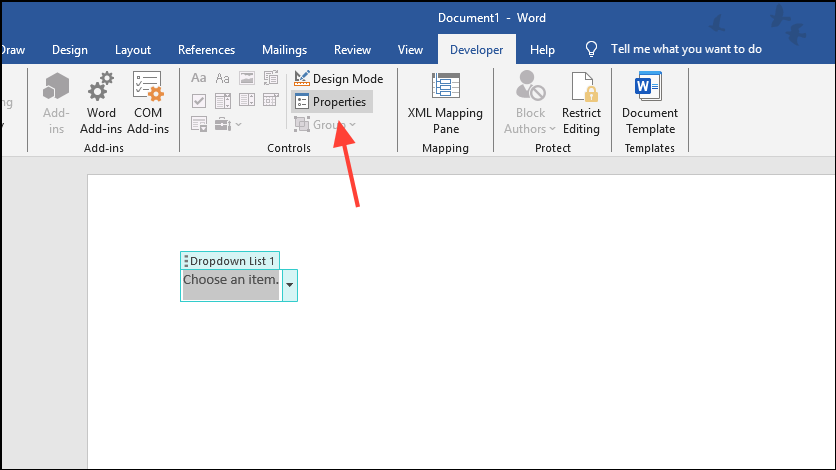
- Click on the 'Developer' menu again and then on 'Properties'.
- Then uncheck the 'Content Control cannot be deleted' option.
- Now, right-click on the dropdown list and click on 'Remove Content Control' to delete the list.
Things to know
- When adding a dropdown list to your Word document, make sure to keep your font size, style, alignment, etc. consistent for a clean appearance.
- You can add instructions or descriptive labels near the top of your dropdown list to make it easier for the users to understand various list items.
- To ensure the various items in your list are easily legible and to reduce clutter, make sure there is sufficient space near your dropdown list.


