Auto-filling PDF forms on your iPhone and Mac can significantly enhance your productivity by eliminating the repetitive task of entering the same information across various documents.
Previously, filling out a PDF on an iPhone was a cumbersome process, often requiring third-party apps or complex workarounds. With the release of iOS 17.2 and macOS Sonoma 14.2, Apple has introduced Enhanced AutoFill, making it seamless to fill PDF forms directly on your devices. This feature leverages the information from your contact card to automatically populate form fields, streamlining the entire process.
Autofilling PDF Forms on iPhone
To utilize Enhanced AutoFill on your iPhone, it's essential that your contact information is up-to-date in the 'My Card' section of the Contacts app. The AutoFill feature pulls data from your contact card to populate the PDF form fields.
Step 1: Open the PDF form you wish to complete on your iPhone.
Step 2: If prompted to open the document in the Files app, tap on 'Save' to proceed.
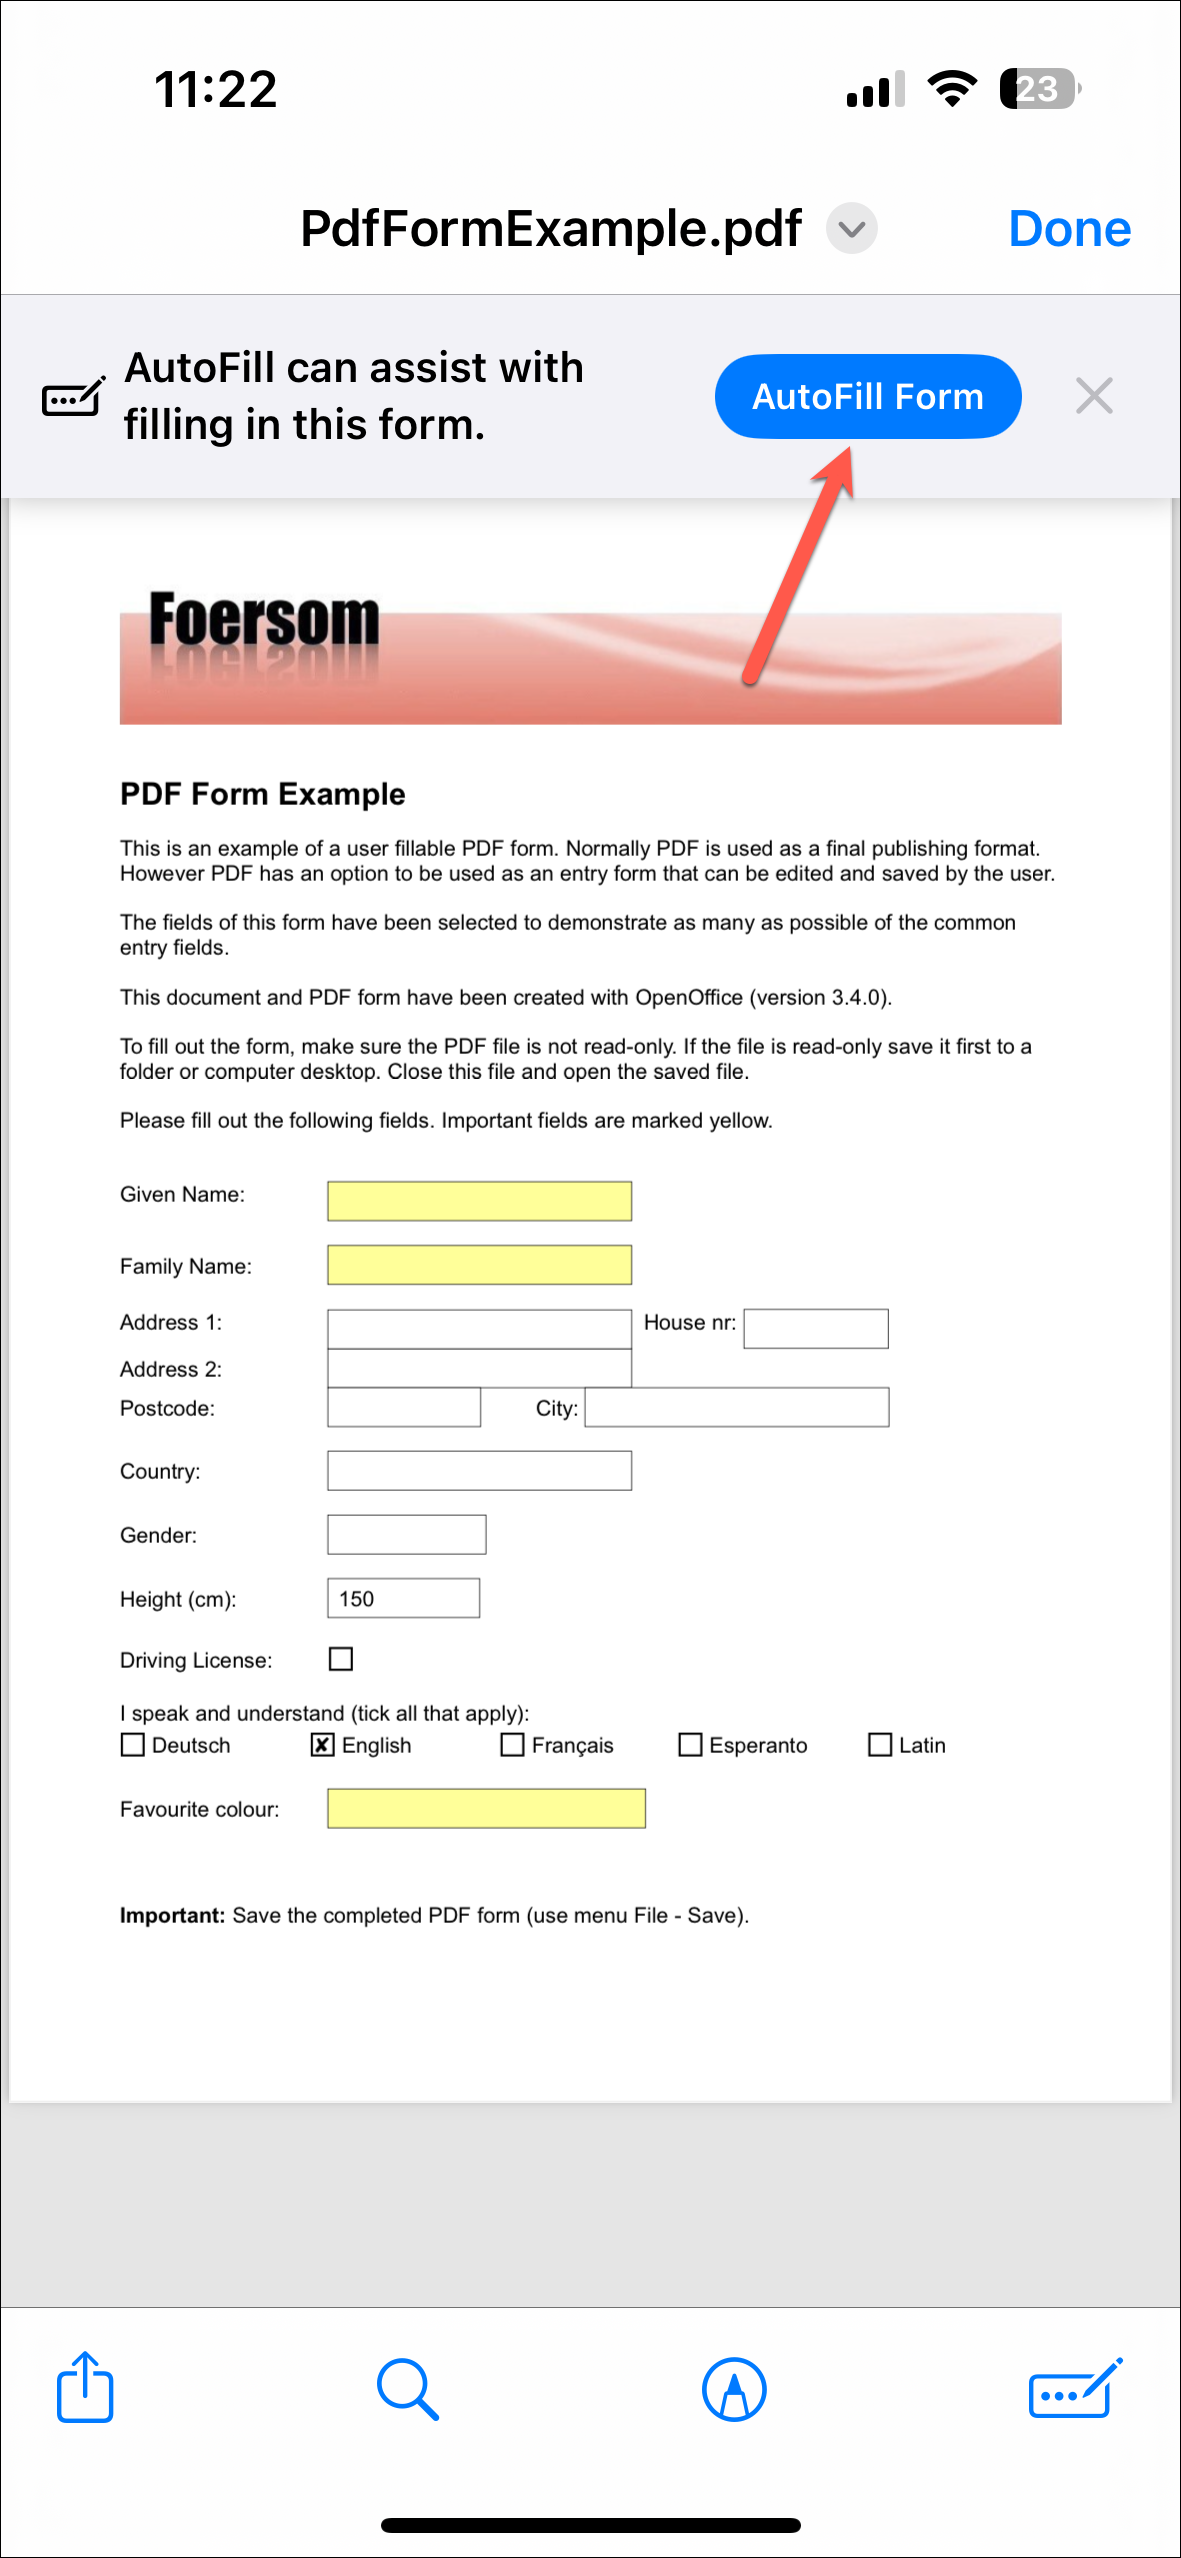
Step 3: Once the PDF opens, you might see a notification at the top of the screen stating, "AutoFill can assist with filling in this form." Tap the 'AutoFill Form' button in this alert.
Step 4: If you don't see the alert, tap the 'AutoFill' button located at the bottom right corner of the screen.
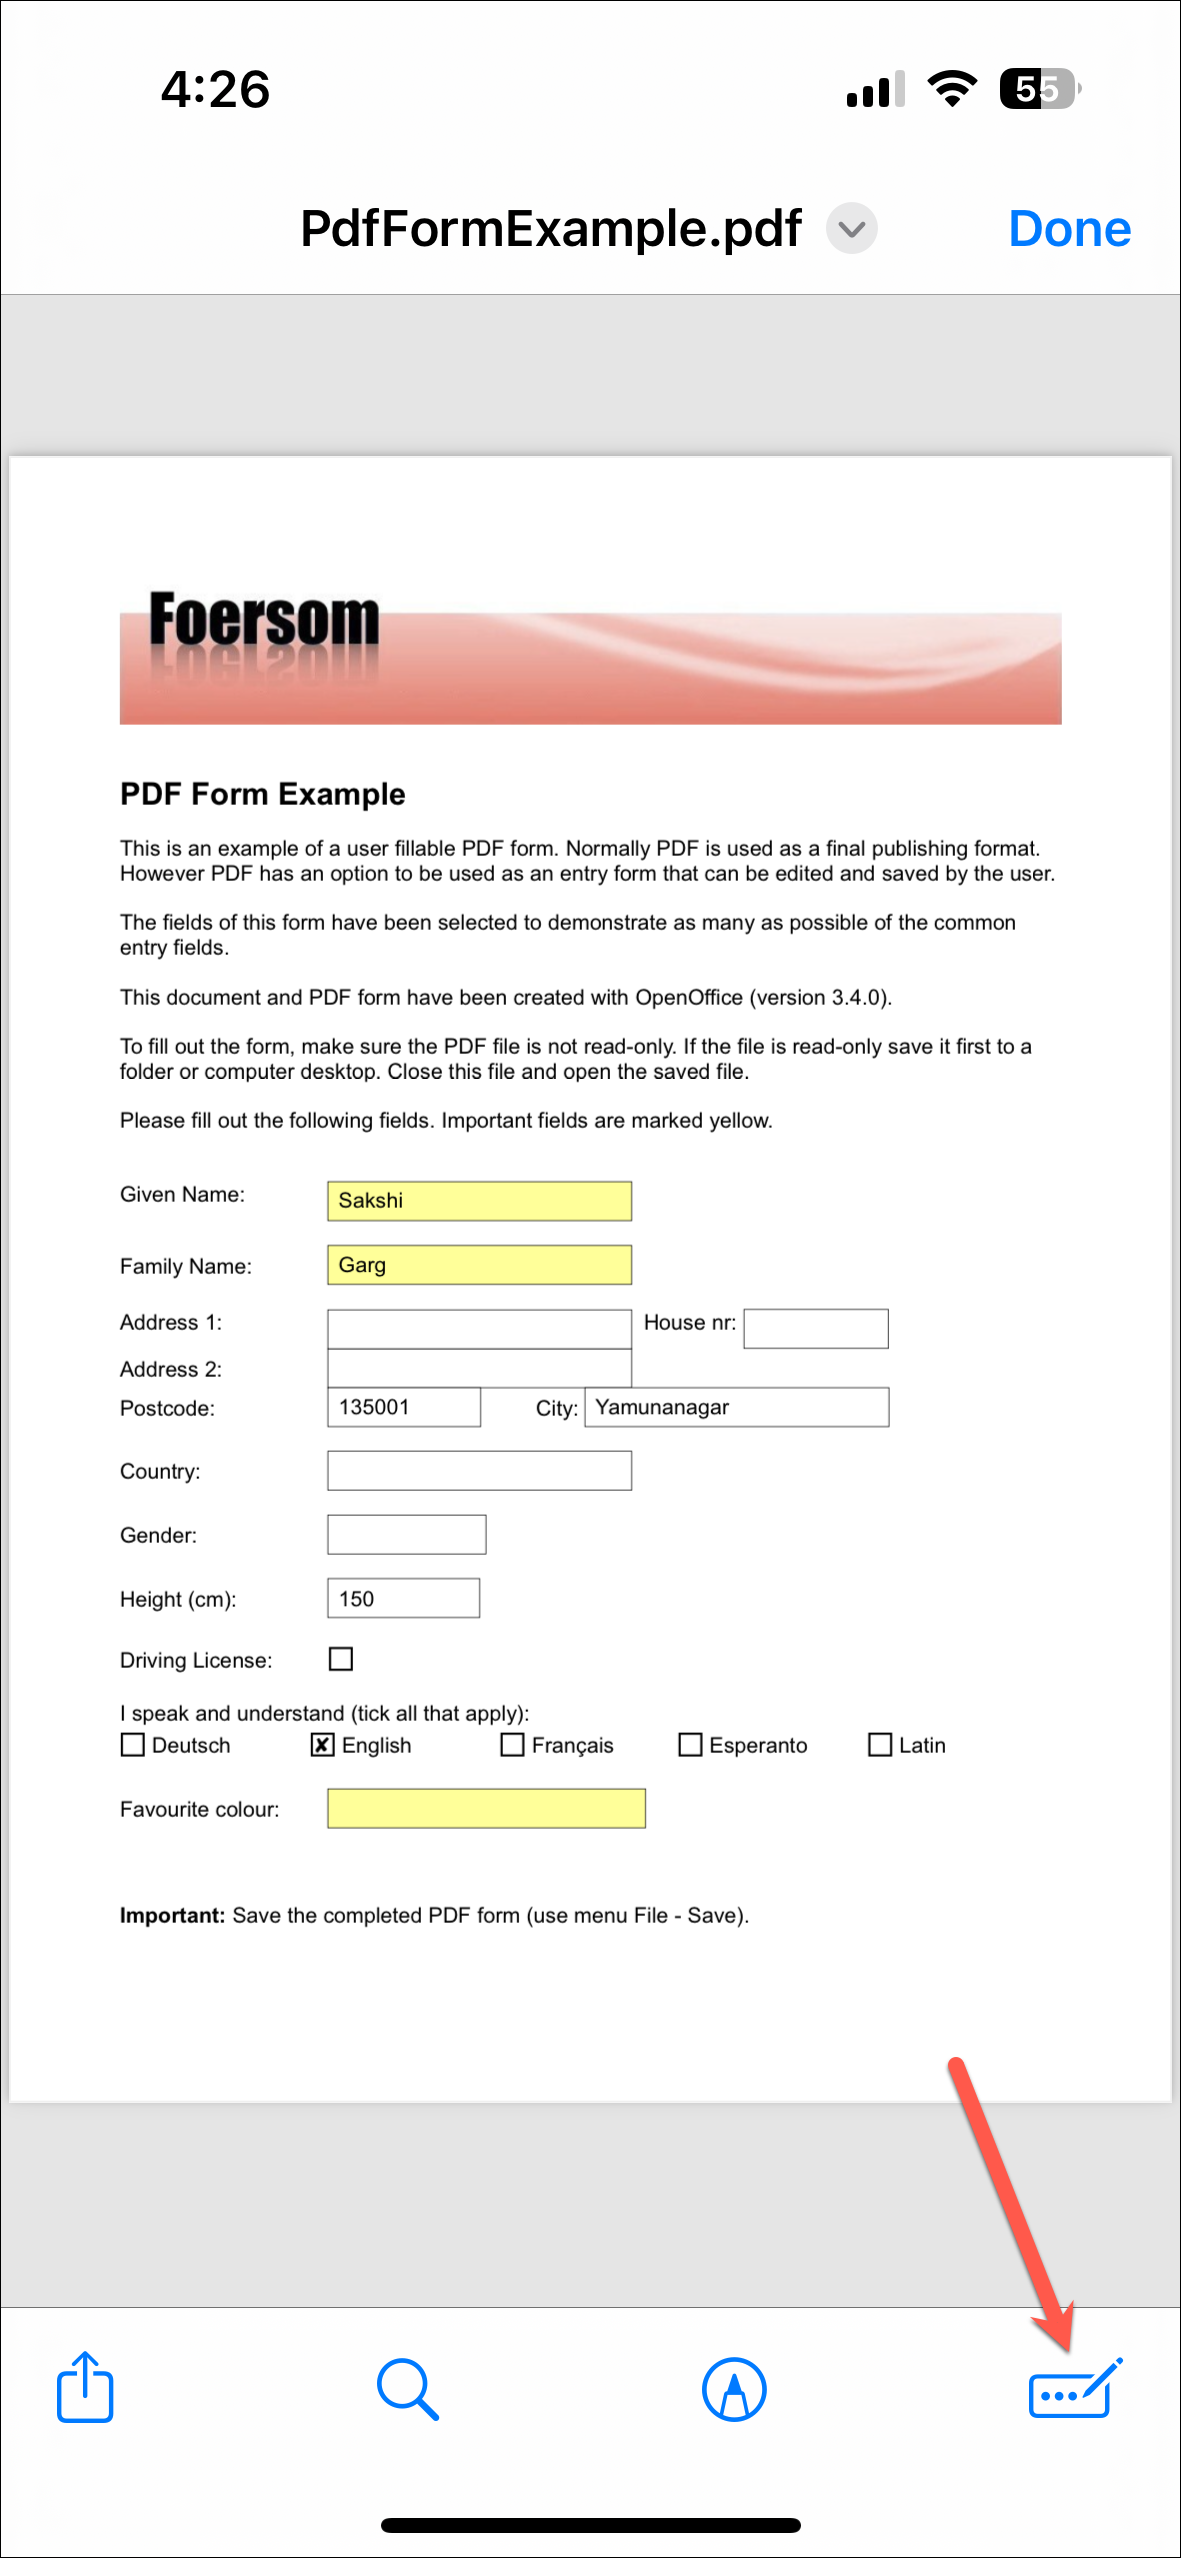
Step 5: Tap on any blank field within the form.
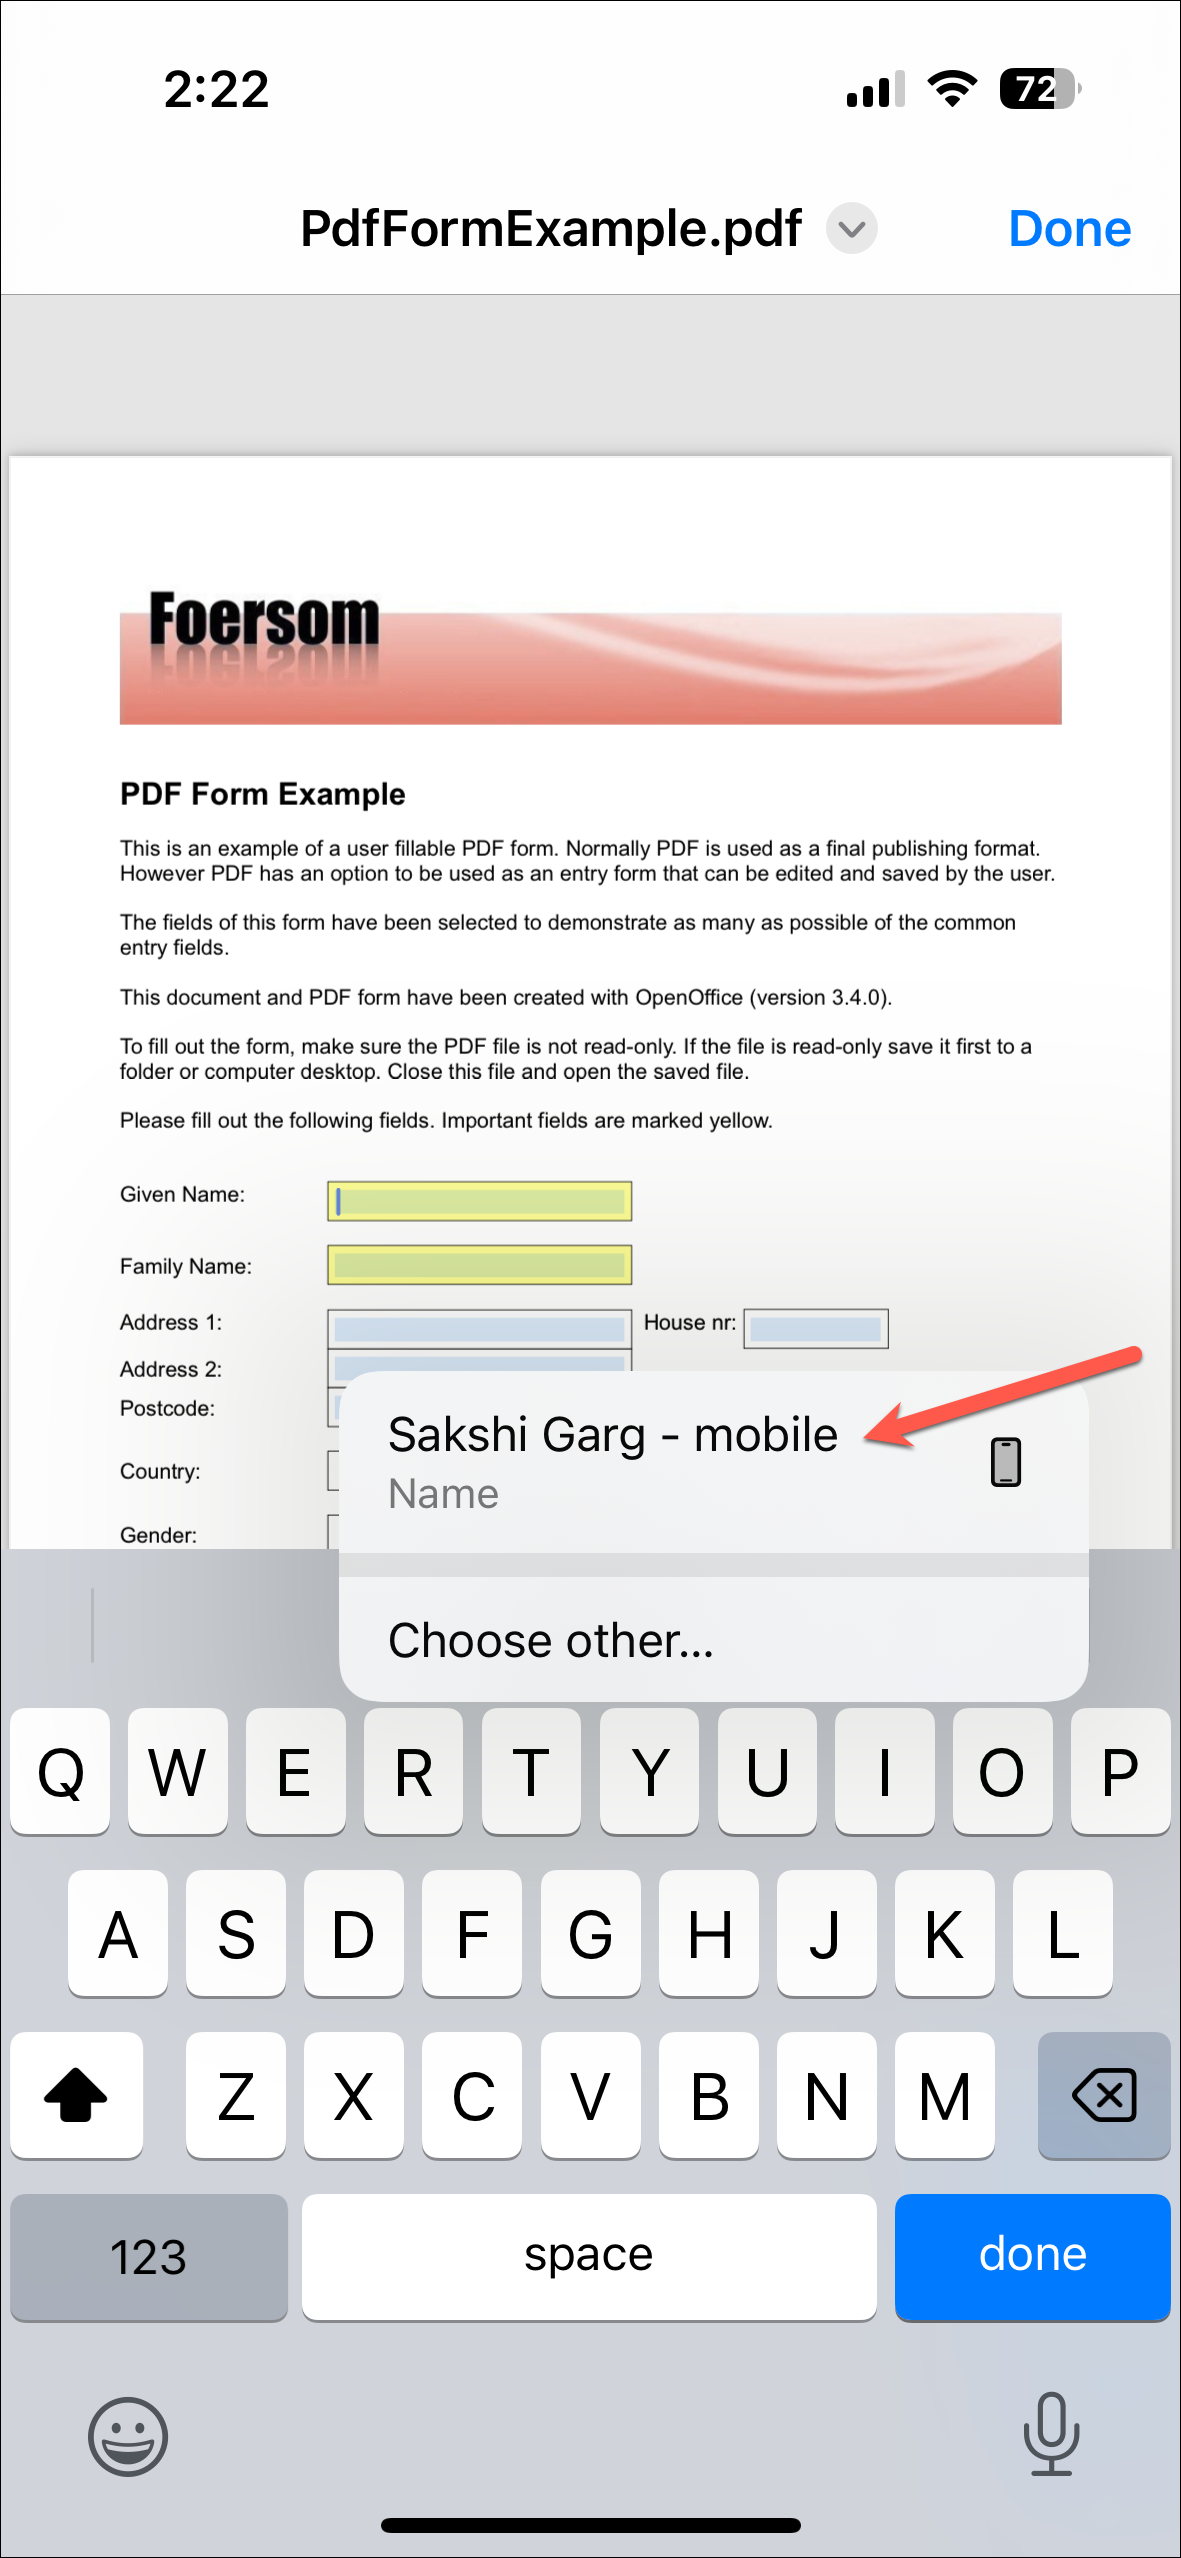
Step 6: An option will appear above the keyboard to autofill the entire form using your information. Tap on your name to auto-fill all the relevant fields. If you prefer to use someone else's information, tap on 'Choose Other' and select a different contact from your list.
Step 7: Alternatively, you can fill out individual fields by tapping on them and selecting the appropriate AutoFill suggestion that appears above the keyboard.
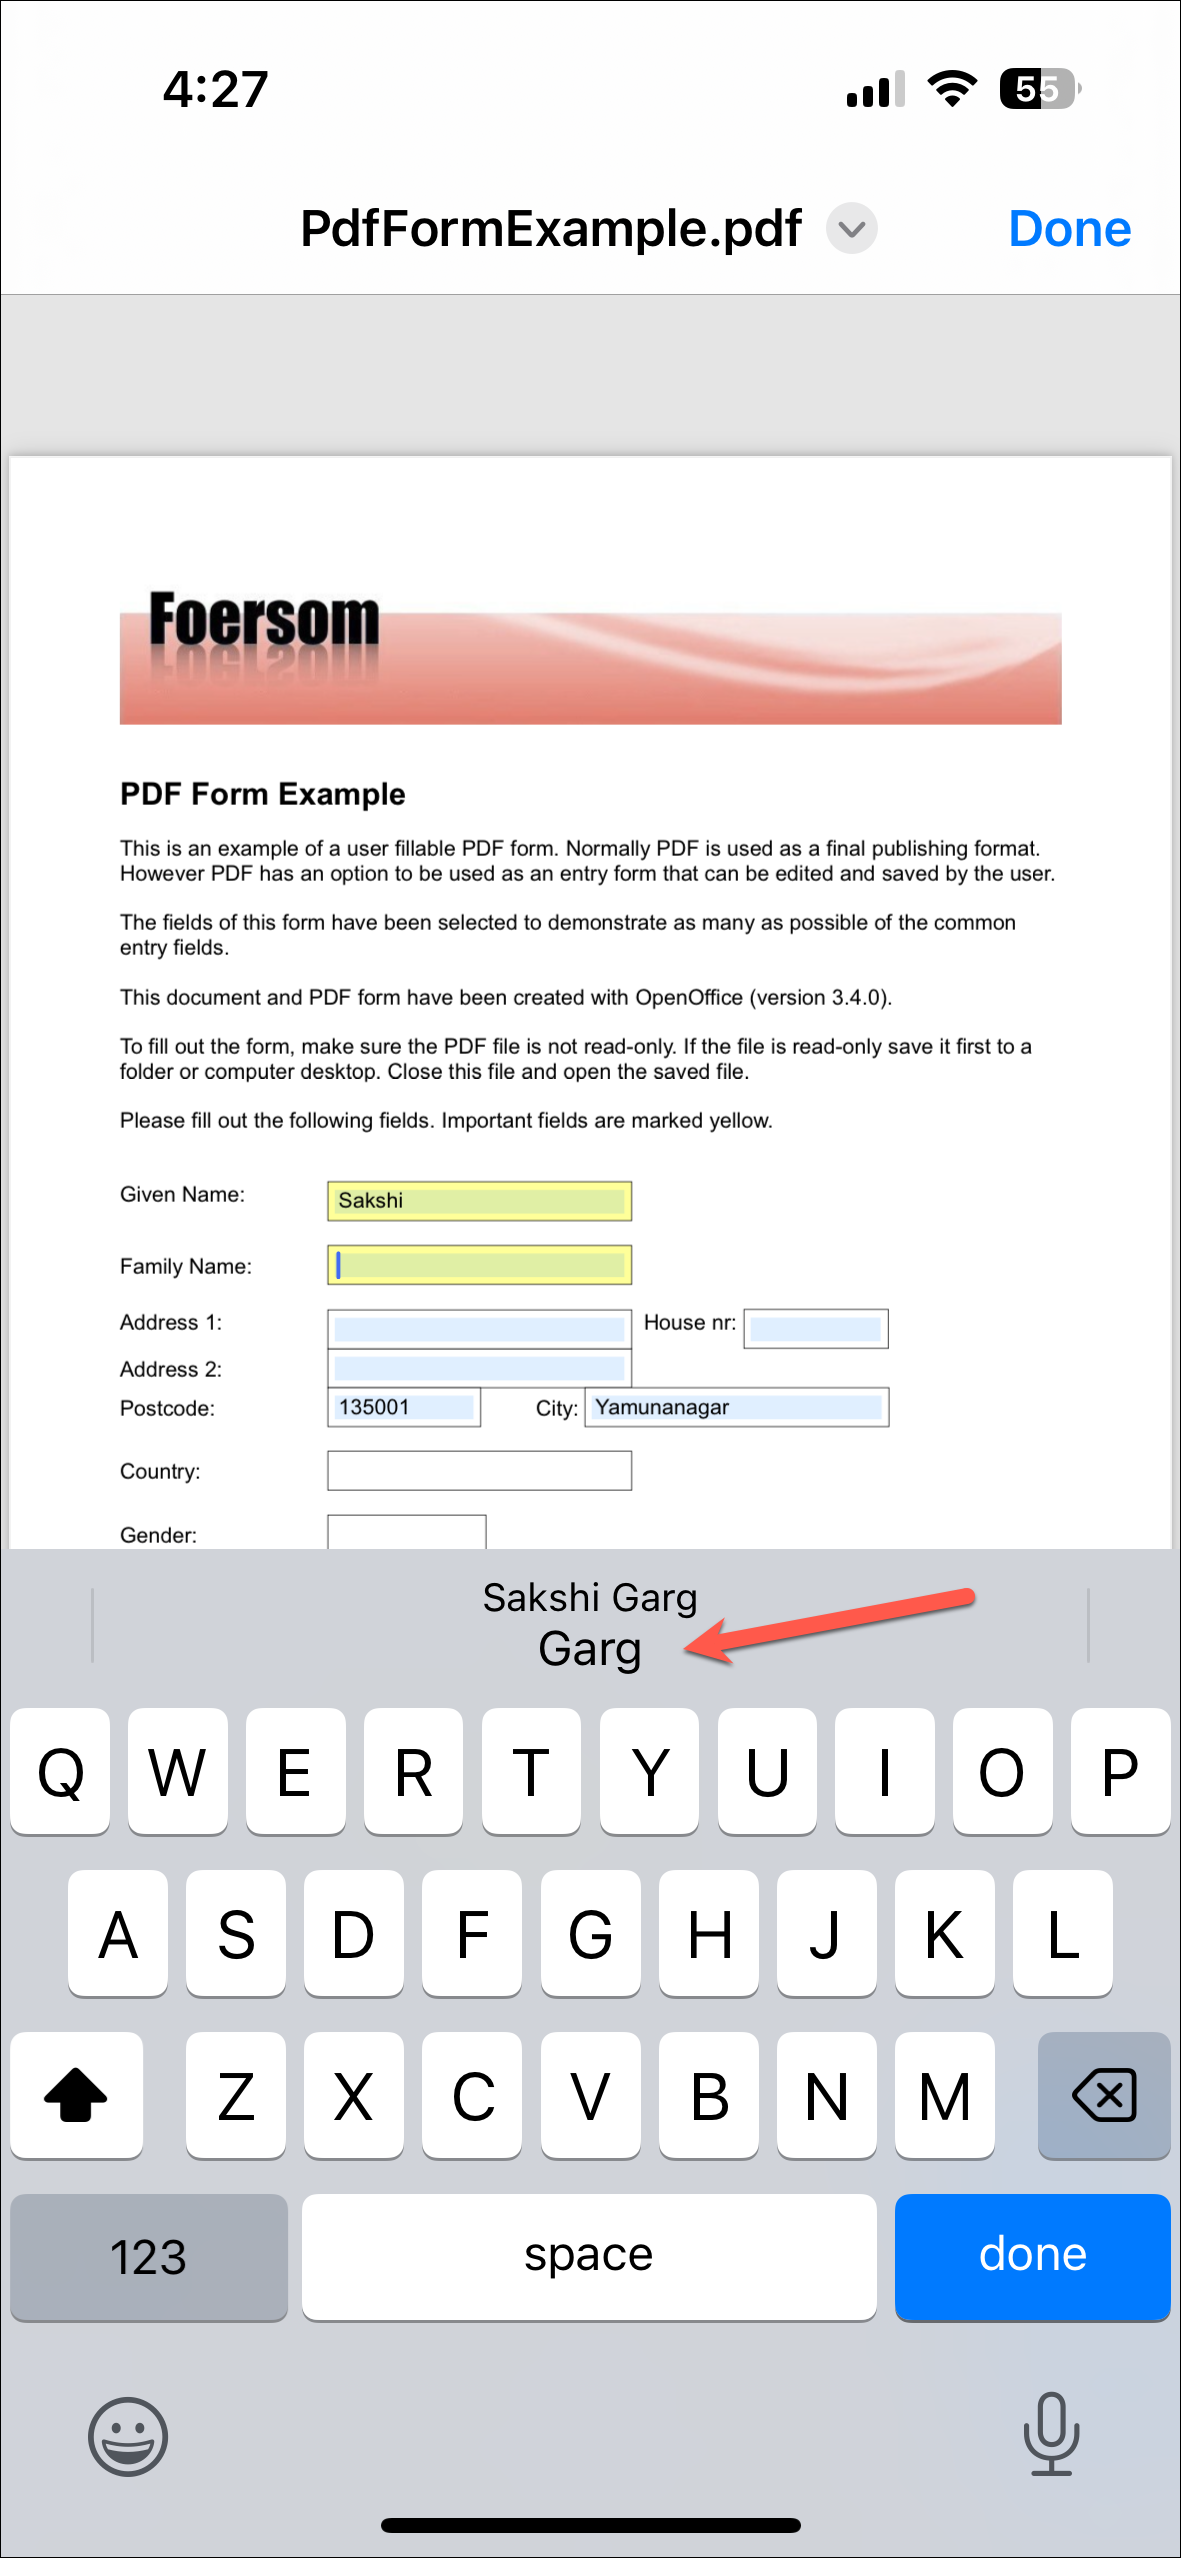
Step 8: If needed, you can edit any auto-filled information by tapping the field and using the on-screen keyboard to make changes.
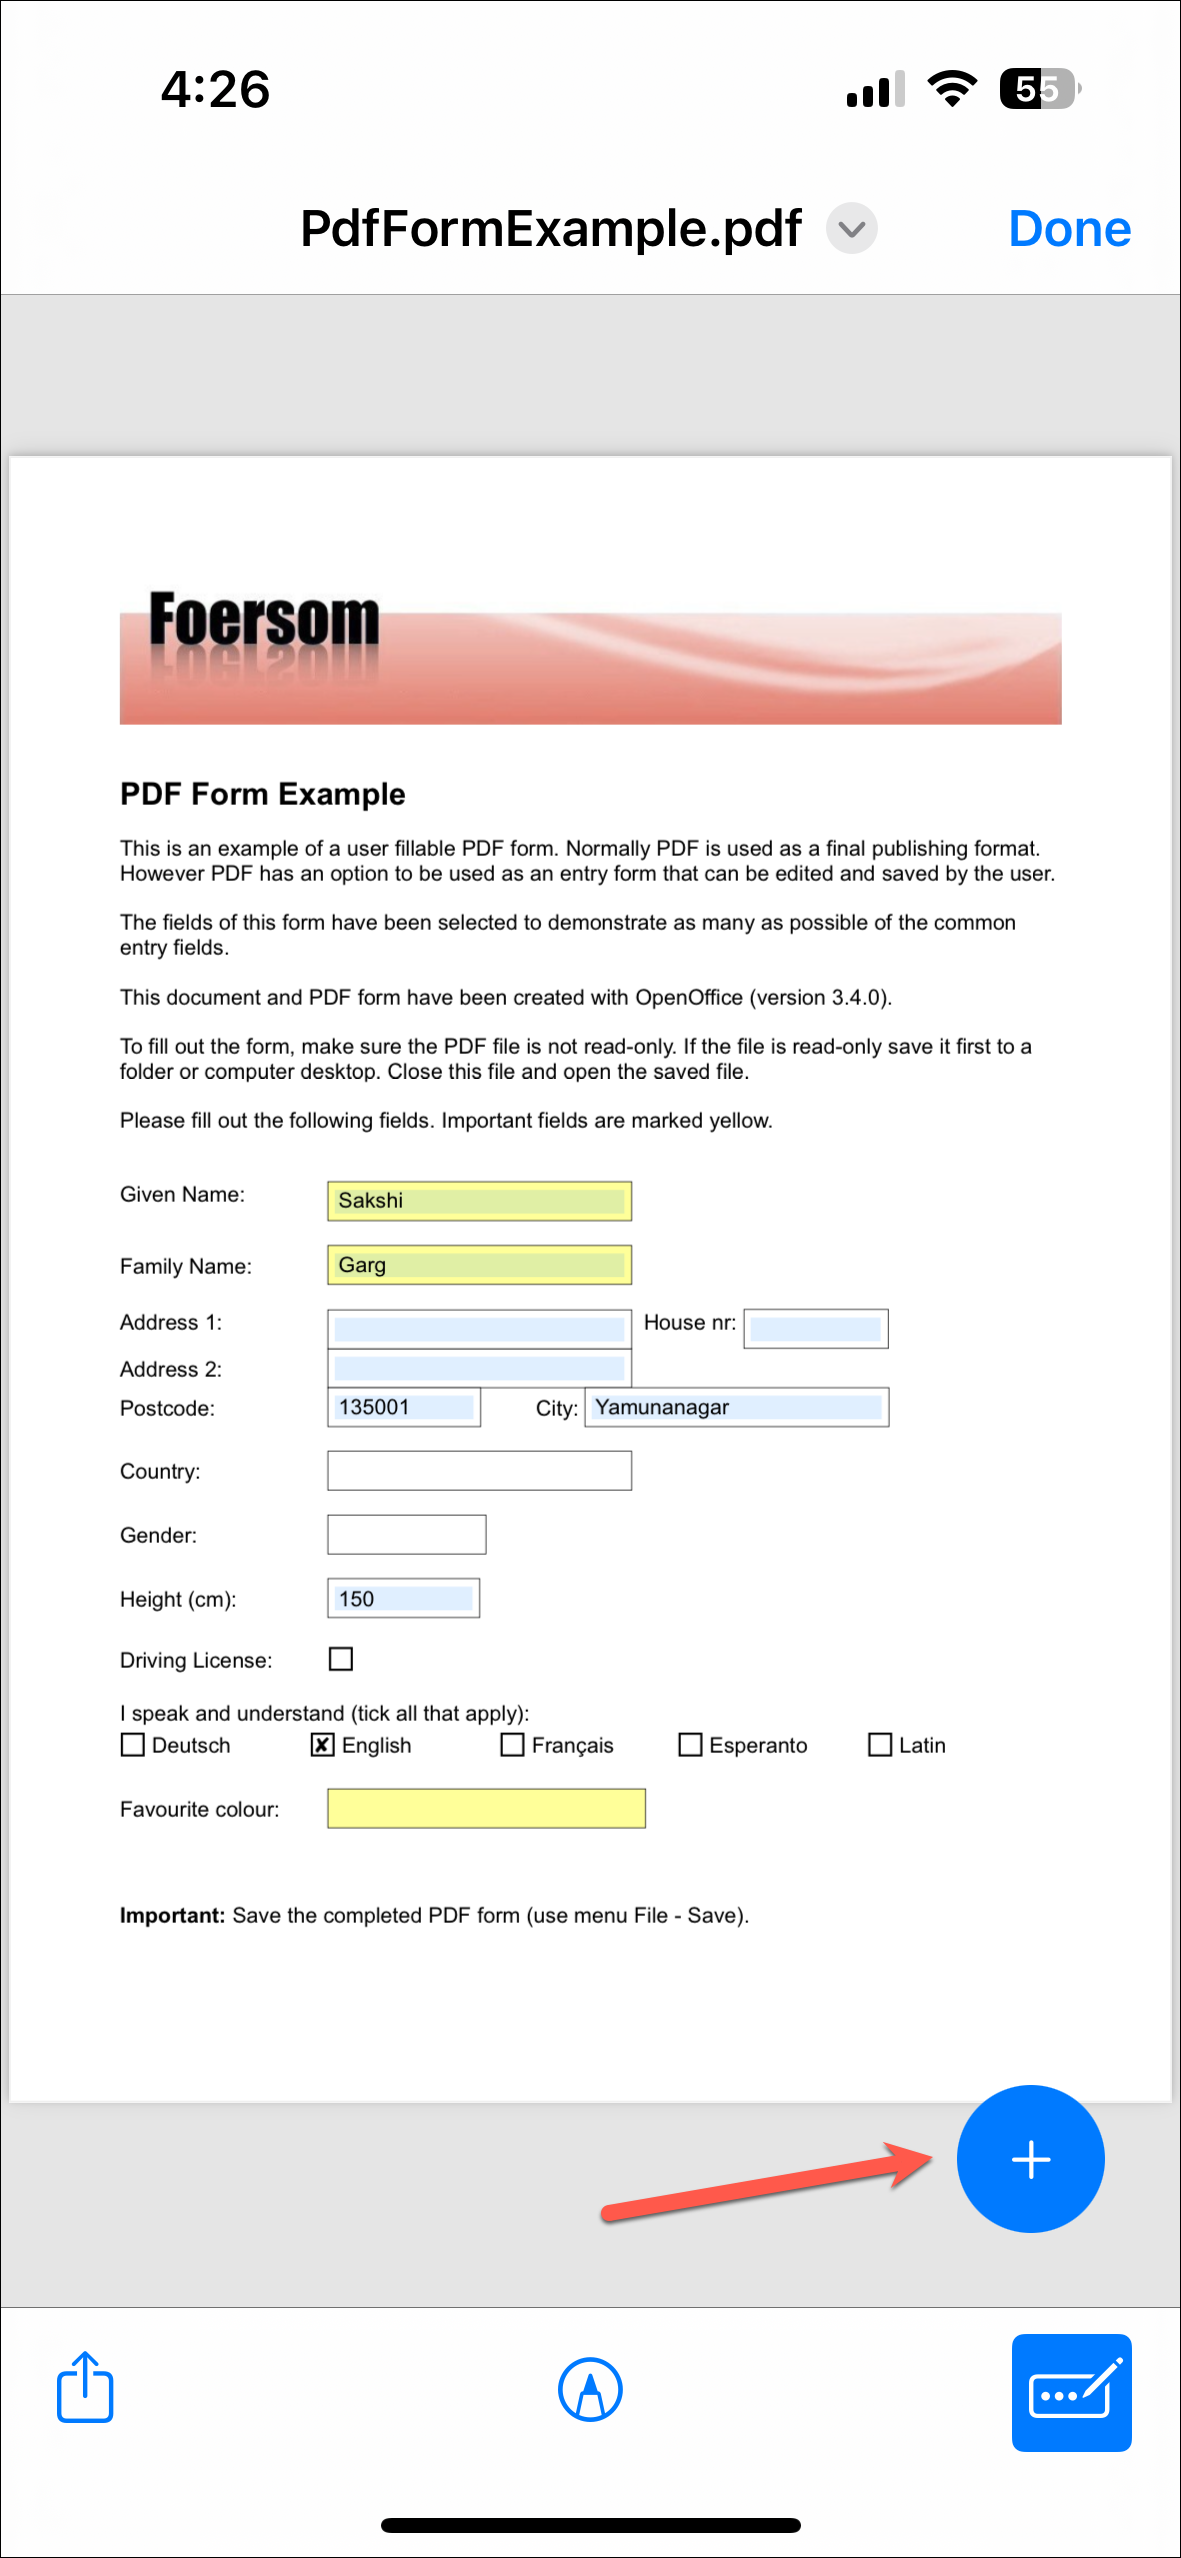
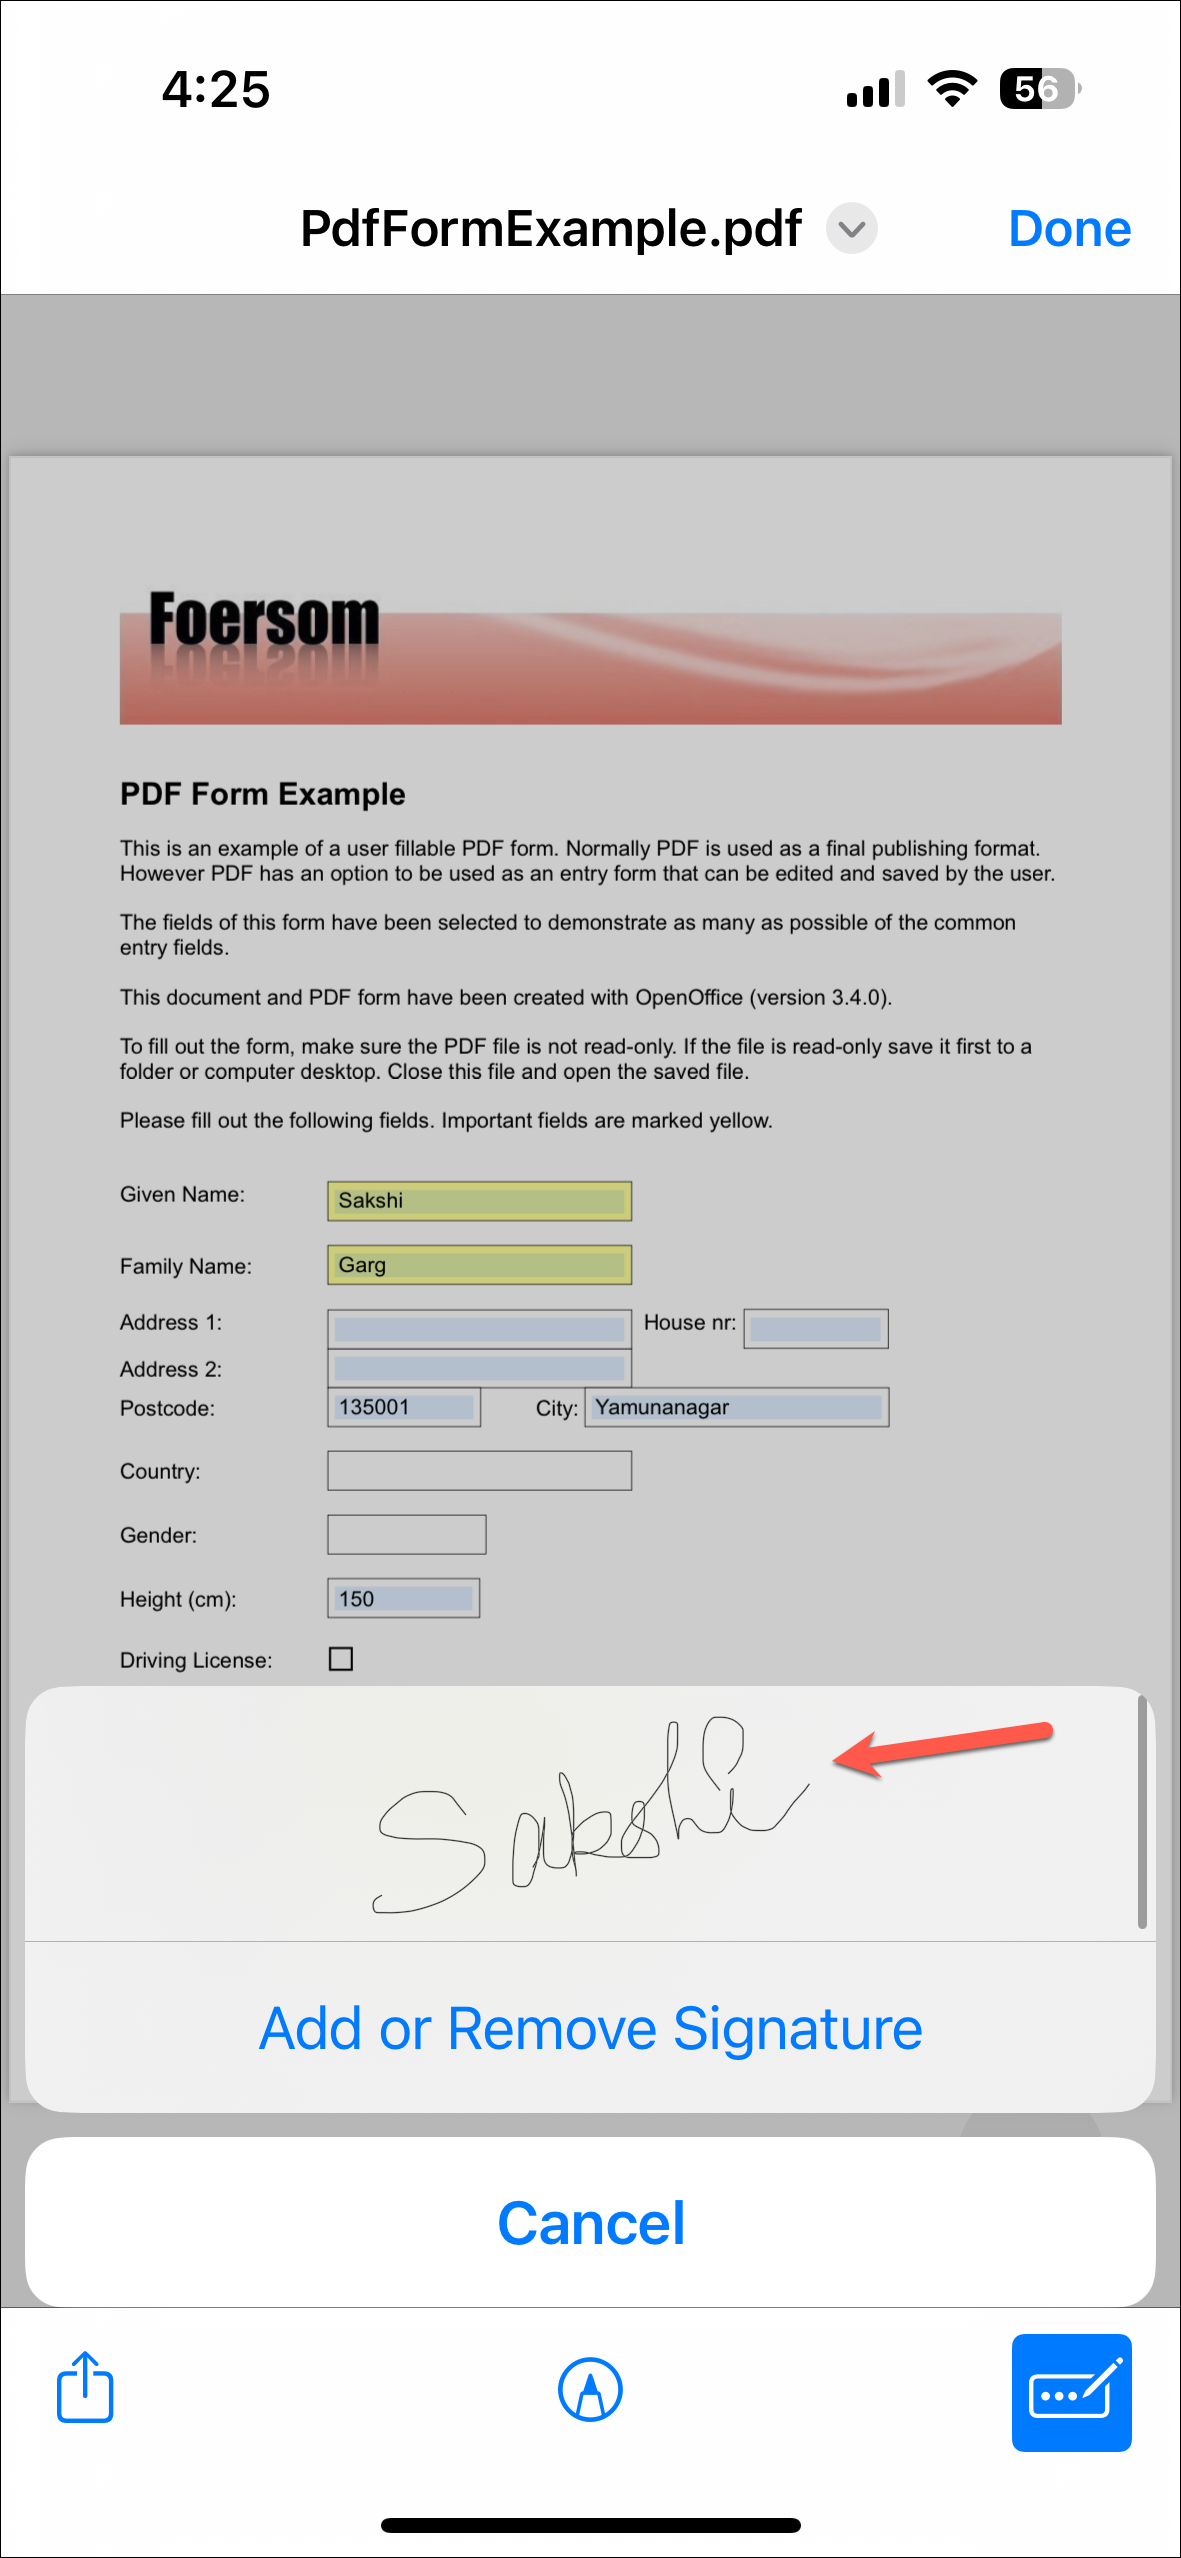
Step 9: To add additional elements like a text box or your signature, tap the floating '+' icon at the bottom-right corner of the screen.
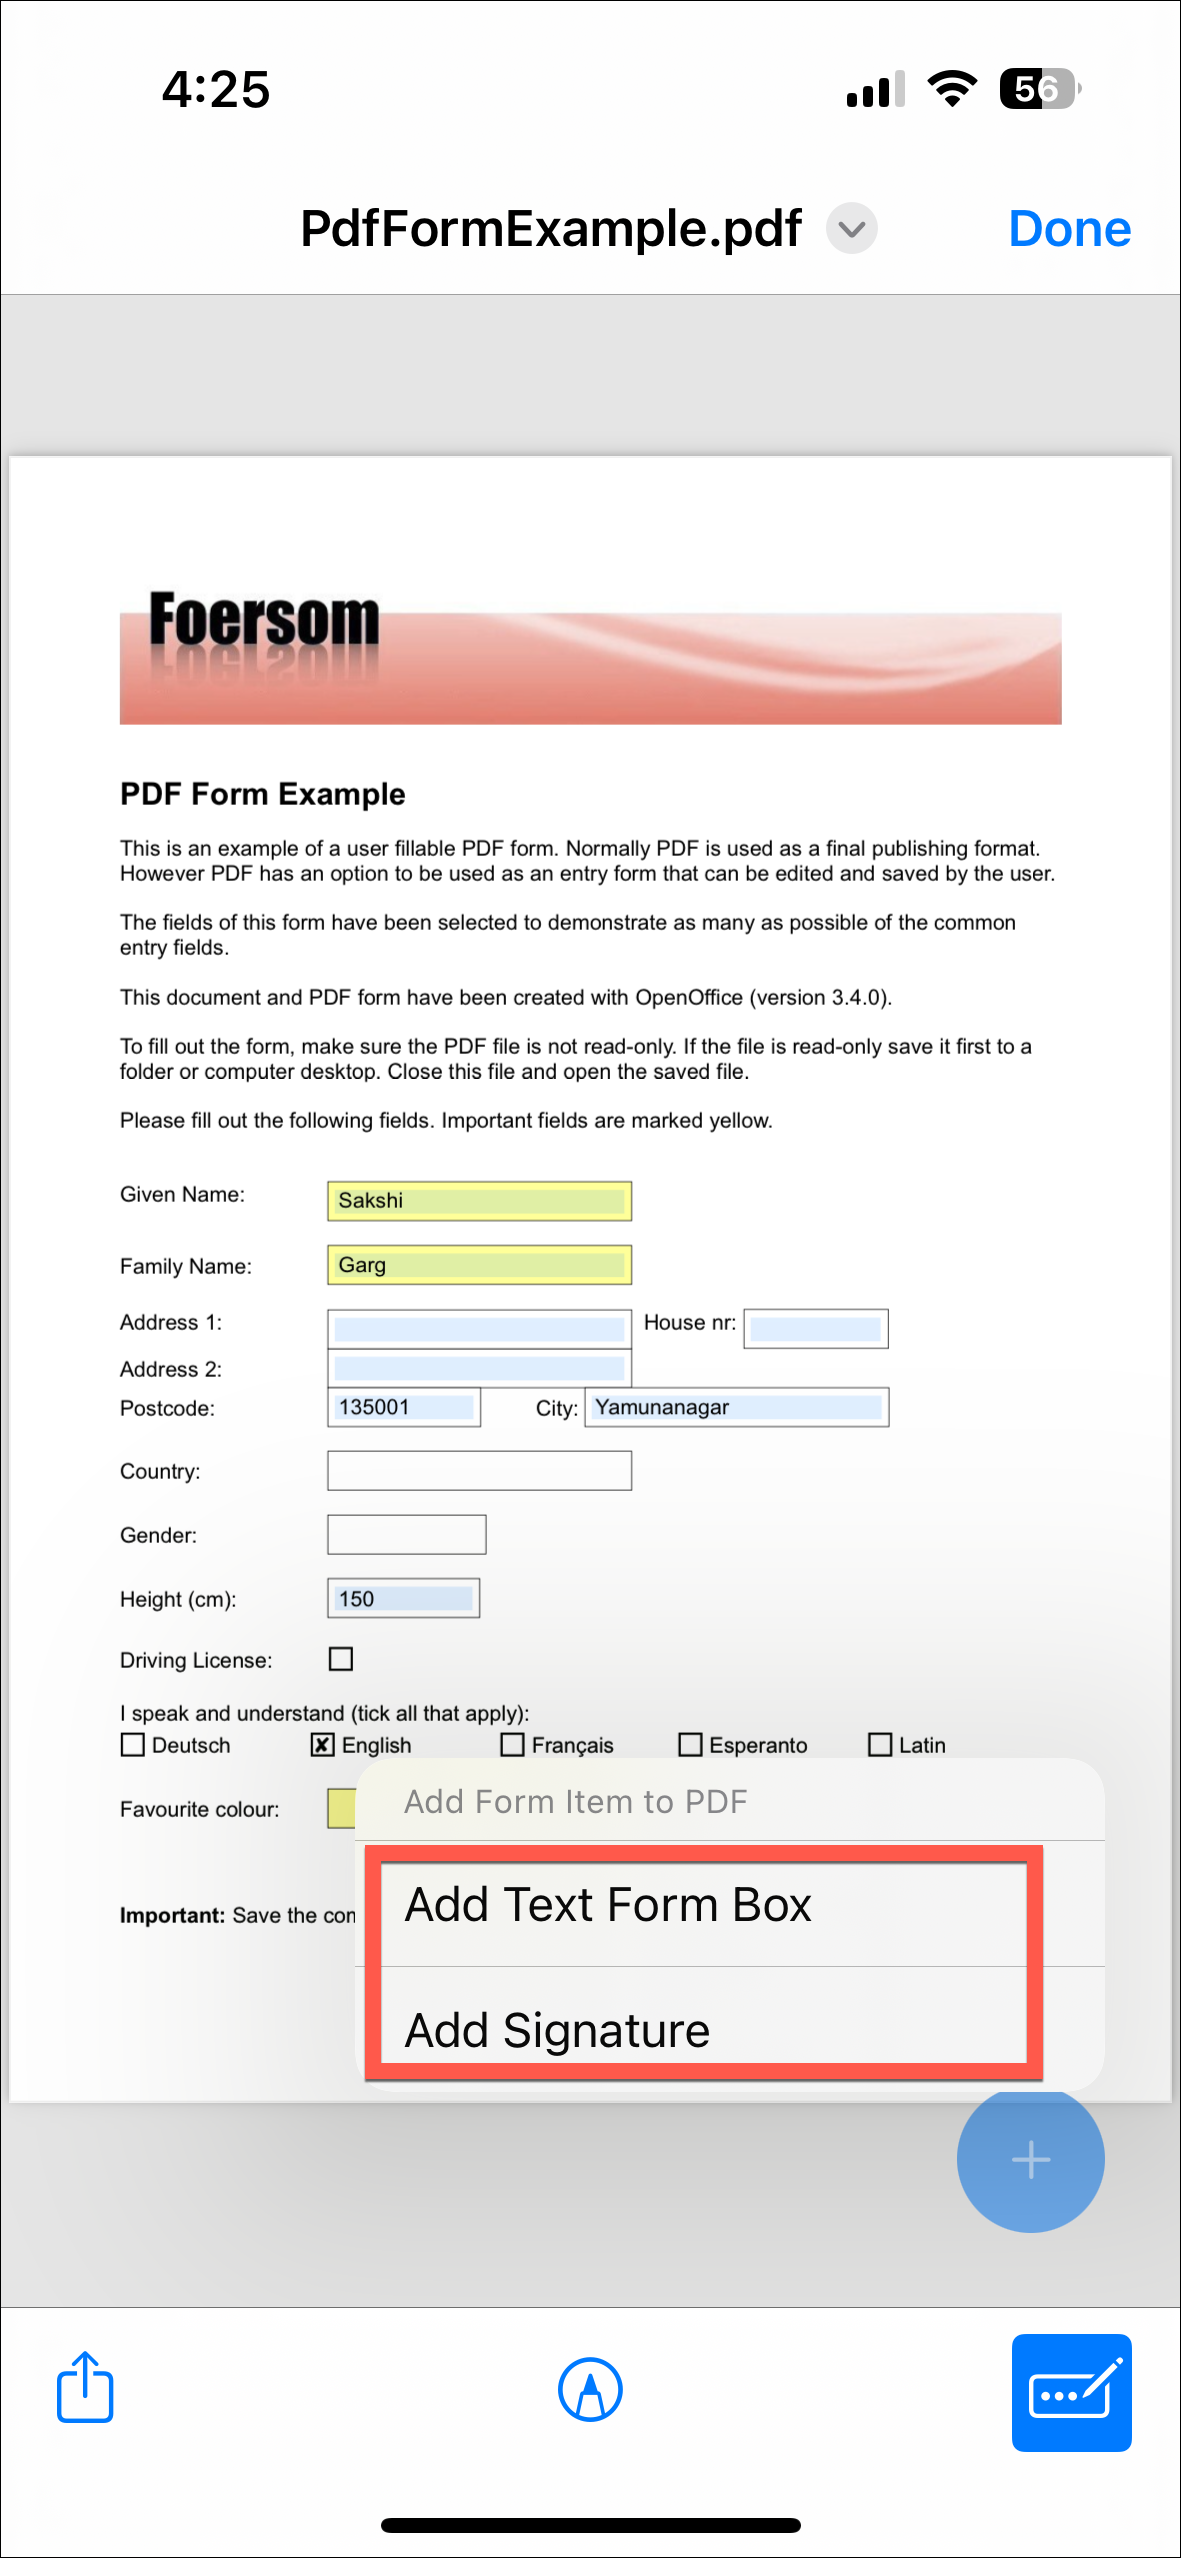
Step 10: Choose 'Add Text' to insert a text form box or 'Add Signature' to include your sign-off on the document.
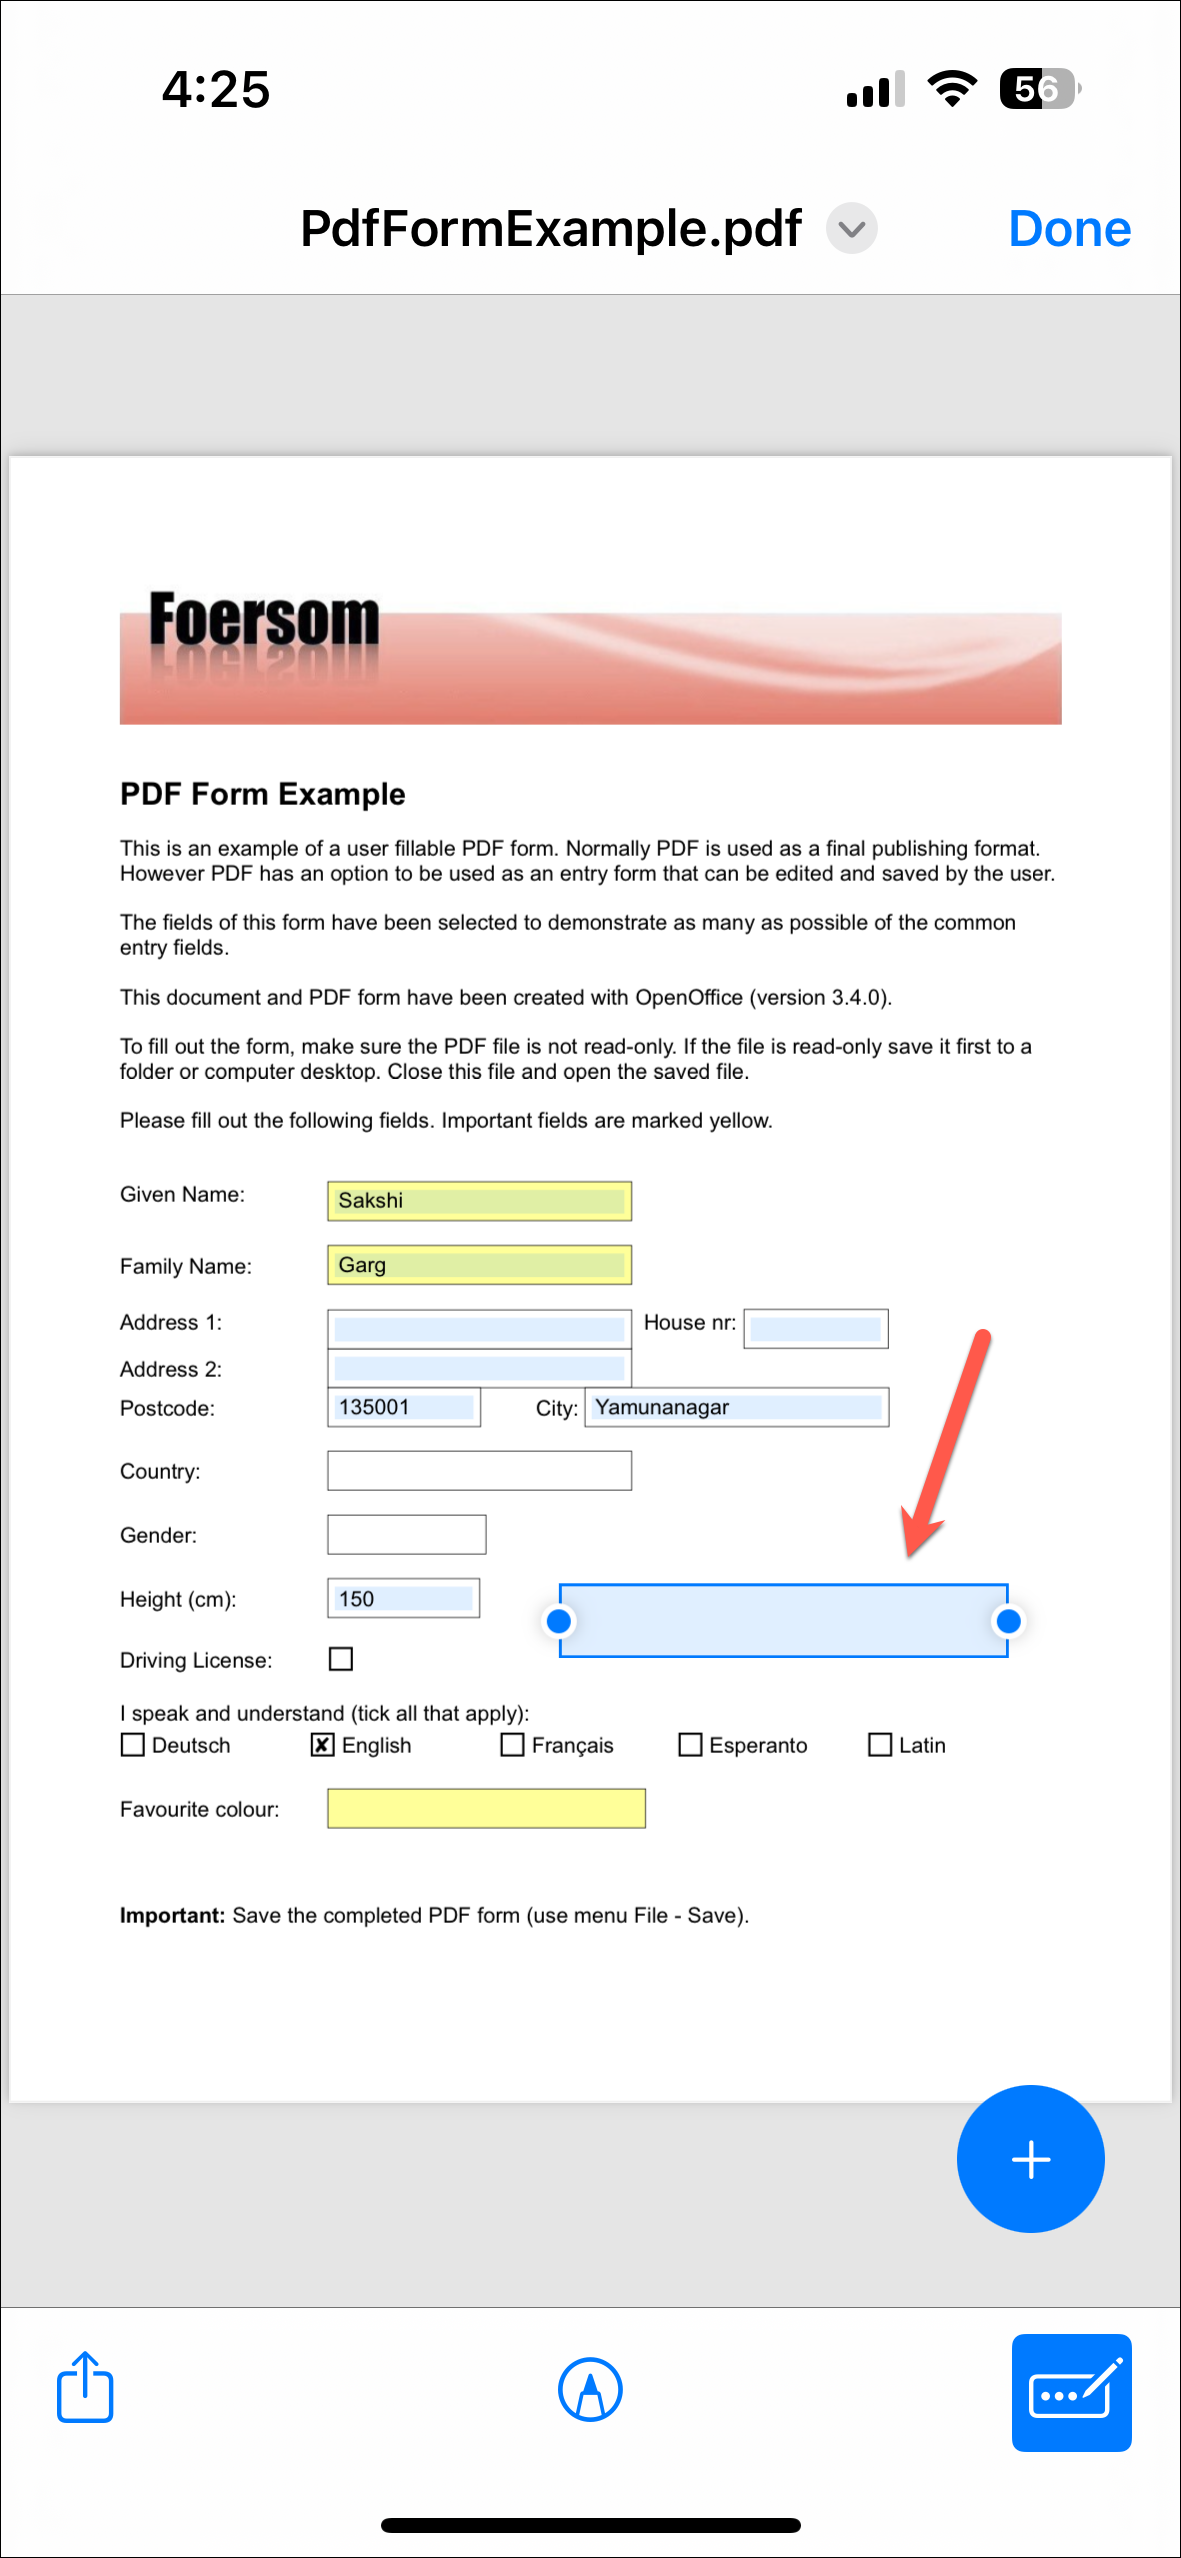
Step 11: For text form boxes, adjust the size by dragging the edges and move it to the desired location by dragging and dropping. Tap inside the box to type your text.
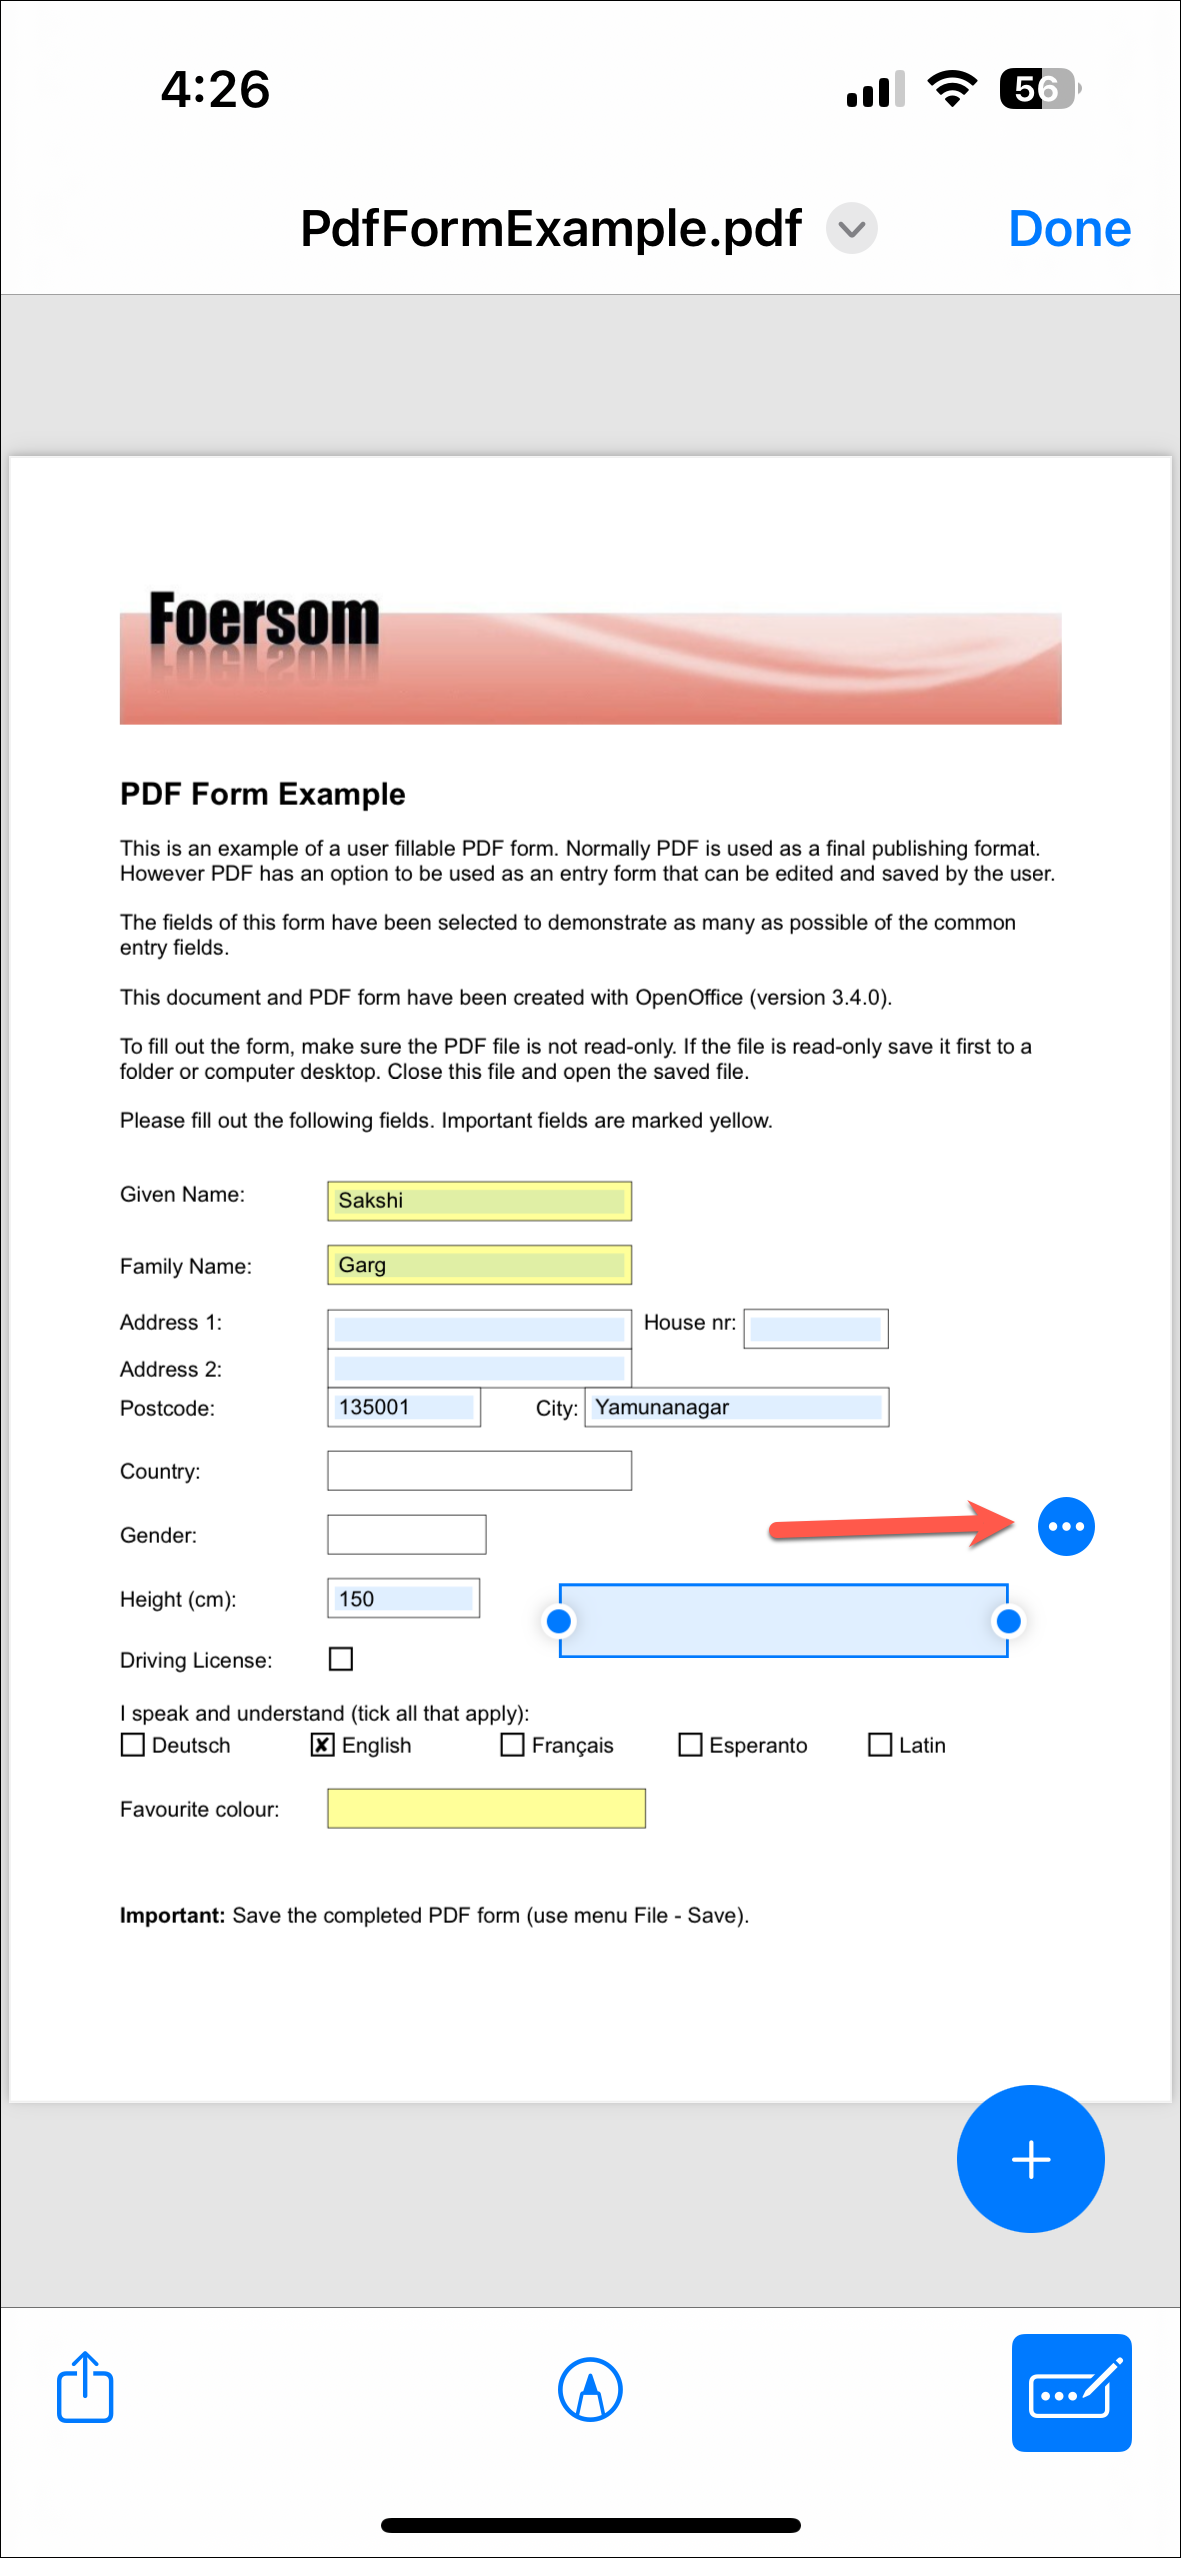
Step 12: To access more options for the text box, such as cut, copy, duplicate, or delete, tap the floating three-dot menu icon.
Step 13: If you're adding a signature and haven't created one before, you can draw a new signature when prompted and save it for future use.
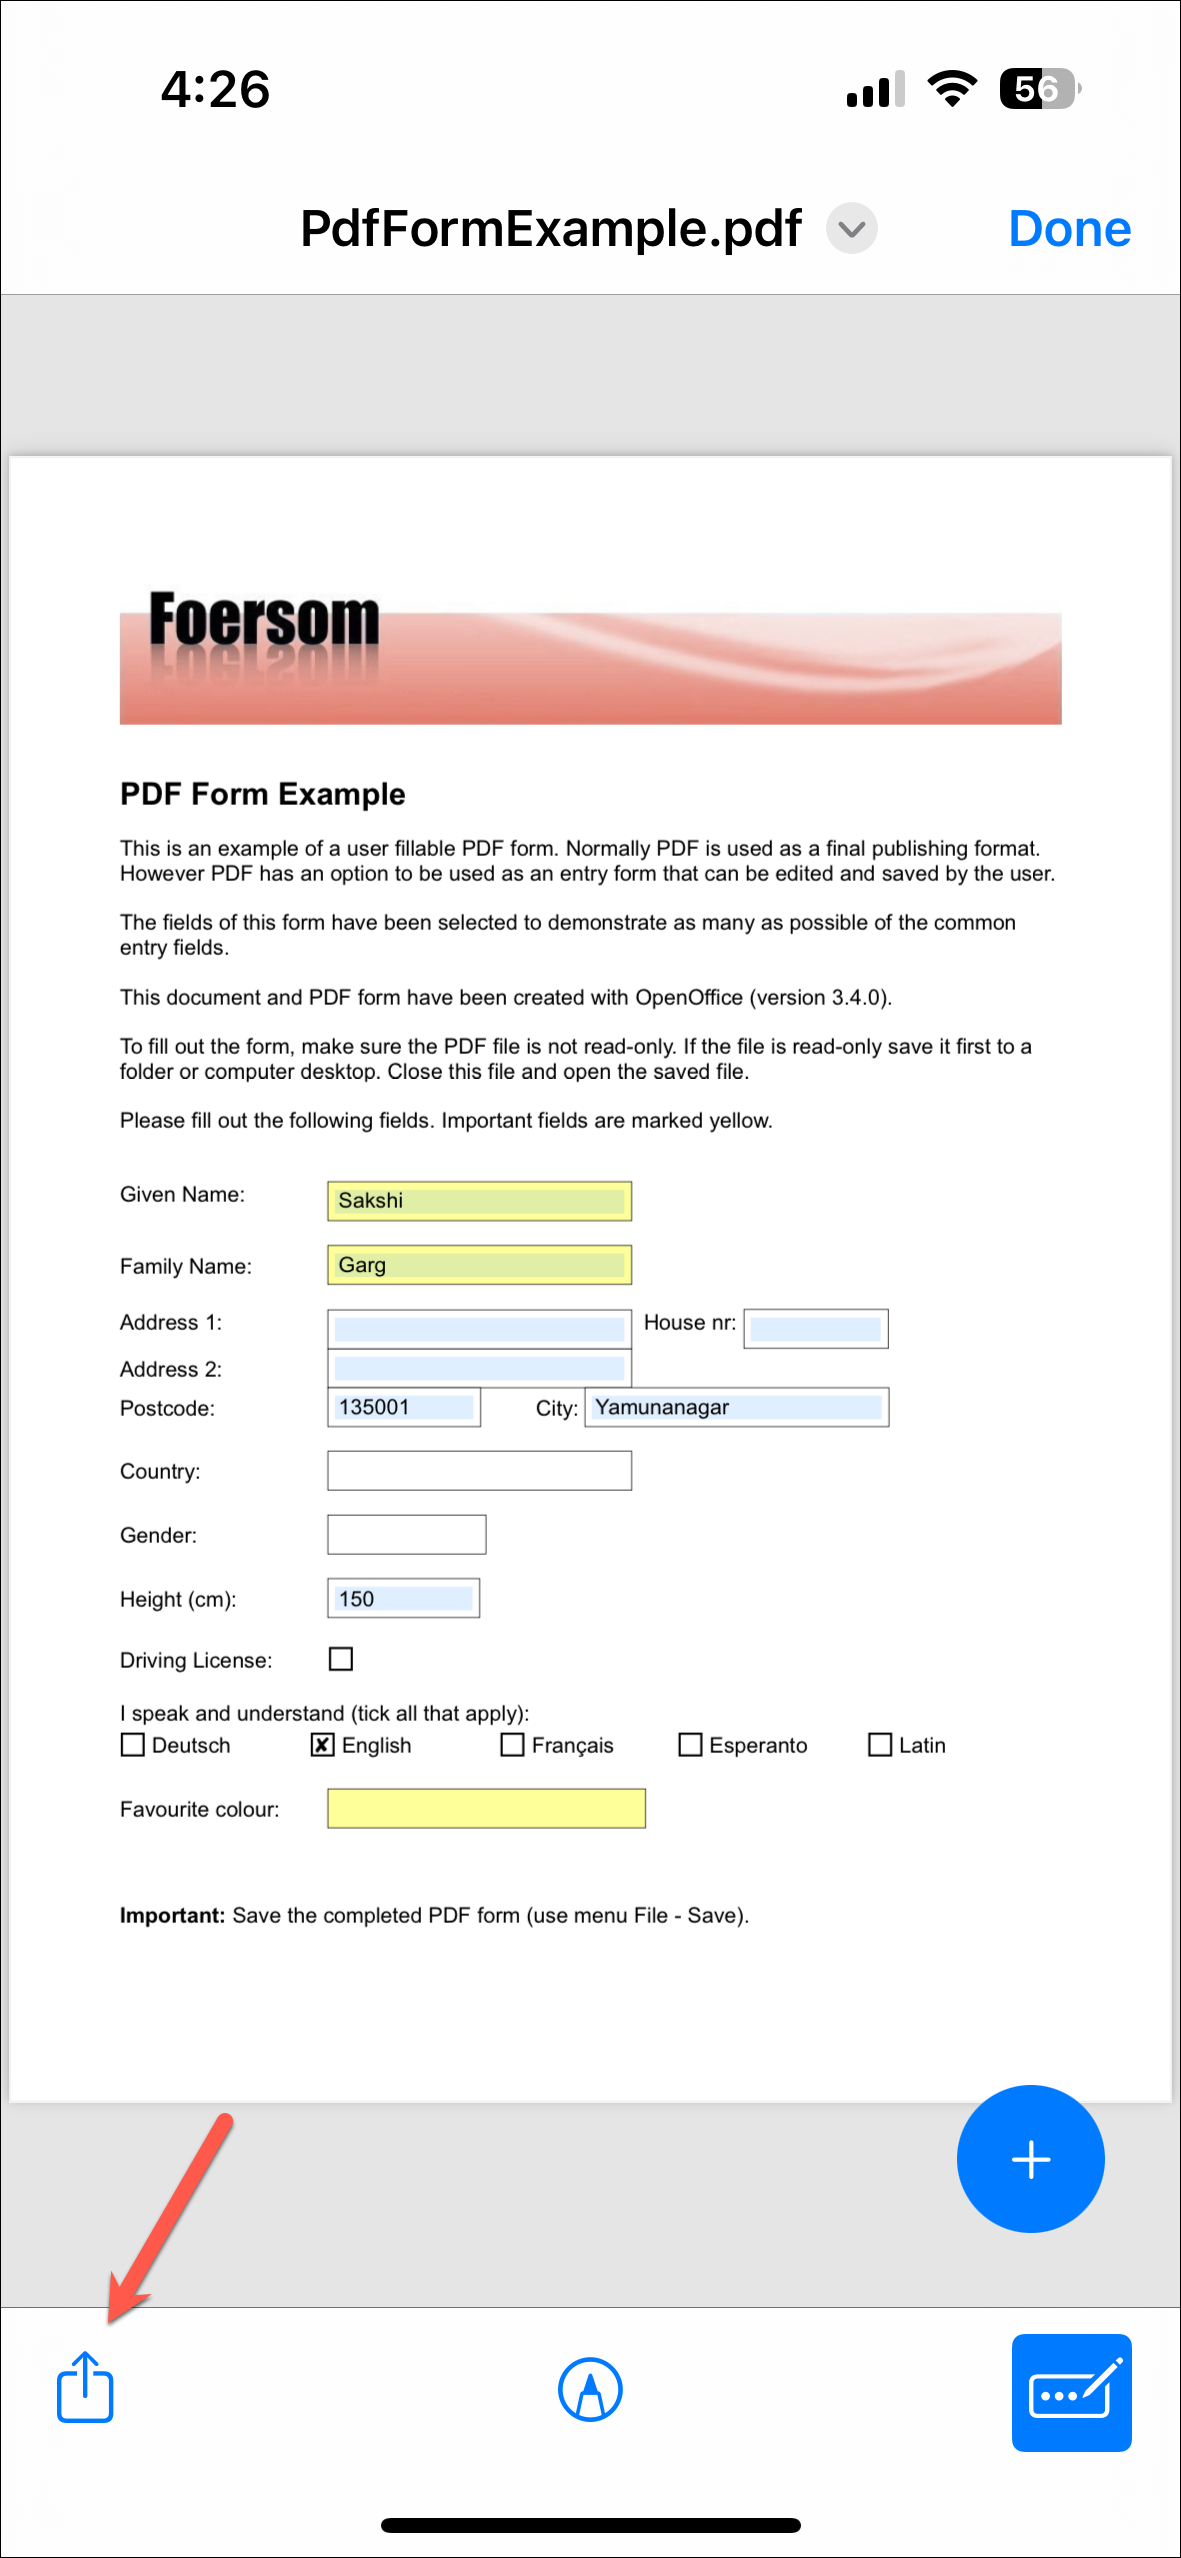
Step 14: After completing the form, tap the 'Share' button to send the document via AirDrop, Mail, Messages, or other sharing options available on your device.
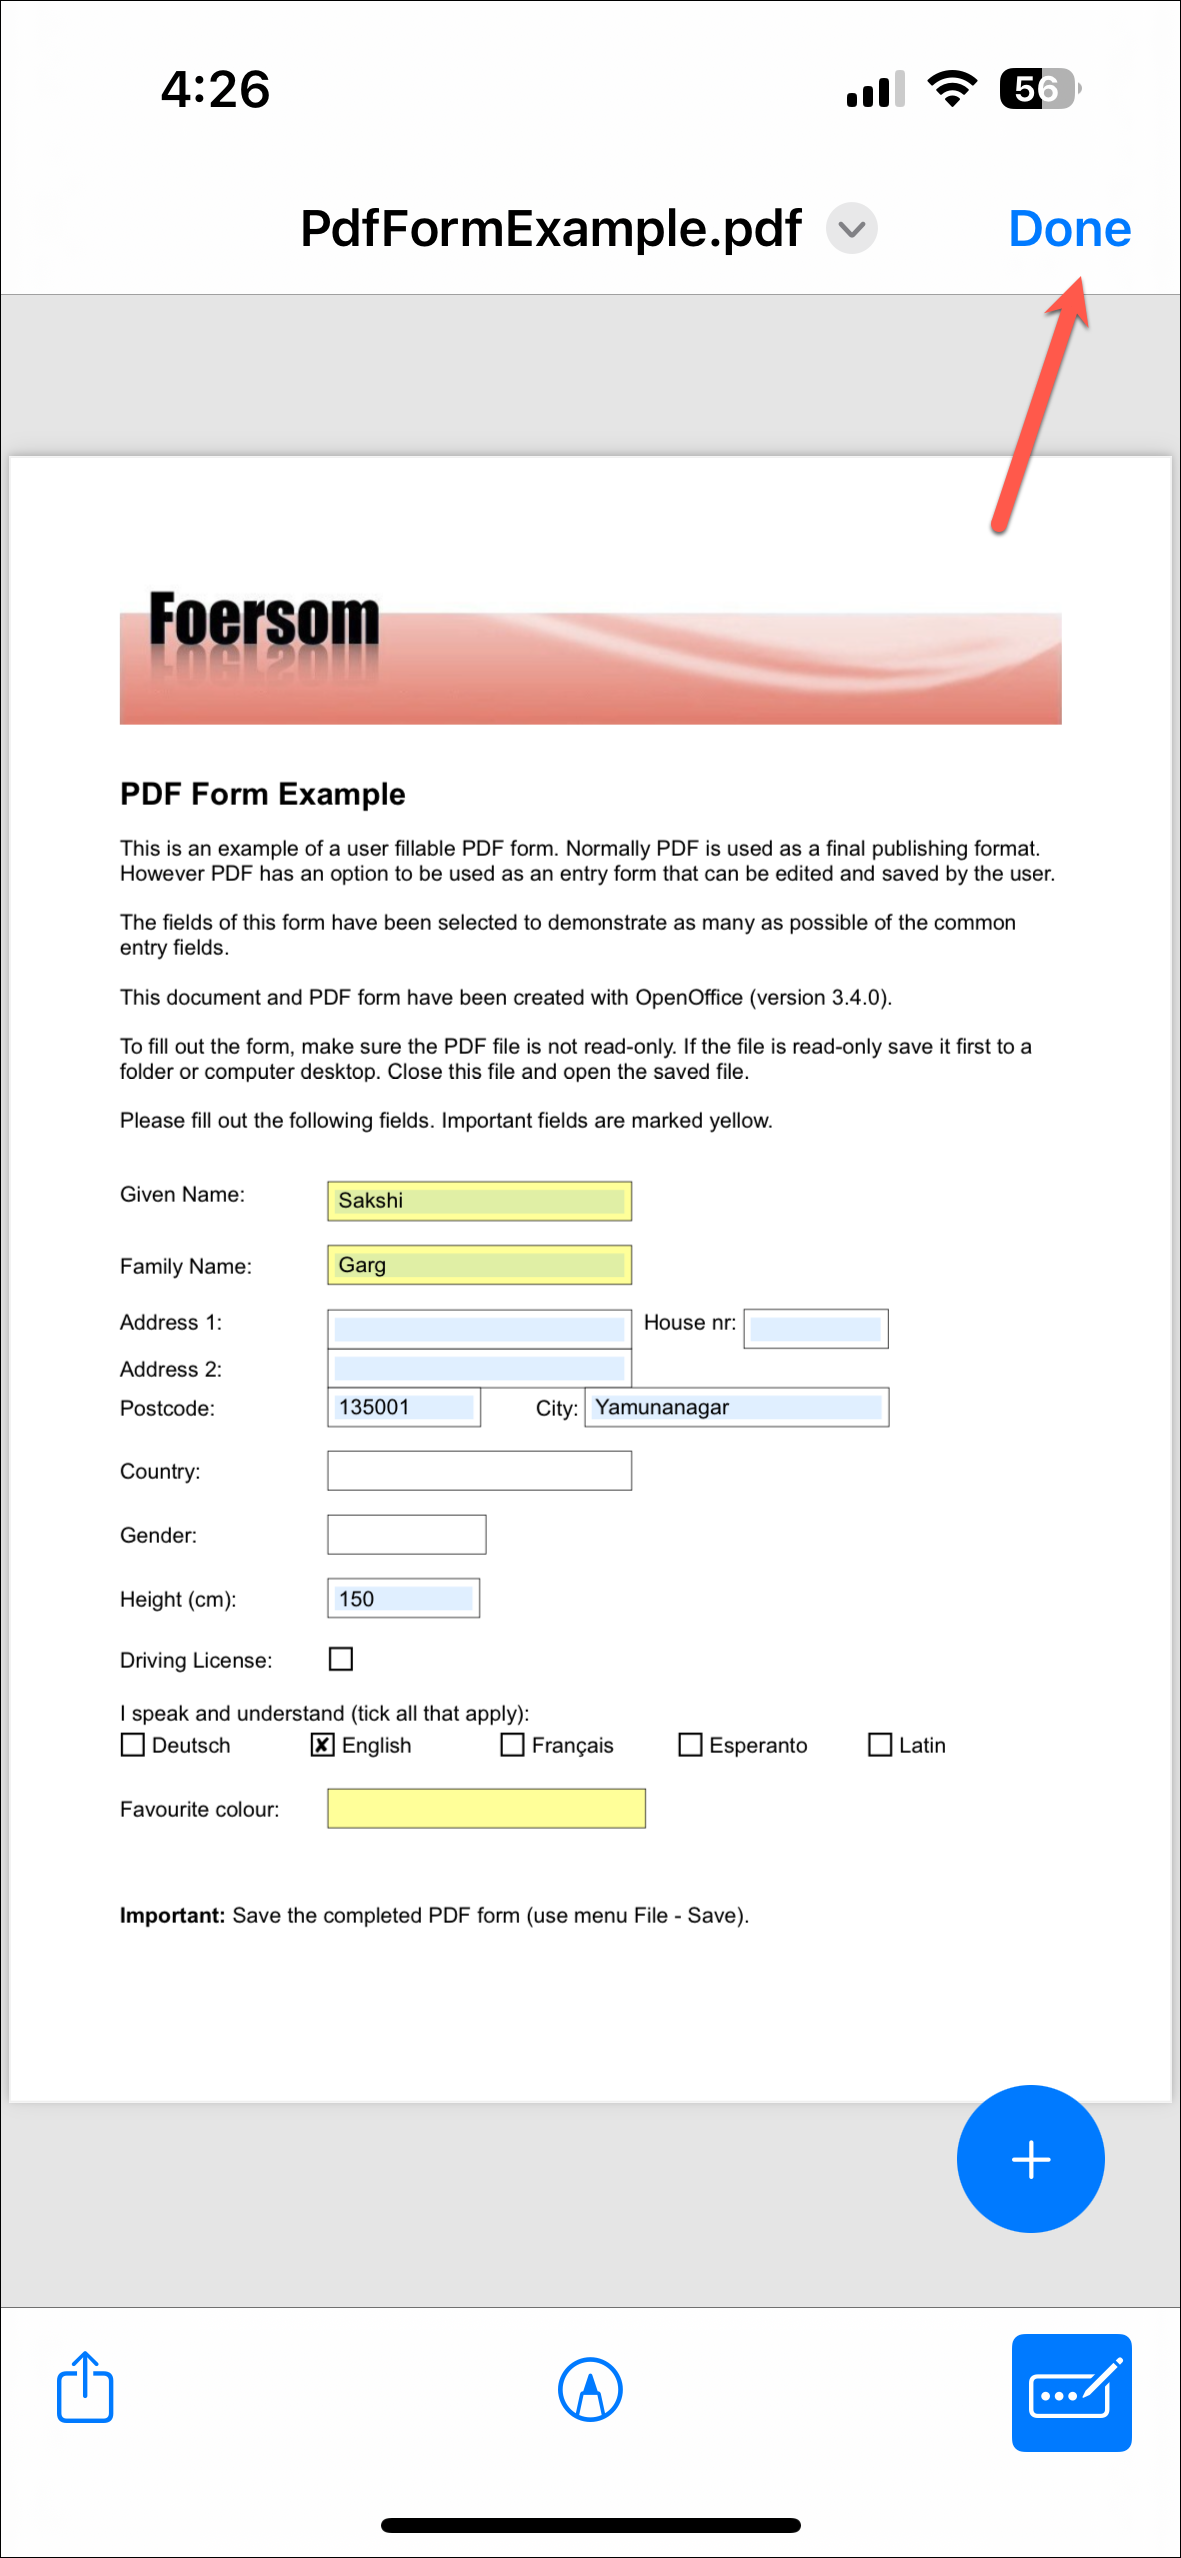
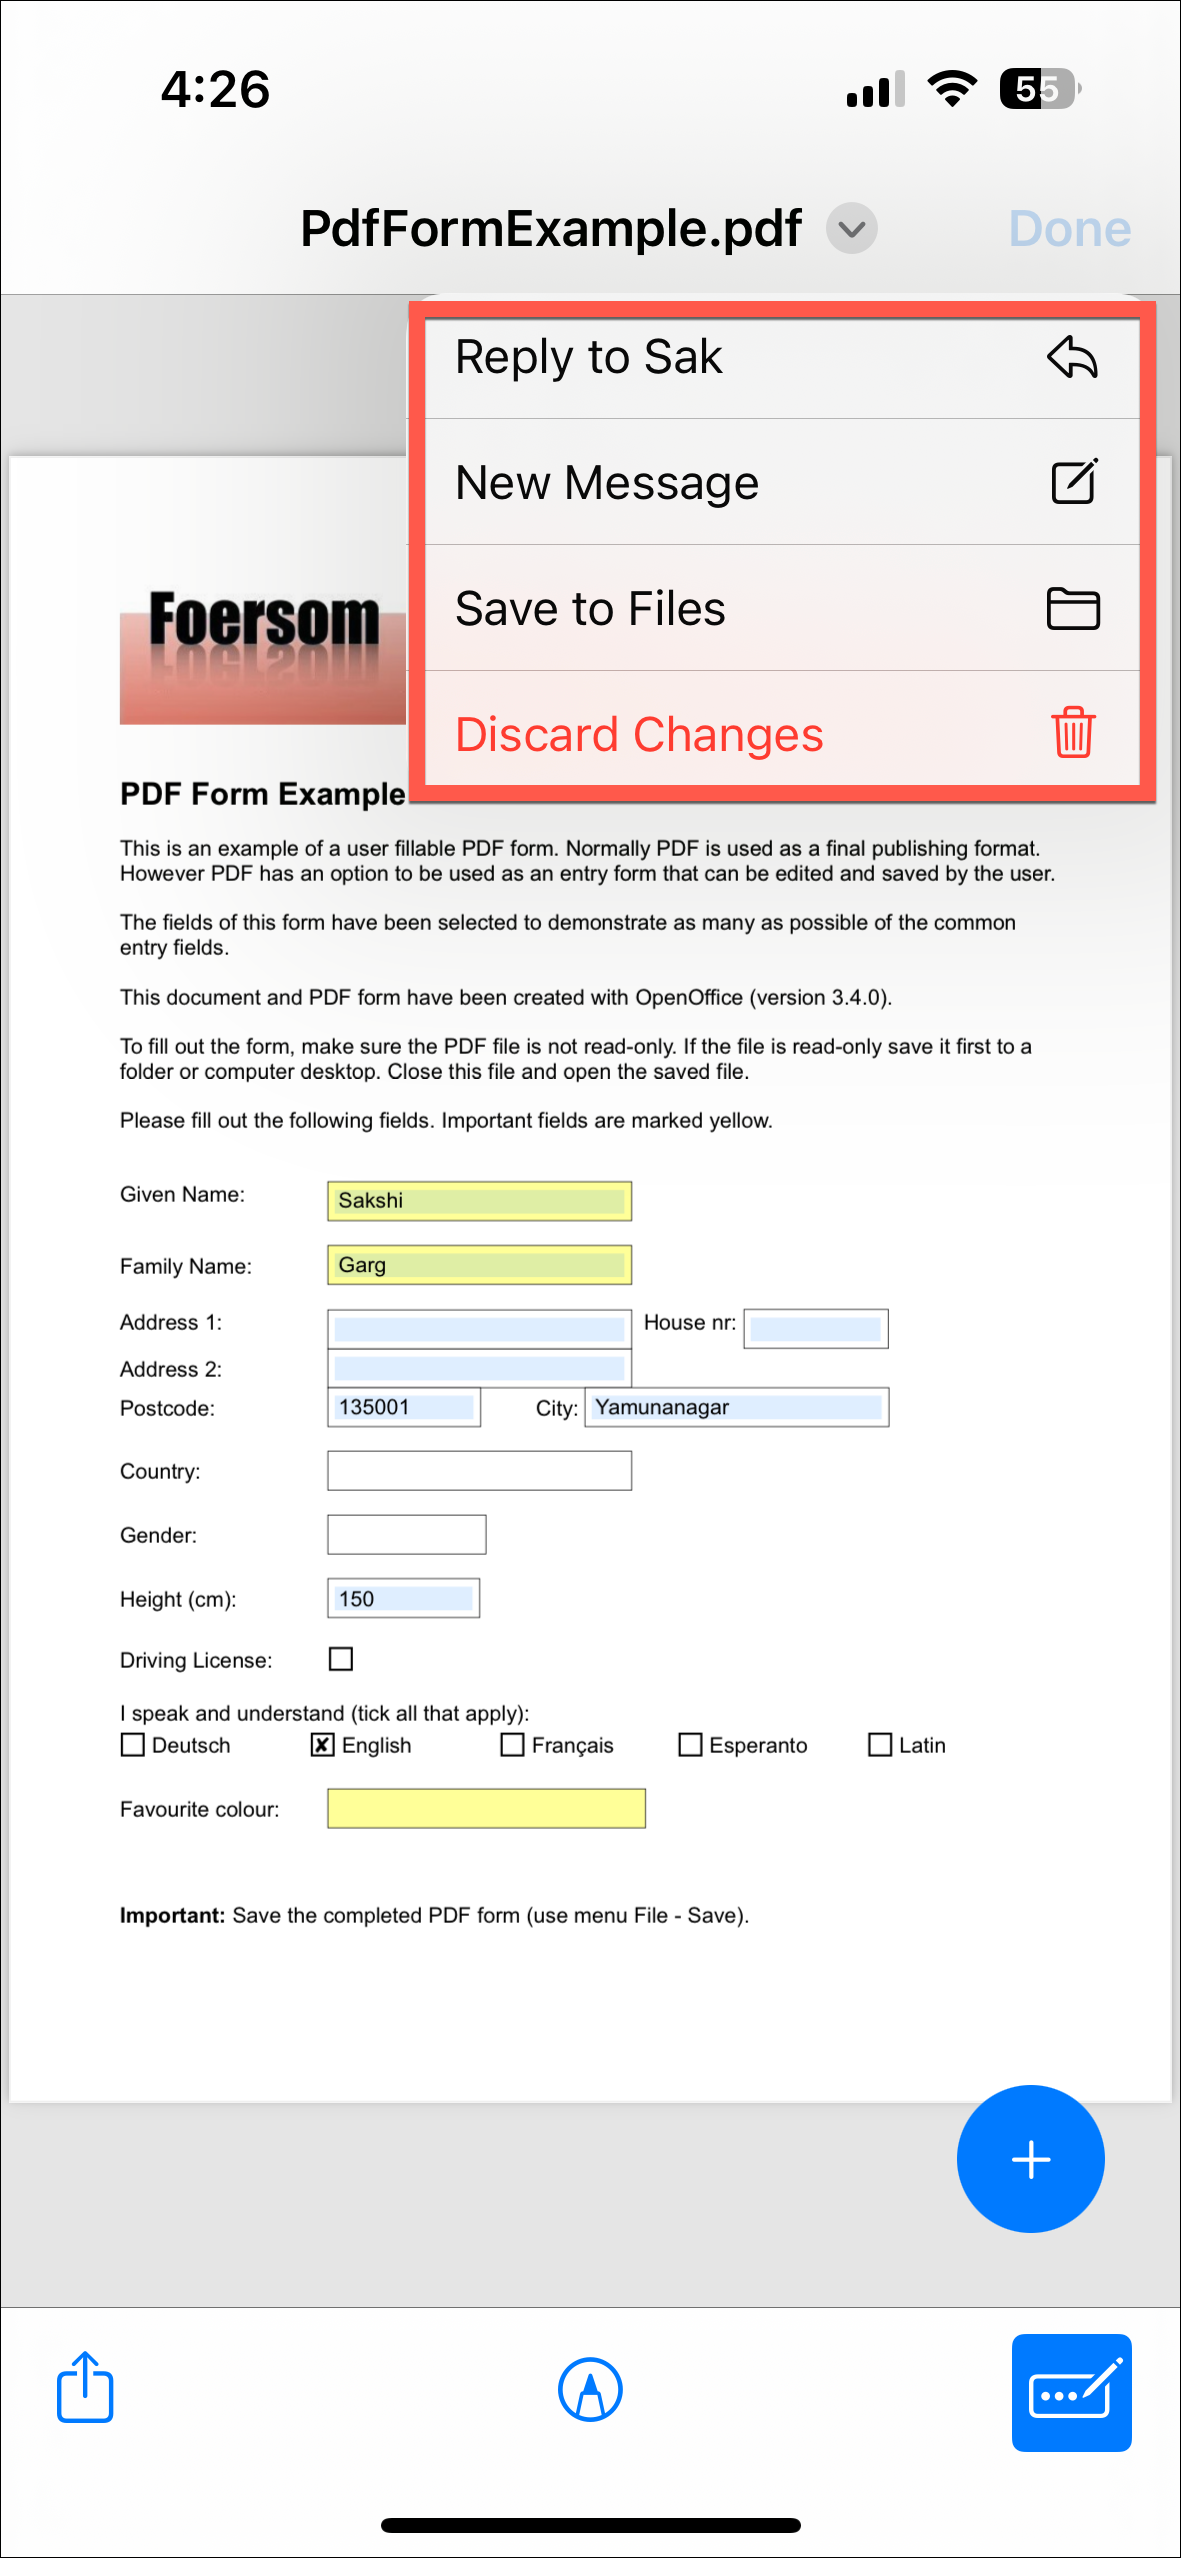
Step 15: If you're filling out the form within the Mail app, tap 'Done' in the top-right corner once you're finished.
Step 16: You'll then have options to reply to the original email with the filled form, send it as a new message, save the document to Files, or discard the changes.
Autofilling PDF Forms on Mac
On a Mac, the process of autofilling PDF forms is handled through the Preview app, which comes pre-installed on all macOS devices.
Step 1: Open the PDF form using the Preview app on your Mac.
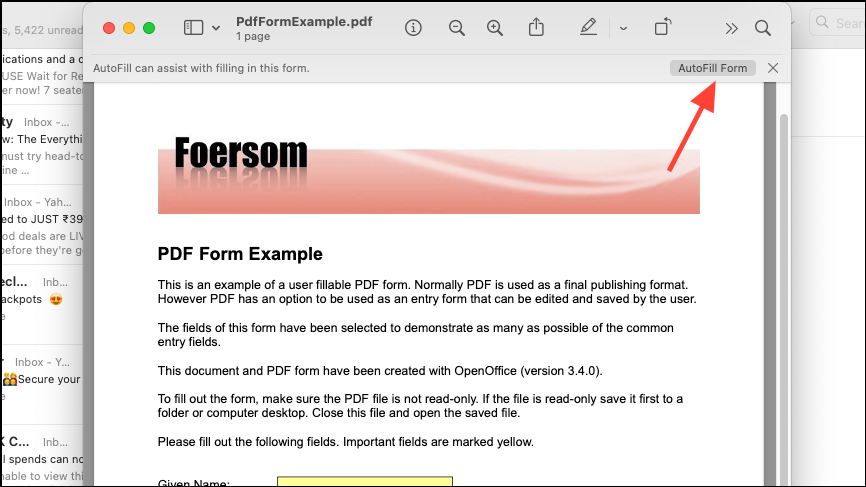
Step 2: You may see a message at the top of the document saying, "Autofill can assist with filling in this form." Click the 'Autofill Form' button next to this notification.
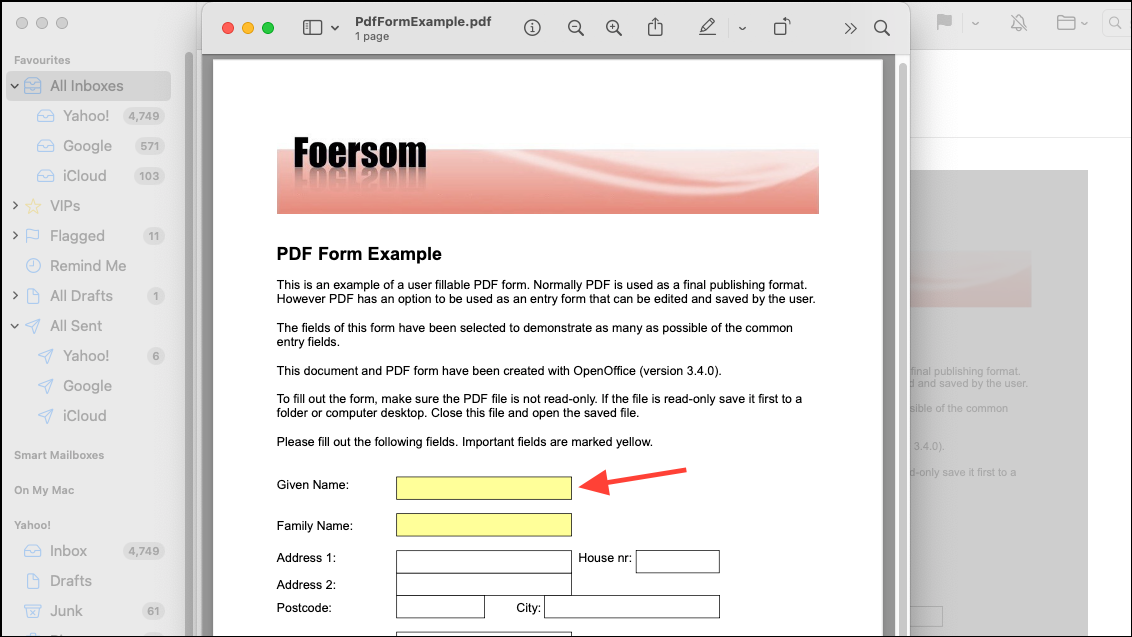
Step 3: If the notification doesn't appear, click on any field within the form to proceed.
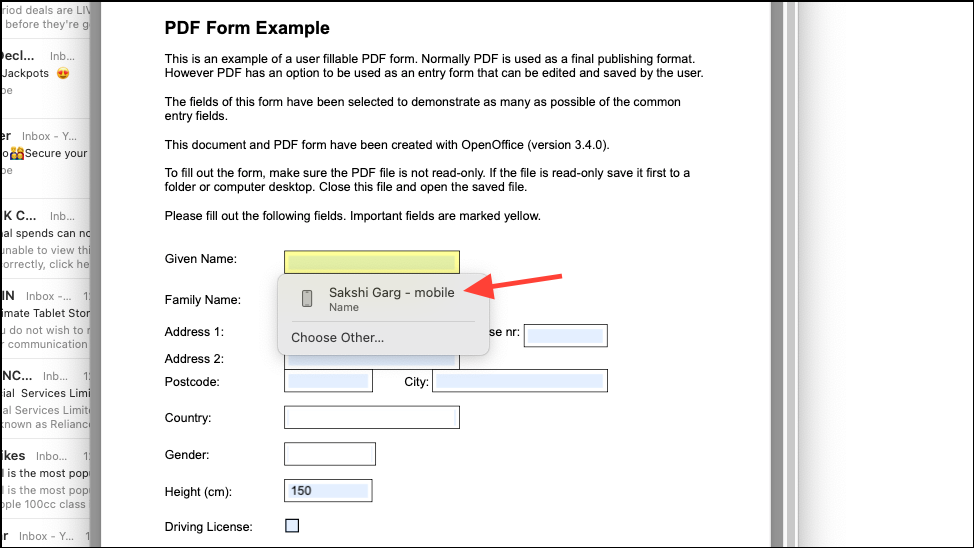
Step 4: A pop-up will appear allowing you to autofill the form. Select your contact information to populate the fields automatically. To use a different contact's information, click 'Choose other' and pick from your Contacts list.
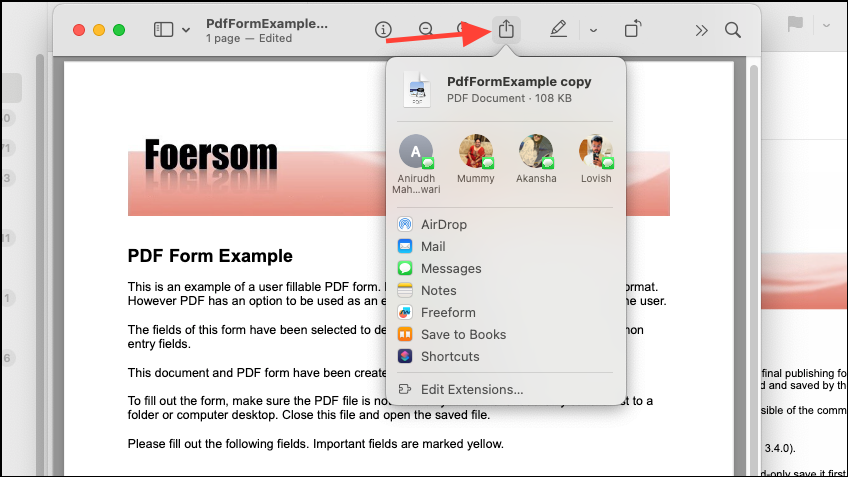
Step 5: After the form is populated, you can manually fill in any remaining fields or make adjustments as necessary. Once completed, click the 'Share' button to send the document through Mail, Messages, AirDrop, or other sharing options.
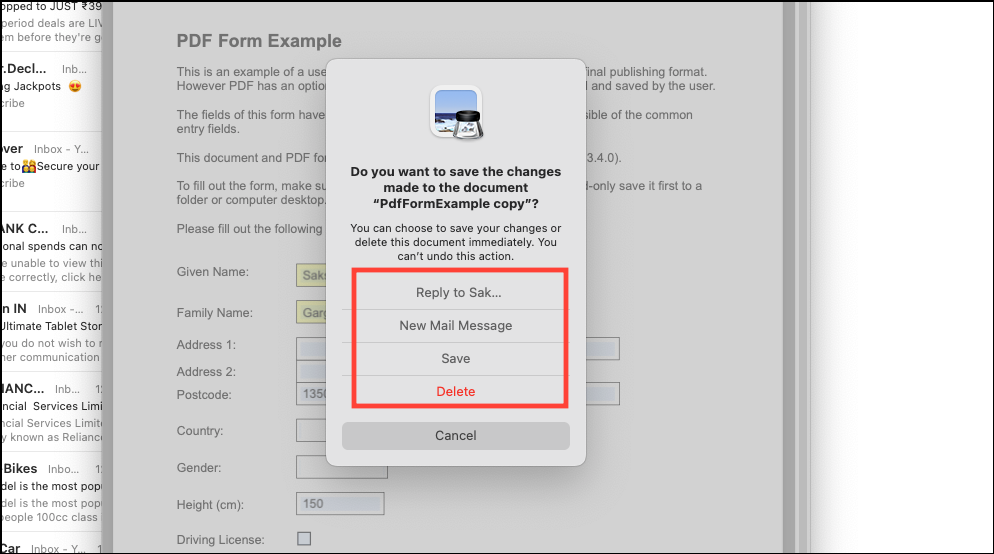
Step 6: If you opened the PDF from the Mail app, clicking the 'Close' button will present options to reply to the original sender with the filled form, compose a new email with the document attached, save it to your files, or discard the changes altogether.
Enhanced AutoFill for PDFs simplifies the process of completing forms, whether you're on the move with your iPhone or working from your Mac. By ensuring your contact information is up-to-date, you can save time and avoid repetitive data entry across documents.

